Gebruikershandleiding C40-C/C40D-C
Inhoudsopgave Hoofdstuk 1 TOSHIBA: wet- en regelgeving en veiligheid Copyright, afwijzing van aansprakelijkheid en handelsmerken ....... 1-1 Voorschriften ......................................................................................... 1-2 Verklaring met betrekking tot videostandaarden ............................... 1-8 ENERGY STAR®-programma ............................................................... 1-9 Afvalverwerking van de computer en de computeraccu's ................
Geluidssysteem en videomodus ....................................................... 4-25 Hoofdstuk 5 Hulpprogramma's en geavanceerd gebruik Hulpprogramma's en toepassingen .................................................... 5-1 Speciale voorzieningen ........................................................................ 5-5 TOSHIBA-wachtwoordhulpprogramma ............................................... 5-7 TOSHIBA System Settings .................................................................
Hoofdstuk 1 TOSHIBA: wet- en regelgeving en veiligheid In dit hoofdstuk vindt u informatie over wet- en regelgeving en veiligheid met betrekking tot TOSHIBA-computers. Copyright, afwijzing van aansprakelijkheid en handelsmerken Copyright © 2015 TOSHIBA Corporation. Alle rechten voorbehouden. Krachtens de auteurswetten mag deze handleiding op geen enkele wijze worden verveelvoudigd zonder voorafgaande schriftelijke toestemming van TOSHIBA.
Handelsmerken Intel, Intel SpeedStep, Intel Core, en Centrino zijn handelsmerken of gedeponeerde handelsmerken van Intel Corporation. AMD, het AMD-logo met de pijl, PowerPlay, Vari-Bright en combinaties daarvan zijn handelsmerken van Advanced Micro Devices, Inc. Windows, Microsoft en het Windows-logo zijn gedeponeerde handelsmerken van Microsoft Corporation. Het Bluetooth®-woordmerk en de Bluetooth-logo's zijn gedeponeerde handelsmerken in eigendom van Bluetooth SIG, Inc.
Sluit de apparatuur en de ontvanger op verschillende stopcontacten aan. Raadpleeg de leverancier of een ervaren radio-/tv-monteur. Alleen randapparaten die voldoen aan de FCC-normen voor klasse B mogen op deze apparatuur worden aangesloten. Gebruik met nietcompatibele randapparaten of randapparaten die niet door TOSHIBA zijn aanbevolen, zal waarschijnlijk resulteren in storing op radio- en tvtoestellen.
Overeenstemming met CE-richtlijnen Dit product draagt het CE-keurmerk in overeenstemming met de relevante Europese richtlijnen, met name RoHS-richtlijn 2011/65/EU, richtlijn 1999/5/ EG betreffende radioapparatuur en telecommunicatie-eindapparatuur, richtlijn 2009/125/EG betreffende ecologisch ontwerp (ErP) en de bijbehorende implementatiemaatregelen. Dit product en de oorspronkelijke opties zijn ontworpen conform de relevante EMC- (Elektromagnetische compatibiliteit) en veiligheidsnormen.
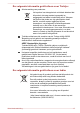
product uitsluitend worden gebruikt nadat de fabrikant of luchtvaartmaatschappij hiervoor toestemming heeft verleend. Verder is het in verband met algemene veiligheidsoverwegingen verboden dit product te gebruiken in omgevingen met ontploffingsgevaar. De volgende informatie geldt alleen voor EU-lidstaten: Afvalverwerking van producten Het symbool van een doorgekruiste vuilnisbak geeft aan dat producten afzonderlijk moeten worden ingezameld en gescheiden van huishoudelijk afval moeten worden verwerkt.
Verwerking van batterijen en/of accu's Het symbool van een doorgekruiste vuilnisbak geeft aan dat batterijen en/of accu's afzonderlijk moeten worden ingezameld en gescheiden van huishoudelijk afval moeten worden verwerkt.
De volgende informatie geldt alleen voor Turkije: Afvalverwerking van producten: Het symbool van doorgekruiste vuilnisbak betekent dat dit product niet mag worden ingezameld en weggegooid met ander huishoudelijk afval. Wanneer het product het einde van zijn gebruiksduur heeft bereikt, moet dit worden ingeleverd bij een inzamelpunt, recyclingbedrijf of afvalverwerkende instantie om zo het milieu en de menselijke gezondheid te beschermen.
Afhankelijk van het land of de regio waar u dit product hebt aangeschaft, zijn deze symbolen mogelijk niet aanwezig.
ENERGY STAR®-programma Uw computer voldoet mogelijk aan de ENERGY STAR®richtlijnen. Als het model dat u hebt gekocht, aan deze richtlijnen voldoet, is het voorzien van het Energy Starlogo en is de volgende informatie van toepassing. TOSHIBA neemt deel aan het ENERGY STARprogramma van de Environmental Protection Agency (EPA). Deze computer voldoet aan de nieuwste ENERGY STAR-richtlijnen voor energiebesparing.
Veiligheidsinstructies voor optische stations Vergeet niet de voorzorgsmaatregelen aan het einde van deze paragraaf te lezen. Het model met een station gebruikt een lasersysteem. Om er zeker van te zijn dat dit product correct wordt gebruikt, dient u deze handleiding zorgvuldig te lezen en ter referentie bij de hand te houden. Als het apparaat ooit moet worden gerepareerd, neemt u contact op met een erkend Toshiba-servicecenter.
Algemene voorzorgsmaatregelen TOSHIBA-computers bieden optimale veiligheid en optimaal gebruikerscomfort; bovendien zijn ze robuust, een belangrijke eigenschap voor draagbare computers. U moet echter bepaalde voorzorgsmaatregelen nemen om het risico van lichamelijk letsel of beschadiging van de computer verder te beperken. Lees de volgende algemene aanwijzingen en let op de waarschuwingen die in de handleiding worden gegeven.
Blessures door overbelasting Lees zorgvuldig de Instructiehandleiding voor veiligheid en comfort. Hierin wordt toegelicht hoe u hand- en polsblessures als gevolg van langdurig toetsenbordgebruik kunt voorkomen. Dit document bevat eveneens informatie over het inrichten van de werkplek, de lichaamshouding en de verlichting, met behulp waarvan u lichamelijke overbelasting kunt reduceren. Letsel door verhitting Vermijd langdurig lichamelijk contact met de computer.
Sproei schoonmaakmiddel nooit rechtstreeks op de computer en laat er geen vloeistof inlopen. Gebruik nooit bijtende chemicaliën om de computer te reinigen. De computer verplaatsen Hoewel de computer is ontworpen voor flexibel dagelijks gebruik, dient u enkele eenvoudige voorzorgsmaatregelen te treffen wanneer u de computer verplaatst om te zorgen dat het systeem probleemloos blijft werken. Zorg dat alle schijfactiviteit is gestopt voordat u de computer verplaatst. Schakel de computer uit (afsluiten).
Instructiehandleiding voor veiligheid en comfort Alle belangrijke informatie voor een veilig en juist gebruik van deze computer wordt beschreven in de bijgesloten Instructiegids voor veiligheid en comfort. Lees deze gids voordat u de computer gebruikt. Veiligheidspictogrammen Veiligheidspictogrammen worden in deze handleiding gebruikt om u attent te maken op belangrijke informatie. Elk type mededeling wordt aangeduid zoals hieronder wordt geïllustreerd.
Hoofdstuk 2 Aan de slag Dit hoofdstuk bevat een controlelijst voor de apparatuur en alle basisgegevens om met uw computer aan de slag te gaan. Als u een besturingssysteem gebruikt dat niet vooraf is geïnstalleerd door TOSHIBA, werken sommige functies die in deze handleiding worden beschreven mogelijk niet correct. Controlelijst van apparatuur Pak de computer voorzichtig uit en bewaar de doos en het verpakkingsmateriaal voor toekomstig gebruik.
Klikken Tik op het touchpad of klik eenmaal op de linker touchpadbesturingsknop. Klik eenmaal met de linkermuisknop. Tik eenmaal op het aanraakscherm (alleen modellen met een aanraakscherm). Rechtsklikken Klik eenmaal met de rechtertouchpadbesturingsknop. Klik eenmaal met de rechtermuisknop. Tik op het aanraakscherm en laat uw vinger staan (alleen voor modellen met een aanraakscherm). Dubbelklikken Tik tweemaal op het touchpad of klik tweemaal met de linkertouchpadbesturingsknop.
De weergave Apps U vindt alle apps, waaronder bureaubladprogramma's, in de weergave Apps. U opent de weergave Apps als volgt: Verplaats de muisaanwijzer en klik op het in de linkerbenedenhoek van pictogram het scherm. Veeg omhoog vanaf het midden van het Startscherm (alleen voor modellen met een aanraakscherm). De computer voor het eerst gebruiken Zorg dat u de bijgesloten Instructiehandleiding voor veiligheid en comfort hebt gelezen om deze computer veilig en juist te gebruiken.
De netadapter kan zich automatisch aanpassen aan elke spanning tussen 100 en 240 volt en aan een frequentie van 50 of 60 hertz, waardoor u de computer in praktisch elk land of gebied kunt gebruiken. De netadapter zet wisselstroom om in gelijkstroom en reduceert de spanning die aan de computer wordt geleverd.
Raadpleeg de bijgesloten Instructiegids voor veiligheid en comfort voor gedetailleerde voorzorgsmaatregelen en bedieningsinstructies. 1. Sluit het netsnoer op de netadapter aan. Afbeelding 2-1 Het netsnoer op de netadapter aansluiten (2-pins stekker) Afbeelding 2-2 Het netsnoer op de netadapter aansluiten (3-pins stekker) Een 2- of 3-pins adapter/snoer wordt met de computer meegeleverd, afhankelijk van het model. 2.
Terwijl u de polssteun met één hand omlaag drukt, zodat het hoofdgedeelte van de computer niet omhoog komt, tilt u langzaam het beeldscherm omhoog. Zo kunt u de hoek van het beeldscherm aanpassen voor een optimale zichtbaarheid. Afbeelding 2-4 Het beeldscherm openen 1 1. Beeldscherm De vormgeving van het product verschilt per model. Wees voorzichtig wanneer u het beeldscherm opent en sluit. Als u het scherm te ruw opent of dichtklapt, bestaat het risico dat u de computer beschadigt.
Wanneer u het beeldscherm open- of dichtklapt, moet u een hand op de polssteun plaatsen om de computer op zijn plaats te houden en gebruikt u de andere hand om het beeldscherm voorzichtig open of dicht te klappen (gebruik niet te veel kracht bij het open- of dichtklappen van het beeldscherm). Het apparaat inschakelen In dit gedeelte wordt beschreven hoe u de tablet inschakelt. Het aan/uitlampje geeft de status aan.
besturingssysteem volgt u de aanwijzingen in elk scherm dat wordt weergegeven. Lees zorgvuldig de Licentievoorwaarden door wanneer deze worden weergegeven. Kennismaken met Windows Voor meer informatie over nieuwe onderdelen en het gebruik van Windows raadpleegt u Windows Help en ondersteuning.
Delen Met deze charm kunt u items (koppelingen, foto's en meer) delen. Start Met deze charm gaat u naar het Startscherm of, als u zich al in het Startscherm bevindt, keert u terug naar de vorige app. Apparaten Met deze charm kunt u uw hardware beheren. Instellingen Via deze charm hebt u toegang tot de instellingen van de computer (volume, helderheid, internetverbinding en meer). Tegels Tegels zijn toegankelijk en kunnen worden gestart via het Startscherm.
Afsluitmodus Wanneer u de computer uitschakelt in de afsluitmodus, worden er geen gegevens opgeslagen. De volgende keer dat u de computer aanzet, wordt het hoofdscherm van het besturingssysteem weergegeven. 1. 2. Als u gegevens hebt ingevoerd, slaat u deze in de interne opslagruimte of een ander opslagmedium op. Controleer of alle schijfactiviteit is gestopt voordat u de schijf verwijdert.
hoofdgeheugen van de computer. Wanneer u de computer weer inschakelt, kunt u direct doorgaan waar u was gebleven. Als u de computer moet uitschakelen aan boord van een vliegtuig of op een plaats waar elektronische apparaten worden bestuurd of bediend, dient u de computer altijd af te sluiten. Hierbij moet u ook functies voor draadloze communicatie uitschakelen en instellingen annuleren die de computer automatisch activeren, zoals een opnametimer.
De functie bespaart energie door het systeem af te sluiten wanneer geen hardware-activiteit plaatsvindt of de computer geen invoer ontvangt in de tijdsduur die is ingesteld met de functie Slaapstand. U kunt de functie Uitschakelen via LCD gebruiken. De slaapstand uitvoeren U kunt de slaapstand op een van de volgende manieren activeren: Klik op het aan/uit-pictogram ( ) op het Startscherm en selecteer Slaapstand Klik in de charm Instellingen op Aan/uit en selecteer Slaapstand. Sluit het beeldscherm.
Als u de netadapter loskoppelt voordat het opslagproces is voltooid, gaan gegevens verloren. Om gegevensverlies te voorkomen mag u niet overschakelen naar de sluimerstand terwijl gegevens worden overgezet naar externe media, zoals USB-apparaten, geheugenmedia of andere externe geheugenapparaten. Voordelen van de sluimerstand De sluimerstand biedt de volgende voordelen. Wanneer de computer automatisch wordt afgesloten omdat de accu bijna leeg is, worden de gegevens opgeslagen in de interne opslagruimte.
2. 3. Activeer de gewenste sluimerstandinstellingen voor Actie als ik op de aan/uit-knop druk en Actie als ik het deksel sluit. Klik op de knop Wijzigingen opslaan. Gegevensopslag in de sluimerstand Zodra u de computer in de sluimerstand afsluit, worden de gegevens uit het geheugen in de interne opslagruimte opgeslagen, wat enkele ogenblikken zal duren. Nadat u de computer hebt uitgeschakeld en de geheugeninhoud is opgeslagen in de interne opslagruimte, dient u eventuele randapparaten uit te schakelen.
Hoofdstuk 3 Rondleiding In dit hoofdstuk worden de verschillende onderdelen van de computer beschreven. Het wordt aanbevolen vertrouwd te raken met elk onderdeel voordat u de computer gebruikt. Wettelijke voetnoot (niet-toepasselijke pictogrammen) Raadpleeg het gedeelte Wettelijke voetnoten voor meer informatie over niet-toepasselijke pictogrammen. Ga voorzichtig om met de computer om krassen of beschadiging van het oppervlak te voorkomen.
Linkerkant In de volgende afbeelding ziet u de linkerkant van de computer. Afbeelding 3-2 Linkerkant van de computer 1 2 3 4 1. Gelijkstroomingang (19 V) 2. LAN-aansluiting* 3. Universal Serial Bus-poort (USB 2.0) 5 4. Universal Serial Bus-poort (USB 2.0 of 3.0) 5. Optisch station* * Aanwezig op sommige modellen. De vormgeving van het product verschilt per model.
Universal Serial Bus- Twee USB-poorten, die voldoen aan de USB 2.0poort (USB 2.0 of 3.0) of 3.0-standaard, bevinden zich in de linkerkant van de computer. Het type USB-poort hangt af van het gekochte model. De blauwe poort is de USB 3.0-poort. De USB 3.0-poort is compatibel met de USB 3.0standaard en is neerwaarts compatibel met USB 2.0-apparaten. De USB 2.0-poort is niet compatibel met USB 3.0-apparaten.
Geheugenmediasleuf In deze sleuf kunt u een SD™/SDHC™/SDXC™geheugenkaart, miniSD™/microSD™-kaart of MultiMediaCard™ plaatsen. Raadpleeg het gedeelte Geheugenmedia voor meer informatie. Zorg ervoor dat er nooit metalen voorwerpen, zoals schroeven, nietjes en paperclips, in de geheugenmediasleuf komen. Metalen voorwerpen kunnen tot kortsluiting leiden, waardoor de beschadigd raakt en er brand ontstaat, met mogelijk ernstig letsel tot gevolg.
Afbeelding 3-4 De achterkant van de computer 1 1. Accu Accu De oplaadbare lithium-ion accu voorziet de computer van stroom wanneer de netadapter niet is aangesloten. Raadpleeg het gedeelte Accu voor meer informatie over het gebruik en de werking van de accu. Wettelijke voetnoot (gebruiksduur van de accu) Raadpleeg het gedeelte Wettelijke voetnoten voor meer informatie over de gebruiksduur van de accu. Onderkant De volgende afbeelding illustreert de onderkant van de computer.
Voorkant met geopend beeldscherm In deze paragraaf wordt de computer met geopend beeldscherm beschreven. U opent het scherm door dit omhoog te klappen en in een comfortabele kijkhoek te plaatsen. Afbeelding 3-6 De voorkant van de computer met geopend beeldscherm 1 2 3 4 5 6 8 8 7 9 10 11 A B 12 12 13 13 1. Microfoon 2. Webcamlampje 3. Webcam 4. Microfoon* 5. Antennes voor draadloze communicatie (niet zichtbaar) 6. Beeldscherm 7. Stereoluidsprekers 8. Beeldschermscharnieren 9.
Webcam Een webcam is een apparaat waarmee u video kunt opnemen of foto's kunt maken met uw computer. U kunt deze camera gebruiken voor videochats of videovergaderingen via een communicatieprogramma. Richt de webcam niet direct op de zon. Raak de lens van de webcam niet aan en druk er niet op. Als u dat wel doet, kan de beeldkwaliteit afnemen. Gebruik een brillendoekje (lensdoekje) of andere zachte doek om de lens te reinigen als deze vuil wordt.
Beeldschermscharnie Dankzij de beeldschermscharnieren kunt u het ren beeldscherm in de gewenste, comfortabele stand zetten. Aan/uit-knop Druk op deze knop om de computer in of uit te schakelen. Aan/uit-lampje Het aan/uit-lampje brandt wit als de computer aanstaat. Als u de computer echter uitschakelt in de slaapstand, knippert dit lampje wit.
CPU Het type processor hangt af van het model. Als u wilt controleren welk type processor uw model bevat, opent u TOSHIBA PC Health Monitor door te klikken op PC Health Monitor in de groep TOSHIBA in de weergave Apps en klikt u daarna op Pc-gegevens. Wettelijke voetnoot (CPU) Raadpleeg het gedeelte Wettelijke voetnoten voor meer informatie over de CPU. Interne opslagruimte De capaciteit van de interne opslagruimte hangt af van het model.
Geheugenmodule De geheugenmodule is in de computer geïnstalleerd. Wettelijke voetnoot (geheugen (hoofdsysteem)) Raadpleeg het gedeelte Wettelijke voetnoten voor meer informatie over het geheugen (hoofdsysteem). Graphics Processing Unit De prestaties van de Graphics Processing Unit (GPU) hangen af van het productmodel, de ontwerpconfiguratie, de toepassingen, de instellingen voor energiebeheer en de gebruikte functies.
AMD® Vari-Bright™ Modellen met een AMD-GPU beschikken mogelijk over de functie AMD® Vari-Bright™ die het stroomverbruik van de computer kan verminderen door het beeldcontrast van het interne LCD-scherm te optimaliseren. Deze functie kan worden gebruikt als de computer: wordt gebruikt in de accumodus alleen het interne LCD-scherm gebruikt U kunt de Vari-Bright-functie inschakelen in het AMD VISION Engine Control Center/Catalyst Control Center.
Als de accu tijdens het opladen te heet wordt, stopt het opladen en gaat het DC IN-/acculampje uit. Wanneer de temperatuur van de accu weer normaal is, wordt het opladen hervat, ongeacht of de computer aan- of uitstaat. Aan/uit-lampje Controleer het aan/uit-lampje om de status van de accu te bepalen. Let daarbij op de volgende indicaties: Wit Geeft aan dat de computer van stroom wordt voorzien en is ingeschakeld.
Hoofdstuk 4 Basisbeginselen In dit hoofdstuk worden de grondbeginselen van computergebruik beschreven en wordt toegelicht welke voorzorgsmaatregelen u daarbij dient te treffen. Het touchpad gebruiken Het touchpad in de polssteun kan de volgende bewegingen ondersteunen: Tikken Tik eenmaal op het touchpad om een item, zoals een app, te activeren. Tikken met twee vingers Tik eenmaal met twee vingers tegelijk op het touchpad om een menu of andere functie weer te geven, afhankelijk van de gebruikte software.
Vegen Beweeg uw vinger snel vanaf een rand van het touchpad zonder te pauzeren wanneer u het touchpad voor het eerst aanraakt. Vegen vanaf de linkerrand: de laatst geopende apps weergeven. Vegen vanaf de rechterrand: de charms (Zoeken, Delen, Start, Apparaten, Instellingen) openen of sluiten. Vegen vanaf de bovenrand: de opdrachtbalk van de app openen of sluiten. Plaats geen voorwerpen op het oppervlak van het touchpad om ongewenste acties te voorkomen.
Afbeelding 4-1 Toetslampjes 1 1. CAPS LOCK-lampje CAPS LOCK Dit lampje brandt groen als de hoofdlettervergrendeling is ingeschakeld voor lettertoetsen. Functietoetsen De functietoetsen (F1~F12) zijn de twaalf toetsen bovenaan op het toetsenbord. U kunt de functietoetsmodus configureren als 'Speciale functiemodus' of 'Standaard F1-F12-modus' door te klikken op System Settings -> Toetsenbord in de groep TOSHIBA in de weergave Apps.
Speciale functiemodus Standaard F1F12-modus Functie F6 FN + F6 Media terugspoelen. F7 FN + F7 Media afspelen of de weergave pauzeren. F8 FN + F8 Media vooruitspoelen. F9 FN + F9 Het geluidsvolume van de computer verlagen. F10 FN + F10 Het geluidsvolume van de computer verhogen. F11 FN + F11 Het geluid in- of uitschakelen. F12 FN + F12 De vliegtuigmodus in- of uitschakelen.
Deze toets heeft dezelfde functie als de secundaire (rechter)muisknop. Optische stations In sommige modellen is een DVD Super Multi-station geïnstalleerd. Wanneer de computer toegang heeft tot een optische schijf, brandt het lampje op het station.
3. Leg de schijf met het opschrift omhoog in de disclade. Afbeelding 4-3 Een schijf plaatsen 1 1. Laserlens Wanneer de disclade volledig is uitgeschoven, bedekt de rand van de computer de disclade een stukje. Wanneer u de schijf in de lade plaatst, moet u de schijf daarom schuin houden. Zorg na het plaatsen van de schijf echter dat de schijf plat ligt. Raak nooit de laserlens of de omringende behuizing aan om onjuiste uitlijning te voorkomen.
Wanneer de disclade een stukje wordt geopend, moet u even wachten totdat de schijf is opgehouden met draaien voordat u de disclade volledig opentrekt. 2. 3. De schijf steekt iets uit over de zijkanten van de disclade, zodat u hem kunt pakken. Til de schijf er voorzichtig uit. Duw zachtjes tegen het midden van de disclade om deze te sluiten. Duw zachtjes totdat de houder vastklikt.
Dvd's DVD-R's, DVD+R's, DVD-R DL- en DVD+R DL-schijven kunnen slechts één keer worden beschreven. De opgenomen gegevens kunnen niet worden gewist of veranderd. DVD-RW-, DVD+RW- en DVD-RAM-schijven kunnen meermaals worden beschreven. Schijven beschrijven Met het DVD Super Multi-station met kunt u gegevens schrijven naar CDR, CD-RW, DVD-R, DVD-R DL, DVD-RW, DVD+R, DVD+R DL, DVD+RW en DVD-RAM.
Vóór schrijven of herschrijven Op grond van beperkte compatibiliteitstests door TOSHIBA worden de volgende fabrikanten van schijfmedia aanbevolen. De schijfkwaliteit kan echter van invloed zijn op het schrijf- of herschrijfproces TOSHIBA staat niet in voor de werking, kwaliteit of prestaties van enigerlei schijven. CD-R: TAIYO YUDEN CO., Ltd. MITSUBISHI KAGAKU MEDIA CO., LTD. CD-RW: (Multi-Speed, High-Speed en Ultra-Speed) MITSUBISHI KAGAKU MEDIA CO., LTD.
Tijdens schrijven of herschrijven Neem de volgende punten in acht wanneer u een medium beschrijft of herschrijft: Kopieer gegevens altijd van de interne opslagruimte naar het optische station. Gebruik geen knippen en plakken, aangezien de oorspronkelijke gegevens verloren gaan ingeval van een schrijffout. Vermijd de volgende handelingen: Wisselen tussen gebruikers in het besturingssysteem.
CyberLink PowerDVD for Toshiba ondersteunt het afspelen van dvd's en videobestanden. Er kunnen frames wegvallen, het geluid kan overslaan en het geluid en beeld kunnen niet meer synchroon lopen tijdens de weergave van bepaalde video's. Sluit alle andere toepassingen wanneer u CyberLink PowerDVD for TOSHIBA gebruikt. Open geen andere toepassingen en voer geen andere bewerkingen uit tijdens de videoweergave. De weergave kan in sommige gevallen stoppen of niet correct werken.
Beeldschermen en geluid Als het videobeeld niet wordt weergegeven op een extern beeldscherm of een televisie, stopt u CyberLink PowerDVD for TOSHIBA en wijzigt u de schermresolutie. Als u de schermresolutie wilt wijzigen, klikt u op Configuratiescherm -> Vormgeving en persoonlijke instellingen -> Beeldscherm -> Resolutie aanpassen in de groep Systeem in de weergave Apps. Video kan echter niet worden uitgevoerd naar sommige externe schermen en televisie vanwege de uitvoer- of weergaveomstandigheden.
Accu In dit gedeelte worden de accutypen, de omgang ermee, de oplaadmethoden en het gebruik ervan toegelicht. Accu Deze lithium-ion accu, in deze handleiding ook wel 'hoofdaccu' of kortweg 'accu' genoemd, is de voornaamste energiebron van de computer wanneer de netadapter niet is aangesloten. RTC-functie (Real-Time Clock) De RTC-functie (Real-Time Clock) wordt ondersteund.
Oplaadtijd In de volgende tabel ziet u de geschatte tijd die nodig is om een lege accu volledig op te laden. Type accu Uitgeschakeld Ingeschakeld Accu (32 Wh, 4 cellen) circa 3 uur circa 12 uur Accu (45 Wh, 4 cellen) circa 4 uur circa 12 uur Houd er rekening mee dat de oplaadtijd wanneer de computer aanstaat, wordt beïnvloed door de omgevingstemperatuur, de temperatuur van de computer en de manier waarop u de computer gebruikt.
Wacht enkele seconden wanneer u de resterende gebruiksduur wilt controleren omdat de computer tijd nodig heeft om de resterende capaciteit van de accu te controleren en de resterende gebruiksduur te berekenen op basis hiervan en van het huidige stroomverbruik. Let er wel op dat de werkelijke resterende gebruiksduur enigszins kan afwijken van de berekende tijd. Bij herhaald ontladen en opladen zal de capaciteit van de accu geleidelijk afnemen.
Gebruiksduur van de accu verlengen U kunt de gebruiksduur van een accu verlengen door de volgende stappen ten minste eenmaal per maand uit te voeren. 1. 2. 3. 4. 5. Schakel de computer uit. Koppel de netadapter los en schakel de computer in. Als de computer niet wordt ingeschakeld, gaat u naar stap 4. Laat de computer vijf minuten aanstaan op de accu. Als de accu ten minste vijf minuten gebruiksduur heeft, ga dan verder totdat de accu helemaal leeg is.
De LAN-kabel aansluiten U sluit de LAN-kabel als volgt aan: Sluit de netadapter aan alvorens de LAN-kabel aan te sluiten. Tijdens LAN-gebruik moet de netadapter aangesloten blijven. Als u de netadapter loskoppelt terwijl de computer gegevens uitwisselt met een LAN, wordt de verbinding wellicht verbroken. Sluit uitsluitend LAN-kabels aan op de LAN-aansluiting. Doet u dat niet, dan kan dit schade of storingen veroorzaken. Sluit geen voedingsapparaat aan op de LAN-kabel die op de LANaansluiting is aangesloten.
Voor gebruik van een miniSD-/microSD-kaart is een adapter vereist. Niet alle geheugenmedia zijn getest op een correcte werking. Er kan derhalve niet worden gegarandeerd dat alle geheugenmedia probleemloos functioneren.
Formattering van geheugenmedia Nieuwe mediakaarten worden geformatteerd volgens specifieke normen. Als u een mediakaart opnieuw wilt formatteren, gebruik hiervoor dan een apparaat dat mediakaarten kan gebruiken. Een geheugenkaart formatteren Wanneer u een geheugenkaart koopt, is deze reeds geformatteerd conform specifieke normen.
SD-kaart (SD-geheugenkaart, SDHC-geheugenkaart, SDXCgeheugenkaart) Zet de schrijfbeveiligingsschakelaar in de vergrendelde stand als u geen gegevens wilt vastleggen. Geheugenmedia plaatsen De volgende instructies zijn van toepassing op alle soorten ondersteunde media. U plaatst geheugenmedia als volgt: 1. 2. 3. Draai het geheugenmedium zodanig dat de contactpunten (metalen delen) naar beneden zijn gericht. Plaats het geheugenmedium in de geheugenmediasleuf van de computer.
2. 3. Selecteer Geheugenmedia. Verwijder nu het medium. Als u het geheugenmedium verwijdert of de computer uitschakelt terwijl de computer het geheugenmedium gebruikt, bestaat de kans dat gegevens op het medium verloren gaan of beschadigd raken. Verwijder een geheugenmedium niet terwijl de computer in de slaapstand of de sluimerstand staat. Hierdoor kan de computer instabiel raken of kunnen gegevens op het geheugenmedium verloren gaan.
Afbeelding 4-8 De HDMI-uitgang aansluiten 2 1 1. HDMI-uitgang 2. HDMI-kabel In de volgende omstandigheden mag u een HDMI-apparaat niet aansluiten of loskoppelen: Het systeem wordt opgestart. Het systeem wordt afgesloten. Wanneer u een televisie of externe monitor aansluit op de HDMI-poort, moet het beelduitvoerapparaat zijn ingesteld op HDMI. Wanneer u de HDMI-kabel verwijdert en weer aansluit, dient u ten minste vijf seconden te wachten voordat u de HDMI-kabel opnieuw aansluit.
Terwijl er gegevens worden gelezen of weggeschreven Terwijl er communicatie plaatsvindt HD-formaat selecteren U selecteert de weergavemodus als volgt: 1. 2. Klik op Configuratiescherm -> Vormgeving en persoonlijke instellingen -> Beeldscherm -> Beeldscherminstellingen wijzigen -> Geavanceerde instellingen -> Alle modi weergeven in de groep Systeem in de weergave Apps. Selecteer een van de modi bij Alle modi weergeven.
De beeldscherminstellingen wijzigen Nadat een of meer externe beeldschermen zijn aangesloten, kan het besturingssysteem automatisch de beeldscherminstellingen detecteren, identificeren en configureren. U kunt ook handmatig beheren hoe de externe schermen werken en de scherminstellingen wijzigen door op P te drukken terwijl u de Windowstoets ( ) ingedrukt houdt. Als u het externe beeldscherm loskoppelt voordat u de computer uitschakelt, moet u eerst overschakelen naar het interne scherm.
Universele netadapter Als u de computer regelmatig op verschillende locaties gebruikt, is het wellicht een goed idee om voor elke locatie een extra netadapter te kopen: u hoeft de adapter dan niet telkens mee te nemen. Geluidssysteem en videomodus In dit gedeelte worden enkele van de audiobedieningsfuncties beschreven. Volumemixer Met het hulpprogramma Volumemixer kunt u het afspeelvolume regelen van apparaten en toepassingen onder Windows.
Informatie Klik op de informatieknop om hardwaregegevens, softwaregegevens en de taalinstelling weer te geven. Energiebeheer De audiocontroller in uw computer kan worden uitgeschakeld wanneer de audiofunctie niet actief is. Als u de configuratie van het audioenergiebeheer wilt aanpassen, klikt op de knop Energiebeheer . Als audio-energiebeheer is ingeschakeld, is de knop met het rondje linksboven in Power Management (Energiebeheer) blauw en bol.
Hoofdstuk 5 Hulpprogramma's en geavanceerd gebruik In dit hoofdstuk worden de hulpprogramma's en speciale voorzieningen van deze computer beschreven en wordt het geavanceerde gebruik van bepaalde hulpprogramma's toegelicht. Hulpprogramma's en toepassingen In deze paragraaf worden de op de computer voorgeïnstalleerde hulpprogramma's beschreven en er wordt toegelicht hoe u de programma's start.
TOSHIBAweergavehulpprogramma Het TOSHIBA-weergavehulpprogramma omvat het hulpprogramma Tekstgrootte bureaublad, het hulpprogramma Scherm splitsen en Resolution+instellingen. Met Tekstgrootte bureaublad kunt u de tekst op het bureaublad groter of kleiner maken op basis van uw gebruik en voorkeur. U kunt de tekstgrootte op het scherm en in de titelbalk van vensters wijzigen door de tekstschaal te wijzigen.
CyberLink PowerDVD Deze software wordt meegeleverd voor het for Toshiba afspelen van video-dvd's. U opent dit hulpprogramma door te klikken op CyberLink PowerDVD for Toshiba in de weergave Apps. Dit hulpprogramma is alleen beschikbaar op sommige modellen. Voor informatie over het gebruik van CyberLink PowerDVD for Toshiba raadpleegt u het Helpbestand. TOSHIBA eco Utility Deze computer beschikt over een 'ecomodus'.
TOSHIBA-functietoets Met dit hulpprogramma kunt u bepaalde functies uitvoeren door te drukken op de opgegeven toets, al dan niet in combinatie met de FN-toets. U opent dit hulpprogramma door te klikken op Functietoets in de groep TOSHIBA in de weergave Apps. Voor meer informatie raadpleegt u het gedeelte Functietoetsen.
TOSHIBAHet TOSHIBA-hulpprogramma voor onderhoud hulpprogramma voor wordt meegeleverd om de interne opslagruimte onderhoud (vaste schijf of eMMC) te wissen. Met dit hulpprogramma kunt u alle gegevens en partities verwijderen en alle sectoren op de interne opslagruimte overschrijven. Als er een externe vaste schijf op de computer is aangesloten, kan deze ook worden gewist. Als u de gegevens van de externe vaste schijf echter niet wilt verwijderen, koppelt u deze los van de computer.
Vaste schijf automatisch uitschakelen *1 Met deze functie wordt de vaste schijf automatisch uitgeschakeld als een bepaalde tijd geen activiteit op de vaste schijf heeft plaatsgevonden. De vaste schijf wordt ingeschakeld wanneer deze weer wordt gebruikt. Dit kan worden ingesteld via Energiebeheer.
Sluimerstand Met deze functie kunt u de stroom naar de computer uitschakelen zonder de software te hoeven sluiten. De inhoud van het hoofdgeheugen wordt automatisch in de interne opslagruimte opgeslagen, zodat u uw werk kunt hervatten op de plaats waar u was gebleven wanneer u de computer weer aanzet. U moet de sluimerstand inschakelen voordat u deze functie kunt gebruiken. Raadpleeg het gedeelte Sluimerstand activeren voor meer informatie.
Gebruikerswachtwoord U start het hulpprogramma door te klikken op de volgende items in de groep TOSHIBA in de weergave Apps: Wachtwoordhulpprogramma -> Gebruikerswachtwoord Gebruikersverificatie is mogelijk vereist om de gebruikersrechten te controleren wanneer u 'TOSHIBA-wachtwoordhulpprogramma' gebruikt om wachtwoorden te verwijderen of te wijzigen en dergelijke. Instellen (knop) Klik op deze knop om een wachtwoord te registreren.
Als u het gebruikerswachtwoord voor de vaste schijf vergeet, kan TOSHIBA u NIET helpen en wordt de vaste schijf VOLLEDIG en VOORGOED ONBRUIKBAAR. TOSHIBA kan NIET verantwoordelijk worden gesteld voor verlies van gegevens, voor het feit dat de vaste schijf niet bruikbaar of toegankelijk is of voor enig ander verlies dat u of een persoon in uw organisatie lijdt doordat de vaste schijf niet meer toegankelijk is. Stel geen gebruikerswachtwoord voor de vaste schijf in als u dit risico niet aanvaardt.
3. Druk op ENTER. Als u het wachtwoord driemaal achter elkaar onjuist invoert of als u niet binnen één minuut een wachtwoord invoert, wordt de computer uitgeschakeld. In dit geval werken functies die de computer automatisch inschakelen (zoals Activering op LAN, Taakplanner en dergelijke) mogelijk niet. U moet de computer opnieuw inschakelen en het wachtwoord opnieuw proberen in te voeren.
De instellingen en opties die hier worden beschreven hangen af van het aangeschafte model. Nadat u de instellingen hebt gewijzigd, kan een dialoogvenster worden weergegeven waarin wordt vermeld dat de wijzigingen worden toegepast nadat u de computer opnieuw hebt opgestart. Zorg dat u de computer direct opnieuw opstart om deze wijzigingen toe te passen.
De software TOSHIBA PC Health Monitor vergroot of wijzigt op geen enkele wijze de verplichtingen van TOSHIBA volgens de standaard beperkte garantie. De voorwaarden en beperkingen in de standaard beperkte garantie van TOSHIBA blijven van toepassing. TOSHIBA PC Health Monitor starten U kunt TOSHIBA PC Health Monitor openen door te klikken op PC Health Monitor in de groep TOSHIBA in de weergave Apps. Het hoofdscherm van TOSHIBA PC Health Monitor wordt weergegeven.
De vooraf geïnstalleerde software herstellen met de gemaakte herstelmedia De vooraf geïnstalleerde software herstellen vanaf de herstelpartitie Als u met het TOSHIBA-hulpprogramma voor onderhoud de interne opslagruimte wist, worden alle gegevens, inclusief het besturingssysteem en de herstelpartitie, verwijderd. In dat geval kunt u geen herstelmedia maken of de vooraf geïnstalleerde software herstellen vanaf de herstelpartitie.
Sommige van de schijfmedia zijn mogelijk niet compatibel met het optische station dat op uw computer is aangesloten. Controleer daarom voordat u verdergaat of het optische station het lege medium dat u hebt gekozen ondersteunt. Als u verdergaat, wordt het USB-flashgeheugen geformatteerd en gaan alle gegevens in het USB-flashgeheugen verloren. 2. 3. 4. Zet de computer aan en wacht terwijl het besturingssysteem Windows op de normale manier wordt geladen.
3. Selecteer UEFI Boot (Standaard). Als u de opstartmodus instelt op CSM Boot, werken de herstelmedia die door Recovery Media Creator zijn gemaakt NIET voor de herstelbewerking. Als u een herstelimage maakt met behulp van geavanceerde herstelfuncties in het Configuratiescherm, zorg dan ook dat u de standaardoptie voor de opstartmodus (UEFI Boot) in TOSHIBA Setup Utility selecteert voordat u de herstelbewerking uitvoert. 1. 2. 3. 4. 5.
Als u er eerder voor hebt gekozen de herstelpartitie te verwijderen zonder een herstelmedium te maken, kan het herstelmedium niet worden gemaakt. Als u al een herstelmedium hebt gemaakt, kunt u hiermee de herstelpartitie herstellen. Als u geen herstelmedium hebt gemaakt, neemt u voor hulp contact op met de ondersteuning van TOSHIBA. De vooraf geïnstalleerde software herstellen vanaf de herstelpartitie Een deel van de totale interne opslagruimte is geconfigureerd als een verborgen herstelpartitie.
4. Volg de aanwijzingen op het scherm om het herstel te voltooien.
Hoofdstuk 6 Problemen oplossen TOSHIBA heeft met deze computer een duurzaam product willen maken, maar mochten zich problemen voordoen dan kunt u aan de hand van de procedures in dit hoofdstuk bepalen wat er aan de hand is. Het is raadzaam kennis te nemen van dit hoofdstuk omdat u bepaalde problemen kunt vermijden als u weet wat er fout kan gaan. Probleemoplossingsproces Als u zich aan de volgende richtlijnen houdt, kunt u probleem veel makkelijker oplossen.
Controleer of alle kabels op de juiste manier zijn aangesloten en stevig vastzitten. Loszittende kabels kunnen signaalfouten veroorzaken. Controleer alle verbindingskabels op losse draden en alle connectoren op losse pinnen. Controleer of een eventuele schijf correct is geplaatst Maak uitgebreide notities van uw bevindingen en bewaar deze in een permanent foutenlogboek. Hierdoor kunt u gemakkelijker aan de TOSHIBA-ondersteuning uitleggen wat de problemen zijn.
Software De problemen worden wellicht door uw software of schijf veroorzaakt. Als u een softwarepakket niet kunt laden, is het medium of het programma misschien beschadigd. Probeer in dat geval een andere kopie van de software te laden. Als tijdens het gebruik van een softwarepakket een foutbericht verschijnt, raadpleegt u de softwaredocumentatie. Deze bevat meestal een gedeelte over probleemoplossing of een overzicht van foutberichten.
2. 3. Selecteer het programma dat u wilt sluiten en klik op Beëindigen. Nadat het programma is gesloten, zou u moeten kunnen doorwerken. Zo niet, ga dan verder met de volgende stap. Sluit de overige programma’s een voor een door de programmanaam te selecteren en op Beëindigen te klikken. Nadat u alle programma's hebt gesloten, zou u verdere moeten kunnen werken. Zo niet, zet dan de computer uit en start opnieuw op.
Voeding Toetsenbord Intern beeldscherm Interne opslagruimte Optisch station Geheugenkaart Aanwijsapparaat USB-apparaat Geluidssysteem Externe monitor LAN Draadloos LAN Bluetooth Voeding Als de computer niet op een stopcontact is aangesloten, is de accu de voornaamste voedingsbron. Uw computer heeft ook een RTC-functie (Real Time Clock). Alle voedingsbronnen staan met elkaar in verband en elke bron kan schijnbare stroomvoorzieningsproblemen veroorzaken.
Probleem Procedure De netadapter Controleer de aansluitingen en kijk of het netsnoer/ voorziet de computer netadapter goed aan de computer vastzit en of het niet van stroom stopcontact in orde is. Controleer de toestand van het snoer en de aansluitpunten. Als het snoer versleten of beschadigd is, moet het worden vervangen, als de aansluitpunten vervuild zijn, reinigt u deze met een schone, droge doek.
Real-Time Clock Probleem Procedure De BIOS-instelling en systeemdatum/tijd zijn verloren gegaan. De duur van de RTC-functie is verstreken. U moet de datum en tijd opnieuw instellen via TOSHIBA Setup Utility door de volgende stappen uit te voeren: 1. 2. 3. 4. Start TOSHIBA Setup Utility. Raadpleeg het gedeelte TOSHIBA Setup Utility voor meer informatie. Stel de datum in via het veld System Date. Stel de tijd in via het veld System Time. Volg de aanwijzingen op het scherm om verder te gaan.
Probleem Procedure Er verschijnen vlekken op het beeldscherm. Deze vlekken kunnen zijn veroorzaakt door contact met het toetsenbord of het touchpad bij het sluiten van het scherm. Probeer de vlekken te verwijderen door het scherm voorzichtig af te vegen met een schone, droge doek of, als dit niet lukt, met een goed LC-reinigingsmiddel. In dit laatste geval moet u altijd de instructies volgen bij de schermreiniger en het scherm altijd goed laten drogen voordat u het sluit.
Probleem Procedure U kunt geen toegang Controleer of de disclade goed is gesloten. Duw krijgen tot een cd/ zachtjes totdat de lade vastklikt. dvd in het station. Open de disclade en controleer of de schijf goed is geplaatst. De schijf moet plat op het ladeoppervlak liggen met het opschrift omhoog. Een vreemd voorwerp in de disclade kan verhinderen dat de laser de schijf leest. Zorg dat de laser niet wordt geblokkeerd. Verwijder eventuele voorwerpen. Controleer of de schijf vuil is.
Touchpad Probleem Procedure Het touchpad werkt niet. Controleer de apparaatinstellingen. Schermaanwijzer reageert niet wanneer het aanwijsapparaat wordt gebruikt In dit geval kan het systeem bezet zijn. Beweeg de muis nogmaals nadat u enkele ogenblikken hebt gewacht. Dubbel aantikken (touchpad) werkt niet. Probeer in dit geval eerst om de dubbelkliksnelheid te wijzigen in het hulpprogramma voor muisbesturing.
USB-muis Probleem Procedure Schermaanwijzer reageert niet wanneer de muis wordt gebruikt. In dit geval kan het systeem bezet zijn. Beweeg de muis nogmaals nadat u enkele ogenblikken hebt gewacht. Dubbelklikken werkt niet. Probeer in dit geval eerst om de dubbelkliksnelheid te wijzigen in het hulpprogramma voor muisbesturing. Koppel de muis los van de computer, sluit hem weer aan op een vrije USB-poort en zorg ervoor dat hij stevig vast zit. 1. 2. 3.
Probleem Procedure USB-apparaat werkt niet. Koppel het USB-apparaat los van de computer, sluit het weer aan op een vrije poort en zorg dat het stevig vast zit. Zorg ervoor dat de benodigde USBstuurprogramma's correct zijn geïnstalleerd. Raadpleeg hiervoor zowel de documentatie van de apparatuur als van het besturingssysteem. Geluidssysteem Raadpleeg naast de informatie in dit gedeelte ook de documentatie bij het audio-apparaat.. Probleem Procedure Geen geluid hoorbaar.
Probleem Procedure Het scherm blijft leeg. Stel het contrast en de helderheid op de externe monitor bij. Druk op de functietoets om de beeldschermprioriteit te wijzigen, zodat deze niet alleen op het interne beeldscherm is ingesteld. Controleer of de externe monitor is aangesloten.
Probleem Procedure Activering op LAN werkt niet. Controleer of de netadapter is aangesloten. De functie Activering op LAN werkt niet zonder de netadapter. Controleer of snel opstarten is uitgeschakeld: 1. 2. 3. 4. 5. Klik op Configuratiescherm -> Systeem en beveiliging -> Energiebeheer in de groep Systeem in de weergave Apps. Klik op Het gedrag van de aan/uit-knoppen bepalen of Het gedrag van het sluiten van het deksel bepalen. Klik op Instellingen wijzigen die momenteel niet beschikbaar zijn.
TOSHIBA-ondersteuning Als u extra hulp nodig hebt of als u problemen hebt bij het gebruik van de computer, kunt u contact opnemen met de technische ondersteuning van TOSHIBA. Voordat u belt Aangezien sommige problemen wellicht te wijten zijn aan het besturingssysteem of het programma dat u gebruikt, is het belangrijk om eerst andere hulpbronnen te raadplegen.
Hoofdstuk 7 Aanhangsel Specificaties Dit gedeelte geeft een overzicht van de technische specificaties van de computer. Gewicht en afmetingen Bij de volgende fysieke afmetingen zijn uitstekende delen niet meegerekend. De fysieke afmetingen hangen af van het gekochte model. Afmetingen Circa 344,0 (b) x 244,4 (d) x 23,2/23,2 (h) millimeter (uitstekende delen niet inbegrepen).
Netsnoer en connectoren De stekker van het netsnoer moet compatibel zijn met verschillende internationale wandcontactaansluitingen en het netsnoer moet voldoen aan de normen van het land waarin het wordt gebruikt. Alle snoeren moeten voldoen aan de volgende specificaties: Kabeldikte: Minimaal 0,75 mm2 Stroomsterkte: Minimaal 2,5 ampère Certificeringsinstanties China: CQC VS en Canada: Goedgekeurd door UL en CSA Nee.
In de onderstaande afbeeldingen worden de stekkervormen voor de VS en Canada, het Verenigd Koninkrijk, Australië, Europa en China weergegeven. V.S.
De draadloze apparaten zijn niet geverifieerd op aansluiting van en werking met alle apparaten die de draadloos LAN- of Bluetooth-radiotechnologie gebruiken. Bluetooth- en draadloos LAN-apparaten werken in hetzelfde frequentiebereik en kunnen elkaars werking verstoren. Als u Bluetooth- en draadloos LAN-apparaten tegelijk gebruikt, kunnen de netwerkprestaties minder dan optimaal zijn of kan de netwerkverbinding zelfs verloren gaan.
Draadloze LAN-technologie De functie voor draadloze communicatie van de computer ondersteunt bepaalde apparaten voor draadloze communicatie. Alleen sommige modellen zijn voorzien van functies voor draadloos LAN en Bluetooth. Gebruik de functies voor draadloos LAN (Wi-Fi) en Bluetooth niet in de buurt van een magnetron of in gebieden met radiostoring of magnetische velden. Storing van een magnetron of andere bron kan tot onderbreking van de Wi-Fi- of Bluetooth-functie leiden.
Media Access Protocol CSMA/CA (Collision Avoidance) met ACK (Acknowledgement) Radiospecificaties De radiospecificaties van draadloos LAN-modules kunnen variëren afhankelijk van: land/regio waarin het product is aangeschaft type product Draadloze communicatie is vaak gebonden aan plaatselijke voorschriften voor radiocommunicatie.
U kunt de ingebouwde Bluetooth-functies van de computer en een externe Bluetooth-adapter niet tegelijk gebruiken. De kenmerken van Bluetoothtechnologie zijn als volgt: Beveiliging Twee geavanceerde beveiligingsmechanismen zorgen voor optimale beveiliging: Verificatie voorkomt dat onbevoegden toegang tot kritieke gegevens krijgen en maakt het onmogelijk de oorsprong van een bericht te vervalsen. Codering biedt bescherming tegen afluisteren en waarborgt de privacy van verbindingen.
Italië: - Voor privégebruik is algemene goedkeuring vereist als WAS/ RLAN's buiten de eigen locatie wordt gebruikt. Voor openbaar gebruik is algemene goedkeuring vereist. Luxemburg: Geïmplementeerd Algemene goedkeuring is vereist voor netwerk- en servicelevering. Noorwegen: Geïmplementeerd Deze subsectie geldt niet voor het geografische gebied binnen een straal van 20 km rond het midden van Ny-Alesund. Russische Federatie: - Alleen voor gebruik binnenshuis.
Beperkingen voor gebruik van de frequenties tussen 5470-5725 MHz in Europa Italië: - Voor privégebruik is algemene goedkeuring vereist als WAS/ RLAN's buiten de eigen locatie wordt gebruikt. Luxemburg: Geïmplementeerd Algemene goedkeuring is vereist voor netwerk- en servicelevering. Russische Federatie: Beperkt e.i.r.p 100 mW. Gebruik is alleen toegestaan binnenshuis, in afgesloten industriële gebieden en opslagplaatsen en aan boord van vliegtuigen. 1. 2.
en (2) dit apparaat moet ontvangen storing accepteren, zelfs storing die ongewenste resultaten kan hebben. Ce dispositif est conforme à la norme CNR-210 d'Industrie Canada applicable aux appareils radio exempts de licence. Son fonctionnement est sujet aux deux conditions suivantes: (1) le dispositif ne doit pas produire de brouillage préjudiciable, et (2) ce dispositif doit accepter tout brouillage reçu, y compris un brouillage susceptible de provoquer un fonctionnement indésirable.
Taiwan Artikel 12 Zonder toestemming van de NCC is het geen enkel bedrijf, onderneming of gebruiker toegestaan de frequentie te wijzigen, het zendvermogen te vergroten of de oorspronkelijke eigenschappen of de prestaties te wijzigen van een goedgekeurd apparaat met laag vermogen op radiofrequentie. Artikel 14 Apparaten met laag vermogen op radiofrequentie mogen geen invloed hebben op de vliegtuigveiligheid en wettelijk toegestane communicatie niet storen.
3. Neem contact op met een erkende TOSHIBA-servicedienst als u problemen ondervindt met storingen die dit product bij andere radiostations veroorzaakt. 2. Aanduiding voor draadloos LAN De hieronder weergegeven aanduiding wordt op deze apparatuur vermeld. (1)(2) (3)(4) (5) 1. 2. 3. 4. 5. 2.4: Deze apparatuur gebruikt een frequentie van 2,4 GHz. DS: Deze apparatuur gebruikt DS-SS-modulatie. OF: Deze apparatuur gebruikt OFDM-modulatie. 4: Het storingsbereik van deze apparatuur is minder dan 40 m.
Apparaatvalidatie Dit apparaat is goedgekeurd conform de Technical Regulation Conformity Certification en behoort tot de klasse van radio-apparaten van gegevenscommunicatiesystemen met laag vermogen zoals vermeld in de handelswetten op het gebied van telecommunicatie. Intel® Centrino® Wireless-AC 3160 voor draadloos LAN en Bluetooth De naam van de radioapparatuur: 3160NGW DSP Research, Inc. Keuringsnummer: D130092003 Realtek 802.
Indonesië Ierland Italië Japan Korea Letland Liechtenstein Litouwen Luxemburg Malta Monaco Nederland Noorwegen Filipijnen Polen Portugal Roemenië Slowakije Slovenië Spanje Zweden Zwitserland Verenigd Koninkrijk V.S. Wettelijke voetnoten Niet-toepasselijke pictogrammen Bepaalde computerchassis zijn ontworpen om alle mogelijke configuraties voor een volledige productserie te huisvesten.
In sommige omstandigheden kan de computer mogelijk automatisch worden afgesloten. Dit is een normale beschermende maatregel ter voorkoming van gegevensverlies of beschadiging van het product bij gebruik buiten de aanbevolen omstandigheden. Vermijd het risico van gegevensverlies door altijd back-ups van gegevens te maken. Dit doet u door de gegevens van tijd tot tijd op een extern opslagmedium op te slaan. Voor optimale prestaties dient u uw computer alleen onder de aanbevolen omstandigheden te gebruiken.
Gebruiksduur van de accu De gebruiksduur van de accu varieert sterk al naar gelang factoren zoals productmodel, configuratie, toepassingen, energiebeheerinstellingen en gebruikte functies. Bovendien is de gebruiksduur onderhevig aan de natuurlijke prestatievariaties die voortvloeien uit het ontwerp van afzonderlijke onderdelen. Bepaalde modellen en configuraties die door TOSHIBA vóór het tijdstip van publicatie zijn getest, worden geleverd met een classificatie voor de gebruiksduur van de accu.
Draadloos LAN De verzendsnelheid via het draadloos LAN en het maximale bereik van draadloos LAN kunnen variëren al naar gelang de elektromagnetische omgeving, obstakels, ontwerp en configuratie van toegangspunten, clientontwerp en software-/hardwareconfiguratie. De werkelijke verzendsnelheid zal lager zijn dan de theoretische maximumsnelheid. Kopieerbeveiliging Technologie ter bescherming van het auteursrecht in sommige media verhindert mogelijk het weergeven en opnemen van die media.
5. 6. Products derived from this software may not be called "OpenSSL" nor may "OpenSSL" appear in their names without prior written permission of the OpenSSL Project. Redistributions of any form whatsoever must retain the following acknowledgment: "This product includes software developed by the OpenSSL Project for use in the OpenSSL Toolkit" ( http://www.openssl.
This can be in the form of a textual message at program startup or in documentation (online or textual) provided with the package. Redistribution and use in source and binary forms, with or without modification, are permitted provided that the following conditions are met: 1. 2. 3. Redistributions of source code must retain the copyright notice, this list of conditions and the following disclaimer.
Copyright 1996-2002, 2006 by David Turner, Robert Wilhelm, and Werner Lemberg Introduction ============ The FreeType Project is distributed in several archive packages; some of them may contain, in addition to the FreeType font engine, various tools and contributions which rely on, or relate to, the FreeType Project. This license applies to all files found in such packages, and which do not fall under their own explicit license.
authors (David Turner, Robert Wilhelm, and Werner Lemberg) as the `FreeType Project`, be they named as alpha, beta or final release. `You` refers to the licensee, or person using the project, where `using` is a generic term including compiling the project`s source code as well as linking it to form a `program` or `executable`. This program is referred to as `a program using the FreeType engine`.
-------------Neither the FreeType authors and contributors nor you shall use the name of the other for commercial, advertising, or promotional purposes without specific prior written permission. We suggest, but do not require, that you use one or more of the following phrases to refer to this software in your documentation or advertising materials: `FreeType Project`, `FreeType Engine`, `FreeType library`, or `FreeType Distribution`. As you have not signed this license, you are not required to accept it.
Index A E Aanwijsapparaat touchpad 3-8 Accu capaciteit controleren 4-14 energiebesparingsmodus 5-6 gebruiksduur verlengen 4-16 Externe monitor problemen 6-12 G Geheugenmediasleuf 4-17 Geheugenmedium plaatsen 4-20 verwijderen 4-20 B Beeldscherm automatisch uitschakelen 5-5 openen 2-5 scharnieren 3-8 scherm 3-7 Geluidssysteem problemen 6-12 Graphics Processing Unit 3-10 H Beveiligingsslot 4-24 HDMI-uitgang 3-4 Bluetooth 7-6 Herstelmedia 5-14 C Herstelschijfstation 5-16 Controlelijst van apparatuur
kaarten 4-19 R MultiMediaCard verwijderen 4-20 Reinigen van de computer 1-12 S N SD/SDHC/SDXC-kaart formatteren 4-19 opmerking 4-18 Netadapter aansluiten 2-3 extra 4-25 gelijkstroomingang (19 V) 3-2 Slaapstand instelling 2-10 systeem automatisch in 5-6 O Stroomvoorziening afsluitmodus 2-10 in-/uitschakelen via LCD 5-6 inschakelen 2-7 omstandigheden 3-11 slaapstand 2-10 sluimerstand 2-12 uitschakelen 2-9 Opnieuw opstarten van de computer 2-10 P Problemen accu 6-6 controlelijst voor hardware en sy
automatisch uitschakelen 5-6 Verplaatsen van de computer 1-13 Video-RAM 3-9 Videomodus 4-26 W Wachtwoord computer opstarten met wachtwoord 5-9 gebruiker 5-8 opstarten 5-6 supervisor 5-9 Webcam 3-7 Gebruikershandleiding Index-3