DIGITAL VIDEO DVD VIDEO PLAYER SD-2700 Sep.
Introduction SAFETY PRECAUTIONS WARNING RISK OF ELECTRIC SHOCK DO NOT OPEN AVIS RISQUE DE CHOC ELECTRIQUE NE PAS OUVRIR WARNING : TO REDUCE THE RISK OF ELECTRIC SHOCK, DO NOT REMOVE COVER (OR BACK). NO USERSERVICEABLE PARTS INSIDE. REFER SERVICING TO QUALIFIED SERVICE PERSONNEL.
The instructions shall state that an ALL-POLE MAINS SWITCH with a contact separation of at least 3 mm in each pole shall be incorporated in the electrical installation of the building. These servicing instructions are for use by qualified service personnel only. To reduce the risk of electric shock do not perform any servicing other than that contained in the operating instructions unless you are qualified to do so. Introduction CAUTION: In the spaces provided below, record the Model and Serial No.
Introduction IMPORTANT SAFETY INSTRUCTIONS CAUTION: PLEASE READ AND OBSERVE ALL WARNINGS AND INSTRUCTIONS GIVEN IN THIS OWNER’S MANUAL AND THOSE MARKED ON THE UNIT. RETAIN THIS BOOKLET FOR FUTURE REFERENCE. This set has been designed and manufactured to assure personal safety. Improper use can result in electric shock or fire hazard. The safeguards incorporated in this unit will protect you if you observe the following procedures for installation, use and servicing.
7. Do not block any ventilation openings. Install in accordance with the manufacturer’s instructions. Introduction 8. Do not install near any heat sources such as radiators, heat registers, stoves, or other apparatus (including amplifiers) that produce heat. 9. Do not defeat the safety purpose of the polarized or grounding-type plug. A polarized plug has two blades with one wider than the other. A grounding type plug has two blades and a third grounding prong.
Introduction IMPORTANT SAFETY INSTRUCTIONS 13. Unplug this apparatus during lightning storms or when unused for long periods of time. 14. Refer all servicing to qualified service personnel. Servicing is required when the apparatus has been damaged in any way, such as power-supply cord or plug is damaged, liquid has been spilled or objects have fallen into the apparatus, the apparatus has been exposed to rain or moisture, does not operate normally, or has been dropped. 15.
18. Keep your fingers well clear of the disc tray as it is closing. Neglecting to do so may cause serious personal injury. Introduction 19. Do not place a heavy object on or step on the apparatus. The object may fall, causing serious personal injury and serious damage to the apparatus. 20. Do not use a cracked, deformed, or repaired disc. These discs are easily broken and may cause serious personal injury and apparatus malfunction.
Introduction Precautions Notes on handling When shipping the DVD video player, the original shipping carton and packing materials come in handy. For maximum protection, repack the unit as it was originally packed at the factory. Do not use volatile liquids, such as insect spray, near the DVD video player. Do not leave rubber or plastic products in contact with the DVD video player for a long time. They will leave marks on the finish.
Notes on Discs Structure of disc contents Do not touch the playback side of the disc. Introduction On handling discs Normally, DVD video discs are divided into titles, and the titles are sub-divided into chapters. VIDEO CDs and audio CDs are divided into tracks. DVD video disc DVD video disc Title 1 Chapter 1 Title 2 Chapter 2 Chapter 1 Chapter 2 Chapter 3 Playback side Do not attach paper or tape to discs.
Introduction Notes on Discs (continued) About this owner’s manual This owner’s manual explains the basic instructions of this DVD video player. Some DVD video discs are produced in a manner that allows specific or limited operation during playback. As such, the DVD video player may not respond to all operating commands. This is not a defect in the DVD video player. Refer to instruction notes of discs. “ ” may appear on the TV screen during operation.
Table of Contents SAFETY PRECAUTIONS .......................... 2 IMPORTANT SAFETY INSTRUCTIONS ... 4 Precautions ............................................... 8 Notes on Discs .......................................... 9 Notes on region numbers ............................... 10 Table of Contents.................................... 11 Identification of Controls ....................... 12 Front panel ..................................................... 12 Rear panel ....................................
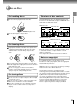
Introduction Identification of Controls See the page in for details. Front panel PAUSE button 21 POWER indicator 20 Disc tray 20 STOP button 21 PLAY button 20 OPEN/CLOSE POWER POWER button 20 DVD display 13 STOP PLAY PAUSE SKIP SKIP buttons 25 OPEN/CLOSE button 20 Rear panel When connecting the optical digital cable, remove the cap and fit the connector into the jack firmly. When not using the jack, keep the cap inserted to protect it from dust intrusion.
FL DIM Normal Dimmed Introduction Pressing of the FL DIM button on the remote control changes the brightness of the display. DVD display Off Total playing time indicator Chapter number indicator Play mode indicator Memory playback indicator Title number indicator Track number indicator HDCD indicator HDCD TITLE TOTAL CHP TRK Random playback indicator M R A- B DVD VCD Multifunctional indicator (indicates operating status or messages, etc.
Introduction Identification of Controls (continued) The instructions in this manual describe the functions on the remote control. See the page in for details.
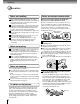
About the illustrations of the battery compartment There are two types of battery compartment in the supplied remote controls. (This does not mean a difference in performance between the two.) Refer to either illustration depending on the actual remote control. 1 Operating with the remote control Open the cover. Introduction Loading batteries Point the remote control at the remote sensor and press the buttons. 2 1 30° 30° Within about 7 m (23 feet) 2 Insert batteries (AA size).
Connections Connecting to a TV Connect the DVD video player to your TV. For details of output sound, see 35 .
Connecting to an audio system and TV equipped with component video inputs Connections Signal flow Y PB R L ANALOG S (red) AC IN AUDIO OUT VIDEO OUT VIDEO PR COAXIAL OPTICAL BITSTREAM/PCM To wall outlet (white) To PR VIDEO OUT To ANALOG AUDIO OUT To PB To Y VIDEO VIDEO OUT OUT To audio inputs of the amplifier (red) (white) To Y video input To PB video input To PR video input Audio system TV or monitor with component video inputs Component video (ColorStream®) outputs/inputs • Make the f
Connections Connecting to Optional Equipment You can enjoy high quality dynamic sounds by connecting the DVD video player to optional audio equipment. For connection to your TV, see “Connecting to a TV” 16 17 . For details of output sound, see 35 .
Warning • When you are connecting (via the BITSTREAM/PCM AUDIO OUT jack) an AV decoder that does not have Dolby Digital, Digital Theater Systems (DTS) or MPEG2 decoding function, be sure to set “Audio Out Select” to “PCM” from the onscreen displays 38 40 . Otherwise, high volume sound may damage your hearing as well as the speakers. • When playing DTS-encoded discs (DVD video discs and audio CDs), excessive noise may be output from the analog stereo jacks.
Basic playback Playing a Disc This section shows you the basics on how to play a disc. CAUTION Keep your fingers well clear of the disc tray as it is closing. Neglecting to do so may cause serious personal injury. POWER indicator 3 OPEN/CLOSE POWER 1 DVD VCD CD DVD display PLAY STOP 2, 4 STOP PLAY PAUSE SKIP PAUSE Basic playback Preparations • When you want to view a disc, turn on the TV and select the video input connected to the DVD video player.
2, 4 1 PAUSE/STEP PLAY STOP MENU ENTER / TOP MENU To obtain a higher quality picture Occasionally, some picture noise not usually visible during a normal broadcast may appear on the TV screen while playing a DVD video disc because the high resolution pictures on these discs include a lot of information. While the amount of noise depends on the TV you use with this DVD video player, you should generally reduce the sharpness adjustment on your TV when viewing DVD video discs.
Basic playback REV Playing a Disc (continued) FWD You can play discs at various speeds, and resume playback from the location where you stopped playback. PLAY STOP PAUSE/STEP SLOW DVD VCD CD Playing in fast reverse or fast forward directions Press REV or FWD during playback. REV FWD Press PLAY. PLAY REV: Fast reverse playback FWD: Fast forward playback Each time you press the REV or FWD button, the playback speed changes.
DVD VCD Playing in slow-motion SLOW Each time you press the SLOW button, the slow-motion speed changes. To resume normal playback Basic playback Press SLOW during playback. Press PLAY. PLAY Note The sound is muted during slow-motion playback. DVD VCD CD 1 Resuming playback from the same location Press STOP at the location where you want to interrupt playback. STOP 2 The DVD video player memorizes the location where playback is stopped. Press PLAY.
Basic playback Locating a Specific Title, Chapter, or Track Normally, DVD video discs are divided into titles, and the titles are sub-divided into chapters. VIDEO CDs and audio CDs are divided into tracks. You can quickly locate any specific title, chapter, or track. DVD video disc Title 1 Chapter 1 Chapter 2 DVD 1 Chapter 1 Press TOP MENU. The top menu appears on the TV screen. TOP MENU Press want.
TOP MENU SKIP PLAY / / / ENTER CLEAR T Number buttons DVD VCD CD Press T. If you are using a VIDEO CD/audio CD, skip steps 1 and 2, then at step 3, enter the number for the track you want using the number buttons. e.g. SEARCH 1 1 –:––:–– T 2 Press to highlight the space of “C (Chapter).” e.g. 1 1 –:––:–– ENTER 3 4 Press PLAY. PLAY Playback starts from the selected chapter or track.
Advanced playback Accessing a Specific Location Directly You can locate a specific location by entering its corresponding time (hours, minutes, seconds). 3 1 2 DVD VCD CD 1 Entering the time of the desired location Press T three times. SEARCH You may have to press further depending on the disc. Press the button repeatedly until the clock icon is highlighted. T e.g. 1 2 1 –:––:–– Press the number buttons to enter the time. e.g. 1 2 5 1 1 3 26 3 0 1:2 5 :3 0 Press PLAY.
Playing Repeatedly PLAY You can play a specific title, chapter, track, or segment repeatedly. (Title repeat, chapter/track repeat, A-B repeat) CLEAR REPEAT A-B RPT DVD VCD CD 1 Repeating a title, chapter, or track Press REPEAT. REPEAT Each time you press the REPEAT button, the repeat mode changes as follows. 2 Press PLAY. PLAY DVD DVD VCD CD 1 Chapter Repeat Repeats the current chapter. DVD Title Repeat VCD CD Track Repeat DVD VCD CD All Repeat Repeats the entire disc.
Advanced playback Playing in a Favorite Order You can combine your favorite titles, chapters, or tracks and play them in the order you determine. You can program up to 30 selections into the memory. (Memory playback) 3 / / / 2 CLEAR 2 1 DVD VCD CD 1 Setting titles, chapters, or tracks in a favorite order Insert a disc and press MEMORY during stop. MEMORY The following display appears. e.g.
Playing in Random Order You can play titles, chapters within a title, or tracks in random order. (Random playback) 2 CLEAR 1 DVD VCD CD 1 Playing titles, chapters or tracks in random order To resume normal playback Press RANDOM. RANDOM Press CLEAR. Each time you press the RANDOM button, the random playback mode changes as follows. DVD Chapter Random Plays the chapters within the current title in random order. DVD Title Random Plays the titles in random order.
Advanced playback Zooming a Picture You can magnify areas within a picture. / / / ENTER CLEAR ZOOM DVD Zooming a picture To resume normal playback Press ZOOM during normal, slow or still playback. The DVD video player enters the zoom playback mode and displays the icon. ZOOM While “ZOOM” is selected, press ZOOM repeatedly to turn off the icon. Picture restores the size when the icon disappears. ZOOM e.g.
Selecting the picture enhancement (E.P.M.*) You can easily switch the picture enhancement to your preference. 2 *E.P.M.: Enhanced Picture Mode ENTER 1, 2 DVD VCD CD 1 Selecting the picture enhancement Press E.P.M. E.P.M. To turn off the picture enhancement selection Press ENTER. The picture enhancement selection appears. Alternatively leave the DVD video player unoperated for about 5 seconds after having made the selection. Note Actual effects to pictures may vary depending on the TV.
Advanced playback Selecting the sound enhancement (E.A.M.*) You can easily switch the sound enhancement to your preference. 2 *E.A.M.: Enhanced Audio Mode ENTER 1, 2 DVD VCD CD 1 Selecting the sound enhancement Press E.A.M. E.A.M. To turn off the audio enhancement selection Press ENTER. The sound enhancement selection appears. ENTER 2 Select the sound enhancement by pressing E.A.M. or / . Each time you press the button, the sound enhancement changes. Normal: Normal sound.
Selecting the Camera Angle If the scene was recorded from multiple angles, you can easily change the camera angle of the scene you are watching. 2 1, 2 CLEAR DVD 1 Changing the camera angle Press ANGLE while playing a scene recorded with multiple angles. ANGLE e.g. 1 2 3 2 Press CLEAR. CLEAR Notes • You can change the camera angle during still playback. The camera angle changes to the new setting when you resume normal playback.
Advanced playback Selecting Subtitles You can display subtitles on the TV screen and select a subtitle language from those included on the DVD video disc. / / / SUBTITLE CLEAR Good evening! DVD 1 Bonsoir! `Buenas tardes! Selecting a subtitle language Press SUBTITLE during playback. SUBTITLE The current subtitle setting is displayed. To turn subtitles on or off 1 Press SUBTITLE during playback. SUBTITLE e.g.
Selecting a Language You can select a preferred language and sound recording system from those included on the DVD video disc. Good morning! DVD VCD 1 Bonjour! 2 1, 2 CLEAR ¡Buenos días! Selecting a playback audio setting Press AUDIO during playback. AUDIO The current audio setting is displayed. 2 Press AUDIO or / while the audio setting is displayed on the TV screen. AUDIO ENG1 PCM 2CH ENG2 D 2CH Advanced playback e.g.
Advanced playback Operating in the on-screen display mode When you turn on the on-screen display, you can view information on operational status and access the features and settings on-screen. / ENTER DISPLAY DVD VCD CD Operating in the on-screen display mode Press DISPLAY. The following display appears. Each time you press the DISPLAY button, the on-screen display changes as follows. If you press the / buttons to select an icon, then press the ENTER button, you can access the feature.
2 3 24 number * : Chapter To locate a chapter using the number. 25 : To stop playback. 21 : Playback starts from the beginning of the current chapter or track. 25 Advanced playback number (Track number) * : Title To locate a title or track using the number. : Fast reverse playback 22 : To start playback. 20 : Fast forward playback 22 : To locate succeeding chapters or tracks. 25 : To slow motion playback. 23 : To pause playback. 21 Press DISPLAY again. : To turn off the display.
Function setup Customizing the Function Settings 2 You can change the default settings to customize performance to your preference. RETURN 3, 4 1, 6 DVD VCD CD 1 Setting procedure Press SETUP during stop. SETUP The following on-screen display appears. 3 Press / to select the setting you want to change, then press ENTER. ENTER ENTER AB C Picture TV Shape 4:3 LB 4 2 Press / to select a symbol for the setting you want to change.
Setting TV Shape Audio Out Select Details DVD DVD VCD CD Page To select a picture size according to the aspect ratio of your TV. 40 To select an output sound format corresponding to your system connection. 40 To turn on or off a function that makes faint sounds easier to hear even if you lower the volume during late hours playback. 40 DVD Karaoke Vocal DVD To turn on or off the vocal output during DVD KARAOKE disc playback.
Function setup Customizing the Function Settings (continued) Setting details AB C AB C Audio Audio Out Select Dynamic Range Control Karaoke Vocal CD Attenuation Picture TV Shape 4:3 LB TV Shape 4:3 Letterbox: 4:3 Normal: DVD Select when a standard 4:3 TV is connected. Displays theatrical images with masking bars above and below the picture. Audio Out Select Notes • The displayable picture size is preset on the DVD video disc.
Karaoke Vocal DVD Off: The primary vocal is not output. On: The primary vocal is output when it is recorded on the disc. Notes • The vocal output feature is used during playback of Dolby Digital (multi-channel) recorded DVD KARAOKE discs. This feature allows you to turn off vocal audio tracks, or restore them for background accompaniment. • When playing KARAOKE, connect appropriate audio equipment such as an amplifier to the DVD video player. CD Attenuation CD Off: For normal use.
Function setup Customizing the Function Settings (continued) Setting details Audio Language English: French: Spanish: Others: 3) Press the / buttons to shift and select the second character by pressing the / buttons. DVD To play sound tracks in English. To play sound tracks in French. To play sound tracks in Spanish. To make a further choice. After pressing the ENTER button, follow steps 1) - 4) below. 1) Obtain the abbreviation of the preferred language from the list 46 .
AB C AB C Display On-Screen Displays On Background Gray Screen Saver On On-Screen Displays DVD Off: Operational modes (e.g. “ displayed. On: Operational modes (e.g. “ displayed on-screen. Background DVD VCD VCD Operation Pause/Still Parental Lock Title Stop PBC CD ”, “ ”) are not ”, “ ”) are DVD Auto: For normal use. Still and fast motion images can be paused. Frame: The resolution of still pictures is improved, so that you can make a motionless picture more clearer when you pause it.
Function setup Customizing the Function Settings (continued) Setting details 3) Press the / buttons to select the parental lock level, then press the ENTER button. (Continued) 1) Press the number buttons to create a personal 4-digit security code, then press the ENTER button. If you make a mistake before pressing the ENTER button, press the CLEAR button and enter your 4-digit security code again.
Title Stop AB C DVD Initial Setup On-Screen Language ENG TV Shape 4:3 LB Audio Out Select Bitstream Off: The DVD video player continues after playback of a title is completed. On: The DVD video player stops after playback of a title is completed. PBC VCD Off: When playing a VIDEO CD without using the menu. On: To use the menu when playing a PBC-featured VIDEO CD. Initial Setup DVD VCD CD 1) Press the / buttons to select “On-Screen Language,” and press the ENTER button.
Others Table of Languages Table of languages and their abbreviations Abbreviation ––– CHI (ZH) DUT (NL) ENG (EN) FRE (FR) GER (DE) ITA (IT) JPN (JA) KOR (KO) MAY (MS) SPA (ES) AA AB AF AM AR AS AY AZ BA BE BG BH BI BN BO BR CA CO CS CY DA DZ EL EO ET EU FA FI FJ FO FY GA GD GL 46 Language No alternate language Chinese Dutch English French German Italian Japanese Korean Malay Spanish Afar Abkhazian Afrikaans Amharic Arabic Assamese Aymara Azerbaijani Bashkir Belorussian Bulgarian Bihari Bislama Bengali
Before Calling Service Personnel Check the following guide for the possible cause of a problem before contacting service. Symptoms and correction Symptom Cause Correction No power. • The power plug is disconnected. • Connect the power plug securely into the wall outlet. 16 The DVD video player turned off by itself. • The automatic power off function turned the unit off. • Press the PLAY button. 21 No picture. • The TV is not set to receive DVD signal output.
Others Specifications DVD video player / outputs / supplied accessories DVD Video Player Power supply 120 V AC, 60 Hz Power consumption 15 W Mass 2.3 kg External dimensions 430 × 81 × 225 mm (W/H/D) Signal system Standard NTSC Laser Semiconductor laser, wavelength 650/780 nm Frequency range DVD linear sound : Signal-to-noise ratio More than 112 dB Audio dynamic range More than 108 dB Harmonic distortion Less than 0.002 % Wow and flutter Below measurable level (less than ±0.001 % (W.
LIMITED WARRANTY DVD VIDEO PLAYER Toshiba America Consumer Products, Inc. (“TACP”), Toshiba Hawaii (“THI”) and Toshiba Canada Limited (“TCL”) make the following limited warranties. These limited warranties extend to original purchaser or any person receiving this set as a gift from the original purchaser and to no other purchaser or transferee.
Others LIMITED WARRANTY DVD VIDEO PLAYER (continued) How to Obtain Warranty Service (1) Refer to the troubleshooting guide in your owner’s manual. This check list may solve your problem. (2) In the U.S.A., only call the TACP toll free number 800-631-3811, or if in Hawaii or Canada see listing below within (30) days after you find a defective product or part. (3) Arrange for the delivery of the product to the TACP/THI/TCL Authorized Service Station or TACP Return Center.