TOSHIBA VIDEO/AUDIO [DIGITAL VIDEO] DIGITAL AUDIO PORTABLEDVD PLAYER SD-P2800SN OWNER'S MANUAL DB_ ° DIGITAL © 2005 TOSHIBA CORPORATION _]PM0024801010
SAFETY PRECAUTIONS CAUTION: This equipment employs a Laser System. To ensure proper use of this product, please read this owner's manual carefully and retain for future reference. Should the unit require maintenance, contact an authorized service location see service procedure. Use of controls or adjustments or performance may result in hazardous radiation exposure. of procedures other than those specified herein To prevent direct exposure to laser beam, do not try to open the enclosure.
In the spaces provided below, record the Model and Serial No. located on the bottom of your DVD player. Model No. Serial No. m Retain this information for future reference. S Location of the required label PORTABLE DVD PLAYER q_, _,,DC I 12V ---'== r_ FOR TO COMPLY WITH DHHS RULE 21 CFR SUBCHAPTER JPRODUCT APPLICABLE IS CERTIFIED AT THE DATE BY THE OF MANUFACTURE. MANUFACTURER With Tested FCC T° Standards C°mply HOME OR OFFICE USE TOSHIBA 1-1,SNIBAURA MODELNO.
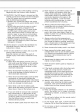
IMPORTANT CAUTION: SAFETY INSTRUCTIONS PLEASE READ AND OBSERVE ALL WARNINGS AND INSTRUCTIONS GIVEN IN THIS OWNER'S MANUAL AND THOSE MARKED ON THE UNIT. RETAIN THIS BOOKLET FOR FUTURE REFERENCE.
24.Donotusethisproduct whilewalking ordriving. g) Never dispose of used battery packs with Neglecting thismaycausea trafficaccident. other ordinary solid wastes, since they contain toxic substances. Always dispose of 25.CAUTION: IftheDVDplayeris dropped andthe used battery packs in accordance with cabinetorenclosure surface hasbeendamaged community regulations that apply to the ortheDVDplayerdoesnotoperatenormally, disposal of batteries.
IMPORTANT SAFETY e) If you do not use the remote control for a long period of time, remove the battery to avoid possible damage from battery corrosion. 30.After unpacking coin-shaped batteries, store them in poly bags, etc. separately one by one when unused. If you leave them unwrapped, they may be short-circuited by contact with metal objects, resulting in battery leakage, heat or bursting.This may cause burns or injury.
S • • • • • Do not shock the LCD monitor. It may cause unit damage and malfunction. Do not use the player in a place subject to vibration. Neglecting this may cause malfunction of the player or damage to the disc. Do not leave the player in a vehicle. Rise or drop in temperature may result in malfunction of the player. When transporting the player, the original shipping carton and packing materials come in handy. For maximum protection, repack the unit as it was originally packaged at the factory.
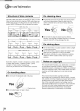
tes and Information I Structure of disc contents ........................................... ! ! On cleaning Normally, DVD video discs are divided into titles, and the titles are sub-divided into chapters. DVD audio discs are divided into groups, and the groups are sub-divided into tracks. VIDEO CDs/audio CDs are divided into tracks. • discs 1 Fingerprints and dust on the disc may cause picture and sound deterioration.Wipe the disc from the center outwards with a soft cloth.
About this owner's manual m =.e. S This owner's manual explains the basic instructions of this player. Some DVD video discs are produced in a manner that allows specific or limited operation during playback. As such, the player may not respond to all operating commands.This is not a defect in the player. Refer to instruction notes of discs. "(_" may appear on the screen during operation.
tes and Information (continued) • • This player can play the following memor Card Mark cards. Contents • SD Memory Card Media Multi Card Photograph (JPEG files) and Music MMC playback (MP3, WMA files) Memory Stick MEMORY xDPicture Card • xD-Picture • SD is a trademark. • MMC and MultiMediaCard 5TIEK • • • Card "_ are trademarks • of Infineon Technologies AG and licensed to MMCA (MultiMediaCard Association). • Memory Stick and _%, are trademarks of Sony Corporation.
ble of Contents Introduction OSAFETY PRECAUTIONS .......................... 2 • IMPORTANT SAFETY INSTRUCTIONS ... 4 • ............................................... 7 Precautions • Notes and Information ............................. Notes on region numbers ................................. • Identification of Controls ....................... Main unit ......................................................... Side view ........................................................ Rear view .....
ntification of Controls See the page in[_ for details. LCD monitor Press the open switch to open the LCD monitor.
m =,e.
_ntification of Controls (continued) The instructions in this manual describe the functions of the remote control. See the page in [_ MENU button (see below) MODE button[_[_ SETUP button* [_ ZOOM button [_/ RANDOM button* [_ / POWER button [_ _ TOP MENU button [_ SUBTITLE button [__ PAUSE/STEP STOP T button [_/ MEMORY button* [_ ANGLE button [_ A-B button [_/ REPEAT button* [_ RETURN button / AUDIO button [_ PAUSE/STEP for details.
m S _1 Gently insert a fingernail in groove and pull out the holder in direction _. Point the remote control at the remote sensor on the player and press the buttons. Backside Take care not to break your fingernail. Within about m (9.9 feet) Place a coin-shaped (CR2025) with the _ side up onbattery the holder. Keep the holder horizontal does not fall through. so that the battery Push the holder back into its receptacle. Distance: About 3 m (9.
wer Connection Connect the supplied AC adapter to power the player. For mobile use, the battery pack (supplied) is also available. When using the battery pack, follow the instructions on page _. CAUTION • Do not connect the power plug to a power outlet other than that indicated on the label, as this can result in a risk of fire or electric shock. • Do not connect or disconnect the power plug with wet hands. Doing so may cause electric shock.
About this manual Aside from the section "Playing a Disc", explanations of operations only include illustrations of the corresponding buttons on the remote control. The buttons sharing the same name on the main unit can also be used in an identical manner.
CAUTION a Disc This section shows you the basics on how to play a disc. [_ indicates a reference page of this manual. See the page in [_ for details. • Keep your fingers clear of the disc as it is spinning. Neglecting to may cause serious personal injury. • Be careful not to catch your fingers in the disc holder. • Do not use a cracked, deformed, or repaired disc. • Do not tilt, shake or move the main unit while playing. It may damage the disc.
MODE/SETUP • To obtain a higher quality picture (When connected to aTV) Occasionally, some picture noise not usually visible during a normal broadcast may appear on the TV screen while playing a DVD video disc because the high resolution pictures on these discs include a lot of information. While the amount of noise depends on the TV you use with this player, you should generally reduce the sharpness adjustment on the connected TV when viewing DVD video discs.
a Disc (continued) • To change an on-screen language. 1 Press SETUP while pressing SHIFT during stop. Alternatively press SETUP on the main unit. SHIFT The following on-screen display appears. 5 Press SETUP while pressing SHIFT. Alternatively press SETUP on the main unit. SHIFT ÷ MODE/SETUP CD MODE/SETUP SETUP SETUP © © 2 Press _1 / I_ to select" (LANGUAGE MENU)", then press ENTER. SII ¸¸'I 3 / _ Press • / • to select "OSD Menu", then press ENTER.
About the screen saver If 20 minutes elapse while the power is on and there is no disc in the player or while the disc is stopped, the screen saver is automatically displayed (when "Screen Saver" is set to "On" [_). To turn off the screen saver, press any button on the main unit or remote control. Automatic power off function If the player is stopped or the screen approximately 20 minutes, the player automatically.
riable Speed Playback i -- You can play discs at various speeds, and resume playback from the location where you stopped playback. i• {Z]i il} PAUSE/STEP PLAY FWD REV {ii_ C3 i iiiiiiiii{i iiiiiii iiiil Press REV or FWD on the remote control during playback. s_._-_ • To resume normal Press PLAY. playback PLAY REV: Fast reverse playback FWD: Fast forward playback Notes ow ach time you press the REV or FWD button, the playback speed changes.
SLOW 'LAY SHIFT STOP • Press SLOW while pressing SHIFT during playback. SHIFT _ L__J + s_ 4- playback PLAY Each time you press the SLOW _,_ button, the slow-motion speed changes. If you press the SLOW ._ button during playback, you can view the picture in reverse slow-motion. (Only when using a DVD video disc.) _v To resume normal Press PLAY. Notes • The sound is muted during slow-motion playback. • The playback speed may differ depending on the disc.
TOP =E.U a Specific Title, ( } ( 2 [ ] Chapter, or Track t •TOP MENU '/,,_/_ ENTER SKIP (I_1_/_1) Normally, DVD video discs are divided into titles, and the titles are sub-divided into chapters. Contents of DVD audio discs are divided into groups, and the groups are sub-divided into tracks. VIDEO CDs and audio CDs are divided into tracks. You can quickly locate any specific title, chapter, or track.
@ectly Accessing a Specific Location You can access a specific location by entering its corresponding minutes, seconds). time (hours, buttons • Press T several times. The display changes pressed. each time this button is Using the bookmark function You can register a bookmark for your favorite scene and jump from any other scene to that location to play the scene.You can register up to three bookmarks. 1 Play the disc and press PAUSE/STEP you want to bookmark. MEMORY e.g.
or DivX ®Video Files You can play MP3/WMA or DivX ®files on this player. ..........
TOP MENU PAUSE/STEP MODE ZOOM STOP --PLAY -- FWD ._ wing JPEG Files :rTc_ c3 _ You can play JPEG files that have been recorded :, on a CD-R or memory card on this player. ,._ __'_ _"_ -_._ I "_:_ J,_C,._ .-._ PLAY ::_t_ MO D E ENTER :;/ A/T/-,q/_ ? ? i i A/ v/ 4 / _- L__ ENTER -- SKIP REv i ) / _ _ PAUSE SKIP ( t.,_ / _1_1) m, • Preparation O" Prepare a compatible disc or memory card that contains JPEG files you want to view _.
wing JPEG Files (continued) Viewinc • To rotate JPEG Files • To return to normal playback from memory playback Press STOP twice to end memory playback. a picture Press _1 / I_ during playback. _1 Rotate counterclockwise (by 90°). 1_ Rotate clockwise (by 90_'). • To zoom in a picture Press ZOOM Notes • Some discs may not permit memory playback operation. • The programmed selections will be cleared when you turn off the player. during playback. RANDOM • You will enter the zoom mode.
"o JPEG files compatibility o" ¢} Discs and pixels whose compatibility with this unit has been confirmed by TOSHIBA are as follows. Kodak Picture CD JPEG disc compatibility • Playable discs: • File system: • File name: • File size: • File format: • Resolution: with this unit is limited as follows: CD-ROM, CD-R, CD-RW ISO9660, UDF without interleave File names are limited to eight characters or less and must incorporate e.g.' ......... .
You can play a specific title, chapter, track, or segment repeatedly. (Title repeat, chapter/track repeat, A-B repeat) • Press REPEAT while pressing SHIFT. SHIFT -IREPEAT To resume normal playback Press REPEAT while pressing SHIFT repeatedly "Off" appears for the repeat mode display. Each time you press the REPEAT button, the repeat mode changes as follows. until SHIFT + REPEAT If you press STOP twice, the Repeat function playback stops. Off Resume normal playback.
!!!!i!!!!i_!!!!i_!!!!i_!i_!!!i_!!!_ ll!!_!lllll!llll!lilll_!!!!_!l_!!!_!!!!_!!!!_!!!!_!!!!_!l_!!_!!!!_!!!!_!!!!_!!!!_! l_!l_ !!!!_!!!!_!!!!_!!!!_!!! _!l_!!_!!!!_!!!!_!!!!_!!!!_!l_!_!!!!_!!!!_!!!!_!!!!_!l_!l_!!!_!!!!_!!!!_!!!!_! l_!l_!!_!!!!_!!!!_!!!!_!!! _!l_!l_ !!!!i_!!!!i_!!!!i_!!!!i_!!i_!!i_!!i_!!!!i_!!!!i_!!!!i_!!i_!!i_!_!!!!i_! ! !!!!!!! !_!!!! ! !! !!!! !!!! !!!! !!;!!!!! _!!! ! !_!! !!! !!!!! t! ! !_ in a Favorite Order You can combine your favorite titles, chapters, or tracks and play them in the o
in Random Order You can play chapters or tracks in random order. (Random playback) :ks • Press RANDOM while pressing SHIFT. + RANDOM Each time you press the RANDOM button, the random mode changes as follows. To resume normal Press RANDOM playback while pressing ""Shuffle Off" appears SHIFT for the random repeatedly until mode display. 4RANDOM E Shuffle Off _, Shuffle On Resumes normal playback by pressing STOP playback. Plays chapters or tracks in random order.
a Picture -- ZOOM -- A/_/-'_ You can magnify areas within a picture. During normal, slow, still, fast reverse or fast forward playback, press ZOOM. • / _,- To exit zoom playback Press ZOOM repeatedly until "OFF" appears. RANDOM RANDOM The player enters the zoom playback mode, and the zoom icon appears. Notes • Some discs may not respond to zoom feature. • During some scenes, the buttons may not work as described. e,g, • Zooming does not work on characters O,,|X2 Tihze.
@lecting the Sound Enhancement (E.A.M.*) You can easily select a preferred audio enhancement. : *E.A.M.: Enhanced Audio Mode -E.A.M Notes • Actual effects to sounds may vary depending on the speaker system. Make the selection to your preference. • Actual effects to sounds may very depending on the disc. Press E.A.M.E.A.M.The sound enhancement menu (_ appears. Select theE.A.M. sound enhancement by pressing E.A.M. (_ If yOU press E.A.M.
a Camera Angle If a scene was recorded with multiple angles, you can easily change the camera angle of the scene you are viewing. Chanc il .... the camera Notes Press ANGLE while playing a scene recorded with multiple angles. ANGLE While playing a scene recorded with multiple angles, the angle icon (f_) • After selecting angle, it will take a few moments to change the camera angle of the scene you are viewing.
ii!!!_!!!!!!_!i!_!!_!i#_!i#_!n_p:l_ba_K_i#_i_i#!i_i_i_i;i_!i!i_i;i!!i_ _#!ili!#!i_!!ii_i_!i!i!iiiili;ii!i#!il;ii!i!#_:i!i!i_ii;i!!il _!i_!!_!i#_!i_!!_!!_!i#_!i_i_!!_!!_!i#_!i_!!_!#!#_!i_!!_!!_!!_!i#_!!_!!_!!_!i#_!i_!!_!!_!i#_!i_i_!!_!!_#_!i_!!_!!_!!_ ¸!!:!_!i_i_iiiii!i;i!!i ¸!!:!_!I_I!!:I!;!_I!II!!;!!!I ¸/!_ii_i!ili;!i!ii!!;!!!i ¸!!:!_!i_i!!:i!;!_i;i!il ¸i!!_!i_i!!:i!;!_i! ¸!!:!_!i_/!:ii ¸!!:!_!i_ Subtitles @lect ng You can display subtitles on the screen and select a subtitle language from those include
a Language AUDIO You can select a preferred language and sound recording system from those included on the disc. r 1 • Press AUDIO AUDIO (_ during playback. Selecting sound During playback, sound channel. The current audio setting is displayed. channels press AUDIO of VIDEO repeatedly CDs to select the < AUDIO "o Notes • Some discs allow you to change audio selections only via the disc menu.
a Language (continued) Selectim rback audio settin( • Output sound conversion table (sampling frequency]quantization Audio Discs Sound recor@ng system BITSTREAM/PCM jack CDs CDs Yes Bitstrear¢l BITSTREAM/PCM jack Spe&kerdAVOUTjade Headphone_ks Yes Yes PCM Yes No Yes PCM Yes PCM I 96 kHz PCM* Yes No Yes PCM* Yes Linear Bitstream "PCM" _0eakerdAVOUT_a_ Fleadphorejacks PCM Bitstream No NO Yes No Yes Bitstream Bitstream Bitstrearn Bifstream PCM Yes MPEG1 Bitstream Yes
!!!i!!_!i_!!_!_!!_!_!!_!_!!_!_!!_!_!!_!ii!ii!ii!ii!ii!!_!iS!!l!!_!!l!!_!!l!!_!!l!!_!!l!!_!!l!!_!!l!!_!!l!!_!!l!!_!!l!!_!!l!!_!!l!!_!!l!!_!!l!!_!!l!!_!!l!!_!!l!!_!!l!!_!!l!!_!!l!!_!!l!!_!!l!!_!!l!!_ ¸i!!_!!!i!!!i!!!ili !!!I ¸_!_!!_!!_!l!!_!!l!!_!!l!!_!!l!!_!!l!! @-screen Display Mode You can confirm the disc usage status and player operation information on the screen. On.Screen Dis • Press DISPLAY DISPLAY KD during When playing a DVD video or audio disc playback.
-screen Display Mode (continued) _ • On-Screen When playing a VIDEO Current track number Dis CD or audio CD Elapsed time of Remained time of the current track the current track e.g. Note This may net be displayed for some discs.
( usting the Picture ? 113 ?i_ ii?i ???3 You can easily select a preferred picture. I PICTURE Press PICTURE. PICTURE on the Alternatively main unit. press (This function can only be set when you view pictures on the LCD of the player.) PICTURE The picture setting display 108 I PICTURE 0 appears. Each time you press setup items changes the button, as follows. the Brightness 108 Contrast Io8 Color Io8 Tint Io8 Screen No display Press -,=/ D-to adjust the value.
SETUP stomizing Settings the Function ii il You can change the default settings to customize performance to your preference. _ 1 Settin )rocedure Press SETUP while pressing SHIFT during stop. Alternatively press SETUP on the main unit. Change selection by • / _, by referring the to the corresponding pages _, then press ENTER. e.g. (_ The following appears. on-screen disptay + AUDIO MENU EO Mode None E.A.Id.
Setting TV MENU LANGUAGE MENU Details TV Shape Page To select a picture size according to the aspect ratio of your TV. 48 AV-OUT _ To set the connection terminal to use when you want to connect and output to an external device. 48 OSD Menu _ To select a preferred language for on-screen displays. 48 Subtitle _ To select a preferred language for subtitles. 48 Audio _ To select a preferred language for the sound track. 48 DVD Menu _ To select a preferred language for disc menus.
'T'_I_IE_U "RIShape _ LANGUAGEMENU 4:3 Normal OUD Menu 4:3 Lette_ Box AV-OIJT 4:3 Normal: Off Sebct when a standard 4:3 TV is connected. Displays pictures cropped to flit your TV screen. Either or both sides of the picture are cut off. 4:3 Let_rbox: Select when a standard 4:3 TV is connected. Displays theatrical images with masking bars above and bebw the picture. When playing a source of 16:9 picture size. 16:9Widescreen: Select when a 16:9 wide TV is connected.
WesternEurope: CentralEuropea: SlavonicCyrillic: To display subtitles in west European language. To display subtitles in Central European language. To display subtitles in Slavonic Cyrillic language. AUDIOMENU EOMode EA,M, D,D,C, DigitalOut m Normal On Analog2ch Notes • Some DVD video discs may be set to display subtitles in a different language than you selected. A prior subtitle language may be programmed on the disc.
Select the output sound format correspondhTg to your system connection. For details of sound recording systems, see _. Bitstream: Analog 2ch: SeLect when connected to an amp_itier equipped with a Dolby Digital, DTS, MPEGt or MPEG2 decoder. [_ The player outputs digital audio signal in the bitstream format when you play a DVD video disc recorded in the Dolby Digital, DTS, MPEG1 or MPEG2 recording system. Select when connected to a TV or stereo system via the analog audio jacks.
• To change 1) After selecting five times. your 5-digit password, security code press the 9 button OPERATION MENU-2 C 3-C 3-C 3-C 3-C 3 The 5-digit security Priority Contents DivX registration _ DVD-VIDEO code is cleared. 2) Press the number buttons 5-digit security code. to create a new '11 On : To use the menu when playing a PBC-featured VIDEO CD.
nnecting to a TV or audio system Connect the player to your TV or audio system. For details of output sound, see [_. to a TV _ Signal flow To S VIDEO OUT If the TV has an S video input, connect the player with an S video cable. When using an S video cable, do not connect the yellow video cable. Audio/video cable (supplied) To audio inputs (white) TV or monitor with audio/video inputs To video input S video cable (not supplied) I Make the following On-screen display To S video input setting.
_l_i_!_!li_!li_!li_!li_!li_!li_!li_!li_!li_!li_!li_!li_!!!_lli!_!li_!li_!li_!li_!li_!li_!li_!li_!li_!li_!li_!li_!li_!li_!li_!li_!li_!li_!li_!li_!li_!li_!li_!li_!li_!li_!li_!li_!li_!li_!li_!li_!li_!li_!li_!li_!li_!li_!li_!li_!li_ INTERLACED outputs/inputs (ColorStream ®) Some TVs or monitors are equipped with component video inputs. Connecting to these inputs allows you to enjoy higher quality picture playback. Actual labels for component video inputs may vary depending on the TV manufacturer. (ex.
CAUTION mnecting to Headphones When you use headphones, keep the volume at a moderate level. If you use the headphones continuously with high volume sound, it may cause hearing damage. You can listen to movies and music privately by connecting headphones. Connecting headphones Connect headphones to the headphone jack using a stereo mini plug. Before connecting, temporarily turn down the volume with the headphone volume control. Readjust to your preference when playback starts.
nnecting to Audio Equipment You can enjoy high quality dynamic sounds by connecting equipment. • For connection to your TV, see "Connecting to a TV" lax • For details of output sound, see [_. • This section uses the following reference marks.
mnecting to Audio Equipment (continued) Dolby Digital Dolby Digital is the surround sound technology used in theaters showing the latest movies, and is now available to reproduce this realistic effect in the home. You can enjoy motion picture and live concert DVD video discs with this dynamic realistic sound by connecting the player to a 6 channel amplifier equipped with a Dolby Digital decoder or Dolby Digital processor. "Manufactured under license from Dolby Laboratories.
MPEG2 sound • Use DVD video discs encoded You can enjoy motion picture and live concert DVD video discs with dynamic realistic sound by connecting an amplifier equipped with an MPEG2 audio decoder or MPEG2 audio processor. mplifier equipped with an_ PEG2 audio decoder | To digital audio input t (optical) L_To ................... _ -_I" via the MPEG2 recording system. • Make the following setting. On-screen display Select: Page "Digital Out....
ing the Battery Pack WARNING • Do not use a battery pack other than one specified as it can result in a fire or damage to the unit. • Do not heat, open, or short-circuit the battery pack. Do not throw the battery pack into a fire. Doing so may cause an explosion or a fire. • Attach the battery pack properly following the explanation below. Make sure that the battery pack is attached firmly to the player when using it. Otherwise, the battery pack may become detached and cause persona) injury.
• Detaching the battery pack 1 Turn the player off. 2 Disconnect the AC adapter and the power cord from the player. 3 Turn the player upside down. 4 Slide the battery pack's lock switch in the direction of the arrow _, then slide the battery pack in the direction of the arrow _ to remove it. O o Lock switch 5 Attach the connector cover on the bottom of the player. Note De not detach the battery pack while the POWER indicator illuminates in green, yellow or orange.
ing the automobile/vehicle adapter or power port For use of the DVD player Jna car, thfs adapter can power the DVD player from the cigarette lighter socket. WARNING • NEVER operate the DVD player or view a DVD so is illegal in many jurisdictions. NEVER place a DVD player within the eyesight DVD player located in the front seating section Failure to observe the above instructions could hazards. Video while operating an automobile or other vehicle.
• Instructions for Use 1 Turn off the DVD player. 2 Insert the pin plug of the adapter into the DC IN 12V jack of the DVD player. OFF o ¢0 u_ The LED illuminates when powered, ( J ) 3 Insert the plug of the adapter into the cigarette lighter socket or power port fully. 4 Turn on the vehicle engine so that the cigarette lighter socket or power port is powered. In some vehicles the cigarette lighter socket or power port is powered even when the vehicle's engine is not running.
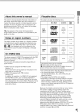
Calling Service Personnel Check the following guide for the possible cause Symptom Cause No power. • The AC adapter disconnected. before contacting service. Correction • The battery • Battery of a problem or power plug is Page • Connect the AC adapter securely. pack has been removed, • Install the battery empty, • Re-charge 60 the battery, • The automatic LCD off, LCD off function No picture. (Other than builtin LCD monitor) • The connected TV is not set to receive No sound.
Cause Symptom The remote control does not work properly. Correction • The remote control is not pointed remote sensor of the player. • The remote player. • The batteries exhausted. control is too far from the in the remote control are • The player's remote sensor is exposed a strong light source such as direct sunlight or other illumination. For details on how to resolve a problem, If you are still unable to resolve Page • Point the remote at the control sensor of the player. • Operate 3m.
Player Power supply DC 12 V (Rated current : 3 A (Maximum: during battery pack charging)) 120 V AC, 60 Hz (with the supplied AC adapter) Mass 1250 g External dimensions 259 x 36 x 193 mm (W/H/D) Signal system Standard Laser Semiconductor Frequency Operating range NTSC laser, wavelength 650 nm / 795 nm DVD linear sound : 48 kHz sampling 4 Hz to 22 kHz 96 kHz sampling 4 Hz to 44 kHz 192 kHz sampling 4 Hz to 88 kHz conditions Temperature: 5 "C to 35 _'C, Operation status: Horizontal Connec
Limited Digital United Audio States Video Warranty ("DAV') Product - Depot Repair Warranty Toshiba America Consumer Products, L.L.C. ("TACP") makes the following limited warranties to original consumers in the United States. THESE LIMITED WARRANTIES EXTEND TO THE ORIGINAL CONSUMER PURCHASER OR ANY PERSON RECEIVING THIS DAV PRODUCT AS A GIFT FROM THE ORIGINAL CONSUMER PURCHASER AND TO NO OTHER PURCHASER OR TRANSFEREE. DAV PRODUCTS PURCHASED IN THE U.S.A.
ii!!_!!!!!_i_!!_i!;_!!_!!_n!_s_!!_i!;_!_!!_!!_i!_!!_!!_i!;_!!_i_ii_ii_ii_ii_ii_ii_iiii_ii_ii_ii_ii_!i_i_ii_ii_ii_ii_i_ii_ii_ii_ii_iI_ii_ii_ii_ii_ii_ii_ii_ii_ii_ii_ii_ii_ii_ii_ii_ii_ii_ii_ii_ Limited United States Warranty Digital Audio Video ("DAV") Product - Depot Repair Warranty (continued) How to Obtain Warranty Services If, after following all of the operating instructions in this manual and checking the section "Troubleshooting;' you find that service is needed: (1) For instructions on how to obtain w
TOSHIBA - IMPORTANT - CANADIAN WARRANTY INFORMATION GARANTIE CANADIENNE STANDARD WARRANTY TYPE OF SET WARRANTY PERIOD DVD Player DVD/VCR Combination Home Theatre in a Box DVD Recorder Portable DVD GARANTIE NORMALE TYPE D'APPAREIL DVD/magn_toscope combo Cinema maison dans une bofte Enregistreur DVD DVD Portatif DUREE DE LA GARANTIE: 12 MONTHS Lecteur DVD 12 MOIS CANADIAN WARRANTY Toshiba of Canada Limited (TCL) makes the following limited warranties to original consumers in Canada.
TOSHIBA Printed in China