TH-C550M.NA1UTT RH0074C ENG DIGITAL V I D E 0 _ O=_=TALAUO=O SURROUND DVD/VCR Home Theater System S Before connecting, operating or adjusting this product, please read this instruction booklet carefully and completely. ©2005 Toshiba Corporation This device does not tape-record copy protected DVD Video Discs.
CAUTION: The apparatus should not be exposed to water (dripping or splashing) and no objects filled with liquids, such as vases, should be placed on the apparatus. CAUTION FCC WARNING: This equipment may generate or use radio frequency energy. Changes or modifications to this equipment may cause harmful interference unless the modifications are expressly approved in the instruction manual. The user could lose the authority to operate this equipment if an unauthorized change or modification is made.
IMPORTANT SAFETY 1. Read these instructions. - All these safety and operating instructions should be read before the product is operated. INSTRUCTIONS 11. Only use attachments/accessories the manufacturer. specified by 2. Keep these instructions. - The safety, operating and use instructions should be retained for future reference. 3. Heed all warnings. - All warnings on the product and in the operating instructions should be adhered to. 4. Follow all instructions.
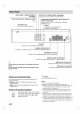
Introduction Safety Precautions ............................ IMPORTANT SAFETY INSTRUCTIONS ............ Table of Contents ............................. Before Use ................................ Playable Discs ............................. Precautions ............................... Notes on Discs ............................. About Symbols ............................. Selecting the Viewing Source .................. Front Panel .................................. Display Window ............................
Playable Discs v, D Eo DVD (8 cm/12 cm disc) Video CD (VCD) (8 cm / 12 cm disc) ............ AudioCD (8 cm/12 cm disc) In addition, this unit can play a DVD-R/+RW, SVCD and CD-R or CD-RW that contains audio titles, MP3, WMA or JPEG files. Notes • Depending on the conditions of the recording equipment or the CD-R/RW (or DVD-R/_+RW) disc itself, some CD-R/RW (or DVD-R/+RW) discs cannot be played on the unit.
Precautions Handling the unit When shipping the unit The original shipping carton and packing materials come in handy. For maximum protection, re-pack the unit as it was originally packaged at the factory. Cleaning Fingerprints and dust on the disc can cause poor picture quality and sound distortion. Before playing, clean the disc with a clean cloth. Wipe the disc from the center out. When setting up the unit The picture and sound of a nearby TV, VCR, or radio may be distorted during playback.
I I ON/STANBY I/_ Switches the DVDNCR _ EJECT Ejects the tape in the VCR deck. Receiver ON and OFF. LINE IN 2 (VIDEO / AUDIO (L/R) input Connect the audio/video output of an external source (Audio system, TV/Monitor, another VCR). VOLUME Adjusts volume of speakers. _ (PLAY) To play back a recorded tape er disc. Disc Tray (DVD deck) Insert a disc here. TUNING (/_ / _/) Selects FM and AM band. COPY/MEMORY Press to copy a DVD in the DVD deck to a VHS tape in the VCR deck.
I I A cassette is in the VCR deck. Indicates encoding format of the current disc. RADIO Indicates RADIO mode is active MUTE The speaker sound is muted. Indicates sound mode is DOLBY PRO LOGIC or DOLBY PRO LOGIC II. SAP Indicates when a SAP BILINGUAL broadcast is being received. HI-FI Indicates the unit is playing back a tape recorded in Hi-Fi. REC DVD/VCR Receiver is Recording. COPY DVD to VCR copy is in progress. TIMER DVD/VCR Receiver is in timer recording or a timer recording is programmed.
I I TV Switches TV ON and OFE POWER (I/V) Switches DVD/VCR Receiver ON and OFF. INPUT • - Selects the VCR deck's source (Tuner, LINE 1, er LINE 2) in VCR mode. - Selects the TV external source in TV mode. • TV To control multi-brand TV. • DVD/CD To control DVD/CD operating. AUX • To listen to an audio source connected to the • VCR To control VCR operating. DIGITAL AUDIO IN (OPTICAL) jack with video from LINE 1.
I I VCR IN LINE 1 (VIDEO IN/AUDIO IN (Left/Right)) Connect the audio/video output of an external source (Audio system, TV/Monitor, Another VCR). / DVD/VCR OUT (VIDEO/AUDIO (Left/Right)) Connect to a TV with video and audio inputs. COMPONENT/PROGRESSIVE SCAN VIDEO OUT (Y Pb Pr) (DVD OUT) Connect to a TV with Y Pb Pr inputs. FOR DVD VIEWING ONLY. AC Power Cord ANT.IN Connect the VHF/UHF/CATV antenna to this terminal. lug into the power source. ....®®®o REOUT I Connect to a TV with RF coaxial inputs.
Tips Without • Depending on your TV and other equipment you wish to connect, there are various ways you could connect the DVD/VCR Receiver. Use connections described on pages 11-14. • Please refer to the manuals of your TV, VCR, Stereo If your cable wire is connected to your TV without a converter or descrambler box, unscrew the wire from your TV and attach it to the ANT.IN jack on the DVD/VCR Receiver.
I I Basic TV Connections Optional Make one of the following connections, the capabilities of your TV. RF coaxial depending on connection Connect the RF.OUT jack on the DVDNCR Receiver to the antenna in jack on the TV using the 75-ohm Coaxial Cable supplied (R). Note If you use this connection, tune the TV to the DVDNCR Receiver's RF output channel (CH 3 or 4).
Speaker System Connections Speaker Positioning Connect the speakers using the supplied speaker cords by matching the colors of the terminals and those of the cords. To obtain the best possible surround sound, adjust the speaker parameters (distance, level, etc.). For a normal setup use 6 speakers (2 front speakers, center speaker, 2 rear speakers and subwoofer). Notes • Be sure to match the speaker cord to the appropriate terminal on the components: (_ to (_ and Q to Q.
Radio Antenna Connections Connect the supplied FM/AM antennas for radio listening. 1. Connect the AM loop antenna to the AM antenna connectors. 2. Connect the FM wire antenna to the FM antenna connectors. Notes • To prevent noise pickup, keep the AM loop antenna away from the DVDNCR Receiver and other components. • Be sure to fully extend the FM wire antenna. • After connecting the FM wire antenna, keep it as horizontal as possible.
I I AUX DVD/CD VCR FM AM Follow these guidelines to select and switch among the various DVDNCR Receiver input and output sources: • DVD/CD To view output from the DVD deck: Press DVD/CD on the remote or DVD/VCR on the front panel until the DVD indicator on the front panel lights and output from the DVD deck is viewed on the TV screen.
Mini Glossary for Audio Stream & Surround mode Software with multichannel surround audio signals is played according to the way it was recorded. Sound Mode (DTS) Allows you to enjoy 5.1 (or 6) discrete channels of high quality digital audio from DTS program sources such as discs, DVD and compact discs, etc.bearing the trademark.
On-Screen Display (OSD) Set the Output Source to VCR as shown in "Selecting the Input/Output Source" on page 15. Some of these functions appear during VCR operated. 0 @ @ 0 OTAPE SPEED DISPLAY Shows the current tape speed. € FUNCTION DISPLAY Indicates the current function.
VCR Setup Menu Options Channel Selection 1. Press MENU and the MAIN menu will appear. This DVD/VCR Receiver is equipped with a frequency synthesized tuner capable of receiving up to 181 channels. These include VHF channels 2-13, UHF channels 14-69 and CATV channels 1-125. 2. Use A/• to select the SETUP menu, then press ENTER. The SETUP menu will appear.
I I Note Setting the Clock There are cases where the TV station does not send or sends The DVD/VCR Receiver gives you two ways to set the time and date: the Auto Clock Feature or manually. The Auto Clock feature enables the DVD/VCR Receiver to set up the clock while the DVD/VCR Receiver is turned off. * Manual 1. Press MENU and the MAIN menu will appear. 2. Use _ to choose the CLOCK menu. Press ENTER and the CLOCK menu will appear. The initial Clock Setting is JANUARY 1, 2005, 12:00 AM.
I I General Explanation Temporary Feedback Field Icons This manual gives basic instructions for operating the DVD/VCR Receiver. Some DVDs require specific operation or allow only limited operation during playback. When this occurs, the symbol @ appears on the TV screen, indicating that the operation is not permitted by the DVD/VCR Receiver or is not available on the disc. ® ..... : Repeat Title ....................... @o"_"_: Repeat Chapter _ ..... Repeat Track (non-PBC Video CDs ..........
I I Initial Settings You can set your personal preferences on the DVD/VCR Receiver. General Operation 1. Press SETUP. The Setup menu appears. 2. Use A/T to select the desired option. The screen will show the current setting for the selected option, as well as alternate setting(s). 3. While the desired option is selected, press I_, then A/T to select the desired setting. 4. Press ENTER to confirm your selection. Some options require additional steps. 5.
I I Speaker setup Auto Play 5.1 Speaker You can set up the DVDNCR Receiver so a DVD disc automatically starts playing whenever the DVD is inserted. settings Select speaker settings, including volume balance and distance, or test the speaker settings. Speaker settings are only active on the Analog MultiChannel Output. (See "Speaker Setup", page 37.) If Auto Play mode is set to On, this DVD/VCR Receiver will search a title where playback time is longest and then play back the title automatically.
Parental Control Rating ql_ Movies on DVDs may contain scenes not suitable for children. Therefore, discs may contain Parental Control information that applies to the complete disc or to certain scenes on the disc. These scenes are rated from 1 to 8, and alternatively, more suitable scenes are available for selection on some discs. Ratings are area dependent. DVD video discs may or may not respond to the parental control setting if the Area code of the disc is set wrongly.
Special Effect Playbacks Normal Playback Preparation: Special • Turn on the TV. • Tune the TV to the DVD/VCR Receiver output channel (CH 3 or 4) or set the TV's source selector to VIDEO. • If a direct VIDEO/AUDIO connection is made between the DVD/VCR Receiver and the TV, set the TV's source selector to VIDEO. • Set the Output Source to VCR as shown in "Selecting the Input/Output Source" on page 15. 1. Insert a prerecorded video cassette. Receiver notes on the TV screen.
Normal Recording Timer Recording Preparation: This DVD/VCR Receiver can be programmed to record up to 8 programs within a period of 1 year. For unattended recording, the timer needs to know the channels to be recorded and the starting and ending times. • Turn on the power of both the DVDNCR Receiver and TV. • Tune the TV to the DVD/VCR Receiver output channel (CH 3 or 4) or set the TV's source selector to VIDEO.
I I 10. Use V to choose the SPEED Use _/1_ to cheoee the desired (AUTO_ SP or SLP)o Notes option. recording speed AUTO mode determines how much tape is left and switches speed from SP to SLP, if necessary, to complete recording the program. There will be some picture and sound distortion at the point of the speed change. 11o Use _' to choose the REPEAT option. Use _/_ to choose the desired repeat WEEKLY (ONCE, or DAJLY)o ONCE event....
Instant Timer Recording Dubbing Instant Timer Recording easily of a preset length ble timer. If you wish to edit or dub your camcorder (or another VCR) recordings to this DVDNCR Receiver, the rear (or Front) panel mounted Audio and Video (A/V) input jacks make the connections quick and easy. These direct AN jacks will also provide better picture results than using the RF jack on the rear panel.
MTS (Multi-Channe_ VHS Hi-F__ MTS Broadcast This DVD/VCR Receiver is equipped with the VHS Hi-Fi audio sound system for recording and playback. The information below gives a brief description of Hi-Fi audio and how to record and play a tape in the Hi-Fi audio mode. Mu_tichannel Playback with HFFi Stereo Audio Sound A stereo TV with AUDIO/VIDEO input jacks or a stereo audio system is required for true stereo playback.
Tape Counter Memory Feature Additional Real-Time Counter • In manual recording, Timer recording, Instant Timer Recording, playback, or fast forward modes, the DVDNCR Receiver automatically starts rewinding the tape at the end of the tape. The cassette will stop at the beginning of the tape and be ejected, and the DVD/VCR Receiver will turn itself off. • After you have finished using the DVD/VCR Receiver, rewind, eject, and remove the cassette.
Playing DVD and Video CD Playback Setup | _ • Turn on the TV and select the video input source connected to the DVDNCR Receiver. • Audio system: Turn on the audio system and select the input source connected to the DVDNCR Receiver. • Set the Output Source to DVD as shown in "Selecting the Input/Output Source" on page 15. 1. Press OPEN/CLOSE ( "_ ) to open the disc tray. 2. Load your chosen disc in the tray, with the label facing up.
General Search _ Features (Continued) _ Repeat A-B 1 Press REW (_t_1) or FWD (1=,,_)during playback. The DVDNCR Receiver will now go into SEARCH mode. 2 Each press of the REW (_t_1) or FWD (1=,,_)button will increase the speed of the search _t_IX2, _t_IX4, _t_IX16, _t_IX100 (backward) or I=,,-I_X2,I=,,-I_X4, I=,,_X16, I=,,_X100 (forward). With a Video CD, the Search speed changes: _t_IX2, _t_IX4, _t_IX8, (backward) or I=,,_X2, I=,,_X4, I=,,_X8, (forward). 3 To return to playback, press PLAY.
General Features (Continued) Special DVD Features Checking Marker Search discs: You can start playback from a memorized point. Up to nine points can be memorized. To enter a mark, follow these steps. 1 During disc playback, press MARKER when playback reaches the spot that you want to memorize. The Marker icon will appear on the TV screen briefly. 2 Repeat step 1 to enter up to nine Marker points on a disc. To Recall a Marked Scene Menus DVDs may contain menus that allow you to access special features.
Playingan Audio CD and MP3NVMA Notes on MP3/WMA Recordings Discs About The DVD/VCR Receiver can play MP3/WMA formatted recordings on CD-ROM, CD-R or CD-RW discs. Before playing MP3/WMA discs, read the notes on MP3/WMA Recordings on right. Insert a disc and close the tray. Audio CD: Audio CD menu appears on the TV screen. Go to step 4. MP3/WMA disc: The MP3/WMA-JPEG choice menu appears on the TV screen. Go to step 2. Use _ to select the MP3/WMA then press ENTER.
I I Pause ql_D ql_ qi_ Repeat A-B 1 Press PAUSE/STEP during playback. 2 To return to playback, press PLAY or press PAUSE/STEP again. Moving to another Tracks qI_DC]_)(_) • Press SKIP (14<1 or IH_I) briefly during playback to go to the next track or to return to the beginning of the current track. • Press SKIP (144) twice in quick succession to step back to the previous track. • On Audio CDs, to go directly to any track, enter the track number using the numbered buttons (0-9) during playback.
Viewing JPEG Files on a Disc This DVDNCR Receiver can play discs with JPEG files. Before playing JPEG files, read the notes on JPEG Files on right. 1. Insert a disc and close the tray. The MP3/WMA-JPEG choice menu appears on the TV screen. Selecting other Files Press SKIP (1_1 or I_1_1) once while viewing a picture to advance to the next file or to the previous file. Still Picture 1 Press PAUSE/STEP during slide show. The player will now go into PAUSE mode.
I I Programmed Playback and MP3/WMA with Audio CDs Discs The Program function enables you to store your favourite tracks from any disc in the player memory. Program can contain 30 tracks. 1. Press mode The [] on the Programmed Playback with Video CD Note On a Video CD with PBC, you must set PBC to Off on the setup menu to use the Program function. See page 22. 1. Insert Video CD and close the tray. 2. Press PROGRAM while playback The VCD Program menu will appear. is stopped.
I I Adjust the following settings for the built-in 5.1 channel surround decoder. Distance If you connected speakers to your DVD/VCR Receiver, setting the Distance lets the speakers know how far the sound has to travel to reach your set listening point. This allows the sound from each speaker to reach the listener at the same time. (1-20 ft, 1 ft = 0.30 m) Note You can not set the distance of subwoofer speaker. Test 1. Select "5.1 Speaker Setup" using the A/V buttons on the setup menu. 2. While "5.
I I Presetting the Radio Stations Listening to the Radio You can preset 50 stations for FM and AM. Before tuning, make sure that you have turned clown the volume. Preset radio stations in the DVDNCR Receiver memory first (see "Presetting Radio Stations" on the left). 1. Press FM/AM on the remote 1. control the front panel until the frequency on the display and TV screen.
I I Tuning into a Station Manually 1. Press FM/AM on the remote control until the frequency band appears on the display and TV screen. 2. Press FM/AM on the remote control to select the desired band. 3. Press TUNING (JJv) on the remote control to tune in the desired station. For your reference Weak FM stations "ST" may flash when a weak FM stereo signal is received, select another station or realign the antenna.
I I The remote control can be compatible with various brands of TV by setting their control codes. The TOSHIBA code has initially been set to control TOSHIBA TVs. TV POWER TV POWER Setting TV Control Codes POWER C3 C3 C3 [_ VD/CD 1. Press TV to set the remote control operating your TV. VCR 4" MOD_ AUX FM/AM INPUT EJEOr Ci3 E2] [?_ 2. While holding down PROGRAM button, enter the two digits of your TV's brand code (listed on page 41) using number buttons. --PROGRAM 3. Release PROGRAM.
Table of TV Brand Codes Brand name of your TV Brand Code Toshiba 01 Bell & Howell 09 Carver 10 Celebrity 03 Brand name of your TV Runco (NEC) Brand Code 14 Samsung Sanyo Scotch 11,12 09 11 Citizen 12 Scott 11 Curtis Mathes 09, 12 Sears 01, 02, 09, 10, 11 Dumont 14 Sharp 08, 13 Electro band 03 Sony 03 Emerson 09, 11 Fisher 09 GE 02, 07, 11 Gibraiter 14 Soundesign 11 Supreme 03 Sylvania 10 08 Goldstar 11 Tandy Hallmark 11 Technics 07, 15 Hitachi 06 Techwoo
I I Check the following guide for the possible cause of a problem before contacting service. Symptom Cause Solution No power. • The power cord is disconnected. • Plug the power cord into the wall outlet securely. The power is on, but the DVD/VCR Receiver does not work. • No disc is inserted. • No tape is inserted, • Insert a disc or tape. (Check that the disc or tape indicator in the display window is lit.) No picture.
I I Symptom Cause Solution INPUT, VOLUME (_hJ_') and 4/_.,/Am' buttons on remote control cannot operate. Some channels are skipped over when using CH/TRK (A/T) Picture and sound of broadcasting channel are weak or missing. • Incorrect mode (e.g. Remote control in TV mode), • Press DVD/CD, VCR or FM/AM to select the correct mode on the remote control. • Those channels were deleted with the CH. ADD/DEL option. • Use CH. ADD/DEL to restore channels. See "Channel Selection" on page 18.
I I Enter the appropriate code number for the initial settings "Disc Audio", "Disc Subtitle" and/or "Disc Menu" (See page 21).
Enter the appropriate code number for the initial setting "Area Code List" (See page 23).
General Power requirements Power consumption Dimensions (approx.) Mass (approx.) Operating temperature Operating humidity Signal system AC 120V, 60 Hz 110W 430 X 81 X 360 mm (17 x 3.2 x 14.2 inches) (w x h x d) 7.2 kg (15.8 Ibs) 5°C to 35°C (41°F to 95°F) 5 % to 90 % NTSC Inputs ANTENNA VCR VIDEO VCR AUDIO FM ANTENNA AM ANTENNA DIGITAL AUDIO IN IN IN IN IN IN Antenna or CATV input, 75 ohms 1 V (p-p) 75 ohms, sync negative, RCA jack x 2 -6.
FM Tuner Tuning Range Intermediate Frequency 87.5 - 108.0 MHz 10.7 MHz AM Tuner Tuning Range Intermediate Frequency 530 - 1,720 kHz 450 kHz Amplifier Stereo mode Surround mode Inputs 70W + 70W (60. at 1 kHz, THD 10 %) Front: 70W + 70W (60. at 1 kHz, THD 10 %) Center*: 70W (60` at 1 kHz, THD 10 %) Surround*: 70W + 70W (60. at 1 kHz, THD 10 %) Subwoofer*: 150W (40` at 30 Hz, THD 10 %) *Dependingonthe soundmodesettingsandthe source,theremay be no soundoutput.
Limited United States Warranty for DVDiVCF Home Theater System Toshiba America Consumer Products, EL.C. ("TACP") makes the foilowing limited warranties to original consumers in the United States. THESE LIMITED WARRANTIES EXTEND TO THE ORIGINAL CONSUMER PURCHASER OR ANY PERSON RECEIVING THIS DVD/VCR HOME THEATER SYSTEM AS A GIFT FROM THE ORIGINAL CONSUMER PURCHASER AND TO NO OTHER PURCHASER OR TRANSFEREE. DVDNCR HOME THEATER SYSTEMS PURCHASED IN THE U.S.A. AND USED ANYWHERE OUTSIDE OF THE U.S.
How to Obtain Warranty Service If, after following all of the operating instructions in this manual and reviewing the section entitled "Troubleshooting," you find that service is needed: (1) To find the nearest TACP Authorized Service Station, visit TACP's website at www.tacp.toshiba.com/service or contact TACP's Consumer Solution Center toll free at 1-800-6313811. (2) You must present your original biil of sale or other proof of purchase to the TACP Authorized Service Station.
ColorStream and ColorStream Pro are registered trademarks of Toshiba America Consumer Products, L.L.C. P/NO : 3834RH0074C Printed in Indonesia.