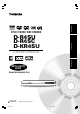
Introduction DIGITAL VIDEO DVD VIDEO RECORDER Connections D-R4SU D-R4SC D-KR4SU OWNER’S MANUAL Basic Setup INSTALLATION GUIDE Read this booklet first. H P000416400 PM0020460011 D-R4SU(E)inst01 © 2005 Toshiba Corporation 1 05.3.
Introduction SAFETY PRECAUTIONS CAUTION RISK OF ELECTRIC SHOCK DO NOT OPEN CHOC ELECTRIQUE NE ATTENTION RISQUE DEPAS OUVRIR WARNING : TO REDUCE THE RISK OF ELECTRIC SHOCK, DO NOT REMOVE COVER (OR BACK). NO USERSERVICEABLE PARTS INSIDE. REFER SERVICING TO QUALIFIED SERVICE PERSONNEL.
Note to cable system installer: This reminder is provided to call the cable system installer’s attention to Article 820-40 of the NEC that provides guidelines for proper grounding and, in particular, specifies that the cable ground shall be connected to the grounding system of the building, as close to the point of cable entry as practical. CAUTION: These servicing instructions are for use by qualified service personnel only.
IMPORTANT SAFETY INSTRUCTIONS 1. Read these instructions. 2. Keep these instructions. 3. Heed all warnings. 9. Do not defeat the safety purpose of the polarized or grounding-type plug. A polarized plug has two blades with one wider than the other. A grounding type plug has two blades and a third grounding prong. The wide blade or the third prong are provided for your safety. If the provided plug does not fit into your outlet, consult an electrician for replacement of the obsolete outlet. 10.
Introduction ADDITIONAL SAFETY INSTRUCTIONS 15. Do not overload wall outlets; extension cords, or integral convenience receptacles as this can result in a risk of fire or electric shock. 18. Do not place anything on top of this apparatus. 23. Dur ing thunderstor ms, do not touch the connecting cables or the apparatus. Basic Setup 24. The apparatus includes lead, an ingredient of solder used on the PCB, which is a harmful substance to human and the environment.
Introduction Precautions Notes on handling Never disconnect the power cord from a wall outlet while the recorder is turned on, unless it is in an emergency. Doing so may cause malfunction. When shipping the recorder, the original shipping carton and packing materials come in handy. For maximum protection, repack the unit as it was originally packed at the factory. Do not use volatile liquids, such as insect spray, near the recorder.
When you record/edit important content, make trial operations beforehand to confirm the recorder can function properly. Toshiba does not compensate for content which was not recorded/edited because of some malfunction of this product or discs during operation, and is not liable for incidental damages (such as profit loss or interruption of business, etc.) produced in such conditions.
Introduction Precautions (Continued) Notes on moisture condensation Moisture condensation damages the unit. Please read the following carefully. Moisture condensation occurs, for example, when you pour a cold drink into a glass on a warm day. Drops of water form on the outside of the glass. In the same way, moisture may condense on the optical pick-up lens inside this unit, one of the most crucial internal parts of the unit.
Recording Can be recorded Copy free Copy within the same disc DVD-RAM DVD-RW Can be copied DVD-RAM Manufactured under license from QSound Labs, Inc. U.S. patent Nos. 5,105,462, 5,208,860 and 5,440,638 and various foreign counterpart. Copyright QSound Labs, Inc. 1998-2002. QXpanderTM is a trademark of QSound Labs, Inc. All rights reserved.
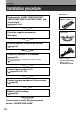
Introduction Installation procedure Accessories Read carefully “SAFETY PRECAUTIONS”, “IMPORTANT SAFETY INSTRUCTIONS” and “Precautions”. ( pages 2 to 9) Check the supplied accessories. (See right) Load the batteries in the remote control. ( page 18) Remote control Batteries (AAA) x 2 Coaxial cable Video/audio cable Connect an antenna to the recorder. ( page 20) Connect a cable box or satellite system to the recorder. ( pages 22 to 24) Connect the recorder to a TV.
Introduction About this product Some differences Connections In isolated cases, a disc bearing the DVD or CD logo may not fully and properly play back all features or as intended by the creator of the disc. This can be due, among other reasons, to problems and errors that can occur during the creation or recording of DVD and other software and the manufacture of software discs (including blank discs).
Introduction Choosing a disc There are many types and formats of discs. Please use the following information to select an appropriate disc. Notes • Handle the disc according to the disc instruction manual. • Toshiba cannot guarantee that all discs bearing the DVD or CD logos will operate as expected. Additionally, Toshiba cannot guarantee that discs recorded in this device will operate properly in other DVD players. For recording / playback Disc Mark Specification Remarks DVD-RAM • Single sided 4.
For playback only Mark DVD video disc Specification Remarks • 12cm (43/4 in.) • Region number The region number of this DVD recorder is 1. If region numbers, corresponding to a specific playable area, are printed on your DVD video disc and you do not find 1 or ALL , or the disc is encoded to permit playback only in regions other than Region 1, disc playback will not be allowed by the recorder. 1 or ALL • Color system: NTSC VIDEO CD Audio CD • 12cm (43/4 in.) CD-R • 12cm (43/4 in.
Introduction Choosing a disc (Continued) On DVD-RAM discs Use only DVD-RAM discs that comply with DVD-RAM standard Version 2.0, 2.1 or 2.2. The recorder cannot record on a disc formatted in any other standard. When using such a disc, initialize it by using the disc-format function of this recorder. The recorder may not record, dub, or edit some DVDRAM discs, because they are edited/recorded with another manufacturer’s equipment or PC, contain a large number of titles, or have little remaining capacity.
On DVD-R discs DVD-R for General Ver.2.0 discs can be used for recording and playback. Discs compatible with 2X speed recording (labeled Ver.2.1/2X etc.) and discs compatible with 4X speed recording (labeled Ver.2.1/4X etc.) can also be used. Select discs labeled “for video,” “for recording,” “120 min.” etc. DVD-R for authoring Ver.1.1 cannot be used. The following are examples of marks and the meanings. Mark Number of audio streams recorded in the disc.
Introduction Choosing a disc (Continued) Structure of disc contents On handling discs Normally, DVD video discs are divided into titles, and the titles are subdivided into chapters. VIDEO CDs/audio CDs are divided into tracks. Do not touch the playback side of the disc. DVD video disc Title 1 Title 2 Chapter 1 Chapter 2 Chapter 1 Chapter 2 Chapter 3 Yes Playback side Do not stick paper or tape to discs.
Introduction Table of Contents Introduction SAFETY PRECAUTIONS ...................................................................................................... 2 Precautions ........................................................................................................................... 6 Installation procedure ........................................................................................................ 10 Introduction IMPORTANT SAFETY INSTRUCTIONS ............................
Introduction Preparation of the remote control 1 Open the cover. 2 Insert batteries (AAA size). Caution • Never throw batteries into a fire. Notes • Be sure to use AAA size batteries. • Dispose of batteries in a designated disposal area. • Batteries should always be disposed of with the environment in mind. Always dispose of batteries in accordance with applicable laws and regulations.
Connection procedure 1 Connections “Connecting an antenna and TV” ( page 20) Connect your recorder to your TV or stereo system.
Connections Connecting an antenna and TV Connect your TV and the antenna to this recorder for recording and to view broadcast programs on the TV. 1 2 Disconnect the antenna cable from your TV, and connect it to the RF IN (FROM ANT.) terminal on the recorder. Using the supplied coaxial cable of this recorder, connect the RF OUT (TO TV) terminal to the TV. VHF/UHF antenna Antenna cable (not supplied) 1 To RF OUT (TO TV) To RF IN (FROM ANT.
3 Connect to a TV equiped with audio/video inputs. Connect as below for watching received channels or recorded contents. Watching via the RF OUT terminal is not available. Introduction (red) To OUTPUT (R/L) (white) (yellow) To OUTPUT (VIDEO) To OUTPUT (S-VIDEO) S-Video cable (not supplied) Video/audio cable (supplied) To S-video input Connections If the TV has an S-video input, connect the recorder with an S-video cable. When using an S-video cable, do not connect the yellow video cable.
Connections Connecting to cable TV signal Choose one of the below according to your usage of the cable box. For watching received channels, connect to the TV via the audio/video cable. This set-up will allow you to: – record an unscrambled channel. – record an unscrambled channel while watching another (only when you connect a cable-compatible TV). You will need to: • to record a channel while watching another, select a desired channel on the TV (only when you connect a cable-compatible TV).
This set-up will allow you to: You will need to: • A/B switch “A”: record an unscrambled channel which bypasses the cable box. • A/B switch “B”: record a scrambled or unscrambled channel coming through the cable box. Introduction – record an unscrambled or scrambled channel. – record an unscrambled channel while watching another unscrambled channel (only when you connect a cable-compatible TV).
Connections Connecting to a satellite system Choose one of the following according to your type of satellite receiver. When the satellite receiver does not have audio/ video outputs 1 Connect a satellite antenna to the satellite receiver. 2 Connect the RF IN (FROM ANT.) terminal on the recorder and the RF OUT terminal of the satellite receiver. 3 Connect the RF OUT (TO TV) terminal on the recorder and the antenna input connector of the TV.
Connections Connecting to a TV equipped with component video inputs If your TV has component video inputs, you can obtain pictures in better quality. To PB COMPONENT OUTPUT Introduction To Y COMPONENT OUTPUT To PR COMPONENT OUTPUT Video cable (not supplied) Connections Only video signals are output from the COMPONENT OUTPUT jacks. (Audio signals are not output.) To obtain the sound, connect an audio system to the audio output jacks.
Connections Connecting to an audio system You can enjoy multichannel surround-sound such as 5.1 channel by connecting to an amplifier compatible with Dolby Digital and DTS sound. • For connection to your TV, see • For details of output sound, see pages 20 to 21, 25. page 67 in “OPERATIONS GUIDE”.
Basic Setup Read this chapter for necessary settings to get started. When you use this recorder for the first time, be sure to perform A to C in this order. Proceed to D if necessary.
Basic Setup Starting up the recorder After all the necessary connections, • Turn on the equipment connected to the recorder. • Select the corresponding video input on your television. Perform these selections whenever you operate the recorder. While the icon is flashing, the recorder is checking the status and reading data of the DVD drive for startup. If the DVD drive does not contain a disc, the recorder consumes less time to startup, because it does not need to read data from the DVD drive.
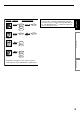
Startup/finishing (closing) icons Startup, reading a disc, finishing recording Loading Un loading Introduction These icons are displayed on the right corner on the top of the screen.
Basic Setup A: Initial settings This step sets the recorder’s clock and tuner to record broadcasting TV programs. If there are discrepancies in the recorder’s time display or changes made to receivable TV stations, you should make this setting again. When the recorder is operated for the first time, begin from step 3. OPEN/CLOSE DISPLAY FL SELECT DIMMER PROGRESSIVE ANGLE SUBTITLE AUDIO/SAP FREEZE Start REMAIN REC MODE EXTEND ZOOM SETUP VOL TIMESLIP 1 Press SETUP.
If a message appears The recorder provides you with a variety of GUI (Graphical User Interface) displays to perform key operations including customizing of setting, playback or recording. Refer to the guide on the bottom on each GUI for further programming related information. The recorder may display a message. Each message varies according to operational status. To respond, follow the below examples. Introduction Tip on setting Message e.g. e.g.
Basic Setup A: Initial settings (Continued) 1: Language setting Select a preferred language for on-screen displays. When the recorder is operated for the first time, begin from step 3. OPEN/CLOSE DISPLAY FL SELECT DIMMER PROGRESSIVE ANGLE SUBTITLE AUDIO/SAP FREEZE Start REMAIN REC MODE EXTEND ZOOM SETUP VOL TIMESLIP MUTE CH INPUT SELECT EASY NAVI TOP MENU MENU 1 2 3 Press SETUP. Press / to select “Initial settings”, then press SELECT/ENTER.
When the recorder is operated for the first time, begin from step 3. OPEN/CLOSE DISPLAY FL SELECT DIMMER PROGRESSIVE ANGLE SUBTITLE AUDIO/SAP FREEZE ZOOM SETUP TIMESLIP MUTE CH INPUT SELECT EASY NAVI TOP MENU MENU 1 2 3 Press SETUP. Press / to select “Initial settings”, then press SELECT/ENTER. Press / to select “Time & Date setting”, then press SELECT/ENTER. e.g.
Basic Setup A: Initial settings (Continued) Notes on summer time (Daylight-Saving time) on this recorder • The recording system of this recorder always conforms to its own actual clock even at the moment it gains or loses 1 hour of shift to/from summer time. Therefore, there may be some inconsistency in the display’s digits or actual operations on that occasion. For example, on the first Sunday in April, the actual recording length of a programmed recording from 1:00 a.m. to 4:00 a.m.
Manual clock setting OPEN/CLOSE page 33. e.g.
Basic Setup A: Initial settings (Continued) 3: Channel setting The recorder scans through all receivable TV and cable channels and stores only the active ones in its memory. Once this process is completed, you can select a desired channel using the CH button. When the recorder is operated for the first time, begin from step 3.
The recorder starts scanning and active channels are stored in the recorder in ascending order. The display returns to the previous screen after setting is completed. SELECT/ ENTER Introduction 6 Press / to select “Auto”, then press SELECT/ENTER. Adding or erasing channels e.g. 1) Select “Manual” at step 6. 2) Press / to select a channel you want to add or erase. For cable channels, refer to the chart below page.
Basic Setup B: Output sound setting Select the output sound setting corresponding to the connected TV or audio system. OPEN/CLOSE DISPLAY FL SELECT DIMMER PROGRESSIVE ANGLE SUBTITLE AUDIO/SAP FREEZE 1 Press SETUP to display the setup menu. When it is already displayed, press the button. SETUP Start REMAIN REC MODE EXTEND ZOOM SETUP VOL TIMESLIP MUTE CH INPUT SELECT EASY NAVI TOP MENU 2 Press / to select “Picture/Audio settings”, then press SELECT/ENTER. e.g.
SELECT/ ENTER / to select the output sound format. Bitstream: Select when connected to an amplifier equipped with a Dolby Digital, DTS, MPEG1 and MPEG2 decoder. ( page 26) Introduction 4 Press OPTICAL Amplifier Connections The recorder outputs digital audio signals in the bitstream format when you play a DVD video disc recorded on the Dolby Digital, DTS, MPEG1 and MPEG2 recording system. Analog 2ch: Select when connected to a TV or audio system via the pages 21, 25) analog audio jacks.
Basic Setup C: TV shape setting Select the picture shape according to the aspect ratio of your TV. OPEN/CLOSE DISPLAY FL SELECT DIMMER PROGRESSIVE ANGLE SUBTITLE AUDIO/SAP FREEZE 1 Press SETUP to display the setup menu. SETUP When it is already displayed, press the (To return to the previous menu) button. Start REMAIN REC MODE EXTEND ZOOM SETUP VOL TIMESLIP MUTE CH INPUT SELECT e.g. EASY NAVI TOP MENU 2 Press / to select “Display settings”, then press SELECT/ENTER.
SELECT/ ENTER / to select the picture shape. 4:3 LB: Select when a standard 4:3 TV is connected. Displays theatrical images with masking bars above and below the picture. 16:9 wide: Select when a 16:9 wide TV is connected. 5 Basic Setup 16:9 shrink: Select when a 16:9 wide TV is connected. When a 4:3 aspect ratio image has been elongated to 16:9 wide picture size, use this setting. Masking bars to the right and left appears. Connections 4:3 normal: Select when a standard 4:3 TV is connected.
Basic Setup D: Remote control settings Perform this step according to your preference and usage. Operating a TV with the remote control of this recorder The remote control of this recorder has a function to operate a TV. Preparation: Entering a brand code into the remote control MUTE 1 INPUT SELECT EASY NAVI TOP MENU MENU While holding QUICK MENU, press the number buttons to enter a corresponding brand code (see the next page) of your TV. e.g.
Brand code table 0001 0431 1611 2121 0081 0051 0851 0051 0851 0051 0161 0431 0691 2481 0251 2481 0041 0371 0741 2481 0051 0501 1431 0051 2381 0301 0811 1241 1741 2131 0631 0631 0101 0511 1321 0001 0621 2491 0051 0421 0971 0051 2491 0081 0051 0621 0051 0491 2231 0051 0001 0541 2301 1351 1801 0021 0831 1621 2461 0431 0381 1561 0391 1521 0111 0201 0521 1241 0071 0311 0411 0841 0851 1341 1681 1781 1951 2491 Philco Brand code 0051 0161 0271 0291 0361 0421 0501 0551 0621 0631 0661 0711 Philips 0051 0161 0271
Basic Setup D: Remote control settings (Continued) Operating the second and third TOSHIBA DVD video recorders with the remote control of this recorder Switches the codes to operate the recorder. If you use the second and third TOSHIBA DVD video recorders, set the different remote codes for each recorder to avoid confusion in the response of the recorders. Example: Setting this recorder’s remote control mode to DR 2, after another DVD recorder has been set to DR 1.
ANGLE SUBTITLE AUDIO/SAP FREEZE REMAIN REC MODE EXTEND ZOOM Setting up the remote control 5 While pressing Introduction DISPLAY FL SELECT DIMMER PROGRESSIVE , press 2. The remote control mode is set to ‘“DR 2”. SETUP VOL TIMESLIP MUTE CH INPUT SELECT MENU Connections EASY NAVI TOP MENU 2 TV DVD Select the same mode that you have set to the recorder.
Limited United States Warranty Digital Audio Video (“DAV”) Product-Depot Repair Warranty Toshiba America Consumer Products, L.L.C,. (“TACP”) makes the following limited warranties to original consumers in the United States. THESE LIMITED WARRANTIES EXTEND TO THE ORIGINAL CONSUMER PURCHASER OR ANY PERSON RECEIVING THIS DAV PRODUCT AS A GIFT FROM THE ORIGINAL CONSUMER PURCHASER AND TO NO OTHER PURCHASER OR TRANSFEREE. DAV PRODUCTS PURCHASED IN THE U.S.A. AND USED ANYWHERE OUTSIDE OF THE U.S.A.
How to Obtain Warranty Services (2) You must include a copy of original bill of sale or other proof of purchase along with the entire DAV Product to the Depot Warranty Repair Center specified by the TACP Consumer Solutions Center. You are responsible for all inbound transportation and insurance charges for the DAV Product to the Depot Warranty Repair Center specified by the TACP Consumer Solutions Center.
- IMPORTANT CANADIAN WARRANTY INFORMATION GARANTIE CANADIENNE STANDARD WARRANTY TYPE OF SET WARRANTY PERIOD DVD Player DVD/VCR Combination Home Theatre in a Box DVD Recorder Portable DVD 12 MONTHS CANADIAN WARRANTY Toshiba of Canada Limited (TCL) makes the following limited warranties to original consumers in Canada. Please retain your “Bill of Sale” as proof of purchase. To obtain a “Canadian Warranty” please register online at www.toshiba.ca.
Memo Introduction Connections Basic Setup 49
Memo 50
Memo Introduction Connections Basic Setup 51
Printed on 70% Recycled Paper Printed in China