Telecommunication Systems Division Digital Business Telephone Systems DKT2004-CT Cordless Digital Telephone User Guide October 2002
Publication Information Toshiba America Information Systems, Inc., Telecommunication Systems Division, reserves the right, without prior notice, to revise this information publication for any reason, including, but not limited to, utilization of new advances in the state of technical arts or to simply change the design of this document. Further, Toshiba America Information Systems, Inc.
TOSHIBA AMERICA INFORMATION SYSTEMS, INC. (“TAIS”) Telecommunication Systems Division License Agreement IMPORTANT: THIS LICENSE AGREEMENT (“AGREEMENT”) IS A LEGAL AGREEMENT BETWEEN YOU (“YOU”) AND TAIS. CAREFULLY READ THIS LICENSE AGREEMENT.
Toshiba America Information Systems, Inc. Telecommunication Systems Division Limited Warranty Toshiba America Information Systems, Inc., (“TAIS”) warrants that this voice processing equipment (except for fuses, lamps, and other consumables) will, upon delivery by TAIS or an authorized TAIS dealer to a retail customer in new condition, be free from defects in material and workmanship for twenty-four (24) months after delivery.
Contents Introduction Organization.........................................................................................................................v Conventions ........................................................................................................................vi Related Documents/Media................................................................................................ vii Chapter 1 – The Grand Tour Applications ......................................................
Contents Chapter 5 – Features Using the Handset ..............................................................................................................20 Charging the Handset.........................................................................................................20 Switching a Call to Your Cordless Digital Telephone.......................................................21 Switching a Call to the Desk Telephone...........................................................................
Contents Chapter 5 – Features Switching Between Calls................................................................................................42 ISDN Outgoing Calling .....................................................................................................43 Subaddress ......................................................................................................................43 Message Waiting......................................................................................
Contents Chapter 5 – Features iv Strata DKT2104-CT Cordless Digital Telephone 10/02
Introduction This guide describes the features and operation of the Toshiba DKT2004-CT 900 MHz Cordless Digital Telephone with Strata CTX Business Telephone Systems. To get the most from your cordless digital telephone, please read this guide thoroughly. The DKT2004-CT also works with Strata DK telephone systems (except Strata DK24/ 56/96, Release 3). Refer to the approriate user guide for your telephone system (see “Related Documents/Media” on page vii).
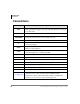
Introduction Conventions Conventions Conventions Description Note Elaborates specific items or references other information. Within some tables, general notes apply to the entire table and numbered notes apply to specific items. Important! Calls attention to important instructions or information. CAUTION! Advises you that hardware, software applications, or data could be damaged if the instructions are not followed closely.
Introduction Related Documents/Media Related Documents/Media Note Some documents listed here may appear in different versions on the CD-ROM or in print. To find the most current version, check the version/date in the Publication Information on the back of the document’s title page. Refer to the following for more information: • Strata CTX WinAdmin Application Software and Documentation Library For DKT2004-CT telephones connected to a Strata DK14, DK16e, DK16, DK24/56/ 96 (Release 4.
Introduction Related Documents/Media viii Strata DKT2004-CT Cordless Digital Telephone 10/02
The Grand Tour 1 Your cordless digital telephone is designed and engineered to work with your Toshiba digital telephone system and provide you with reliability, long life, and outstanding performance. The cordless digital telephone is compatible with all Strata CTX systems. All it requires for connection is a digital station port. Your cordless digital telephone uses digital 900 MHz spread-spectrum technology, which represents state-of-the-art design and engineering.
The Grand Tour Applications • +ROG button • Twenty-speed dial memory (stored in the telephone separate from 40 individual and system speed dial numbers) Your cordless digital telephone offers two different modes of operation. You can use it either in conjunction with a 3000/2000-series digital telephone, or on a stand-alone basis. When used with a DKT, both the cordless digital telephone and the DKT share the same digital station port on the PDKU. It also shares the same extension number.
The Grand Tour Benefits • Multi-line access is available on up to four programmable buttons. These buttons can be used for CO line appearances, multiple [DN] appearances, or features. If the cordless telephone is attached to a 3000/2000-series desk telephone, the four programmable buttons are the same as the first four buttons on the desk DKT. • Your cordless digital telephone rings to the same extension number as the regular DKT it is used with, enabling you to answer via either telephone.
The Grand Tour Cordless Digital Telephone Standard Parts Cordless Digital Telephone Standard Parts Your Toshiba cordless digital telephone includes the following items: • Handset • Base • AC Adapter • Two-foot phone cord • 400 mAh Rechargeable Battery • Belt Clip • User Guide If any of these items are missing, damaged or if you would like replacement parts, contact your System Administrator.
The Grand Tour Base Unit Controls and Functions Base Unit Controls and Functions Base Unit Antenna CHARGE LED BATT CHARGE LED POWER ON LED DESK Button/LED CORDLESS Button/LED 1398 AC Adapter Line In Line Out Strata DKT2004-CT Cordless Digital Telephone 10/02 5
The Grand Tour Features Features 6 • Super Long Range 900 MHz Spread Spectrum • 2-line, 10-digit LCD Display • Headset Jack • Ringer Volume Control • Handset Volume Control • Message Waiting LED • Single button access to Conference, Hold, Message Waiting, and Transfer features • Four Flexible Function Keys (First four keys of DKT port in Strata CTX) • 20-Number Memory Store and Search • Battery Charging System for Optional Standby Battery • 2-Way Handset Mounting • Vibration Ringer
Installation Important! 2 Your telephone system must be programmed for Auto Preference for your 7$/. button to work. If there is a shared digital telephone, you receive internal system dial tone automatically after picking up the handset of your deskset. It is best to set Auto Line Preference to access Intercom dial tone. Step 1: Review Safety Instructions This equipment contains a rechargeable Sealed Lead-Acid battery.
Installation Step 1: Review Safety Instructions CAUTION! To power your Toshiba DKT2004-CT Cordless base unit, use only UL Listed AC Adapter Model AD-960 Class 2 Power Supply. Ratings are: Input: 120VAC 14W Output: 10VDC 500mA ➤ Read and understand all instructions. ➤ Follow all warnings and instructions marked on the product. ➤ Unplug this product from the wall outlet before cleaning. Do not use liquid cleaners or aerosol cleaners. Use a dry cloth for cleaning.
Installation Step 1: Review Safety Instructions personnel under the following conditions: • When the power supply cord is damaged or frayed. • If liquid has been spilled into the product. • If the product has been exposed to rain or water. • If the product does not operate normally when following the operating instructions. Adjust only those controls that are covered by the operating instructions.
Installation Step 2: Select Location Important! ● ● ● ● Do not short circuit the battery. Residents of Minnesota should contact 1-800-225-PRBA for information concerning reclamation and disposal of Rechargeable Nickel-metal Hydride batteries. Residents outside of Minnesota should contact their local authorities for information concerning reclamation and disposal of Rechargeable Nickel-metal Hydride batteries. Charge the battery for 10 hours before using your new Cordless Digital Telephone.
Installation Step 3: Connect Telephone Cords Step 3: Connect Telephone Cords Your cordless digital telephone can be used as a stand-alone telephone or in conjunction with your deskset. There are two telephone line jacks on the back of the base unit of your cordless digital telephone: “Line In” and “Line Out.” You can connect your cordless digital telephone to both the telephone line and a Strata CTX digital telephone.
Installation Step 4: Connect and Apply Power to Base Unit 1145 1. Plug the AC adapter cord into the AC adapter input jack on the base unit. Line In to DKT Circuit AC Adapter Modular Cords BDKU/BDKS, PDKU2, RDSU (CTX100 and CTX670). ADKU (CTX100 only) Line Out to DKT 6056 CAUTION! Use only the AC adapter supplied with your cordless digital telephone. 2. Plug the AC adapter into a standard 120 VAC wall outlet. 3.
Installation Step 5: Attach Belt Clip to Handset (optional) Step 5: Attach Belt Clip to Handset (optional) MUTE Lanyard Clip s 1. Snap the tabs of the belt clip into the notches on the sides of the handset. 2. Use the belt clip to attach the handset to your belt or pocket for convenient portability. R/VOL s ➤ To attach the belt clip to the handset 1160 ➤ To remove the belt clip 1. Pry one tab at a time from the notch on the side of the handset. 2. Carefully lift the belt clip off.
Installation Removing and Charging Your Battery Pack Removing and Charging Your Battery Pack Important! Before using your new cordless digital telephone, the battery must be charged continuously for six to eight hours. ➤ To remove the handset’s battery pack 1. Press in on the battery pack release latch. 2. Slide the battery pack off the handset (shown right). Note You may have to pull hard to slide the battery pack off, when the handset is new. ➤ To charge the handset’s battery pack 1.
Installation Installing Optional Headset Tips on Extending Battery Pack Life All rechargeable nickel cadmium batteries can develop a “memory” (reduced charge capacity) caused by repeated charge and discharge cycles. Batteries that have developed this effect do not operate to their fullest capacity. ➤ To avoid memory effect, operate the unit until the battery pack is completely discharged before recharging. For example, use the handset off the base all day.
Installation Installing Optional Headset 16 Strata DKT2004-CT Cordless Digital Telephone 10/02
Configuration 3 This chapter explains how to enter the Programming Mode. Your cordless digital telephone can operate in either the DKT or the cordless mode and can be programmed whenever the telephone is idle. When entering the program mode during cordless operation, all calls coming to this station are ringback tone until the program mode is ended. Entering the program mode during DKT operation has no effect on current call status. Entering Program Mode 1. Remove the handset from the base unit. 2.
Configuration Entering Program Mode 8. Press 087( to step through the program steps in the reverse order. The LEDs above the ) ~) buttons indicate the current setting for each of the program steps. Each time the feature is entered and digit is pressed these LEDs change their indication. You see the following screens on the cordless LCD prompting you to configure your handset: PROGRAM R/VOL SOFT KEY ON MODE 0 SOFT KEY OFF MODE MUTE PASS MODE 70/71 0 REJECT MODE 70/71 MUTE RCV. LEVEL NORMAL 0 RCV.
4 The Handset This chapter covers the handset volume control and various functions related to the handset itself. Handset Volume Level ➤ Press the 5 92/ button on the side of the handset (shown right) while on a call to select a loud or soft volume level. R/VOL MUTE 1161 Ringer Volume Level ➤ While the telephone is idle, press the 5 92/ button on the side of the handset to select ring volume. When the handset is returned to the base, the ring volume automatically switches to RING HIGH.
The Handset Using the Handset Using the Handset ➤ Pick up the handset and press 7$/.. You may see “ACQUIRING LINK” on the LCD. When the cordless digital telephone communicates between the base unit and the handset, the screen goes to standby (shown right), and the telephone is ready to use. 1187 If you see “NO SERVICE” on the LCD when talking and the handset is at the range limit of your cordless digital telephone, do the following: ➤ During a call, move back in range within 20 seconds.
The Handset Switching a Call to Your Cordless Digital Telephone Switching a Call to Your Cordless Digital Telephone You can switch a call from the deskset to the cordless digital telephone or vice versa whether idle or talking. Note Transferring while idle or when calls are on hold results in a steady light (skipping the flashing state). ➤ To transfer an active call 1. Press &25'/(66 on the base unit. The CORDLESS LED flashes. 2. Pick up the handset and press 7$/.. The CORDLESS LED lights steady.
The Handset Switching a Call to the Desk Telephone Switching a Call to the Desk Telephone 1. Press '(6. on the base unit. The DESK LED flashes. 2. Pick up the handset on your desk telephone. The DESK LED lights steady. 3. Hang up your cordless digital telephone handset. Note If the cordless AC Adapter is unplugged or if the Strata CTX system is turned off, the mode automatically changes to the CORDLESS mode.
The Handset Using Memory Using Memory ➤ To store a number 1. Remove the handset from the base unit. 2. Press 0HP 'LDO. You hear a beep and see “PHONE#--”. 3. Enter the number (up to 16 digits) you want to store. 4. Press 0HP 'LDO. You see “MEMORY#--”. 5. Enter the number (01~20) for the memory location you want to use. You hear a confirmation beep and see the message. The telephone then returns to standby.
The Handset Using Memory ...or press a designated function key with a line assigned to it. For example: Press ) . Your cordless digital telephone then dials the previously stored number. If you select a memory location that does not have a stored number, the handset beeps rapidly and the telephone does not dial. 1245 3. Press 0HP 'LDO. 4. Enter the two-digit memory number (01~20) for that number from the keypad.
Features 5 This chapter gives you all of the cordless digital telephone features in alphabetical order beginning on page 25. Your cordless digital telephone provides many of the same features as a 3000-series corded digital telephone. In addition to the 0VJ +ROG, &RQI 7UQ and 0HP 'LDO functions, you can use your cordless digital telephone’s ) ~) buttons to invoke the features listed below or to gain multiple-line access.
Features Account Code Calls Verified/Non-Verified Account Codes If programmed for Verified Account Codes, the system checks the account code you entered against a list created by the CTX System Administrator. The code you enter must be on the list for the call to proceed. Non-verified account codes must be of a uniform length specified by the CTX System Administrator. Forced Account Codes Some applications require you to enter an Account Code.
Features Automatic Busy Redial Voluntary Account Codes (Verified/Non-Verified) Voluntary Account Codes are optional. They can be entered during a call and are used for tracking selected calls using SMDR call detail recording option. If the system is set for Verified Account Codes, station users must enter a specific code when entering the Voluntary Account Code(s) or the code is not validated for the SMDR call report. This does not affect the call.
Features Automatic Callback Automatic Callback When you reach a busy station, you can set Automatic Callback to have the system monitor the busy extension and notify you when it becomes idle. Automatic Callback can also place you in queue for an available outside line, if you reach a line group in which all lines are busy. When a station or line becomes available, the system rings your telephone. Then when you answer, it automatically rings the intended destination.
Features Auto Redial Auto Redial This feature enables you to automatically redial the last number (outside or [DN]) called by pressing 5HGLDO. 5HGLDO must be programmed as one of the four flexible buttons on the telephone. 1. Press an available [DN] or /LQH. Make sure that you press the same [DN] or /LQH that you used to dial the telephone number that you wish to redial. You hear dial tone. 2. Press 5HGLDO. The last telephone number you dialed is automatically redialed.
Features Call Forward Call Forward Categories You can set Call Forward for the following categories of calls. Within these categories, you can use five different types of Call Forward Settings. • Call Forward Any Call – Forwards any call, whether an internal call or incoming line call. • Call Forward - Incoming Line – Forward incoming line calls only. • Call Forward Any Call - Set for Another Station – Enables you to forward all calls for another telephone within your telephone system.
Features Call Forward • Call Forward Busy/Do Not Disturb/No Answer – Forwards all calls to your station whenever you are busy, in the DND mode, or after ringing and you do not answer the call within a designated time (set by you when you enable the feature). • Call Forward Cancel – Cancels the set Call Forward feature. Notice that each category of Call Forward has a different code for canceling. Station Call Forward Procedures The following table contains Call Forward Button sequences.
Features Call Forward Table 2 Call Forward Procedure Feature Button Sequence Call Forward Any Call - Internal and Incoming Line Calls: Forwards any call, whether an internal call or incoming line call. All Calls Extension button + (Tone) + Destination No. (Tone) Busy Extension button + (Tone) + Dest. No. (Tone) No Answer Extension button + (Tone) + Dest. No. (Tone) + Timer + Busy No Answer Extension button + + Dest. No.
Features Call Park Orbits Table 2 Call Forward Procedure (continued) Feature Button Sequence Call Forward - Incoming Line Call - Set for Another Station: Enables you to set forwarding of incoming line calls for another telephone within your telephone system All Calls Extension button + (Tone) + ext. no. + Pass Code + (Tone) + Dest. No. (Tone) + Busy Extension button + (Tone) + ext. no. + Pass Code + (Tone) + Dest. No. (Tone) + No Answer Extension button + (Tone) + ext.
Features Call Park Orbits If you park a call and it is not retrieved, it will recall to the parking station and one of the following occurs: • • If your station is idle when the system Call Park recall timer expires, the parked call automatically recalls to your station. If your station is busy, the parked call camps on. If you have an LCD telephone, you can let the system automatically select an available orbit number which displays on your LCD. ➤ To park a call 1.
Features Call Pickup Call Pickup You can pick up a call that is ringing another station’s extension, a call placed on hold at another station and other types of calls. When you pick up an internal call, the calling station and the called station displays on your LCD. Group Pickup Stations can be assigned in system programming to Pickup Groups.
Features Call Pickup Table 3 Call Pickup Feature Codes (continued) For Calls On Hold: Dialing Local Retrieve + Primary Remote Retrieve Ext. No. Description Picks up a call held on the telephone from which it is dialed. Retrieves a call held on the telephone specified extension number. Outside Line Retrieve + Outside Line No. (1~128) Picks up a call held on the specified CO line regardless of the telephone placing the call on hold. Must enter three digits (e.g., 007).
Features Call Waiting Call Waiting Call Waiting places an incoming call in queue and alerts you with a warning tone. The [DN] or Line LED flashes at the on-hold rate. 1. If you are talking, press +2/' ...or the flashing [DN]. The call you are on is placed on hold and you are connected to the waiting call. The [DN] or /LQH LED lights steady. ...or /LQH if your telephone has the Auto Hold feature. See your System Administrator to find out if you have Auto Hold. ...or the ringing [DN] or /LQH.
Features Do Not Disturb Do Not Disturb If your station is in Do Not Disturb (DND) mode, internal, external and transferred calls do not ring your station and Off-hook Call Announce calls are denied. You can continue to make calls while in the DND mode. When originating a call in DND mode, you will hear a short burst of interrupted dial tone followed by continuous dial tone. You can start dialing at any time during either tone.
Features Door Lock(s) ➤ To deactivate DND for another extension ➤ Enter (hear Entry Tone) + the Primary extension of the remote extension + the pass code + (hear Success Tone). This removes DND from the target telephone. ➤ To change your DND Pass Code ➤ Enter (hear Entry Tone) + ext. no. (hear Entry Tone) + old pass code + (hear Entry Tone) + new pass code + (hear Success Tone). If you activate DND while a call is ringing, the ringing stops.
Features Door Phone(s) Door Phone(s) Door phones can be used to call telephones selected in system programming. When a door phone calls, you hear a distinctive ringing tone, one or five times (set in system programming). You can also call a door phone and monitor the surrounding area. The number of possible door phones varies by Strata CTX system, with up to 24 as the maximum for larger systems. LCD telephones display the door phone name ID when calls are made to or from door phones.
Features Emergency Ringdown ➤ To call/monitor a door phone 1. With the handset off-hook, press a extension. You hear dial tone and the LED flashes green (in-use). 2. Press + extension for the door location. A two-way talk-path exists between your telephone and the called door phone. You can audibly monitor the area around the door phone. ➤ To call from a door phone 1. Press the door phone button and then release it. You hear a distinctive ringing tone–one or five times (set in system programming). 2.
Features Held Calls Retrieving Held Calls ➤ Press /LQH or the [DN] that is on hold. The Line or [DN] LED flashes at the onhold rate. H O L D N O . 6 7 5 3 talk Using Automatic Hold Automatic Hold enables you to place a call on hold by pressing another /LQH or [DN]. You do not have to press +2/'. You can also switch between a new and the original call without having to press +2/'. Automatic Hold is assigned on a station-bystation basis in system programming.
Features ISDN Outgoing Calling ISDN Outgoing Calling This feature enables calling over Integrated Services Digital Network (ISDN) trunks, provided that you are connected to a Strata CTX and that you subscribe to ISDN lines. ISDN trunks offer faster call connection setup and more connection circuits. An ISDN call is initiated automatically with a timer or with a start sequence. The method depends on your system’s programming. See your System Administrator to determine the method. 1.
Features Message Waiting Message Waiting Use your 0VJ LED/button and LCD to see/retrieve message(s). An extension can receive up to four simultaneous Message Waiting indications and LCD messages. One message is reserved for the Message Center. Your phone can be programmed to have up to four additional (flexible) Message Waiting buttons/LEDs. Ask and check mark if these buttons have been programmed on your phone. If so, substitute them when the 0VJ button/LED is mentioned in the following steps.
Features Off-hook Call Announce Off-hook Call Announce Off-hook Call Announce (OCA) enables you to complete a call to a busy digital telephone. Your telephone must be programmed to either announce automatically or to announce after you press a button on your dial pad. The destination telephone must be programmed to accept an OCA. The announcement may be delivered over the handset or the speaker. Handset OCA can operate on any digital telephone.
Features Override Calls Do Not Disturb Override Do Not Disturb (DND) Override lets you send a call waiting tone or ringing to a station in DND mode to indicate that a call is coming in. Your telephone may be programmed to block DND Override from other telephones. Your station’s LCD shows the station you have called is in the DND mode. OCA is possible to DND stations from stations that are programmed for DND Override. ➤ To use DND Override ➤ After reaching a station in DND mode, press .
Features Paging Class of Service Override By dialing a Class of Service Override code, a user can change a station’s set of privileges to one associated with the override code. When the call is terminated and another is attempted from the same station, the original Class of Service is applied. This allows selected users to override restrictions that are placed on any telephone in the system. ➤ To perform Class of Service Override 1. Access an outside line.
Features Paging ➤ To make a Group Page ➤ Press *URXS 3DJH and enter the Group number (01~16) ...or press extension + and enter the zone number. Answering a Page ➤ To answer a Group Page, lift the handset off-hook, press extension + and enter the Group number. ➤ To answer an External Group Page, lift the handset off-hook, press extension + and enter the Group number. All Call Page You can make an All Call Page to telephones assigned to the “All Call Page Group.
Features Privacy Privacy Privacy controls the ability of more than one person to use the same extension or CO line at the same time. Privacy applies to multiple appearances of extensions, Phantom extensions, outside Lines and outside Line Group buttons.The application of Privacy to individual telephones is controlled in system programming. By default, the system is private.
Features Release and Answer Release and Answer This feature enables you to automatically disconnect or transfer an active call and answer a new call with the push of a button, instead of with the handset. Note Your telephone must be programmed with 5HOHDVH DQG $QV. ➤ Press the 5HOHDVH DQG $QV. The Line or [DN] LED flashes to indicate a new incoming call while you are connected to the existing call. You hear a muted, Busy Override or Camp-on-busy tone.
Features Tone/Pulse Dialing Making a Call Using Speed Dial 1. Dial ...or press 6SGLDO 2. Then, dial the Station or System Speed Dial Number. Station Speed Dial numbers occupy numbers 100~199. System Speed Dial numbers occupy numbers 200~999. Tone/Pulse Dialing With some older Central Offices, you may have to make calls on outside lines programmed for rotary dial pulses.
Features Voice Mail - Direct Transfer 3. Enter the VM mailbox number (usually the same as the extension number), then press . The call transfers immediately and your extension becomes idle.
A Feature Access Codes This appendix contains Feature Access Codes which are entered as a sequence on your telephone to use a particular feature. Also, the Call Forward Feature Access Codes sometimes have special requirements for entering a destination and a timer. Refer to “To use the Call Forward button sequence” on page 31 for more details on these entries.
Feature Access Codes Voice Mail - Direct Transfer Table 4 Feature Access Codes (continued) Feature Feature Access Code Sequences Call Forward - External (Outside) Calls All Call Ext. button + + Dest. No. Busy Ext. button + + Dest. No. No Answer Ext. button + + Dest. No. + Timer + Busy No Answer Ext. button + + Dest. No. + Timer + Cancel Ext. button + Call Forward - Remote Activation All Call Ext. button + + ext. no. + Pass Code + + Dest. No.
Feature Access Codes Voice Mail - Direct Transfer Table 4 Feature Access Codes (continued) Feature Feature Access Code Sequences Call Pickup Incoming - Group Pickup Ext. button + Incoming - Directed Terminal Pickup Ext. button + + Ext. Number to be picked up Incoming - Directed Group Pickup Ext. button + + Group Number to be picked up Incoming - Directed Extension Pickup Ext. button + + Ext. Number On hold - Local Retrieve Ext.
Feature Access Codes Voice Mail - Direct Transfer Table 4 Feature Access Codes (continued) Feature Feature Access Code Sequences LCD Language (Change) LCR (Outgoing Call) + Language No. Message Waiting (MW) Release a received MW Retrieve a received MW Activate MW at another Station without Ringing + Ext. no. Cancel MW at another Station without Ringing + Ext. no.
Feature Access Codes Voice Mail - Direct Transfer Table 4 Feature Access Codes (continued) Feature Speed Dial Register Station (00~99) System Feature Access Code Sequences + Index Number (00~99) + Index Number (000~099) + Index Number (100~199) + Index Number (200~299) + Index Number (300~399) + Index Number (400~499) + Index Number (500~599) + Index Number (600~699) + Index Number (700~799) Start Application Substitution of Dial “ ” Substitution of Dia
Feature Access Codes Voice Mail - Direct Transfer 58 Strata DKT2004-CT Cordless Digital Telephone 10/02
Troubleshooting and Specifications B This appendix contains additional information for your cordless digital telephone.
Troubleshooting and Specifications Troubleshooting Troubleshooting If your cordless telephone is not performing to your expectations, try these suggestions. If you are still unable to resolve the problems, contact your telephone system administrator. Do not attempt to service this unit yourself. All service must be done by qualified service personnel. Problem Suggestion Make sure the AC adapter is plugged into the base unit and wall outlet.
Troubleshooting and Specifications Range and Performance Range and Performance The cordless digital telephone is designed to operate up to 1.1 miles from the base in a completely unrestricted test environment. Typically, ranges of 300 to 400 feet are possible, depending upon the structure of the building the telephone is used in.
Troubleshooting and Specifications Radio Interference Radio Interference Radio interference may occasionally interrupt your conversations. When this happens, remember that your unit is not defective. If these noises continue, and are too distracting, move to a different location while you are talking on the telephone. (As noted in the preceding Range section, you may need to move the base unit as well.) If the situation persists, contact your telephone system administrator.
Index A C about this book related documents, vii access codes, 53 account code, 53 calls, 25 forced account codes (verified/nonverified), 26 account code calls, 25 advisory messaging, 56 all call page, 48 attendant console, 29, 53 automatic busy redial, 53 callback, 29 callback cancel, 53 hold, 42 auto preference, 7 call B background music (BGM), 53 base unit controls and functions, 5 battery, 14 charging extra packs, 14 extending life, 15 removing and charging, 14 busy override, 45 Strata DKT2004-CT C
Index E~P DISA security code, 55 do not disturb, 38, 55 override, 46 door lock, 39 control, 55 door phone, 40 calling, 55 DSS, 37 L E memory, 20 message waiting, 37, 44, 56 messaging, 44 advisory, 56 Msg button/LED, 44 emergency call, 55 page, 48 erase a stored number, 23 executive override, 46 F feature access codes, 53 features, 6 flash, 55 forced account codes (verified/nonverified), 26 M N name⁄number display, 43 night ring answer, 56 O handset, 19, 20 charging, 20 volume level, 19 off-hook c
Index R~V privacy, 49 on-line, 47 override, 47 private network access, 56 R radio interference, 62 range, 61 release and answer, 50 repeat last number dialed, 56 ringer volume level, 19 V voice mail access codes, 57 direct transfer, 51 volume control, 57 voluntary account codes (verified/nonverified), 27 S simultaneous conversation channels, 61 specifications, 62 speed dial, 50 access codes, 57 spread spectrum technology, 1 start (ISDN button), 43 start application, 57 store a number, 23 sub (subaddress