726+,%$ Telecommunication Systems Division Digital Business Telephone Systems DK Admin/DK Backup Release 4 User Guide March 1999
Publication Information Toshiba America Information Systems, Inc., Telecommunication Systems Division, reserves the right, without prior notice, to revise this information publication for any reason, including, but not limited to, utilization of new advances in the state of technical arts or to simply change the design of this document. Further, Toshiba America Information Systems, Inc.
Contents Introduction Organization..........................................................................................................................................vii Conventions..........................................................................................................................................viii Screen Variations...........................................................................................................................viii Related Documentation...............
DOS Only PC from CD-ROM........................................................................................................ 21 DOS only PC from Floppy Disks ................................................................................................... 21 Step 5: Run DKBackup Program ........................................................................................................ 22 Start-up DKBackup under Windows 3.11, 95, 98 or Windows NT 4.0.........................................
Speed Dial Programming Section ......................................................................................................... 68 System Speed Dial Numbers .......................................................................................................... 68 Station Speed Dial Numbers........................................................................................................... 69 ACD Administration ................................................................................
Direct Connection to Strata DK .......................................................................................................... 130 Connection to Strata DK Via Toshiba Data Interface Units...................................................................................................................... 131 Customer Dialer Setup.................................................................................................................. 131 To Make Connection ................................
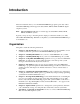
Introduction This User Guide introduces you to the DKAdmin/DKBackup programs (previously called 280Admin/280Backup) which support the Strata DK14, DK16e, DK40 and DK424 digital telephone systems. Note DKAdmin/DKBackup Release 4 software supports Strata DK14, DK16e, DK40, DK280 and DK424 systems. It guides you step-by-step to mastering the few simple procedures that enable you to fully utilize DKAdmin/DKBackup. With this accomplished, you will find DKAdmin/DKBackup to be invaluable tools.
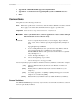
Conventions ––––––––––––––––––––––––––––––––––––––––––––––––––––––––––––––––––––––––––––––––––– ♦ Appendix B – DK424 RCTUE/F Upgrade Using DKAdmin ♦ Appendix C – Considerations for Upgrading DK Systems to DK424 Release 4.0 ♦ Index Conventions This guide uses the following conventions: Note Elaborates specific items or references other information. Within some tables, General Notes apply to the entire table and numbered Notes apply to specific items.
––––––––––––––––––––––––––––––––––––––––––––––––––––––––––––––––––––––––– Related Documentation Related Documentation The following documents can be used to reference more information about the Strata DK systems. ♦ Strata DK Programming Manual provides all instructions necessary to program the system and system record sheets. ♦ Strata DK Installation & Maintenance Manual provides installation instructions for configuring and installing the Strata DK14, DK16e, DK40 and DK424.
How To Use This Manual ––––––––––––––––––––––––––––––––––––––––––––––––––––––––––––––––––––––––– x DKAdmin/DKBackup
The Grand Tour 1 Important! ● ● DKAdmin/DKBackup support all releases of the Strata DK14, DK16e, DK40, DK280, and DK424 (all processors). This guide refers to these systems as Strata DK systems. DKAdmin/DKBackup programs do not support Strata DK8, DK16, or any DK24/56/96 releases. The Toshiba Strata DK systems are powerful, state-of-the-art modular digital key/hybrid/PBX telephone systems offering customers outstanding performance and flexibility.
Basic Operations ––––––––––––––––––––––––––––––––––––––––––––––––––––––––––––––––––––––––––––––– ♦ Voice mail message waiting ID codes ♦ Station and system speed dial memos ♦ Station and system LCD messages ♦ Station feature options ♦ CO line to station ringing and access assignments ♦ Flexible button assignments ♦ Directory number call forward status (Release 3 or above) ♦ Directory number message waiting status (Release 3 or above) ♦ ANI/Caller ID lost call telephone numbers (Release 3 o
–––––––––––––––––––––––––––––––––––––––––––––––––––––––––––––––––––––––––––––– Basic Operations The table below lists the options for each menu. A check mark (✓) appears next to the functions which are available on that menu: Table 1 Main Menu Options Main Menu DKAdmin DKBackup Select Customer Select a customer for whom you wish to program or update Strata DK system data. ✓ ✓ Maintain Customer File Create a new customer or update an existing customer’s basic file information.
Screen Conventions –––––––––––––––––––––––––––––––––––––––––––––––––––––––––––––––––––––––––––– Table 1 Main Menu Options (continued) DKAdmin Main Menu DKBackup Distributed Hunt Group Administration Maintain Distributed Hunt Group assignments. ✓ E911/CAMA Trunk Programs (R4 Only) Maintain E911/CAMA trunk assignments. ✓ ISDN Programs (R4 Only) Maintain ISDN program assignments. ✓ Call Forward Assignments Maintain call forward assignments.
–––––––––––––––––––––––––––––––––––––––––––––––––––––––––––––––––––––––––––– Screen Conventions ♦ Find feature: Many of the screens in the DKAdmin/DKBackup programs have a Find feature for customer IDs, program numbers, or port numbers. To use the feature, highlight the number field you are searching (e.g., program number) and type the desired number. The DKAdmin/DKBackup programs move the highlighter to the field requested.
Screen Conventions –––––––––––––––––––––––––––––––––––––––––––––––––––––––––––––––––––––––––––– 6 DKAdmin/DKBackup
Installing DKAdmin 2 Step 1: Check System Requirements For optimum performance, run DKAdmin on a personal computer with the following minimum specifications: ♦ IBM-compatible Pentium® personal computer ♦ 100MB or larger hard drive ♦ CD-ROM or 3.5" 1.44KB high-density floppy drive Note DKAdmin software is distributed on a CD-ROM disk. Installation can be performed using the CD-ROM disk or from floppy disk(s) copied from the CD-ROM DKAdmin install program.
Step 2: Power Up DKAdmin PC ––––––––––––––––––––––––––––––––––––––––––––––––––––––––––––––––––– ● ● ● From C:\280ADMIN\Data, type del *.ntx and press Enter. ● From C:\280ADMIN\XXX.DK, type del *.ntx and press Enter. Run ReIndex Files under Options/System Utilities Menu each time before you start to use DKAdmin. Always exit DKAdmin before you turn your computer off.
––––––––––––––––––––––––––––––––––––––––––––––––––––– Step 3: (Optional) Make Installation Floppy Disks Step 3: (Optional) Make Installation Floppy Disks From Windows If you wish to install DKAdmin on a PC that does not have a CD-ROM, you will need to make installation floppies from a PC that has a CD-ROM. You can make installation disks that install the program using a Windows application (this works on all PCs with Windows 3.x, 95, 98 or Windows NT) or you can make DOS only installation disks.
Step 4: Install DKAdmin ––––––––––––––––––––––––––––––––––––––––––––––––––––––––––––––––––––––––– Step 4: Install DKAdmin DKAdmin is a DOS application program that can be installed and run in either DOS or as a Windows DOS session. CAUTION! If any earlier DKAdmin (280Admin) release is already installed on the PC, do not delete it; install DKAdmin Release 4.XX over the existing DKAdmin (280Admin) version as described below.
––––––––––––––––––––––––––––––––––––––––––––––––––––––––––––––––––––––––– Step 4: Install DKAdmin Notes ● ● If you installed DKAdmin for the first time, a 280ADMIN directory was created and the DKAdmin files copied to it. If you upgraded an existing DKAdmin program, your customer database has been maintained in the 280ADMIN directory. DOS Only PC from CD-ROM In the rare case your DOS only PC has a CD-ROM, follow these steps: 1. Insert the CD-ROM into your CD-ROM drive.
Step 5: Run DKAdmin Program ––––––––––––––––––––––––––––––––––––––––––––––––––––––––––––––––––– ● ● If you upgraded an existing DKAdmin program, your customer database has been maintained in the 280ADMIN directory. If your Config.sys file is changed and you have problems with the new file when you reboot your computer, restore the original file (i.e., Config. bak). Step 5: Run DKAdmin Program Note Running the program under Windows 95, 98 or Windows NT is recommended for the best performance.
––––––––––––––––––––––––––––––––––––––––––––––––––––––––––––––––––– Step 5: Run DKAdmin Program 6. Highlight Yes and press Enter. If you choose No, your new passwords are not installed on the disk. 7. A “Copy to Drive” dialog box displays. The box defaults to drive A:. If you do not want drive A:, type the drive letter to which you wish to copy the installation information. Press Enter. A dialog box displays asking you to insert the DKAdmin Installation Disk #1 into the appropriate disk drive. 8.
Step 5: Run DKAdmin Program ––––––––––––––––––––––––––––––––––––––––––––––––––––––––––––––––––– 6. From Advanced Program Settings screen (shown at right), check only the Suggest MS-DOS mode as necessary option. Click on OK. Note Other screen settings should not be selected. 7. Select the Memory Tab screen (shown at right). All fields should read Auto. If you make changes, click on OK. 8. Select the Screen Tab screen (shown at right).
–––––––––––––––––––––––––––––––––––––––––––––––––– Step 6: Connect to the Strata DK Telephone System 9. Select the Misc Tab screen (shown at right). 10. Only the items in the Termination, Other and Windows shortcut keys boxes should be selected. NoteIt is best not to allow screen savers. If you make changes, click on Apply. 11. Close the DKAdmin Properties dialog box and return to Step 3 of “Start-up DKAdmin under Windows 98, 95 or Windows NT 4.0” on Page 12.
Step 6: Connect to the Strata DK Telephone System ––––––––––––––––––––––––––––––––––––––––––––––––––– 16 DKAdmin/DKBackup
Installing DKBackup 3 Step 1: Check System Requirements For optimum performance, run DKBackup on a personal computer with the following minimum specifications: ♦ IBM-compatible 386/486 personal computer or higher level ♦ 20MB or larger hard drive ♦ CD-ROM or 3.5" 1.44KB high-density floppy drive Note DKBackup software is distributed on a CD-ROM disk. Installation can be performed using the CD-ROM disk or from floppy disk(s) copied from the CD-ROM DKBackup install program.
Step 2: Power Up DKBackup PC –––––––––––––––––––––––––––––––––––––––––––––––––––––––––––––––––– ● ● ● From C:\280BCKUP\Data, type del *.ntx and press Enter. ● From C:\280BCKUP\XXX.DK, type del *.ntx and press Enter. Run “ReIndex Files” under Options/System Utilities Menu each time before you start to use DKBackup. Always exit DKBackup before you turn your computer off.
––––––––––––––––––––––––––––––––––––––––––––––––––––– Step 3: (Optional) Make Installation Floppy Disks Step 3: (Optional) Make Installation Floppy Disks From Windows If you wish to install DKBackup on a PC that does not have a CD-ROM, you will need to make installation floppies from a PC that has a CD-ROM. You can make installation disks that install the program using a Windows application (this works on all PCs with Windows 3.x, 95, 98 or Windows NT) or you can make DOS only installation disks.
Step 4: Install DKBackup –––––––––––––––––––––––––––––––––––––––––––––––––––––––––––––––––––––––– Step 4: Install DKBackup DKBackup is a DOS application program that can be installed and run in either DOS or as a Windows DOS session. CAUTION! If any earlier DKBackup (280Backup) release is already installed on the PC, do not delete it; install DKBackup Release 4.XX over the existing DKBackup (280Backup) version as described below.
–––––––––––––––––––––––––––––––––––––––––––––––––––––––––––––––––––––––– Step 4: Install DKBackup Notes ● ● If you installed DKBackup for the first time, a 280BCKUP directory was created and the DKBackup files copied to it. If you upgraded an existing DKBackup program, your customer database has been maintained in the 280BCKUP directory. DOS Only PC from CD-ROM In the rare case your DOS only PC has a CD-ROM, follow these steps: 1. Insert the CD-ROM into your CDROM drive.
Step 5: Run DKBackup Program –––––––––––––––––––––––––––––––––––––––––––––––––––––––––––––––––– Notes ● ● ● If you installed DKBackup for the first time, a 280BCKUP directory was created and the DKBackup files copied to it. If you upgraded an existing DKBackup program, your customer database has been maintained in the 280BCKUP directory. If your Config.sys file is changed and you have problems with the new file when you reboot your computer, restore the original file (i.e., Config. bak).
–––––––––––––––––––––––––––––––––––––––––––––––––––––––––––––––––– Step 5: Run DKBackup Program 5. After completing your password setup, press Esc. The message Do You Want To Copy User File Back On The Installation Disk? displays. 6. Highlight Yes and press Enter. If you choose No, your new passwords are not installed on the disk. 7. A “Copy to Drive” dialog box displays. The box defaults to drive A:. If you do not want drive A:, type the drive letter to which you wish to copy the installation information.
Step 5: Run DKBackup Program –––––––––––––––––––––––––––––––––––––––––––––––––––––––––––––––––– 6. From Advanced Program Settings screen (shown at right), check only the Suggest MS-DOS mode as necessary option. Click on OK. Note Other screen settings should not be selected. 7. Select the Memory Tab screen (shown at right). All fields should read Auto. If you make changes, click on OK. 8. Select the Screen Tab screen (shown at right).
–––––––––––––––––––––––––––––––––––––––––––––––––– Step 6: Connect to the Strata DK Telephone System 9. Select the Misc Tab screen (shown at right). 10. Only the items in the Termination, Other and Windows shortcut keys boxes should be selected. NoteIt is best not to allow screen savers. If you make changes, click on Apply. 11. Close the DKBackup Properties dialog box and return to Step 3 of “Start-up DKBackup under Windows 3.11, 95, 98 or Windows NT 4.0” on Page 22.
Step 6: Connect to the Strata DK Telephone System ––––––––––––––––––––––––––––––––––––––––––––––––––– 26 DKAdmin/DKBackup
Using DKAdmin/DKBackup 4 This chapter shows you how to log on and off DKAdmin/DKBackup, use the pull-down menus and select system options, respond to system and error messages, and describes the keyboard conventions used in the programs. Before You Start Before using DKAdmin/DKBackup, you must: ♦ Connect your personal computer to a Strata DK in order to send/receive data between the DKAdmin/DKBackup PC and a Strata DK (see Appendix A – Connecting to Strata DK for procedures).
Logging On ––––––––––––––––––––––––––––––––––––––––––––––––––––––––––––––––––––––––––––––––––– If you have entered your User ID and password correctly, the DKAdmin Main Menu displays (shown right). All DKAdmin activity originates from the DKAdmin Main Menu. The three items across the DKAdmin Main Menu bar (i.e., File, Administration, Options) enable you to perform the many functions shown in Figure 5. Some items may not be available for selection, depending on your assigned User ID and password.
––––––––––––––––––––––––––––––––––––––––––––––––––––––––––––––––––––––––––––––––––– Logging On File Select Customer Maintain Customer File Dial DK Hangup Connection Transfer DK Data About Exit Administration View Cabinet Diagram Check Processor Type System/Station Administration Flexible Key Programming Section Speed Dial Programming Section ACD Administration Section Telephone Flexible Button Assignments Add-on Module Button Assignments DSS Console Button Assignments Attendant Console Flexible Button
Logging On ––––––––––––––––––––––––––––––––––––––––––––––––––––––––––––––––––––––––––––––––––– DKBackup ➤ To log on to DKBackup 1. After powering up your computer, at the C:\ prompt type CD 280BCKUP and press Enter. 2. From the C:\280BCKUP prompt, type dkbckup and press Enter. The Toshiba start-up page displays (shown right). 3. Type your User ID and press Enter. 4. Type your password and press Enter. If you have entered your User ID and password correctly, the DKBackup Main Menu displays (shown right).
–––––––––––––––––––––––––––––––––––––––––––––––––––––––––––––––––––––––––– Keyboard Conventions File Select Customer Maintain Customer File Dial DK Hangup Connection Transfer DK Data About Exit Backup Check Processor Type Backup/Restore Data View/Print Data Options System Installation Systems Utilities Screen Type/Color Installation Printer Type Selection System Miscellaneous Variables User Password Level Setup Communications Setup ReIndex Files 1088DK Figure 5 DKBackup Main Menu Options Keyboard
Using the Pull-Down Menus –––––––––––––––––––––––––––––––––––––––––––––––––––––––––––––––––––––– Using the Pull-Down Menus You can perform all basic operations from the Main Menu’s menu bar. When you select an item in the menu bar, a “pull-down” options menu appears, listing all the functions which you can perform (shown right). ➤ To use a pull-down menu 1. Use the left/right arrow keys to highlight the item and press Enter.
––––––––––––––––––––––––––––––––––––––––––––––––––––––––––––––––––––––––––––––––––– Logging Off Logging Off ➤ To exit the DKAdmin/DKBackup system 1. Return to the DKAdmin/DKBackup Main Menu by pressing Esc until the Main Menu displays. 2. Highlight the File Menu option and press Enter, or type f. 3. Highlight Exit and press Enter, or type x. DKAdmin/DKBackup shuts down and returns the screen to a DOS prompt. CAUTION! Always exit the program properly before turning off your DKAdmin/ DKBackup PC.
Logging Off ––––––––––––––––––––––––––––––––––––––––––––––––––––––––––––––––––––––––––––––––––– 34 DKAdmin/DKBackup
File Menu 5 This chapter gives you step-by-step instructions on using the options available on the File Menu. The options are: ♦ Select Customer ♦ Maintain Customer File ♦ Dial DK ♦ Hangup Connection ♦ Transfer DK Data ♦ About ♦ Exit Quick-start Procedures for Using DKAdmin For an Existing Customer ➤ To quickly use DKAdmin with a previously programmed Strata DK 1. Create a new customer record, using the Maintain Customer File option from the File Menu. 2.
Maintain Customer File –––––––––––––––––––––––––––––––––––––––––––––––––––––––––––––––––––––––––– For a New Customer ➤ To quickly use DKAdmin with a new installation of Strata DK 1. Create a new customer record, using the Maintain Customer File option from the File Menu. 2. Select the newly created customer, using the Select Customer option from the File Menu. 3. Program the customer DK data, using the ACD Administration Section and Program Administration Section options from the Administration Menu. 4.
–––––––––––––––––––––––––––––––––––––––––––––––––––––––––––––––––––––––––– Maintain Customer File ➤ To create a customer record or upgrade a customer’s processor 1. Press Ins to insert a record. A blank Customer File Maintenance Screen displays (shown right). 2. See Table 2 for a description of the fields on this screen. Press Enter after each entry. Table 2 Customer File Maintenance Screen Fields Field Description Customer ID Enter a unique customer ID, using up to eight alphanumeric characters.
Maintain Customer File –––––––––––––––––––––––––––––––––––––––––––––––––––––––––––––––––––––––––– Table 2 Customer File Maintenance Screen Fields (continued) Field Description After Connect Enter the After Connect String when calling into a Strata DK modem pool (see Figure 20 on Page 135). It is recommended that you enter AT~~~ATDDYYY as the After Connect string (where YYY is the extension number of the PDIU-DS connected to the Strata DK TTY port).
––––––––––––––––––––––––––––––––––––––––––––––––––––––––––––––––––––––––––––––– Select Customer Table 2 Customer File Maintenance Screen Fields (continued) Field Description 280BCKUP 1.0 Conversion Directory If you chose “Upgrade Installation Only” when installing the DKAdmin/DKBackup program, this field appears on your screen. It is no longer supported by the programs and should not be used. Note See Appendix A – Connecting to Strata DK for DIU, modem, and After Connect dial settings. 3.
Dial DK –––––––––––––––––––––––––––––––––––––––––––––––––––––––––––––––––––––––––––––––––––––– 2. Press Enter and the Customer List displays. 3. Highlight the desired customer, and press Enter. The DKAdmin/DKBackup Main Menu displays. Note If you have multiple customers, you can use the Find function to move quickly to another customer by typing the first letter of the Customer ID number. The program highlights the first customer which matches your entry.
–––––––––––––––––––––––––––––––––––––––––––––––––––––––––––––––––––––––––––––––––––––– Dial DK Important! ● ● ● In order for the DKAdmin/DKBackup Backup/Restore Data option to operate if you are using an IMDU or RMDS modem, Program 77-1, LED 14 must be “ON.” (See Prg 77-1 LED 15 for RMDS bps rate in the Strata DK Programming Manual.) The DKAdmin/DKBackup hardware key (green or red) must be installed whenever using the DKAdmin/DKBackup program (see the figure in Substep 6 on Page 2-4).
Hangup Connection ––––––––––––––––––––––––––––––––––––––––––––––––––––––––––––––––––––––––––––– 3. Pressing Enter from the last field on the screen, saves the new information and returns you to the Customer List screen. Pressing Esc, exits the screen without saving the changes and returns you to the Customer List screen. Hangup Connection ➤ To close the DK communications link 1. Type f and the File Menu displays. 2.
Administration Menu (DKAdmin) Note 6 The Administration Menu is only available in the DKAdmin program. The Check Processor Type, Backup/Restore Data, and View/Print Data appear in both the DKAdmin Administration Menu and the DKBackup Backup Menu. These functions are identical (e.g., screens, operations, commands, etc.) whether you use DKAdmin or DKBackup. This chapter gives you step-by-step instructions on using the options available on the Administration Menu.
View Cabinet Diagram ––––––––––––––––––––––––––––––––––––––––––––––––––––––––––––––––––––––––––– View Cabinet Diagram The base and expansion cabinet diagram displays the current Printed Circuit Board (PCB) configuration for the customer’s Strata DK system. The diagram varies based on the Strata DK model and processor listed in the Customer File Maintenance screen. ➤ To view cabinet diagram 1. Select a customer using the Select Customer option in the File Menu. 2.
–––––––––––––––––––––––––––––––––––––––––––––––––––––––––––––––––––– System/Station Administration While you can assign these attributes to individual ports, station attributes cannot be copied from one port to another, or set for a range of ports from this menu. However, range programming for ports can be completed on a program level using the Program Administration option.
System/Station Administration ––––––––––––––––––––––––––––––––––––––––––––––––––––––––––––––––––––– Programming/Updating System ➤ To program or update the entire system or an individual port 1. Highlight the Telephone Location field of the physical port with which you wish to work. Enter the physical telephone location (for example, main conference room, VP office, lunch room, etc.). 2. Highlight the Log. Port No. field of the physical port.
–––––––––––––––––––––––––––––––––––––––––––––––––––––––––––––––––––– System/Station Administration Note You cannot duplicate DID numbers. ...or if you would like to change DID numbers for a range of ports, press F5. A Change dialog box displays similar to the one shown above. Type the Starting DID Number you wish to assign and press Enter. A pop-up screen asks you to confirm the change. The DID numbers for the range of ports you specified are changed if you enter Yes. 6.
System/Station Administration ––––––––––––––––––––––––––––––––––––––––––––––––––––––––––––––––––––– For information on selecting printers, see Chapter 8 – Options Menu. See Figure 8 for a System/Station Administration printout example.
–––––––––––––––––––––––––––––––––––––––––––––––––––––––––––––––––––– System/Station Administration System LCD Messages (F8) ➤ To set or change available system LCD messages Note You may create up to 40 system messages which may be used by all LCD telephone ports. Each message may contain two lines using up to 32 characters. 1. From the System/Station Administration Screen, press F8. The System Messages screen displays (shown right). 2.
System/Station Administration ––––––––––––––––––––––––––––––––––––––––––––––––––––––––––––––––––––– ♦ Press the spacebar to toggle between available options, or enable (indicated by a check mark)/disable (indicated by a blank) the attribute. ♦ Enter a value. 4. Press F10 to save the changed data to the customer database file. Note Table 3 After saving the data, press F9 to update the Strata DK with the changes.
–––––––––––––––––––––––––––––––––––––––––––––––––––––––––––––––––––– System/Station Administration Table 3 Attribute Definitions (continued) Attribute Description Change Verified A.C. If selected for this feature, a station can change the Verified Account Codes established in Program 69. Change T.C.O. Code If selected for this feature, a station can change the Toll (Restriction) Class Override codes.
System/Station Administration ––––––––––––––––––––––––––––––––––––––––––––––––––––––––––––––––––––– Table 3 Attribute Definitions (continued) Attribute Description Ringing Line Preference A user, by going off-hook (or by pressing the Speaker button) may be automatically connected to the lowest line ringing in without having to press a CO line button or dial an access button.
–––––––––––––––––––––––––––––––––––––––––––––––––––––––––––––––––––– System/Station Administration Table 3 Attribute Definitions (continued) Attribute Description LCR Station Group This option assigns the station to a particular LCR group routing scheme. The Least Cost Routing (LCR) feature enables the system to automatically route each outgoing voice call over common carriers and selected lines.
System/Station Administration ––––––––––––––––––––––––––––––––––––––––––––––––––––––––––––––––––––– Flexible Button Assignments (F5) ➤ To view or change flexible button assignments 1. Press F5 from the Port Attributes screen and the Port Flexible Key Assignments screen displays (shown right). 2. To change a flexible button assignment, highlight the Flexible Key Assignment and press: ♦ F5–Pause to deactivate or blank out a key assignment. ♦ F9–Increment SD to add multiple speed dial key assignments.
–––––––––––––––––––––––––––––––––––––––––––––––––––––––––––––––––––– System/Station Administration 4. Press Ctrl+F2 again. A pop-up dialog box displays (shown at right). 5. Type the desired ports and press Enter. Another pop-up dialog box displays asking you confirm the change. 6. Highlight Yes and press Enter to make the change or No to cancel the changes. 7. Press F10 to save the changes you just made. CO Line Assignments (F6) ➤ To view CO line assignments 1. Press F6 from the Port Attributes screen.
System/Station Administration ––––––––––––––––––––––––––––––––––––––––––––––––––––––––––––––––––––– System Messages (F8) ➤ To assign system messages ➤ Press F8 from the Port Attributes screen. The Port Personal Messages screen displays (shown right). Refer to Page 49 for procedures. Saving/Uploading Programmed Data (F9) ➤ To upload programmed data ➤ After completing your programming, press F9 to save the information and begin the uploading process.
–––––––––––––––––––––––––––––––––––––––––––––––––––––––––––––––––––– System/Station Administration Printout Examples Customer Name PCB Placement Per Program 03 Assignments CABINET 1 R11 PCB Type RCTU S11 S12 S13 S14 S15 S16 RCTUB PDKU PDKU RSTU RATU RDTU PIOU 000~007 008~015 016~023 024~027 028~035 RRCS-8 OCA OCA Port Nos. 001~008 Line Nos Option CABINET 2 S21 S22 S23 S24 S25 S26 PCB Type RSTU RCOU RSTU PIOU RDTU PDKU Port Nos.
System/Station Administration ––––––––––––––––––––––––––––––––––––––––––––––––––––––––––––––––––––– System/Station Administration ➊ ➋ C S N Phy. Port No. 001 002 003 004 005 006 007 008 009 001 002 003 004 005 006 007 008 009 ➍ ➎ PT Telephone Location Log Port No. DO DO DO DO DO DO DO DO DO OFFICE #114 OFFICE #112 OFFICE #109 OFFICE #87 OFFICE #107 CAFETERIA SHIPPING DOCK CONFERENCE PHONE ROOM 000 001 002 003 004 005 006 007 008 ➌ ➏ ➐ Int. No. DID No.
–––––––––––––––––––––––––––––––––––––––––––––––––––––––––––––––––––– System/Station Administration CUSTOMER NAME Intercom 202/Port 002 Attributes for BRIAN No: 202 PRG 38 80 27 30 30 Figure 11 KEY Feature Description Attribute 20-Button (A) 3 3 01 02 Telephone Keystrip Type Ring Tone Volume Level Speakerphone Enabled MIC Key Lock Enabled ✓ ✓ Station Attributes by Station (prints out with current port attributes) CUSTOMER NAME Intercom 202/Port 002 Flexible Key Assignments for BRIAN No: 202 Key No.
System/Station Administration ––––––––––––––––––––––––––––––––––––––––––––––––––––––––––––––––––––– CUSTOMER NAME Intercom 202/Port 002 Personal Messages for BRIAN No: 202 Personal Message Number Message Line 1 Message Line 2 010 011 CALL BRIAN ASAP OUT OF OFFICE UNTIL AUG.
–––––––––––––––––––––––––––––––––––––––––––––––––––––––––––––– Flexible Button Programming Section Flexible Button Programming Section The Flexible Key Programming Section option in the Administration Menu enables you to maintain flexible button assignments for telephones, add-on modules, DSS consoles and attendant consoles. ➤ To access flexible button assignments 1. Type a and the Administration Menu appears. 2. Type u and the Flexible Key Program Administration screen displays (shown right).
Flexible Button Programming Section ––––––––––––––––––––––––––––––––––––––––––––––––––––––––––––––– 3. Press F2 to make the key a Primary DN, F3 a Secondary DN, F4 a Phantom DN, or F6 to change the key feature. If you press F3 or F4, a pop-up list appears and you must enter a primary or secondary number. If the number you enter does not exist, the following warning message appears and you must re-enter the number. DN Does Not Exist. Please Refer to Program *04. ...
–––––––––––––––––––––––––––––––––––––––––––––––––––––––––––––– Flexible Button Programming Section 4. Press Ctrl+F2 again. A pop-up dialog box displays (shown at right). 5. Type the desired ports and press Enter. Another pop-up dialog box displays asking you confirm the change. 6. Highlight Yes and press Enter to make the change or No to cancel the changes. 7. Press F10 to save the changes you just made. Add-On Module Button Assignments ➤ To access the option 1.
Flexible Button Programming Section ––––––––––––––––––––––––––––––––––––––––––––––––––––––––––––––– ➤ To copy the features from one port to another 1. Highlight the LED you wish to copy and press F4. The Copy to Port dialog box displays. 2. Type the range of port numbers that you wish to copy TO. 3. Highlight the Button Assignment Column of Add-On Module 1 or 2 for the LED you wish to change and press F3. A message displays at the top of the screen: Current template copied from port XXX.
–––––––––––––––––––––––––––––––––––––––––––––––––––––––––––––– Flexible Button Programming Section ➤ To assign more than one speed dial number 1. Follow the procedure for changing an assigned feature and assign a station/system speed dial number. 2. Press F8– + SD to add additional speed dial key assignments. Important! You can only use this key when you are assigning more than one speed dial key at a time.
Flexible Button Programming Section ––––––––––––––––––––––––––––––––––––––––––––––––––––––––––––––– The selected feature replaces the previous feature. Notes ● ● You can only assign a feature to one button within a console. If you attempt to assign a feature already assigned, an error message displays. Press F8–Increment SD to add additional speed dial key assignments. Important! You can only use this key when you are assigning more than one speed dial key at a time.
–––––––––––––––––––––––––––––––––––––––––––––––––––––––––––––– Flexible Button Programming Section ➤ To edit your attendant console flexible button assignments 1. Highlight the key assignment you wish to change and press F6. A feature pop-up list displays (shown right). 2. Use the +/- keys or the Page Up/Page Down keys to scroll through the list. Highlight the feature you want to assign to the key and press Enter. The selected feature replaces the previous feature. 3.
Speed Dial Programming Section –––––––––––––––––––––––––––––––––––––––––––––––––––––––––––––––––– Speed Dial Programming Section The Speed Dial Programming Section option in the Administration Menu enables you to maintain system and station speed dial assignments. ➤ To access speed dial assignments ➤ Type d; the System & Station Speed Dial Administration screen displays (shown right). System Speed Dial Numbers ➤ To edit system speed dial number assignments 1. Press Enter.
––––––––––––––––––––––––––––––––––––––––––––––––––––––––––––––––– Speed Dial Programming Section Station Speed Dial Numbers ➤ To edit station speed dial number assignments 1. Highlight the Station Speed Dial Numbers option and press Enter. The Station Speed Dial Numbers screen displays (shown right). Note To make entries or edit the Telephone Location, Log. Port No., Int/DN No.
ACD Administration ––––––––––––––––––––––––––––––––––––––––––––––––––––––––––––––––––––––––––––– CAUTION! The DKAdmin PC must be connected to the Strata DK to upload any changes to this data (see Appendix A – Connecting to Strata DK for procedures on connecting the DKAdmin PC to a Strata DK). 6. Press Esc to close the System & Station Speed Dial Administration screen and return to the Main Menu.
–––––––––––––––––––––––––––––––––––––––––––––––––––––––––––––––––––––––––––– ACD Administration 2. Highlight the program number and press F3. The Edit Program screen displays (shown right). The screen varies, depending upon the program selected. Note You can also use the Find function to quickly move to a program by typing the first digit of the program number. DKAdmin highlights the first program number matching the entry. 3. Highlight the field you wish to change and enter the information.
ACD Administration ––––––––––––––––––––––––––––––––––––––––––––––––––––––––––––––––––––––––––––– 5. Follow Step 2 ~ Step 4 of “To edit ACD programs” on Page 70. ACD Agent Programs ➤ To edit ACD agent programs 1. Highlight the ACD Agent Programs option and press Enter. The ACD Agent Programs screen displays (shown right). This screen enables you to edit ACD Agent programs. 2. Highlight the ACD Group Number field for the ACD Agent you wish to change.
––––––––––––––––––––––––––––––––––––––––––––––––––––––––––––––––––– Program Administration Section Program Administration Section The Program Administration Section option in the Administration Menu enables you to maintain Strata DK programs. This includes pulling the program from the DK, editing the program, initializing the Strata DK processor, or sending the program to the Strata DK. For complete information on Strata DK programs, including default definitions, refer to the Strata DK Programming Manual.
Program Administration Section ––––––––––––––––––––––––––––––––––––––––––––––––––––––––––––––––––– After selecting the program, you have the following options: ♦ Press F2 to pull the program data from the DK. See “Restore Data” on Page 102 for procedures on downloading data. ♦ Press F3 to edit the program. Only programs displaying a check mark may be edited by your password level. Options for editing programs differ depending on the selected program.
––––––––––––––––––––––––––––––––––––––––––––––––––––––––––––––––––– Program Administration Section ➤ To edit a program 1. Press F3 and the Directory Numbers Assignments screen displays (shown right). 2. Highlight the logical port number and press F2 to reset the DN for the logical port numbers on a range of ports. 3. A change dialog box displays and you must enter the starting DN. A pop-up screen displays asking you to confirm the change: This operation will modify DN numbers. Go ahead? 4.
Program Administration Section ––––––––––––––––––––––––––––––––––––––––––––––––––––––––––––––––––– When using DKAdmin, Table 5 provides important information regarding specific programs: Table 5 DKAdmin Program List Program Comment Program 03 On new or upgraded installations, Program 03 should always be checked and uploaded to make sure all PCB slots have the correct codes for PCBs and PCB options.
–––––––––––––––––––––––––––––––––––––––––––––––––––––––––––––––––––– Security Maintenance Section Security Maintenance Section The Security Maintenance Section option (level 9 password required to access this option) enables you to set up to three levels of security using: ♦ Passwords - defines the functions available to users using menu-specific passwords as described on Page 121.
Security Maintenance Section ––––––––––––––––––––––––––––––––––––––––––––––––––––––––––––––––––––– The password levels (0 ~ 9) are based on a hierarchal system. This means that password level 9 has access to all programs, but password level 5 (for example) has access to all programs tagged with 5 and below, but not 6 and above. Note Program Security (Default Levels) Program security is maintained by assigning access levels to each program.
–––––––––––––––––––––––––––––––––––––––––––––––––––––––––––––––––––– Security Maintenance Section Table 6 Strata DK Program Security (continued) Strata DK Program Security Level Program Title *11-8 0 911 Special [DN] Notification Assignments (R4) *12 0 ANI Station Information (R4) *13 0 Station Group Information (R4) *14-1 5 Auto Answer with Zip Tone Assigned to Agent ID *14-2 5 DID/TIE Line After Shift & Overflow Substitution Destination *15 8 CO Line Tenant Assignments *16 8 ISDN
Security Maintenance Section ––––––––––––––––––––––––––––––––––––––––––––––––––––––––––––––––––––– Strata DK Program Security (continued) Table 6 Strata DK Program 80 Security Level Program Title *62-2 0 Non-ISDN Station Outgoing Call Pad Level (R4) *62-3 0 Non-ISDN Station Incoming Call Pad Level (R4) *63 0 ISDN Dialing Parameters (R4) *64-1 0 Direct Inward Dialing Parameters (R4) *64-2 0 Direct Inward Dialing Parameters (R4) *65 0 ISDN Channel Group Assignment (R4) *66-1 0 Chann
–––––––––––––––––––––––––––––––––––––––––––––––––––––––––––––––––––– Security Maintenance Section Strata DK Program Security (continued) Table 6 Strata DK Program Security Level Program Title 09 8 Auto Attendant Prompt/Station Assignments 10-1 8 System Assignments 10-2 8 System Assignments 10-3 8 System Assignments 10-4 5 ACD Parameters 11 5 ACD Timing Assignments 12 8 System Assignments - Basic Timing 13 8 Defining the Message Center 14-0 5 ACD CO Line Assignments 14-1 5
Security Maintenance Section ––––––––––––––––––––––––––––––––––––––––––––––––––––––––––––––––––––– Strata DK Program Security (continued) Table 6 Strata DK Program 82 Security Level Program Title 30 5 Station Class of Service 31 5 Station Class of Service 32 5 Automatic Preference 33 5 Station Hunting (Voice Calls Only) 34 5 Hold/Park Recall Timing 35 5 Station Class of Service 36 5 Fixed Call Forward (Voice Calls Only) 37 5 CO and TIE Line Ring Transfer (Camp-on) Recall Time
–––––––––––––––––––––––––––––––––––––––––––––––––––––––––––––––––––– Security Maintenance Section Strata DK Program Security (continued) Table 6 Strata DK Program Security Level Program Title 53 8 LCR Schedule Assignments for LCR Plans 54 8 LCR Route Definition Tables 55-0~2 8 LCR Modified Digits Tables 56 5 LCR Station Group Assignments 58-1 5 Attendant Console Overflow Timer 58-2 5 Attendant Console Display Type 58-4 5 Attendant Console Answer Key Priority Assignments 58-5 5 A
Security Maintenance Section ––––––––––––––––––––––––––––––––––––––––––––––––––––––––––––––––––––– Strata DK Program Security (continued) Table 6 Strata DK Program 84 Security Level Program Title 85 5 CO/Line/Station Ringing Assignments (DAY 2 12-Second Delay) 86 5 CO/Line/Station Ringing Assignments (DAY 2 24-Second Delay) 87 5 CO/Line/Station Ringing Assignments (NIGHT Immediate) 88 5 CO/Line/Station Ringing Assignments (NIGHT 12-Second Delay) 89 5 CO/Line/Station Ringing Assignments
–––––––––––––––––––––––––––––––––––––––––––––––––––––––––––––––––– Directory Number Administration Directory Number Administration Note This option cannot be used by Strata DK Release 2 or below. ➤ To maintain your directory number assignments for both your PDNs and PhDNs 1. Press r and the Directory Number Administration screen displays (shown right). This screen enables you to assign and change PDN and PhDN user names, call forward ID codes and message waiting ID codes.
Directory Number Administration ––––––––––––––––––––––––––––––––––––––––––––––––––––––––––––––––––– to change the range of numbers used for all the ports, press F5. A pop-up box displays, enabling you to specify a range of numbers. ♦ Type the desired range of Port Reference Numbers for the PDNs (000 ~ 079). ♦ Type the desired range of Port Reference Numbers for the PhDNs (500 ~ 579). ♦ Type a Voice Mail CF Prefix (up to four characters) and press Enter.
–––––––––––––––––––––––––––––––––––––––––––––––––––––––––––––––––– Directory Number Administration 4. Highlight the 24s Dly field for the desired DN. The spacebar toggles the field between enabled and disabled. When the field is enabled a check mark is displayed in the field and a 24-second delay before ringing occurs. Note You cannot enable both the 12s Dly field and the 24s Dly field. Enabling either field, automatically disables the other. ➤ To specify your ringing options 1.
Directory Number Administration ––––––––––––––––––––––––––––––––––––––––––––––––––––––––––––––––––– ➤ To set/change CO Line flexible key assignments 1. From the Directory Number for Primary DN XXX screen, highlight a [DN] and press F5. The Flexible Key Assignments screen for the selected Port/DN displays (shown right). 2. Highlight the desired Flexible Key Assignment and: ♦ Press F2 to change the assignment from a CO line to the PDN. ♦ Press F3 to change the assignment to the SDN.
–––––––––––––––––––––––––––––––––––––––––––––––––––––––––––––––––––––––––––– DNIS Administration DNIS Administration Note This option cannot be used by Strata DK Release 2 or below. This option enables you to maintain assignments for your DNIS/DID/ANI lines, change or add number/name/ringing/voice mail ID assignments, or network tables and tenant locks specifications. ➤ To access the option ➤ Type n. The DNIS Administration screen displays (shown right).
DNIS Administration –––––––––––––––––––––––––––––––––––––––––––––––––––––––––––––––––––––––––––– Each field has only two selections. Use the spacebar or +/- keys to toggle between them. Note Field Selection Tie Line Voice & Page Page & Voice/No Page & Voice Tie/DID Wind/Immed Immediate/Wink Start DID Line Camp On Busy Auto Camp-on/No Camp-on DID/Tie Line Second Dial Line Second Tone/No Second Tone 3. Repeat Step 2 for each tie/DID line you wish to set/change. 4.
–––––––––––––––––––––––––––––––––––––––––––––––––––––––––––––––––––––––––––– DNIS Administration 5. Highlight the DAY Ring field and enter the desired DAY ringing point. ♦ Press F2 to review the Ringing Point Identification codes. ♦ Press F6 to select a ringing point. Highlight the ringing point you wish to assign and press Enter. 6. Highlight the DAY2 Ring field and repeat Step 5. 7. Highlight the NIGHT Ring field and repeat Step 5. 8.
Distributed Hunt Group Administration –––––––––––––––––––––––––––––––––––––––––––––––––––––––––––––– DNIS Tenant Lock Assignments ➤ To set/change passwords for station port numbers 1. Select the DNIS Tenant Lock Assignments option and press Enter. The DNIS Tenant Night Lock Assignments screen displays. This screen (shown right) enables you to set/change passwords for station port numbers for each of your DNIS tenant night numbers. 2.
––––––––––––––––––––––––––––––––––––––––––––––––––––––––––––––––––––––– Call Forward Assignments 3. Type a DH Group [DN] (up to four digits) and press Enter. If the entered number conflicts with a DN/Port already assigned, an error message displays. 4. Highlight the Hunt PDN 01 field. Type the hunt [PDN] number and press Enter ...or press F6 to select the number from a table. Highlight the desired number and press Enter. 5. Repeat Step 4 for each Hunt PDN field.
E911/CAMA Trunk Programs (R4 Only) ––––––––––––––––––––––––––––––––––––––––––––––––––––––––––––– 4. Highlight the next Call Forward Type field. A default value (All, Busy, No Answer, Busy/ No Answer) is entered in this field based on your selection in Step 3. To change the assignment, press + /- to toggle the selections and press Enter. 5. Highlight the Call Forward Timer field. A default value is entered in this field based on your selection in Step 3.
––––––––––––––––––––––––––––––––––––––––––––––––––––––––––––– E911/CAMA Trunk Programs (R4 Only) The Strata DK16e and DK424 accomplishes this with a special interface between the KSU and the CO. This special interface takes the station number information and sends it through the public network in a format compatible with the central E911 database. This special interface is required in addition to sending software within the Strata DK16e and DK424.
E911/CAMA Trunk Programs (R4 Only) ––––––––––––––––––––––––––––––––––––––––––––––––––––––––––––– ➤ To use the Strata DK’s program files to edit 1. Press F2 and the DK Code dialog box displays. 2. Type the DK Code: XXXX, where XXXX is the DK level 1 security code set in Program 00. The DK System Program File screen displays.
––––––––––––––––––––––––––––––––––––––––––––––––––––––––––––––––––––––– ISDN Programs (R4 Only) ISDN Programs (R4 Only) Note This option cannot be used by Strata DK Release 3 or earlier. The Integrated Services Digital Network (ISDN) Programs option in the Administration Menu enables you to maintain ISDN programs. Release 4.0 provides the Primary Rate Interface (PRI) ISDN capabilities. Release 4.1/4.2 will introduce the ISDN Basic Rate Interface (BRI).
Backup/Restore Data ––––––––––––––––––––––––––––––––––––––––––––––––––––––––––––––––––––––––––– Note If the Problem: Unable to Establish Communications screen displays, follow the troubleshooting steps on the screen and/or refer to Appendix A – Connecting to Strata DK to correct the problem. 3. Press F2 to select (tag) all Program No. (data) files. 4. Highlight Yes and press Enter. DKAdmin establishes communications to the Strata DK, turns on LED 10 in Program 77-1, and receives data blocks.
Backup Menu (DKBackup) Note 7 The Backup Menu is only available in the DKBackup program. The Check Processor Type, Backup/Restore Data, and View/Print Data appear in both the DKBackup Backup Menu and the DKAdmin Administration Menu. These functions are identical (e.g., screens, operations, commands, etc.) whether you use DKAdmin or DKBackup. DKAdmin/DKBackup makes backing up and restoring Strata DK programs quick and easy and saves valuable time and labor when upgrading Strata DK software.
Check Processor Type ––––––––––––––––––––––––––––––––––––––––––––––––––––––––––––––––––––––––––– Check Processor Type ➤ To check processor type 1. Select a customer using the Select Customer option in the File Menu. 2. From the Administration Menu/Backup Menu, press c to display a pop-up dialog box. 3. Enter the four-digit DK Code. The default is 0000. This is the “first level password” which is set in the Strata DK Program 00. The code does not display as you type it. 4.
–––––––––––––––––––––––––––––––––––––––––––––––––––––––––––––––––––––––––––––––––– Backup Data The DK System Program File screen displays listing the available data for backup (see screen in Step 3). For security, this code does not display on screen as you type it. The default code is 0000. This is the “1st level password” which is set in the Strata DK Program 00 (see the record sheet for Program 00 in the Strata DK Programming Manual).
Restore Data –––––––––––––––––––––––––––––––––––––––––––––––––––––––––––––––––––––––––––––––––– ● The DK System Program File list is displayed (see Step 3 on Page 101). If this screen does not display, the DKAdmin/DKBackup PC and the Strata DK are not communicating. See Appendix A – Connecting to Strata DK for procedures to connect the PC COM port to the Strata DK PIOU, RSSU, RSIS, RSIU, or PIOUS TTY port, or IMDU or RMDS modems.
––––––––––––––––––––––––––––––––––––––––––––––––––––––––––––––––––––––––––––––––– Restore Data Notes ● ● ● ● When you back up PRGALL, the DK security code, set in the DKBackup customer database, is not sent to the processor. You must always enter the DK security code that is actually programmed on the processor installed in the Strata DK. You can change the DK security code using the DKAdmin Program Administration Section option or manually using the programming telephone.
Restore Data –––––––––––––––––––––––––––––––––––––––––––––––––––––––––––––––––––––––––––––––––– Important! These messages display Processor Conversion PLEASE READ THE FOLLOWING SCREENS AS THEY PROVIDE VERY IMPORTANT INFORMATION REGARDING THE UPGRADE AND INITIALIZATION PROCESSES. Please turn DK system power off and add/change cabinets, processor ROM or RMSS memory and/or RCTU PCBs as required.
––––––––––––––––––––––––––––––––––––––––––––––––––––––––––––––––––––––––––––––––– Restore Data 7. After completing the steps on the screen, press Enter (twice) and the Baud Rate Selection screen displays (shown below). This screen enables you to set the DKAdmin/ DKBackup PC COM port baud rate which must match the baud rate of the TTY or modem port set by the programming telephone.
Restore Data –––––––––––––––––––––––––––––––––––––––––––––––––––––––––––––––––––––––––––––––––– 9. After reading the screen in Step 7, press Enter. The screen below displays. DK System Program File ✓ Program No. Program Title ✓ PRGALL All System Programs REPALL All Station and System Speed Dial Numbers NAMEALL All User Names VIDALL All Voice Mail ID Codes (#656) Pull Program 03 from DK to Update Customer Database? Yes No 10. Highlight Yes and press Enter. You are prompted for the DK Code.
––––––––––––––––––––––––––––––––––––––––––––––––––––––––––––––––––––––––––––––––––––– Upgrade 16. Press Enter from the screen above. DKAdmin/DKBackup runs Program 91-2 and then displays the message Program 91-2 has been completed. The system has performed a power off/on simulation. 17. After the above screen displays, press any key. The restore process has been completed. You may use the Esc key to exit to the top menu.
Upgrade –––––––––––––––––––––––––––––––––––––––––––––––––––––––––––––––––––––––––––––––––––––– ● ● ● ● ● ● When upgrading from an RCTU Release 1 or 2 to an RCTU Release 3 or above, DKAdmin/DKBackup automatically converts Program 39 intercom code (000) to the appropriate Primary Directory Number code (##XXX) for each station port. When upgrading from DK16e and RCTUA to RCTUB or C/D (all releases), System Speed Dial numbers and buttons (060~099) are upgraded to (660~699).
––––––––––––––––––––––––––––––––––––––––––––––––––––––––––––––––––––––––––––––––––––– Upgrade If the following message displays: Problem: Unable to Establish Communications, follow the steps on the screen and/or refer to Appendix A – Connecting to Strata DK to correct the problem. 4. From the Administration Menu/Backup Menu, type b. The DK Code dialog box displays. 5. Enter the four-digit DK Code that is programmed on the installed processor. The DK System Program File screen displays as shown below.
Upgrade –––––––––––––––––––––––––––––––––––––––––––––––––––––––––––––––––––––––––––––––––––––– 8. Press Enter and then select the processor type you are upgrading to; press Enter after selecting the processor (RDTU E/F, Release 3 in this example). 9. If you haven’t backed up the customer database by downloading the original RCTU, answer Yes to Backup From DK First; otherwise, answer No. Press the spacebar to make your selection and then press Enter. 10.
––––––––––––––––––––––––––––––––––––––––––––––––––––––––––––––––––––––––––––––––––––– Upgrade 14. Press Enter and the following screen displays: Processor Conversion Step A: After changing the processor, you should initialize the new processor by running Program 91-9 manually from the Programming Telephone. Then you must reset the PIOU, PIOUS, RSSU, or RSIU/ RSIS/RMDS TTY port that is connected to DKAdmin PC by performing Step B and/or C.
Upgrade –––––––––––––––––––––––––––––––––––––––––––––––––––––––––––––––––––––––––––––––––––––– 16. Select the DKAdmin/DKBackup PC COM port baud rate and press Enter. The information screen below instructs you to pull Program 03 if you changed any PCBs during the upgrade process. DKAdmin/DKBackup can be used to pull Program 03 automatically. Processor Conversion If you added or changed any PCBs other than the RCTU PCB in the DK system, the customer database will need to be updated to reflect these changes.
––––––––––––––––––––––––––––––––––––––––––––––––––––––––––––––––––––––––––––––––––––– Upgrade For Release 2, only the following message displays: Turn the system OFF (5 sec). Note 23. Turn the system off (five seconds) and then on. ...or When the screen displays the message Perform Automatic Power OFF/ON Simulation?, highlight Yes (Release 3 or Release 4 upgrades only). 24. Press Enter and DKAdmin/DKBackup runs Program 91-2 and displays the screen below (Release 3 or Release 4 upgrades only).
Upgrade –––––––––––––––––––––––––––––––––––––––––––––––––––––––––––––––––––––––––––––––––––––– Important! When using DKAdmin/DKBackup, the following list provides important information regarding specific programs: ● ● ● ● Program 00: DKAdmin/DKBackup does not upgrade the DK security codes in Program 00-1 and 00-2. If required, change the code using the DKAdmin Program Administration Section option or manually from the programming telephone.
–––––––––––––––––––––––––––––––––––––––––––––––––––––––––––––––––––––––––––––––– View/Print Data one at a time (for example: PRGALL), instead of tagging all files to download. If a Release 1 processor fails during the downloading process, retry the process or change the original Release 1 processor ROMs to NANP Release 1 upgrade ROMs and then download. View/Print Data ➤ To access the option 1. From the File Menu, select a customer. 2. From the Administration Menu, type v.
View/Print Data –––––––––––––––––––––––––––––––––––––––––––––––––––––––––––––––––––––––––––––––– 116 DKAdmin/DKBackup
Options Menu 8 This chapter gives you step-by-step instructions on using the options available on the Options Menu.
System Installation ––––––––––––––––––––––––––––––––––––––––––––––––––––––––––––––––––––––––––––– Screen Type/Color Installation ➤ To change your monitor or color setups (not available to password level 2) 1. From the Main Menu, type o. The System Installation Submenu displays (shown right). Press Enter. 2. Type s and a pop-up screen displays (shown right), enabling you to set monitor and screen specifications. Note Press the spacebar to toggle between available options.
––––––––––––––––––––––––––––––––––––––––––––––––––––––––––––––––––––––––––––– System Installation ➤ To change the color of an item 1. From the pop-up dialog box, highlight the Yes for the Change Colors option and press Enter. The Color Selection screen displays. The Color Selection screen (shown right) consists of an item selection menu, a set of item color bars, and a sample screen display showing the result of your color selection.
System Installation ––––––––––––––––––––––––––––––––––––––––––––––––––––––––––––––––––––––––––––– ➤ To select printer 1. Type p. The Printout Destination Selection Matrix screen displays (shown right). 2. Highlight the appropriate printer destination and press the spacebar. The highlighter moves to the Printer field. 3. Press F2. The Available Printer Drivers dialog box displays. 4.
––––––––––––––––––––––––––––––––––––––––––––––––––––––––––––––––––––––––––––– System Installation Proper Case Conversion Select Yes to have text appear in proper - upper/lower case. Select No to have text appear in all capital letters. Shift-Function Keys To build up to 10 function keys which can hold a specified text entry in memory, such as a name, date, or address, type Yes and press Enter. A pop-up window displays (shown below) where you may designate the entries.
System Installation ––––––––––––––––––––––––––––––––––––––––––––––––––––––––––––––––––––––––––––– ➤ To add users and assign passwords See Table 7 for a list of password access levels for each menu option available in the DKAdmin/DKBackup programs. Note 1. Highlight the User ID field and press Ins. A pop-up dialog box displays enabling you to enter new user ID information. 2. Enter a User ID using up to eight characters and press Enter. 3. Enter the User Name and press Enter. 4.
––––––––––––––––––––––––––––––––––––––––––––––––––––––––––––––––––––––––––––– System Installation Table 7 Password Level Menu Access File Menu Password Access Level Select Customer 0,1,2,3,4,5,6,7,8,9 Maintain Customer 6,7,8,9 Dial DK 0,1,2,3,4,5,6,7,8,9 Hangup Connection 0,1,2,3,4,5,6,7,8,9 Transfer DK Data 6,7,8,9 About 0,1,2,3,4,5,6,7,8,9 Exit 0,1,2,3,4,5,6,7,8,9 Administration/Backup Menu* Password Access Level View Cabinet Diagram 2,3,4,5,6,7,8,9 Check Processor Type* 2,3,4,5,6,7,
System Installation ––––––––––––––––––––––––––––––––––––––––––––––––––––––––––––––––––––––––––––– Table 7 Password Level Menu Access (continued) Communications Setup 6,7,8,9 Reindex Files 0,1,2,3,4,5,6,7,8,9 ➤ To change user or password information for an existing user 1. Access the Password File Maintenance screen (under the User Password Level Set Up option). 2. Highlight the user you wish to change and press Enter to display the user information. 3. Change the information, as required. 4.
–––––––––––––––––––––––––––––––––––––––––––––––––––––––––––––––––––––––––––––––– System Utilities ➤ To display the communication settings 1. Type o. The Option Menu displays. 2. Type i. The System Installation Submenu displays. 3. Type o. The Communications Setup screen displays (shown right). 4. To change the Communication port, press Enter. A pop-up ports window displays. 5. Highlight the desired port and press Enter. 6.
System Utilities –––––––––––––––––––––––––––––––––––––––––––––––––––––––––––––––––––––––––––––––– 126 DKAdmin/DKBackup
Connecting to Strata DK A This appendix shows how to connect a DKAdmin/DKBackup PC to the Strata DK. Hardware Requirements The DKAdmin/DKBackup PC is required to edit or change a Strata DK customer database file with or without being connected to a Strata DK telephone system. A PC equipped with DKAdmin/DKBackup enables you to upload, download, upgrade and/or edit complete Strata DK databases. Note DKBackup does not provide the edit function.
PIOU/PIOUS/RSSU/RSIU Setup ––––––––––––––––––––––––––––––––––––––––––––––––––––––––––––––––––– ♦ DKAdmin/DKBackup PC directly connected to the Strata DK – 50 feet maximum (see Figure 16 on Page 130). ♦ DKAdmin/DKBackup PC connected to Strata DK via Toshiba Data Interface Units – 1000 feet maximum (see Figure 17 on Page 131). ♦ DKAdmin/DKBackup PC remote modem connected to Strata DK system external modem/TTY port (direct modem to modem call)(see Figure 18 on Page 132).
––––––––––––––––––––––––––––––––––––––––––––––––––––––––––––––––– Calling Strata DK Using the Dialer Calling Strata DK Using the Dialer The DK Dialer is used only to establish a modem-modem or DIU to DIU/modem connection between the DKAdmin/DKBackup PC and the DK maintenance modem. The DK Dialer is not used when connecting the DKAdmin/DKBackup PC directly to the Strata DK TTY port. ➤ To call Strata DK using the dialer 1.
Direct Connection to Strata DK –––––––––––––––––––––––––––––––––––––––––––––––––––––––––––––––––––– Direct Connection to Strata DK PC COM Port PPTC-9 (PC 9-pin Adaptor) or PPTC-25F 3-pair Modular Cord (Telephone type, cross-pinned) (50 Feet Maximum, 24AWG wire) DK Backup/Admin Personal Computer Customer Strata DK RSSU, RSIU, TTY TSIU, WSIU Port or RSIS PIOU, PIOUS (SW3 – TTY Position) 0918 Program 03 Code 41 for RSSU, PIOUS, or PIOU slot. Program 03, Code 49 for RSIU slot 11.
–––––––––––––––––––––––––––––––––––––––––––––– Connection to Strata DK Via Toshiba Data Interface Units Connection to Strata DK Via Toshiba Data Interface Units PC COM Port Customer Strata DK PC to Modem Type Cable (Dealer Supplied) 6-pair Modular Cord (Telephone type, cross-pinned) (SW1-4 Off) DK Backup/Admin Personal Computer Digital Telephone with PDIU-DI or RPCI-DI (integrated) Station DK Prog 20; LED 01, 02, and 17 ON for PDIU-DI or RPCI-DI Port Figure 17 RSSU, RSIU, TSIU, WSIU or RSIS1 PPTC
Remote Modem Connection to External Modem/TTY Port ––––––––––––––––––––––––––––––––––––––––––––––– Remote Modem Connection to External Modem/TTY Port CO Line PIOU, PIOUS (SW3 – TTY Position) Public Telephone Network External Modem CO Line or RSTU Port (assigned to ring modem) TTY Port 0920 3 Pair Modular Cord Turn off data compression.
–––––––––––––––––––––––––––––––––––––––––––––––––––––––– Voice Call Transferred to Modem Connection 5. After the DKAdmin/DKBackup session is complete, go to the File Menu and press h to hang up the connection.
Voice Call Transferred to Modem Connection ––––––––––––––––––––––––––––––––––––––––––––––––––––––––– To Make Connection 1. From File Menu, type d. 2. Highlight the customer from the customer list. 3. At the remote site, use the standard telephone (connected to the DKAdmin/DKBackup remote modem) to call a telephone (or attendant console) at the customer site. 4.
––––––––––––––––––––––––––––––––––––––––––––––––––––––––– Remote Modem Connection to Modem Pool Remote Modem Connection to Modem Pool Customer Strata DK 3-pair Modular Cord (Telephone type, cross-pinned) Standard PC / Modem Cable Remote Modem1 CO LINE CO Line PDIU-DS (YYY) 3 PPTC25MDM Public Telephone Network PDKU (yellow) PDIU-DS (XXX) 4 PDKU External Modem Pool DK Backup/Admin Personal Computer RSSU, RSIU,TSIU, WSIU or RSIS2 TTY Port PIOU, PIOUS2 (SW3 – TTY Position) Turn off data compress
Remote Modem Connection to Modem Pool –––––––––––––––––––––––––––––––––––––––––––––––––––––––––– To Make Connection 1. From the File Menu select Dial DK and press Enter. 2. Highlight the customer form the customer list. 3. Press F4 to establish remote modem to external modem connection; the Modem Initialization String, the Modem String, and the After Connect String will be sent from the DKAdmin/DKBackup PC COM port.
––––––––––––––––––––––––––––––––––––––––––––– PC DIU/DIU Modem Pool Connection to Strata DK Modem PC DIU/DIU Modem Pool Connection to Strata DK Modem Voice Call First, then Modem to Modem Connection DK Backup/Admin Personal Computer Remote Digital Telephone with PDIURemote Strata DK D2 or RPCI-DI COM Port Customer Strata DK 2 RCOU PDKU RS-232 Cable 1 Public Telephone Network RSTU RCOU PIOU or PIOUS with IMDU Modem SW3 Modem Position or RSIU with RMDS RSTU 0923 CO Lines • SW1-4 Off • Prog 20: L
PC DIU/DIU Modem Pool Connection to Strata DK Modem –––––––––––––––––––––––––––––––––––––––––––––– To Make Connection 1. Select Customer from the Dial DK Option. 2. Call attendant at customer Strata DK from remote digital telephone (voice call using telephone handset). 3. From the remote digital telephone, press the Modem button to reserve the remote modem. The Modem button LED flashes. 4.
––––––––––––––––––––––––––––––––––––––––––––– PC DIU/DIU Modem Pool Connection to Strata DK Modem PC DIU/DIU Modem Pool Connection to Strata DK Modem DIU to DIU Connection, then Modem to Modem Connection DK Backup/Admin Personal Computer COM Port Digital Telephone with PDIU-D2 or RPCI-DI Remote Strata DK RCOU PDKU * RS-232 Cable 2-pair (1000 ft maximum) • SW1-4 Off • Prog 20: LED 01, PDIU-DS 02 and 17 ON for PDIU-DI, RPCI-DI Port See Figure A-8 for PDIU-DS / Modem Pool Configuration Figure 22 Cust
PC DIU/DIU Modem Pool Connection to Strata DK Modem –––––––––––––––––––––––––––––––––––––––––––––– To Make Connection 1. Highlight Customer from the Dial DK Option and press Enter. 2. Highlight the appropriate customer, then press F3; the digital telephone DIU will connect to the remote modem PDIU-DS and then the remote modem will go off hook and seize a CO line and dial the CO line which rings the IMDU (normal ringing assignments in Strata DK Programs 81~89).
––––––––––––––––––––––––––––––––––––––––––––––––––––––––––––––––– PDIU-DS Modem Pool Installation PDIU-DS Modem Pool Installation A B C P5 P1 P2 SIDE GROOVES P7 W6 W8 P4 P3 W3 EX. POWER PERCEPTION W1 W2 DTE/MODEM JUMPER PLUGS P1~P9 SW1 P6 BOTTOM PANEL P8 PDIU-DS PCB P9 0925DK Figure 23 External Modem to Strata DK TTY Port Connection To Make Connection When connecting a PDIU-DS to a modem for modem pool operation (see Figures 20 to 22), set up the PDIU-DS and modem per Steps 1 ~ 7 below. 1.
PDIU-DS Modem Pool Installation –––––––––––––––––––––––––––––––––––––––––––––––––––––––––––––––––– 2. PDIU-DS port Program 20 options: LED 01, 02, 04, and 17 on; all other LEDs off for PDIU-DS port if connecting the modem to a CO line; if connecting the modem to an RSTU port, turn on LED 01, 02, 03, 04, and 17 for the PDIU-DS port. Notes ● ● LED 02 must be turned off until the AT commands shown in 3 below have been set on the modem connected to the PDIU-DS.
––––––––––––––––––––––––––––––––––––––––––––––––––––––––––––––––– PDIU-DS Modem Pool Installation 4. Set the PIOU or PIOUS SW3 switch to the TTY position (RSSU is always TTY, SW3 is not required). Note The PIOU or PIOUS SW3 switch is set to the MODEM position for IMDU operation only. 5. Set the P13 jumper plug on the PIOU to the BELL configuration, or cut the W4 jumper on the PIOUS (also for BELL configuration). Note The P13 (PIOU) and W4 (PIOUS) CCITT configurations are not normally used in the USA.
PDIU-DS Modem Pool Installation –––––––––––––––––––––––––––––––––––––––––––––––––––––––––––––––––– PPCT (Modular to DB25) Adaptor, Modified Wiring for Connecting TTY Jack to an External Modem (only if null-modem adaptor is not used with PPTC): PIOU/PIOUS, TTY Jack Modular Pin Number PPTC1A-5M Adaptor Modular Pin No. DB25 Pin No.
DK424 RCTUE/F Upgrade Using DKAdmin B This appendix discusses considerations and steps for upgrading the Strata DK424 digital business telephone system to an RCTUE/F processor. DKAdmin software is required to upgrade a DK14, DK16e, DK40 or any DK280/DK424 RCTUA, RCTUB, RCTUBA/BB, or RCTUC/D database to an RCTUE/F processor. DKAdmin requires the red 280Admin software protection key installed on the PC LPT1 printer port. This is the same red key used for running 280Admin.
Upgrading to RCTUE/F –––––––––––––––––––––––––––––––––––––––––––––––––––––––––––––––––––––––––– 5. Using the Backup/Restore Data function on the Administration Menu, download the complete customer database via modem or disk by pressing F2 then F3. After the customer database is downloaded and built, it can be upgraded to the RCTUE/F processor. 6. Install the RCTUE/F processor into the DK280 or DK424 base cabinet (see the Strata I&M Manual for more details). Remove the MBJU (DK424 Base only). 7.
––––––––––––––––––––––––––––––––––––––– Important Things to Do After Upgrading to an RCTUE/F Processor processor, remove the MBJU from DK424 Base Cabinet per Chapter 5 – DK424 Installation in the Strata I/M Manual, and install the RCTUE/F processor). 8. From the programming telephone run Program 91-9 (twice) to initialize the RCTU E/F processor. 9. From the programming telephone run Programs 03, 76, and 77-1 to set up the TTY interface port. 10.
Important Things to Do After Upgrading to an RCTUE/F Processor –––––––––––––––––––––––––––––––––––––––– 148 DKAdmin/DKBackup
Upgrading Strata DK Systems to DK424 Release 4.0 C The following important items must be considered when upgrading the DK14, DK16e, DK40, DK280, and DK424 Release 1~3 systems to a DK424 Release 4.0. A new feature in DK424 Release 4.0 is increased station capacity in systems containing Tie and Direct Inward Dialing (DID) lines. In Release 4.0, the station capacity of systems that contain Tie/DID lines increases due to Release 4.0 eliminating automatic assignment of station ports to DID and Tie lines.
DK424 Release 4.0 Upgrade Procedure ––––––––––––––––––––––––––––––––––––––––––––––––––––––––––––– DK424 Release 4.0 Upgrade Procedure 1. Using DKAdmin or DKBackup Release 4.0, download the customer data from the currently installed processor. Save this “Customer” data as a backup in case you must reinstall the current processor and/or processor ROM/Flash memory release level. Note You must use DKAdmin or DKBackup Release 4.0 for this procedure. Prior releases of these programs do not provide DK Release 4.
–––––––––––––––––––––––––––––––––––––––––––––––––– Upgrading Strata DK Systems to DK424 Release 4.0 Upgrading Strata DK Systems to DK424 Release 4.0 1. Power down the system before removing and installing the processor card(s). Figure 25 shows the slot placement of the processor cards. 2. Remove only the RCTUA, RCTUBB, RCTUD, or RCTUF. 3. Remove the MOH connection, if required.
Upgrading Strata DK Systems to DK424 Release 4.
–––––––––––––––––––––––––––––––––––––––––––––––––– Upgrading Strata DK Systems to DK424 Release 4.0 5. Using a small screwdriver, carefully remove the four ROMs or flash memory (see Figure 30). 6. Replace with the equivalent ROMs or flash memory in the upgrade kit. Peel the labels (two locations) off the card.
DK424 Release 4.0 Upgrade Programming Example ––––––––––––––––––––––––––––––––––––––––––––––––––– DK424 Release 4.0 Upgrade Programming Example Important! When upgrading to DK424 Release 4.0 from a lower release, it is highly recommended to use the DKAdmin or DKBackup Release 4.0 PC software program. Trying to upgrade to Release 4.0 manually from the programming telephone could take many hours. The following Release 3.0 to Release 4.
–––––––––––––––––––––––––––––––––––––––––––––––––– DK424 Release 4.0 Upgrade Programming Example System/Station Administration Screen Before/After Release 4.0 Upgrade Figure 33 shows the DKAdmin System/Station Administration Screen of the same DK424 Release 3 system shown in Figure 31. Figure 34 shows the same after upgrading to RCTUE3/ F4 with DKAdmin.
DK424 Release 4.0 Upgrade Programming Example ––––––––––––––––––––––––––––––––––––––––––––––––––– System/Station Administration CSN (Cabinet Slot No.) Phy. Port No. PT Telephone Location Log Port No. Int/ PDN No.
–––––––––––––––––––––––––––––––––––––––––––––––––– DK424 Release 4.0 Upgrade Programming Example Program Changes Before/After Release 4.0 Upgrade The following examples show the type of programs and data that must change when upgrading from DK14/DK16e/DK40 Release 1 and DK280/DK424 Release 1~Release 3 to DK424 Release 4.0. These program changes are required to make the Strata DK operate the same after the upgrade as it did before; thus making the upgrade transparent to the end user.
DK424 Release 4.0 Upgrade Programming Example ––––––––––––––––––––––––––––––––––––––––––––––––––– Programs *04, 05, 09 There is no change to the data in these programs when upgrading to Release 4.0. Note that DID/Tie ports do not cause Phantom DN ports to shift in Strata DK Release 1~Release 3 systems, so they do not shift in Program *04 when upgrading to Release 4.0. Also, the data in Program 09 is DN numbers and not port numbers, so data in Program 09 does not change when upgrading to Release 4.0.
–––––––––––––––––––––––––––––––––––––––––––––––––– DK424 Release 4.0 Upgrade Programming Example If the DID Intercept Destination is the Kitchen Telephone (PDN 107), data in this program must not be changed to adjust for port shifting caused by the RDDU DID line PCB in slot 13.
DK424 Release 4.0 Upgrade Programming Example ––––––––––––––––––––––––––––––––––––––––––––––––––– Program *33 If the Back Room telephone (PDN 119) is programmed as the Owner of PhDN 500, the data in Program *33 must shift: Before the Upgrade After the Upgrade PhDN Port 500 is owned by Port 019 PhDN Port 500 is owned by Port 015 Programs 39, 29, *29, and 59 When a port number shifts from XXX to YYY during an Release 4.
Index A ACD administration, 70 agent programs, 72 edit ACD programs, 70 edit agent programs, 72 view notes on program, 71, 75 ACD/DID assignments, 114 add-on-module change assigned feature, 64 clear port, 64 copy feature, 64 edit assignments, 63 make assignments to another port, 63 administration ACD, 70 administration menu, 43 directory number, 85 distributed hunt group, 92 DNIS, 89 download data, 74 edit data, 74 program, 73 station, 44 system, 44 upload data, 74 view all programs, 74 after connect strin
C call forward assignments, 93 set/change assignments, 93 use system program files to edit, 94 calling Strata DK using dialer, 129 CAMA trunk programs (see E911/CAMA trunk programs check processor type option, 100, 102, 108 CO line, 55 access codes, 91 flexible key assignments, 88 COM port, 124, 127 communication dialing strings, 41 unable to establish, 100, 102, 109 update dialing strings, 41 communication setup display settings, 125 PC DIU/DIU modem pool to modem, 137 remote modem to external modem/TTY po
screen conventions, 4 security, 78 software release, 38 system requirements, 7 using, 27 DKBackup about, 42 backup/restore, 99 check system, 17 install program, 18 software release, 38 DNIS address reference numbers, 90 administration, 89 network table assignments, 91 number/name/ringing/VM-ID assignments, 90 tenant lock assignments, 92 DNIS/DID ringing, 93 DNIS/DID/ANI line assignments, 89 documentation conventions, viii how to use this manual, ix related, ix download data, 41, 100 DSS console assignments
file, 35, 115, 131, 133 item selector, 119 options, 117 password level access, 123 pull-down, 32 system installation, 118 menu options about, 42 ACD administration, 70 ACD agent programs, 72 ACD programs, 70 add-on module button assignments, 63 attendant console flexible button assignments, 66 call forward assignments, 93 change colors, 118 check processor type, 100 communications setup, 124 company general information, 117 dial DK, 40 directory number administration, 85 distributed hunt group administratio
print customer program, 115 port/station information, 47 printer selection screen, 115 printer type selection, 119 select printer, 120 processor upgrade, 37 upgrade RCTU processor, 107 program *04, 76, 108, 112, 114, 158 *09, 76, 106, 108, 112, 158 *17, 158 *29, 160 *33, 160 *42-1, 160 *42-2, 160 00, 101, 114 01, 157 02, 157 03, 76, 105, 109, 112, 114, 128, 150, 157 04, 76, 106, 112, 114, 157 05, 158 09, 158 10-1, 158 10-2, 158 10-3, 158 10-4, 158 13, 158 15, 158 16, 158 17, 158 20, 159 29, 160 30, 159 33,
select customer option, 39, 100, 102 select printer, 120 serial communications port, 124 serial ports baud rate, 105 shift-function keys, 121 software release, 38 speed dial numbers assignments, 55 change, 48 edit station assignments, 69 edit system assignments, 68 programming, 68 set, 48 station assignment, 69 system, 48 system assignment, 68 station attributes copy a range, 53 definitions, 50 program/update, 49 information, 47 speed dial numbers, 69 stop bits serial port, 124 serial ports, 128 system chec
Toshiba America Information Systems, Inc.