Printed in Taiwan on recycled paper
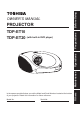
Before Using PROJECTOR In the spaces provided below, record the Model and Serial Number located at the bottom of your projector. Retain this information for future reference. Model No. Serial No.
SAFETY PRECAUTIONS The lightning flash with arrowhead symbol, within an equilateral triangle, is intended to alert the user to the presence of uninsulated “dangerous voltage” within the product’s enclosure that may be of sufficient magnitude to constitute a risk of electric shock to persons. The exclamation point within an equilateral triangle is intended to alert the user to the presence of important operation and maintenance (servicing) instructions in the literature accompanying the appliance.
RESPONSIBLE PARTY: TOSHIBA AMERICA INFORMATION SYSTEMS, INC. 9740 Irvine Blvd., Irvine, CA 92618-1697, USA Phone: (949) 583-3000 WARNING: USA only Notice CANADA only Changes or modifications made to this equipment not expressly approved by Toshiba, or parties authorized by Toshiba, could void the user’s authority to operate the equipment. This Class B digital apparatus complies with Canadian ICES-003. Cet appareil numérique de la classe B est conforme à la norme NMB-003 du Canada.
IMPORTANT SAFETY INSTRUCTIONS CAUTION: PLEASE READ AND OBSERVE ALL WARNINGS AND INSTRUCTIONS GIVEN IN THIS OWNER’S MANUAL AND THOSE MARKED ON THE UNIT. RETAIN THIS BOOKLET FOR FUTURE REFERENCE. This set has been designed and manufactured to assure personal safety. Improper use can result in electric shock or fire hazard. The safeguards incorporated in this unit will protect you if you observe the following procedures for installation, use and servicing.
8. Power-Cord Protection The product should be situated away from heat sources such as radiators, heat registers, stoves, or other products (including amplifiers) that produce heat. Power-supply cords should be routed so that they are not likely to be walked on or pinched by items placed upon or against them, paying particular attention to cords at plugs, convenience receptacles, and the point where they exit from the product. 6.
IMPORTANT SAFETY INSTRUCTIONS (Continued) 10. Lightning storms 12. Do not place the product vertically For added protection for this product, during a storm or when it is left unattended and unused for long periods of time, unplug it from the wall outlet. This will prevent damage to the product due to lightning and power-line surges. However, while it is thundering or lightning, do not touch the apparatus and any connected cable and/or equipment.
Do not place this product on an unstable cart, stand, tripod, bracket, or table. The product may fall, causing serious injury to a child or adult, and serious damage to the product. A product and cart combination should be moved with care. Quick stops, excessive force, and uneven surfaces may cause the product and cart combination to overturn. 17. If glass components, including the lens and lamp, should break, contact your dealer for repair service.
IMPORTANT SAFETY INSTRUCTIONS (Continued) 19. Replacement Parts 22. Do not use the product in a closed installation state. The user may perform replacement of the lamp but a service technician should make all other repairs. When replacement parts are required, be sure the service technician has used replacement parts specified by the manufacturer or have the same characteristics as the original part. Unauthorized substitutions may result in fire, electric shock, or other hazards.
If your line voltage is 220 to 240V, use one of the following types of cable. Plug configuration Plug type EURO Line voltage 220 - 240V UK 220 - 240V Plug configuration Use a 5A fuse which is approved by ASTA or BSI to BSI362. Always replace the fuse cover after changing the fuse.
IMPORTANT PRECAUTIONS (Continued) Avoid Volatile Liquid Do not use volatile liquids, such as an insect spray, near the unit. Do not leave rubber or plastic products touching the unit for a long time. They will leave marks on the finish. If cleaning with a chemically saturated cloth, be sure to follow the product’s precautions. EXEMPTION CLAUSES • Toshiba Corporation bears no responsibility in the case of damages arising from natural disaster such as earthquakes, lightning, etc.
Trademarks • VGA, SVGA, XGA, SXGA, UXGA are registered trademarks of International Business Machines Corporation. • Digital Light Processing (DLP), Digital Micromirror Device and DMD are registered trademarks of Texas Instruments. • HDMI, the HDMI logo and High-Definition Muiltimedia Interface are registered trademarks of HDMI licensing LCC. • HQV and HQV logo are registered trademarks of Silicon Optix. • Dolby, Dolby Digital, Pro Logic are registered trademarks of Dolby Laboratories.
NOTES ON DISCS On handling discs Notes on copyright • Do not touch the playback side of the disc. DO The unauthorized recording, use, distribution, or revision of television programs, videotapes, DVDs, and other materials is prohibited under the Copyright Laws. Structure of disc contents Playback side Normally, DVD video discs are divided into titles, and the titles are sub-divided into chapters. Video CDs and Audio CDs are divided into tracks. DVD video disc • Do not attach paper or tape to discs.
Playable discs The region code of this unit is set accord- The following discs are available. DVD-Video, DVD+RW, DVD+R, DVD-RW, DVD-R, ing to the location you purchased the unit. If CD-DA, VCD, SVCD, ISO9600, CD-R, and region codes, which stand for their playable CD-RW. area, are printed on your DVD video disc and Some of these discs may be incompatible. you do not find ALL or region code matches to Be sure to always use only 12 cm discs.
CONTENTS Before Using SAFETY PRECAUTIONS ................................................................................................. 2 IMPORTANT SAFETY INSTRUCTIONS .......................................................................... 4 POWER SUPPLY CORD SELECTION ............................................................................. 9 IMPORTANT PRECAUTIONS .......................................................................................... 9 EXEMPTION CLAUSES .......................
6. Random playback ................................................................................................ 37 7. Changing angles .................................................................................................. 37 8. Title selection ....................................................................................................... 37 9. Changing soundtrack language ........................................................................... 38 10. Subtitles .....................
Checking the package contents Check that the following items are included in the box, along with the main unit. If any item is missing, please contact the store where you purchased the product. (1) Remote control*1 (2) R03 (size AAA) batteries for remote control (3) Owner’s manual (this book) (4) Power cord *2 (5) Scart adapter *3 *1 Remote shape of TDP-ET10 is different from this figure. p.18 *2 The shape of supplied power cord varies on the product destination.
Names of each part on the main unit 4 2 1 3 3 Front 11 Rear 10D 9 8 8 6 10C 10C 10B 7 10A Bottom 10B For more information, see the pages in parentheses. Name Function (1) Lens Project expanded image. (2) Focusing ring Adjust screen focus. (3) Infrared remote sensor Sense commands from the remote control. (4) (5) (6) (7) (8) Control panel Terminal panel Foot adjuster Air intake Air exhaust Adjust the main functions of the projector. p.18 ~ p.19 Connect external devices. p.
Control panel and remote control parts for TDP-ET10 EN R E ZE SC SI PIC TU MO RE OE 8 7 6 5 2 3 4 1 [TDP-ET10 control panel] [TDP-ET10 Remote] For more information, see the pages in parentheses. (1) ON/STANDBY: Switch projector between ON and STANDBY. (2) MENU (INPUT) p.24 p.41 : 1 9 Access the main programming menu or select input source. (3) ENTER : Activate highlighted item in the on screen menu. (4) DOWN: Move down and highlight the item. 8 (5) UP: Move up and highlight the item.
Control panel and remote control parts for TDP-ET20 8 7 6 5 4 3 2 1 [TDP-ET20 Remote] 9 1 16 10 (3) (4) (5) (6) (7) (8) (9) (10) (11) (12) (13) 17 (14) (15) 3 18 11 12 13 14 15 19 20 21 ON/STANDBY: Switch the projector between ON and STANDBY. MENU (INPUT) p.24 p.41 : Access the main programming menu or select input source. : Activate highlighted items in the on screen menu. ENTER DOWN: Move down and highlights the item. UP: Move up and highlights the item. + - : Increase / decrease the volume.
Terminal panel 11 12 1 3 7 2 5 4 8 9 6 10 For more information, see the pages in parentheses. Name (1) YPBPR /YCBCR (Component) (2) VIDEO terminal (3) S-Video terminal (4) HDMI terminal (5) COMPUTER IN terminal (6) AUDIO IN terminal (7) CONTROL serial terminal (8) COAXIAL (Digital Audio) In terminal (9) COAXIAL (Digital Audio) Out terminal (10) Service terminal (11) Main power switch (12) AC In socket Function : Input component video signal from video equipment. p.
Preparing and using the remote control ■ Loading dry-cell batteries into the remote control (1) Remove the battery cover. ■ Point the remote control toward the projector’s infrared remote sensor and press a button. • Operating the projector from the front Be sure to align the plus and minus ends of the batteries properly. Two batteries (R03, size AAA) are used. • Operating the projector from the rear (3) Put back the battery cover.
Placement Placement Styles This device can be placed in some different placement styles. The factory setting is “floormounted front projection” although you can modify the setting according to your needs. Set the Projection mode in accordance with your needs through remote control or control panel, enter SETUP menu.
Projection Distance and Size Use the figures, tables, and formulas below to determine the projection size and projection distance. (Projection sizes are approximate values for full-size picture with no keystone adjustment.) Screen As seen from above Preparations Lens center As seen from side Lens center a (cm) = projection size (inches) x 1.433 – 13.32 H (cm) = projection size (inches) x 0.
Connection Before connection • Some types of computers cannot be used or connected to this projector. • Turn off the power of both devices before connecting. • The figure below is a sample connection. This does not mean that all of these devices can or must be connected simultaneously. Overview of cable types: composite video cable S-Video cable component video cable HDMI cable 3.
Connecting with HDMI DVD player Preparations From HDMI Output Terminal (Digital Audio/Video) Connecting with Computer Computer From RGB Output Terminal From Audio Output Terminal ■ Notes • To select audio input, use On Screen menu, see p.28 . • Signals which resolution exceeds the native resolution (854 x 480 pixels) will be compressed. For this reason, some information may be lost, or image quality may be affected.
Turning the power on and off ■ Connecting the power cord 1 Insert the power cord connector into the AC IN socket of the projector. 2 Insert the power cord plug into a wall or other power outlet. Power cord connector ■ Turning the power on 1 Turn on the main power switch. The blue LED at the Power key will start to flash, indicating standby mode. 2 Activate the projector.
■ Using standby mode to save power and turning the power off 1 Put the Projector into standby mode to save power. Pressing the ON/STANDBY button once, a power off indication message will appear. Press the ON/STANDBY button to put the projector into standby mode. The power off message has to be displayed for the second press of the power button to be valid. When cooling lamp After cooling complete Red: blink Blue: on B Red: off Blue: blink A The cooling fan will operate for about 60 seconds.
Basic operations 1 Turn on the power. Turn on the power by following the instruction in “Turning the power on” in p.26 . 2 Activate the connected device. Turn on and start the connected device. 3 Select MENU language. This projector can display the on screen language in English, French, German, Spanish, Italian, Portuguese, Japanese, Traditional Chinese, Simplified Chinese and Korean. (1) (2) (3) (4) Press [MENU] key to display MENU.
5 Projector placement angle adjustments (1) There are 4 adjustable feet on bottom of the projector. Each foot height can be adjusted by screwing and the placement angle and the height of the projected image can be changed. (2) To adjust the projection size, it is needed to change placement closer/farther to the projection screen. 6 Adjusting the focus Use focusing ring to adjust the focus. The aspect ratio is the ratio of image width to image height.
Basic operations (Continued) 8 Adjusting the volume The speaker volume can be adjusted by pressing [-] [+] key on control panel or remote control. 9 Turning off the power Turn off the power by following the instruction in “Turning the power off” in p.27 . ■ Note • Note that a lamp characteristics may rarely cause the brightness to fluctuate slightly. • A lamp is consumable item. If used for extended periods, images will appear dark, and the lamp could burn out.
TDP-ET20 DVD playback About The icons on the heading bar show the playable discs for the function described under that heading. You can use this function with DVD video discs. You can use this function with Video CDs. You can use this function with Audio CDs and CD-R/RW discs. Setup the DVD player. You can setup the DVD player setting. (1) Press [DVD SETUP] key on the remote control when DVD input is selected. DVD setup menu will appear. (2) In DVD setup menu, there are 2 pages.
TDP-ET20 DVD Playback (Continued) PARENTAL DVD discs equipped with the password function are rated according to their content. The contents allowed by a parental lock level and the way a DVD disc can be controlled may vary from disc to disc. ■ Notes DVD video discs may or may not respond to parental lock settings. This is not a defect in the DVD player. Make sure this function works with your DVD video discs. Before changing the rating, it is required to enter password for unlocking.
PBC setting This DVD supports Video CDs equipped with the PBC (Version 2.0) function. (PBC is the abbreviation of Playback Control.) You can enjoy two playback variations depending on types of discs. • Video CD not equipped with PBC function (Version 1.1) Sound and movie can be played on this DVD in the same way as an audio CD. • Video CD equipped with PBC function (Version 2.
TDP-ET20 DVD Playback (Continued) MENU LANGUAGE DVD menu language can be selected in this menu. (1) Select MENU LANG in LANGUAGE SETUP page and press key to select DVD menu language and press (2) Press or key. key. ■ Notes Some DVD video discs may not include your pre-selected language. In this case, the DVD video player automatically displays disc menus consistent with the disc’s initial language setting. Playing a disc. 1. Basic playback (1) Turn on the power and select DVD input.
CAUTION Never insert your finger into the disc hole when load the disc to the disc slot. Keep your fingers well clear of the disc slot when disc is loading or unloading. Neglecting to do so may cause personal injury. ■ Notes Strong static electricity may affect the DVD player’s operation and cause it not to work properly. If this happens, please try followings. (1) Press / key for 5 seconds. DVD player will eject the disc.
TDP-ET20 DVD Playback (Continued) • If the disc is not loaded even if the disc is inserted into the DVD disc slot, remove the disc once and try to load the disc again. • Do not put any objects other than discs in the disc slot. Doing so may cause the projector to malfunction. • When you press a button, there may be a slight delay before the function activates. 2. Playing in fast reverse or fast forward directions (1) Press or during playback.
5. Repeat playback Repeat playback allows you to repeat Chapter/Title/All (DVD) or Track/All (CD/VCD). (1) Press [REPEAT] on the remote control during playback or stop mode. Repeat mode will change repeatedly as following. DVD: Chapter Title All Off CD/VCD: Track All Off DIVX/MP3: One Folder All Off • If you press / or , the Repeat function ends and playback stops. • Some discs may not permit the repeat operation. • Repeat does not work with an interactive DVD 6.
TDP-ET20 DVD Playback (Continued) • Depending on the DVD, the title menu may be displayed automatically when the disc is loaded. • Depending on the DVD, a chapter menu may be displayed after you select a title. 9. Changing soundtrack language You can select the language when you play a multilingual disc. (1) Press [AUDIO] on the remote control during playback. The current soundtrack language will appear. (2) Press [AUDIO] on the remote control repeated until the desired language is selected.
• Press [Display] again • Press [Display] again to erase this OSD. (2) When CD/VCD is playing. • Press [Display] again to erase this OSD. 12. Multimedia files on DVD/CD playback Operations (1) Load a disc on which Multimedia files have been recorded in the disc slot. (2) A file menu screen will appear on the screen. Press to change folder window, file window, or file type buttons. To change file types to play, press until file type display button is highlighted.
TDP-ET20 DVD Playback (Continued) • CD file system: ISO9660 Level1, 2, or Joliet. • This internal DVD video player requires discs/recordings meet certain technical standards in order to achieve optimal playback quality. Pre-recorded DVDs are automatically set to these standards. There are many different types of recordable disc formats (including CD-R containing MP3/Divx files).
Using menus You can call up on-screen menus, and conduct a number of adjustments and settings using the operation buttons p.18 p.19 on the control panel (main unit side) and remote control. ■ How to use the menus The menu shown below is for operation instructions purposes and might differ from the actual display. 1. Press the [MENU] button. Display the menu. 2. Select a category. / Select the category using [UP] [DOWN] key.
Using menus (Continued) ■ Input MENU Video input source and audio input source can be selected separately in this projector. Video input Video input source can be selected in this menu from DVD, Component, HDMI, Video, S-video and Computer. / [UP] [DOWN] key. Press . Select with Audio input Audio input source can be selected in this menu from DVD, HDMI, Digital (Coax) and Analog. Audio input source links to the video input source and it is memorized.
Sharpness Adjust the sharpness of the image. Press . Adjust with / [ - ] (Softer) or / [ + ] (Sharper) key. Detail Enhancement Set the function to enhance detail of the image. Press . Adjust with / [ - ] (Lower) or / [ + ] (Higher) key. H-position Adjust horizontal position of the image. Press . Adjust with / [ - ] (Move left) or / [ + ] (Move right) key. This can be adjusted when input source is Computer or HDMI. V-position Adjust vertical position of the image. Press .
Using menus (Continued) Advanced MENU Overscan Adjust overscan ratio of the image. Press . Adjust with / [ - ] (Lower) or No overscan when set to 100% / [ + ] (Higher) key. NTSC mode Set the black level for video/s-video input. Press . Select US(7.5IRE)/Japan(0IRE) with / [UP] [DOWN] key. This can be adjusted only when video input source is video/s-video and input signal is NTSC or NTSC4.43. HDMI mode Set the black/white level for HDMI input. Press . Select HDMI/DVI with / [UP] [DOWN] key.
■ Audio setting MENU Volume Adjust the volume of sound. Press . Adjust with / [ - ] (Lower) or / [ + ] (Higher) key. Bass Adjust the bass level of sound. Press . Adjust with / [ - ] (Lower) or / [ + ] (Higher) key. Treble Adjust the treble level of sound. Press . Adjust with / [ - ] (Lower) or / [ + ] (Higher) key. L/R reverse Set L channel /R channel speaker output reversed. When this projector is used in ceiling mount or rear projection, it is recommended to speaker output reversed. Press .
Using menus (Continued) ■ Setup MENU Language Select a language used in menu system. The following ten languages are available. - English - French (Français) - Germany (Deutsch) - Italian (Italiano) - Spanish (Español) - Portuguese (Português) - Japanese (ᣣᧄ⺆) - Simplified Chinese (ㅔԧЁ᭛) - Traditional Chinese (ᖅᡝϛМ) - Korean (뼗霨꽯) Press . Select with / [UP] [DOWN] key. H-Keystone Correct the horizontal keystone distortion of the screen. Press .
Setting fan mode to high increases the cooling fan speed. Set this option to use the projector at high altitude (over 1800 meter / 6000 feet above sea level) Press . Select from Standard/High with / [UP] [DOWN] key. Projection mode Sets projection mode in accordance with placement style. p.22 The following four modes are available. - Standard - Ceiling (TDP-ET10 only) - Rear - Rear ceiling (TDP-ET10 only) Press . Select with / [UP] [DOWN] key. / [UP] [DOWN] key.
Using menus (Continued) ■ Notes • If a lamp is used for extended periods, images will appear dark, and the lamp could burn out. This is characteristic of a lamp, and is not malfunction. (The lifetime may vary much due to conditions of use.) Total Time Display the total time that this projector is used. Version Display firmware version. This shows the version of the projector’s internal control program. This version is referred to for customer service, etc.
About lamp The product’s light source is a mercury lamp that lights at increased internal pressure. Be sure to fully understand the following characteristics of the lamp and handle it with extreme care. • The lamp may burst with a loud noise due to impact or deterioration, or fail to light at the expiration of its life. • How long it takes before the lamp burst or the life expires may vary greatly by lamp. Some may burst shortly after first use.
Lamp replacement (Continued) CAUTION • If you have been using the projector, the lamp will be very hot, and may cause burn injuries. Wait for the lamp to cool (for longer than 1 hour) before replacing it. • If the lamp should break, please handle with care to avoid injury due to broken pieces and contact your dealer for repair service. 1 Unplug power cord. 2 Wait until lamp is sufficiently cooled. Wait for at least 1 hour. 3 Keep the projector stationary. Do not move the projector while replacing the lamp.
6 Install the new lamp. Insert the new lamp into position and lock it into place with the three lamp locking screws. 7 Replace the lamp cover. Align the cover, and press it in, then tighten the screws loosened in step 4 until the lamp cover is no longer loose. 8 Reset the lamp timer. Reset the lamp timer by using “lamp timer reset” in Setup menu. p.46 • The Lamp time item in the Status display menu indicates the “estimated” time of lamp use. p.47 • Attach the lamp cover so that it is not loose.
Lens and main unit cleaning WARNING Request cleaning and maintenance of a ceiling-mounted unit from your projector dealership. Attempting to clean/replace the lamp at a high site by yourself may cause you to drop down, thus resulting in injury. ■ Lens cleaning • Clean the lens with a commercially available blower and/or lens cleaner. • The lens is easily scratched, so do not rub it with hard objects, or strike it. ■ Main unit cleaning • Clean the main unit after unplugging the power cord.
Trouble indications The indicator lights inform you of internal abnormalities. LED indicators State/Problems Red LED is flashing at ON/ STANDBY indicator (2Hz) Power went out during use ⇒ Internal overheating, or the outside temperature is too high. • Place the projector so that the air intake and exhaust are not blocked. • Unplug the power cord and wait for a short while, then turn the power back on. ❈ The icon will appear before the power goes out. ❈ After approx.
Before calling service personnel If you think something is wrong, check the followings before contacting customer service. Please see “Trouble indications” p.53 as well. If This Happens No Power Check • Is the power cord plugged in? Is it connected to the projector? • Is the lamp cover loose? The projector • Is Pressing ON/STANDBY button quickly? To activate the projector, won’t be activate press the ON/STANDBY button on control panel for 3-5 seconds.
For TDP-ET20 If This Happens Playback does not start Check • • • • • Is the disc inserted? Is the disc inserted upside down? Is an unplayable disc inserted? Is the disc dirty? Is the parental lock function set? The playback • Is the disc dirty? picture has occa- • Is the play mode in fast forward or fast reverse playback? sional distortion.
Specification ■ List of general specifications Item Specification Consumption Power 340 W Input Rating 100~240V AC, 50~60 Hz, 4.0A Weight 4.8 kg (TDP-ET10) 5.0 kg (TDP-ET20) External Dimensions 344 x 322 x 155 mm (W × H × D) Cabinet material PC+ABS resin Conditions for usage environment Temp: 5°C to 35°C; relative humidity: 30% to 70% Display pixels 1 chip DMD™ Picture elements 409, 920 pixels (854H x 480V) Lens F=2.5~2.7 f=7.
■ List of supported signals (Y/Pb/Pr signals) Signal format fh (kHz) fv (Hz) 480i(525i)@60Hz 15.73 59.94 480p(525p)@60Hz 31.47 59.94 576i(625i)@50Hz 15.63 50.00 576p(625p)@50Hz 31.25 50.00 720p(750p)@60Hz 45.00 60.00 720p(750p)@50Hz 37.50 50.00 1080i(1125i)@60Hz 33.75 60.00 1080i(1125i)@50Hz 28.13 50.00 ■ List of supported signals (Video, S-Video signals) Video mode fh (kHz) fv (Hz) fsc (MHz) NTSC 15.73 60 3.58 PAL 15.63 50 4.43 SECAM 15.63 50 4.25 or 4.41 15.
Specification (Continued) ■ CONTROL terminal Conditioning of the projection unit can be also done by a computer via the RS-232C. Pin No. 1 2 3 4 5 6 7 8 9 ● Pin assignment 1 5 6 9 D-sub 9 pin Signal Name N.C RXD TXD DTR GND DSR RTS CTS N.C Description No connection Receiving data Sending data Data terminal ready Signal ground Data set ready Request to send Consent to send No connection ● Interface format 1. Communication method 2.