TEC Bar Code Printer B-442 Owner's Manual Table of Contents
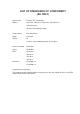
LIST OF STANDARDS OF CONFORMITY (EU ONLY) Manufacturer : Toshoba TEC Corporation Address : 570 Ohito, Ohito-Cho, Tagata-Gun, Shizuoka-Ken, 410-2392 Japan declares that following product Product Name : Bar Code Printer Model : B-442-QP Options : All conforms to the following product specifications Generic Standard : EN50 082-1 Safety : EN 60 950 EMC : EN 55 022 IEC 801-2 IEC 801-3 IEC 801-4 Harmonics : EN 61000-3-2 EN 61000-3-3 Supplementary Information The product herewith complies with the
EM1-33046A Safety Summary Safety Summary Personal safety in handling or maintaining the equipment is extremely important. Warnings and Cautions necessary for safe handling are included in this manual. All warnings and cautions contained in this manual should be read and understood before handling or maintaining the equipment. Do not attempt to effect repairs or modifications to this equipment.
EM1-33046A Safety Summary Disconnect the plug. Connect a grounding wire. If foreign objects (metal fragments, water, liquids) enter the machines, first turn off the power switches and disconnect the power cord plugs from the outlet, and then contact your authorized TEC representative for assistance. Continued use of the machine in that condition may cause fire or electric shock. Disconnect the plug. When unplugging the power cords, be sure to hold and pull on the plug portion.
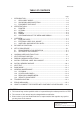
EM1-33046A TABLE OF CONTENTS Page 1. 2. INTRODUCTION ................................................................................................ 1- 1 1.1 APPLICABLE MODEL ............................................................................... 1-6 1.2 UNPACKING AND INSPECTION.............................................................. 1-6 1.3 EQUIPMENT CHECKLIST ........................................................................ 1-6 SPECIFICATIONS ....................................
EM1-33046A 1. INTRODUCTION 1. INTRODUCTION 1. INTRODUCTION Thank you very much for purchasing the TEC B-442 Bar Code Printer. The attractive desktop printer delivers superior performance at an economical price. Both powerful and easy-to-use, the B-442 printer is your best choice among industrial direct thermal and thermal transfer label printers. The B-442 offers both high-resolution thermal transfer and direct thermal printing at selectable speeds of 1.5 inches and 2 inches per second.
EM1-33046A 1. INTRODUCTION 1. INTRODUCTION This equipment has been tested and found to comply with the limits for a Class A digital device, pursuant to Part 15 of the FCC Rules. These limits are designed to provide reasonable protection against harmful interference when the equipment is operated in a commercial environment.
EM1-33046A 1. INTRDUCTION 1.1 APPLICABLE MODEL 1.1 APPLICABLE MODEL B - 4 4 2 - Q Q Destination Code QQ: North America QP: Europe GH12-GB: UK Thermal direct/Thermal transfer 1.2 UNPACKING AND INSPECTION After receiving your B-442 Bar Code Printer, carefully inspect the device and its accessories. The B-442 is specially packaged to withstand damage in shipping. If damage is evident, a damage claim should be filed immediately with the transportation company.
EM1-33046A 2. SPECIFICATIONS 2.1 PRINTER 2. SPECIFICATIONS 2.1 PRINTER 2.1.1 Printer Block Type: Print Speed: Resolution: Font Styles: Bar Codes: 2D Codes: Direct thermal or thermal transfer 1.5 inches or 2.0 inches per second 203 dots per inch (8 dots per mm) Five alphanumeric fonts from 0.059 inches H (1.5 mm) to 0.23 inches (6.0 mm), expandable vertically and horizontally up to 8 times.
EM1-33046A 2. SPECIFICATIONS 2.2 OPTIONS 2.1.4 Communications Interface Communications: Character Set: Word Length: Handshaking: Input Buffer: 2.1.
EM1-33046A 2. SPECIFICATIONS 2.3 MEDIA 2.3 MEDIA Type Tag Paper Ticket 25.0 ~ 115.0 25.0 ~ 115.0 25.0 ~ 115.0 Length (mm) 12.0 ~ 273.0 12.0 ~ 273.0 12.0 ~ 273.0 Thickness (mm) 0.08 ~ 0.46 0.16 ~ 0.32 0.16 ~ 0.32 Item Width (mm) Thermal Label Inner roll diameter (mm) 110.0 max. External roll diameter (mm) 214.0 max. 1) Thermal Label 2.5 mm ~ 5.0 mm Backing Paper Label Label 1.0 mm 1.0 mm BackingPaper 23.0 mm~113.0 mm Fig. 2-1 25.7 ± 0.3 mm 12.0 mm ~ 273.0 mm Fig.
EM1-33046A 2. SPECIFICATIONS 2.4 RIBBON 1.0 mm Printing Area 1.0 mm 1.0 mm 1.0 mm Fig. 2-7 4) Relationship between the head effective print width and paper. Head effective print width 104.0 mm 115.0 mm (Maximum paper width) 2.4 RIBBON Item No. Specification 1 Shape Spool type 2 Width 40 mm ~ 110.0 mm 3 Max. OD 4 Winding method The ink side is outside of ribbon winding.
EM1-33046A 2. SPECIFICATIONS 2.5 CARE/HANDLING OF THE MEDIA AND RIBBON 25.7 ± 0.3 mm Fig. 2-8 Max. 105 ± 0.5 mm NOTE: When purchasing ribbon locally, they must meet the above size. There may be TEC-approved ribbons which do not fall within the above size, however, they have no functional problem. Base Treated back side Core Core Ink outside Adhesive tape Adhesive tape Adhesive tape Leader tape Fig.
EM1-33046A 3. OVERVIEW 3.1 PRINTER PARTS 3. OVERVIEW 3.1 PRINTER PARTS 2 5 3 6 4 7 1 Fig. 3-1 Top Front View 1. 2. 3. 4. 5. 6. 7.
EM1-33046A 3. OVERVIEW 3.1 PRINTER PARTS 3 2 5 4 6 1 10 9 11 8 12 4 7 13 Fig. 3-2 Interior View 1. Printer Cover (in open position) 2. Label Supply Roll Spindle 3. Memory Module Insert Slot (cover on) 4. Ribbon Mechanism 5. Ribbon Supply Spindle 6. Ribbon Rewind Spindle 1 7. Printer Carriage Release Lever 8. Backing Paper Opening 9. Removable Front Panel 10. Pause Switch 11. Power, On-line, Error Indicator Lights 12. Feed Switch 13. Label Taken Sensor 2 5 3 6 4 Fig. 3-3 Rear View 1.
EM1-33046A 3. OVERVIEW 3.2 EXTERNAL LABEL ROLL MOUNT 3.2 EXTERNAL LABEL ROLL MOUNT Fig.
EM1-33046A 3. OVERVIEW 3.3 SWITCHES AND INDICATOR LIGHTS 3.3 SWITCHES AND INDICATOR LIGHTS • INDICATORS PWR. (Power) Indicator The green PWR. indicator light will illuminate when the Power Switch is turned on. On-line Indicator The green On-line indicator will be on when the printer is ready to print. When the Pause button is pressed, the On-line light will flash. ERR.
EM1-33046A 4. DIP SWITCH FUNCTIONS 4. DIP SWITCH FUNCTIONS 4. DIP SWITCH FUNCTIONS The DIP switches are located on the rear of the printer. WARNING! Turn the POWER OFF before changing the DIP switch settings.
EM1-33046A 5. SET UP PROCEDURE 5.1 REQUIREMENTS FOR OPERATION 5. SET UP PROCEDURE 5.1 REQUIREMENTS FOR OPERATION The B-442 has the following requirements: • The host computer must have a serial port. • To set up the initial printer configuration, use either the keyboard on the printer or the DIP switch. • To print the format, create the complete program refering to the command manual. 5.2 SETTING UP THE PRINTER WARNING! 1. Be sure to use the enclosed AC adapter.
EM1-33046A 6. LOADING LABEL AND TAG STOCK 6. LOADING LABEL AND TAG STOCK 6. LOADING LABEL AND TAG STOCK 1. Open the printer cover by pressing the two cover release buttons located on the right and left sides of the printer. While pressing the buttons, pull up on the printer cover. 2. Insert the label supply roll spindle into the core of a label roll. 3. Open the printer carriage by pulling up the release lever on the forward left side of the front rubber roller. 4.
EM1-33046A 6. LOADING LABEL AND TAG STOCK 6. LOADING LABEL AND TAG STOCK 2 2 3 1 Fig. 6-2 Inserting Label Supply Roll into Label Supply Roll Mounts 1. Label Supply Roll Spindle 2. Label Supply Roll Spindle Mount 3. Label Supply Roll 2 3 1 4 Fig. 6-3 Feeding Labels through Adjustable Label Edge Guides 1. 2. 3. 4.
EM1-33046A 7. SELF-PEELING FUNCTION 7. SELF-PEELING FUNCTION 7. SELF-PEELING FUNCTION 1. Remove the printer’s front panel. CAUTION: When removing the front panel, care must be taken not to damage the label taken sensor harness. 2. Feed the backing of the label stock between the front rubber roller and the Self-peeling roller just in front of it, as shown in Fig. 7-1. 3. Feed the backing paper through the Backing Paper Opening in the front panel and replace the panel as shown in Fig. 7-2.
EM1-33046A 8. RIBBON LOADING INSTRUCTIONS 8. RIBBON LOADING INSTRUCTIONS 8. RIBBON LOADING INSTRUCTIONS 1. Place an empty roll on the front ribbon rewind spindle. 2. Loosen the tape that secures the ribbon leader and fold it over the end of the leader. The tape will be used to affix the leader to the ribbon rewind roll. 3. Install the ribbon supply roll on the rear spindle so that the ribbon feeds from the top of the roll toward the rear. Position the ribbon roll at the center of the spindle.
EM1-33046A 8. RIBBON LOADING INSTRUCTIONS 8. RIBBON LOADING INSTRUCTIONS Fig.
EM1-33046A 9. INSTALL EXTERNAL LABEL ROLL MOUNT 9. INSTALL EXTERNAL LABEL ROLL MOUNT 9. INSTALL EXTERNAL LABEL ROLL MOUNT 1 2 3 Fig. 9-1 Install External Label Roll Mount 1. External Label Roll Mount 2. Label Supply Roll Spindle 3.
EM1-33046A 10. INSTALL MOMORY MODULE 10. INSTALL MEMORY MODULE 10. INSTALL MEMORY MODULE WARNING! Turn the power OFF when inserting or removing the memory module. 1. Make sure the power is turned off. 2. Take off the cover from memory module . 3. Insert the memory module and press at the end of the slot. NOTE: Care must be taken not to insert the memory module in wrong orientation. 4. Put the cover on the memory module. 5. Turn on the power. 1 2 Fig. 10-1 Install Memory Module (Option) 1.
EM1-33046A 11. SELF TEST 11. SELF TEST 11. SELF TEST To initiate the Self Test Mode, depress the Feed key while turning on the printer. The printer will first calibrate the label length. If a label edge is not detected within 7", the printer will then stop attempting to feed labels and treat the media as continuous thermal paper. Firstly, the printer will print a pattern to check the performance of the print head.
EM1-33046A 12. DUMP MODE 12. DUMP MODE 12. DUMP MODE After the Self Test Mode, the printer is in Dump Mode. In the Dump mode, any characters sent from the host computer will be printed in two columns as follows: on the left side of the paper are the characters received and on the right side are the corresponding hexadecimal value of the characters. This allows the user to verify programming commands and debug the program. Reset the printer by turning the Power switch off and on.
EM1-33046A 13. GENERAL MAINTENANCE 13.1 CLEANING 13. GENERAL MAINTENANCE 13.1 CLEANING WARNING! 1. Be sure to disconnect the power cord prior to performing any maintenance. 2. Do not use any tool that may damage the print head. 3. DO NOT POUR WATER directly onto the printer. To help retain the high quality and performance of your printer it should be regularly cleaned. The greater the usage of the printer, the more frequent the cleaning. (i.e. low usage=weekly : high usage=daily). 1. Turn the power off.
EM1-33046A 13. GENERAL MAINTENANCE 13.2 COVERS AND PANELS 13.2 COVERS AND PANELS The covers should be cleaned by wiping with a dry cloth or a cloth slightly dampened with a mild detergent solution. NOTE: Clean printer cover with an electrostatic free cleaner for automated office equipment. WARNING! 1. 2. 3. 4. DO NOT POUR WATER directly onto the printer. DO NOT APPLY cleaner or detergent directly onto any cover or panel. NEVER USE THINNER OR OTHER VOLATILE SOLVENT on the plastic covers.
EM1-33046A 14. TOROUBLESHOOTING 14. TROUBLESHOOTING 14. TROUBLE SHOOTING WARNING! If you cannot solve a problem with the following solutions, do not attempt to repair it yourself. Turn the power off, unplug the printer, then contact your TEC representative for assistance. The following table indicates some of the most possible problems that may be encountered while operating the B-442 bar code printer and provides simple and practical solutions.
EM1-33046A 15. ERROR MESSAGES 15. ERROR MESSAGES 15. ERROR MESSAGES 1 Syntax Error The command format is incorrect. Check command manual carefully. The serial port setting is incorrect. Check dip switch and reset the printer. 2 Out of Range Numeric input is too large to be processed. The input string is too long to be stored. The size of the text or Bar Code exceeds that of the label. 3 Download Error The download file format is incorrect. There is not enough memory to receive the file.
16. HOW TO CONNECT THE PRINTER WITH PROTABLE LCD KEYBOARD EM1-33046A 16. HOW TO CONNECT THE PRINTER WITH PORTABLE LCD KEYBOARD 16. HOW TO CONNECT THE PRINTER WITH PORTABLE LCD KEYBOARD To connect a portable LCD keyboard to the printer, we must write a program with particular commands as below: Example: DOWNLOAD "KEYBOARD.BAS" SIZE 4.00, 5.00 CLS SPEED 2 DENSITY 8 SET CUTTER OFF DIRECTION 0 REFERENCE 0,0 GAP 0.10, 0.
E PRINTED IN TAIWAN EM1-33046A