PX30 - A Series User’s Guide If you need assistance: Technical support is available online at Toshiba’s Web site at support.toshiba.com At this Web site, you will find answers for many commonly asked technical questions plus many downloadable software drivers, BIOS updates, and other downloads. For more information, see “If Something Goes Wrong” on page 95 in this guide.
Model: PX30 - A Series Recordable and/or ReWritable Drive(s) and Associated Software Warranty The computer system you purchased may include Recordable and/ or ReWritable optical disc drive(s) and associated software, among the most advanced data storage technologies available. As with any new technology, you must read and follow all set-up and usage instructions in the applicable user guides and/or manuals enclosed or provided electronically.
TOSHIBA, ITS AFFILIATES AND SUPPLIERS DISCLAIM ANY AND ALL LIABILITY ARISING OUT OF THE USE OF THE COMPUTER PRODUCTS IN ANY CRITICAL APPLICATIONS. IF YOU USE THE COMPUTER PRODUCTS IN A CRITICAL APPLICATION, YOU, AND NOT TOSHIBA, ASSUME FULL RESPONSIBILITY FOR SUCH USE. FCC Notice “Declaration of Conformity Information” This equipment has been tested and found to comply with the limits for a Class B digital device, pursuant to Part 15 of the FCC rules.
❖ This device must accept any interference received, including interference that may cause undesired operation. Contact Toshiba’s Support Website at support.toshiba.com.
Bluetooth® Wireless Technology and Your Health The products with Bluetooth® wireless technology, like other radio devices, emit radio frequency electromagnetic energy. The level of energy emitted by devices with Bluetooth wireless technology however is much less than the electromagnetic energy emitted by wireless devices such as mobile phones.
Wireless LAN and Your Health Wireless LAN products, like other radio devices, emit radio frequency electromagnetic energy. The level of energy emitted by Wireless LAN devices however is far much less than the electromagnetic energy emitted by wireless devices like for example mobile phones. Because Wireless LAN products operate within the guidelines found in radio frequency safety standards and recommendations, TOSHIBA believes Wireless LAN is safe for use by consumers.
Regulatory statements This product complies with any mandatory product specification in any country/region where the product is sold. Optical Disc Drive Safety Instructions This appliance contains a laser system and is classified as a CLASS 1 LASER PRODUCT. To use this model properly, read the User’s Guide carefully and keep it for your future reference. Never attempt to disassemble, adjust or repair an optical disc drive. You could damage the drive.
The installer of this radio equipment must ensure that the antenna is located or pointed such that it does not emit RF field in excess of Health Canada limits for the general population; consult Safety Code 6, obtainable from Health Canada’s Web site www.hc-sc.gc.ca/rpb. The RF device shall not be co-located with any other transmitter that has not been tested with this device.
Veuillez noter que les utilisateurs de radars de haute puissance sont désignés utilisateurs principaux (c.-à-d., qu’ils ont la priorité) pour les bandes 5250-5350 MHz et 5650-5850 MHz et que ces radars pourraient causer du brouillage et/ou des dommages aux dispositifs LAN-EL. NOTE The above caution applies to products that operate with an 802.11a radio device. Copyright This guide is copyrighted by Toshiba America Information Systems, Inc. with all rights reserved.
Trademarks eco Utility is a registered trademark of Toshiba America Information Systems, Inc. and/or Toshiba Corporation. Adobe and Photoshop are either registered trademarks or trademarks of Adobe Systems Incorporated in the United States and/or other countries. Atheros is a registered trademark of Atheros Communications, Inc. Bluetooth word mark and logos are owned by the Bluetooth SIG, Inc. and any use of such marks by Toshiba is under license.
Computer Recycling Information As part of a commitment to people and the future, Toshiba promotes the efficient use of resources by working to achieve our zero-wasteto-landfill goal at all our production sites. In addition to our existing waste reduction and recycling policies, Toshiba is strongly committed to reducing electronic waste.
Contents Introduction.......................................................17 This guide ............................................................ 19 Safety icons ......................................................... 20 Other icons used............................................ 20 Your computer’s features and specifications ........................................... 21 Other documentation ........................................... 21 Service options ..............................................
Contents 13 To Restart your computer.................................... 30 To place your computer in Sleep mode............... 31 Adding optional external devices......................... 31 Recovering the Internal Storage Drive ................. 32 Creating recovery media................................ 33 Restoring from recovery media...................... 35 Refresh your PC (with user’s data) ................ 37 Reset your PC ................................................
Contents Inserting an optical disc ................................ 56 Playing optical media..................................... 58 Recording optical media ................................ 58 Removing a disc with the computer on ......... 59 Removing a disc with the computer off ......... 60 Toshiba’s online resources .................................. 60 Chapter 3: Computing............................................ 61 Toshiba’s energy-saver design............................ 61 Power management..
Contents 15 Deleting a user password .............................. 85 System Settings................................................... 86 Sleep Utilities ....................................................... 88 USB Sleep and Charge .................................. 88 Enabling/Disabling USB Sleep and Charge...................................................... 89 Power supply mode settings ......................... 90 Sleep and Music ............................................
Contents If you need further assistance............................ 118 Contacting Toshiba...................................... 118 Other Toshiba Internet Web sites ...................... 118 Toshiba’s worldwide offices .............................. 119 Appendix A: TOSHIBA Function Keys ................. 120 Functions ........................................................... 120 Help file ....................................................... 121 Display brightness ...............................
Introduction Welcome to the world of powerful, multimedia computing. Your computer is ENERGY STAR® qualified. Toshiba is a partner in the Environmental Protection Agency’s (EPA) ENERGY STAR® Program and has designed this computer to meet the latest ENERGY STAR® guidelines for energy efficiency. Your computer ships with the power management options preset to a configuration that will provide the most stable operating environment and optimum system performance for both AC power and battery modes.
Introduction When considering additions to your home office, purchase products that have earned the ENERGY STAR® for all your equipment needs, which can save you money, save energy, and help protect the climate. Visit www.energystar.gov or www.energystar.
Introduction This guide NOTE 19 The product specifications and configuration information are designed for a product Series. Your particular model may not have all the features and specifications listed or illustrated. For more detailed information about the features and specifications on your particular model, please visit Toshiba’s Web site at support.toshiba.com.
Introduction Safety icons Safety icons This manual contains safety instructions that must be observed to avoid potential hazards that could result in personal injuries, damage to your equipment, or loss of data. These safety cautions have been classified according to the seriousness of the risk, and icons highlight these instructions as follows: Indicates an imminently hazardous situation which, if not avoided, will result in death or serious injury.
Introduction Other documentation 21 Your computer’s features and specifications Certain computer chassis are designed to accommodate all possible configurations for an entire product Series. Your select model may not have all the features and specifications corresponding to all of the icons or switches shown on the computer chassis, unless you have selected all those features. This information applies to all the features and icons described in this guide.
Chapter 1 Getting Started This chapter provides tips for using your computer effectively, summarizes how to connect components, and explains what to do the first time you use your computer. Please read the safety instruction information on the Quick Start document (that shipped with your computer) carefully and make sure you fully understand the instructions before you attempt to use your computer in order to avoid potential hazards that could cause bodily injury, property damage, or damage the computer.
Getting Started 23 ❖ Rapid changes in temperature or humidity and sources of temperature change such as air conditioner vents or heaters. ❖ Extreme heat, cold, or humidity. ❖ Liquids and corrosive chemicals. Precautions Your computer is designed to provide optimum safety and ease of use. You should observe certain precautions to further reduce the risk of personal injury or damage to the computer.
Getting Started Handle discs carefully. Avoid touching the surface of the disc. Grasp it by its center hole and edge. If you handle the disc incorrectly, you could damage the disc and possibly lose data. ❖ Scan all new files for viruses. This precaution is especially important for files you receive via email or download from the Internet. Occasionally, even new programs you buy from a supplier may contain a computer virus. You need a special program to check for viruses.
Getting Started Setting up your computer 25 Setting up your computer TECHNICAL NOTE: You must complete all setup steps up to and including “Setting up your software” on page 28 before adding external or internal components to your computer. These components include, but are not limited to a printer and memory. NOTE Please handle your computer carefully to avoid scratches and damage. Connecting to a power source Your computer requires power to operate.
Getting Started Connecting to a power source Always use the TOSHIBA AC adaptor that was provided with your computer, or use AC adaptors specified by TOSHIBA to avoid any risk of fire or other damage to the computer. Use of an incompatible AC adaptor could cause fire or damage to the computer possibly resulting in serious injury. TOSHIBA assumes no liability for any damage caused by use of an incompatible adaptor.
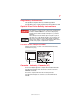
Getting Started Using the computer for the first time _ + 2 27 Plug the AC adaptor cord into the DC-IN on the back of the computer. (Sample Illustration) Connecting the AC adaptor cord to the computer 3 Connect the power cord/cable to a live electrical outlet. Never attempt to connect or disconnect a power plug with wet hands. Failure to follow this instruction could result in an electric shock, possibly resulting in serious injury.
Getting Started Using the computer for the first time Turning on the power To turn on the computer: 1 Make sure the power is properly connected and ready. 2 Check to ensure that all drives and slots are empty. Press and release the power button. The ON/OFF light glows white. Power button (Sample Illustration) Turning on the power The pre-installed operating system will load automatically.
Getting Started Registering your computer with Toshiba 29 Registering your computer with Toshiba Product registration is strongly recommended, and allows Toshiba to send you periodic updates, announcements, and special offers applicable to your Product. Product registration can be completed by one of three methods: 1 From the Toshiba Web site at register.toshiba.com: Type in the requested information and complete the registration process.
Getting Started To Restart your computer 3 In the lower right of the screen click or touch the Power ( ) icon. Shut down option Power (Sample Image) Shut down 4 Highlight Shut down while holding the Shift key, and then click or touch the Shut down option. The computer closes all open applications, shuts down the operating system, and then turns off.
Getting Started To place your computer in Sleep mode 31 To place your computer in Sleep mode 1 From the Start or Desktop screen, move your pointer to the upper-right corner of the screen or swipe in from the right edge. 2 When the Windows® charms appear, click or touch the Settings ( ) charm. Be sure to save your work first. 3 In the lower right of the screen click or touch the Power ( ) icon. Sleep option Power (Sample Image) Sleep 4 Highlight Sleep, and then click or touch the Sleep option.
Getting Started Recovering the Internal Storage Drive Recovering the Internal Storage Drive Your computer includes recovery utilities to allow you to recover your internal storage drive if necessary. The following internal storage drive recovery options are available: Recovery option Creating recovery media Description This option allows you to create the recovery media you will use to restore your computer. Restoring from recovery media See “Creating recovery media” on page 33.
Getting Started Recovering the Internal Storage Drive NOTE 33 When you restore your system, only the operating system files, applications, and drivers originally shipped with the computer are restored. Any files that you created are not restored during this process. Be sure to separately save the files you have created to external media using Windows® or another backup program. For more information, see “Backing up your work” on page 54.
Getting Started Recovering the Internal Storage Drive To create recovery media: 1 From the Start screen begin typing Recovery Media Creator and click or touch your selection. If you are in the Desktop, move your pointer to the upper-right corner of the screen or swipe in from the right edge. When the Windows® charms appear click or touch the Search ( ) charm and, in the Search field, type Recovery Media Creator. In the list that appears, click or touch your selection.
Getting Started Recovering the Internal Storage Drive 4 35 Do one of the following: ❖ If you are copying files to DVD, insert a blank DVD into the optical disc drive. ❖ If you are copying files to a USB flash drive, connect a USB flash drive of the required minimum capacity (as specified in the TOSHIBA Recovery Media Creator utility) to your computer. All information stored on your DVDs or USB flash drive(s) will be erased during the process of creating the recovery media.
Getting Started Recovering the Internal Storage Drive NOTE When you restore your system, only the operating system files, applications, and drivers originally shipped with the computer are restored. Any files that you created are not restored during this process. Be sure to separately save the files you have created to external media using Windows® or another backup program. For more information, see “Backing up your work” on page 54.
Getting Started Recovering the Internal Storage Drive 37 Refresh your PC (with user’s data) Using “Refresh your PC” recovers your internal storage drive to factory default state and attempts to save your data. Toshiba does not guarantee successful data backup. Please make a complete back up of your data to external media before executing the recovery. For more information, see “Backing up your work” on page 54.
Getting Started Recovering the Internal Storage Drive 5 Scroll down to “Refresh your PC without affecting your files,” and click or touch Get Started. The “Refresh your PC” screen appears. (Sample Image) Refresh your PC screen Toshiba does not guarantee successful data back up. Be sure to save your work to external media before executing the recovery (see “Backing up your work” on page 54). 6 Click or touch the Next button to begin. The “Ready to refresh your PC” screen appears.
Getting Started Recovering the Internal Storage Drive 8 39 Your system will restart. The “Refreshing your PC” window appears. When the process is complete your system will reboot your Windows® operating system. Reset your PC The recovery process deletes information stored on the internal storage drive. Be sure to save your work to external media before executing the recovery (see “Backing up your work” on page 54).
Getting Started Recovering the Internal Storage Drive 5 Scroll down to “Remove everything and reinstall Windows,” and click or touch Get Started. The “Reset your PC” screen appears. (Sample Image) Reset your PC screen 6 Click or touch the Next button. The “Do you want to fully clean your drive” screen appears.
Getting Started Recovering the Internal Storage Drive 7 41 Select one of the following options: ❖ Just remove my files ❖ Fully clean the drive The “Ready to reset your PC” screen appears. (Sample Image) Ready to reset your PC screen 8 Click or touch the Reset button. The “Resetting your PC” window appears. When the process is complete your system will reboot your Windows® operating system. NOTE Selecting the “Fully clean the drive” option may take several hours.
Getting Started Connecting an external device type TOSHIBA Application Installer. In the list that appears, click or touch your selection. Search field (Sample Image) Installing drivers and applications 2 Click or touch Next. 3 Click the item you want to install. 4 Click or touch Install. 5 Follow the on-screen prompts to complete the installation process, see “TOSHIBA Application Installer” on page 94. Connecting an external device You can easily attach an external device to your computer.
Getting Started Using external display devices 43 Using external display devices Your computer comes with a built-in display, but you can also connect the following types of external display devices to the video ports described below: Using the HDMI™ In port Your computer comes with an HDMI™ In port, allowing you to connect to a video gaming console or DVD player. NOTE Locate the HDMI™ In port on the Quick Start Card that shipped with your computer.
Getting Started Customizing your computer’s settings HDMI™ Out port* *Available on certain models (Sample Illustration) HDMI™ Out port on back of computer Selecting video cables To connect a device to the HDMI™ Out port (available on certain models), you must purchase an HDMI™ cable. Connecting an HDMI™-compatible television or display device (Available on certain models.
Getting Started Caring for your computer 45 You may also wish to customize your power usage settings. For more information, see “Power Plans” on page 63. There are additional custom settings you can choose. See “Utilities” on page 76. Caring for your computer This section gives tips on cleaning and moving your computer. NOTE Please handle your computer carefully to avoid scratches and damage.
Getting Started Caring for your computer Using a computer lock You may want to secure your computer to a heavy object such as your desk. The easiest way to do this is to purchase an optional computer lock cable. For more information on purchasing a cable lock, visit accessories.toshiba.com. (Sample Illustration) Computer lock cable To secure the computer: 1 Wrap the cable through or around some part of a heavy object. Make sure there is no way for a potential thief to slip the cable off the object.
Chapter 2 Learning the Basics This chapter gives some computing tips and provides important information about basic features. Computing tips ❖ Save your work frequently. Your work stays in the computer’s temporary memory until you save it to the internal storage drive. If the network you are using goes down and you must restart your computer to reconnect, you will lose all work since you last saved. See “Saving your work” on page 54 for further information.
Learning the Basics Using the wireless mouse ❖ Back up your files to external media on a regular basis. Label the backup copies clearly and store them in a safe place. It is easy to put off backing up because it takes time. However, if your internal storage drive suddenly fails, you will lose all the data on it unless you have a separate backup copy. For more information, see “Data and system configuration backup in the Windows® operating system” on page 113.
Learning the Basics Using the wireless mouse 49 Replacing the battery A battery is required to power the wireless mouse. The battery light glows red when the battery power is low. To replace the battery: 1 Save your work and turn the mouse upside down. Battery cover Mouse ON/OFF switch (Sample Illustration) Mouse underside 2 Slide the mouse ON/OFF switch on the underside to the OFF position. 3 Slide the Battery cover off. 4 Always replace the battery with a fresh one.
Learning the Basics Using the wireless keyboard Using the wireless keyboard Your computer comes with a wireless keyboard. The wireless receiver comes installed on your computer. (Sample Illustration) Keyboard Replacing the battery A battery is required to power the wireless keyboard. The battery light glows red when the battery power is low. To replace the battery: 1 Save your work and turn the keyboard upside down.
Learning the Basics Using the wireless keyboard 51 5 Replace the battery cover. 6 Slide the keyboard ON/OFF switch to the ON position. If a battery is leaking or its case is cracked, put on protective gloves to handle it, and discard it immediately. Always dispose of used batteries in compliance with all applicable laws and regulations. Put insulating tape, such as cellophane tape, on the electrode during transportation to avoid a possible short circuit, fire or electric shock.
Learning the Basics Touch screen Special Windows® keys Windows® key Application key (Sample Illustration) Special Windows® keys Your computer’s keyboard has one key and one button that have special functions in Windows®: ❖ Windows® key—Toggles between the Desktop screen and the last app opened on the Start screen.
Learning the Basics Starting an app 53 Drag—Touch and hold an item for a moment and then, without lifting your finger, move the item until you reach the target position. For example, drag items on any app screen to reposition them. Swipe or slide—To swipe or slide, quickly move your finger across the surface of the screen without pausing. For example, swipe your finger to the left from the right edge of the screen to display the Windows® charms. Double-tap—Tap quickly twice to zoom in.
Learning the Basics Saving your work Below is an example using the Search field to start an app: 1 Move your pointer to the upper-right corner of the screen or swipe in from the right edge. When the Windows® charms appear click or touch the Search ( ) charm. (Sample Image) Searching for apps 2 Start typing the app’s name in the Search field. As you type, all matching files and apps are displayed. 3 Click the app you wish to open.
Learning the Basics Using the optical disc drive 55 HINT: Backing up all the files on your internal storage drive may take a considerable amount of time and multiple CDs/DVDs. You may prefer to use a highcapacity backup system, such as an external hard drive. Using the optical disc drive Optical storage is a popular medium for software, music, and video. Digital versatile discs (DVDs) provide a significant increase in data storage and support features that were not available on previous video platforms.
Learning the Basics Using the optical disc drive Optical disc drive components The optical disc drive is located on the side of the computer. Your optical disc drive may look like this: Drive in-use indicator light Eject button Manual eject hole (Sample Illustration) Optical disc drive Drive in-use indicator light—Indicates when the drive is in use. Eject button—Press to release the disc tray. Do not press the eject button or turn off the computer while the drive in-use indicator light is glowing.
Learning the Basics Using the optical disc drive 4 57 Grasp the tray and pull it fully open. (Sample Illustration) Drive tray fully extended 5 Hold the disc by its edges and check that it is free of dust. If the disc is dusty, clean it with a clean dry cloth. 6 Place the disc carefully in the disc tray, label side out. (Sample Illustration) Positioning the disc in the drive 7 Gently press the disc onto the center spindle until it clicks into place.
Learning the Basics Using the optical disc drive 8 Make sure the disc is completely on the spindle and is lying flat against the tray. If you insert the disc incorrectly, it may jam the drive. If this happens, contact Toshiba support for assistance. 9 Push the disc tray in by pressing gently on the center of the tray until it clicks into place. You are ready to use the disc.
Learning the Basics Using the optical disc drive NOTE 59 Due to manufacturing and quality variations in third party optical media (e.g., CD or DVD) or optical media players/recorders, in certain cases, your Toshiba optical disc drive may not record on certain optical media that bear the applicable logo, or play back optical media recorded by other computers or optical media recorders.
Learning the Basics Toshiba’s online resources Removing a disc with the computer off To remove a disc with the computer turned off: 1 Insert a slender object, such as a straightened paper clip, into the manual eject hole. The disc tray slides partially out of the drive. Never use a pencil to press the manual eject button. Pencil lead can break off inside the computer and damage it. 2 Pull the tray out until it is fully open, remove the disc, and place it in its protective cover.
Chapter 3 Computing Toshiba’s energy-saver design Your computer enters a low-power suspension mode when it is not being used, thereby conserving energy and saving money in the process. It has a number of other features that enhance its energy efficiency. Many of these energy-saving features have been preset by Toshiba. We recommend you leave these features active, allowing your computer to operate at its maximum energy efficiency, so that you can use it for longer periods.
Computing Charging the RTC battery Charging the RTC battery Your computer has an internal real-time clock (RTC) battery. The RTC battery powers the System Time Clock and BIOS memory used to store your computer’s configuration settings. When fully charged, it maintains this information for up to a month when the computer is powered off. The RTC battery may have become completely discharged while your computer was shipped, resulting in a CMOS error message during startup.
Computing Power Plans Power Plans You can choose a predefined Power Plan or select your own combination of power options. To do this: 1 While on the desktop, press the Windows® ( then click or touch Power Options. ) key + X, (Sample Image) Windows® Power Options window 2 Select an appropriate plan for your work environment or create your own custom plan. 3 Click or touch Create a power plan in the left pane to set up a new plan.
Computing Using the eco power plan By default the two power plans eco and Balanced are satisfactory for most people and do not need to be edited. Using the eco power plan This computer is equipped with the eco power plan. Operating the computer with this power plan enabled reduces electrical power consumption by slightly lowering system performance. For example, when this power plan is enabled, the brightness of the display is reduced and the interval before Sleep mode takes effect is shortened.
Chapter 4 Exploring Your Computer’s Features In this chapter, you will explore some of the special features of your computer. Exploring the Start screen The Start screen is the launching pad for everything you can do in the Windows® operating system, providing new and easy ways to access everything from your favorite apps and Web sites to your contacts and other important information.
Exploring Your Computer’s Features Exploring the Start screen For detailed information on the new Windows 8 functionality, refer to the Windows® Help and Support. App tiles (Sample Image) Windows® Start screen Charms Use the Windows® charms to start apps, find documents, set up system components, and perform most other computing tasks.
Exploring Your Computer’s Features Exploring the desktop 67 Tiles Tiles can be accessed and launched from the Start screen. Typical Start screen tiles are the Desktop tile and Mail tile, as well as tiles representing all other applications downloaded to your system. Exploring the desktop You can use its features to start applications, find documents, set up system components, and perform most other computing tasks.
Exploring Your Computer’s Features Exploring the desktop Icons An icon represents a folder, file, or program that can be quickly activated by double-clicking the icon. You can create a new desktop icon for any folder, file, or program by dragging the element’s icon from its location in a window to the desktop area. You may see various icons displayed on your system desktop, for example: Recycle Bin – Holds files you have deleted. You may be able to retrieve these files until you empty the Recycle Bin.
Exploring Your Computer’s Features Windows® Store 69 Notification area The Notification area displays icons of tasks or programs that run continuously in the background and displays notifications. To learn more about each task, position the pointer over the icon for a few moments and a short description of the task appears. Typical tasks in the Notification area are Current time, Power usage mode, network connectivity status, and speaker volume.
Exploring Your Computer’s Features Setting up for communications Setting up for communications To connect to the Internet, you need: ❖ A browser or communications program ❖ An Internet Service Provider (ISP) or online service if you plan to use the Internet ❖ A way to connect to the ISP (for example Wi-Fi®/ LAN/ broadband connection, etc.) Using Wireless LAN connectivity NOTE Wireless connectivity and some features may require you to purchase additional software, external hardware or services.
Exploring Your Computer’s Features Exploring audio features 71 Accessing a network To access a network, connect an Ethernet cable to the Network port (RJ45) on your computer. For specific information about connecting to the network, consult your network administrator. Many hotels, airports, and offices offer Wi-Fi® access. Exploring audio features You can use your computer to record sounds using the computer’s internal microphones (available on certain models) or an optional external microphone.
Exploring Your Computer’s Features Using the Web Camera Using external speakers or headphones Your computer is equipped with a full stereo sound system with internal speakers. Instead of using the internal speakers, you can connect headphones or a pair of external stereo speakers. Before putting on headphones to listen, turn the volume down. Do not set the volume too high when using headphones. Continuous exposure to loud sound can harm your hearing.
Exploring Your Computer’s Features Using the Memory card reader NOTE 73 To email, instant message or video conference, you must be connected to the Internet. Depending on your computer model, the process of sending email, taking pictures or recording video messages may vary. To access the Web Camera, on the Start screen click or touch the Camera tile. The Web Camera indicator light glows when the Web Camera is active. NOTE When the Web camera is not active the indicator light is off.
Exploring Your Computer’s Features Using the Memory card reader 2 Push the media into the Memory card reader until it locks in place. (Sample Illustration) Inserting memory media When inserting memory media, do not touch the metal contacts. You could expose the storage area to static electricity, which can destroy data. Always remove memory media when not in use. Removing memory media 1 If you are not currently on the Desktop, choose the Desktop tile on the Start screen, otherwise skip to step 2.
Exploring Your Computer’s Features Using the Memory card reader 5 75 Grasp the card and pull it straight out. (Sample Illustration) Removing memory media Do not remove memory media while data is being written or read. Even when the Windows® message “copying...” disappears, writing to the media might still be in progress and your data could be destroyed. Wait for the indicator light to go out.
Chapter 5 Utilities Your computer includes several utilities designed to help you to reconfigure your system to best meet your individual needs. Together, these allow you to ascertain certain system details, set additional options, or change default options. These utilities are described in this chapter. NOTE 76 The utilities described in this chapter, and the icons shown in the sample images are applicable only if the related utility is available on your system.
Utilities Desktop Assist 77 Desktop Assist The TOSHIBA Assist provides quick access to computer functions and allows you to customize a range of computer settings. To access Desktop Assist from the Start screen begin typing Desktop Assist, or while in the Desktop screen doubleclick or touch the Desktop Assist, icon. The Desktop Assist window appears.
Utilities Desktop Assist Media & Entertainment The feature available in this category is TOSHIBA Video Player.
Utilities Desktop Assist 79 Tools & Utilities The features that may be available in this category are: ❖ eco Utility® ❖ Password Utility ❖ System Settings ❖ TOSHIBA function key (Sample Image) Desktop Assist window – Tools & Utilities tab
Utilities Desktop Assist Support & Recovery The features that may be available in this category are: ❖ Recovery Media Creator ❖ Service Station ❖ TOSHIBA Application Installer ❖ User’s Guide (Sample Image) Desktop Assist window – Support & Recovery tab
Utilities eco Utility® 81 eco Utility® The eco Utility® monitors your power savings from using the eco power plan by tracking real-time power consumption and accumulated savings over time. To access the eco Utility®: 1 From the Start screen begin typing eco Utility, or while in the Desktop screen double-click or touch the Desktop Assist icon. 2 Click or touch Tools & Utilities. 3 Click or touch eco Utility. The eco Utility® window appears.
Utilities Password Utility Password Utility Setting a password lets you walk away from your computer while providing additional protection for your files. When you set a password, you must enter the password before you can work on your computer again. TOSHIBA supports several types of passwords on your computer: ❖ A supervisor password—Prohibits unauthorized users from accessing certain functions such as System Settings. This is useful if more than one person uses the computer.
Utilities Password Utility 2 Click or touch Tools & Utilities. 3 Click or touch Password Utility. 83 (Sample Image) Supervisor Password tab 4 Click or touch Supervisor Password. 5 Click or touch Set. 6 Enter your password, and then enter it again to verify it. 7 Click or touch Set. NOTE 8 Under User Policy, this option may or may not ask for password verification. Click or touch OK to save your password as a text file. Password Utility will suggest “memo.txt” for the text file name.
Utilities Password Utility Deleting a supervisor password To delete a supervisor password: 1 To access Supervisor Password from the Start screen begin typing Password Utility, or while in the Desktop screen double-click or touch the Desktop Assist icon. 2 Click or touch Tools & Utilities. 3 Click or touch Password Utility. A pop-up screen appears asking for a password. 4 Enter your password, and then click or touch Verify. 5 Click or touch Supervisor Password. 6 Click or touch Delete.
Utilities Password Utility 85 2 Click or touch Tools & Utilities. 3 Click or touch Password Utility. 4 Click or touch User Password. 5 Click or touch Set. 6 Enter your password, and then enter it again to verify. 7 Click or touch Set. 8 Click or touch OK to save your password as a text file. Password Utility will suggest “memo.txt” for the text file name. If you have saved a password previously, using the same name may overwrite your password text file with the new password.
Utilities System Settings System Settings System Settings is the TOSHIBA configuration management tool available through the Windows® operating system. To access it: 1 To access System Settings from the Start screen begin typing System Settings, or while in the Desktop screen double-click or touch the Desktop Assist icon. 2 Click or touch Tools & Utilities. 3 Click or touch System Settings. The System Settings screen appears.
Utilities System Settings ❖ 87 Display—Allows you to select the internal LCD and/or external monitor when the computer boots up. NOTE When the computer restarts, it remembers the last configuration. If data does not appear on the display you are using after starting in Sleep mode, press the ( ) + P keys to toggle the display. ❖ General—Allows you to view the current BIOS version or change certain settings back to their default values.
Utilities Sleep Utilities Sleep Utilities This utility displays whether the “USB Sleep and Charge function” is enabled or disabled and shows the position of the USB port that supports the “USB Sleep and Charge function.” 1 While in the Desktop screen double-click or touch the Desktop Assist icon. 2 Click or touch Tools & Utilities. 3 Click or touch System Settings. 4 Click or touch Sleep Utilities.
Utilities Sleep Utilities NOTE 89 ❖ When “USB Sleep and Charge function” is set to Enabled, USB bus power (DC 5V) will be supplied to the compatible port even when the power of the computer is turned OFF. USB bus power (DC 5V) is similarly supplied to the external devices which are connected to the compatible ports. However, some external devices cannot be charged solely by supplying USB bus power (DC 5V).
Utilities Sleep Utilities Power supply mode settings Your computer may provide two different charging modes, to support various types of USB devices. If your computer provides more than one charging mode, the charging mode you should select depends on the USB device you want to charge. For example, Auto Mode, which is the default mode, will charge a wide variety of digital audio players. If your device does not charge in Auto Mode, try using Alternate Mode.
Utilities Sleep Utilities 91 The volume settings and sound quality may differ between Windows® mode and “Sleep and Music” mode. When using the “Sleep and Music” feature, the volume adjustment and mute setting cannot be changed from the computer. To adjust these settings, use the volume controls on your portable audio device. Be sure to turn down the volume of the portable audio device before connecting it to the computer. NOTE This feature applies only to the computer’s speakers.
Utilities TOSHIBA function key TOSHIBA function key Turns notifications for wireless status ON/OFF. (Sample Image) Function Key NOTE The TOSHIBA function key is disabled by default.
Utilities Recovery Media Creator 93 Recovery Media Creator The Recovery Media Creator utility enables you to create recovery media that can be used to return your system to its out-of-box state, if necessary. For detailed information on using the utility to create recovery media, see “Creating recovery media” on page 33.
Utilities TOSHIBA Application Installer TOSHIBA Application Installer The TOSHIBA Application Installer allows you to reinstall the drivers and applications that were originally bundled with your computer. To reinstall drivers and applications: 1 To access TOSHIBA Application Installer from the Start screen begin typing Application Installer, or while in the Desktop screen double-click or touch the Desktop Assist icon. 2 Click or touch Support & Recovery. 3 Click TOSHIBA Application Installer.
Chapter 6 If Something Goes Wrong Some problems you may encounter when using your computer are relatively easy to identify and solve. Others may require help from your network administrator or the manufacturer of the software program. This chapter aims to help you solve many problems by yourself. It covers the problems you are most likely to encounter. If all else fails, contact Toshiba. You will find information on Toshiba’s support services at the end of this chapter.
If Something Goes Wrong Problems when you turn on the computer If you are working in a program that suddenly freezes, chances are the program has stopped responding. You can exit the program without shutting down the operating system or closing other programs. To close a program that has stopped responding: 1 Press Ctrl, Alt, and Del simultaneously (once), and then click or touch Task Manager. The Task Manager window appears.
If Something Goes Wrong The Windows® operating system is not working 97 The computer displays the WARNING RESUME FAILURE/Windows Error Recovery – Windows did not shut down successfully message. To continue, select Start Windows normally. If you performed a shutdown before this message was displayed, a program or driver may have prevented Windows® from shutting down. Data stored in the computer’s memory has been lost. Data stored in the computer’s internal storage drive may not be affected.
If Something Goes Wrong The Windows® operating system is not working 3 Click or touch the Restart option from the menu. 4 Click or touch Troubleshoot from the menu. You now have several options: Refresh your computer ❖ Your files and personalization settings won't change. ❖ Your computer settings will be changed back to their defaults. ❖ Your Apps from the Windows® Store are retained. ❖ Apps you installed from discs or Web sites are removed.
If Something Goes Wrong The Windows® operating system is not working 99 Command Prompt The command prompt is a very powerful tool for advanced users. Startup Settings In previous Operating Systems the majority of the options found on this menu were available by pressing the F8 key during the Windows® boot process: ❖ Enable low resolution video mode Restarts Windows® using your current video driver at low resolution.
If Something Goes Wrong The Windows® operating system is not working Internet problems My Internet connection is very slow. Many factors contribute to the speed with which you can surf the Internet. They include: network speed, network conditions, time of day (when everyone else is surfing, your access can be slow) and popularity of the sites you are trying to access. If accessing a particular site is very slow, try later. My browser cannot find the URL address I typed in.
If Something Goes Wrong Fixing a problem with Device Manager 101 Fixing a problem with Device Manager Device Manager provides a way to check and change the configuration of a device. Changing the default settings using Device Manager can cause other conflicts that make one or more devices unusable. Device Manager is a configuration tool for advanced users who understand configuration parameters and the ramifications of changing them.
If Something Goes Wrong Memory problems Memory problems Incorrectly connected or faulty memory modules may cause errors that seem to be hardware or even software related. It is worthwhile checking for these first: 1 From the Start or Desktop screen, move your pointer over the upper or lower right corner of the screen. 2 When the Windows charms appear, click or touch the Settings ( ) charm. 3 In the lower right of the screen click or touch the Power ( ) icon.
If Something Goes Wrong Power and the battery 103 Power and the battery Your computer receives its power through the AC adaptor and power cord/cable and from the real-time clock (RTC) battery. A faulty AC adaptor or power cord/cable will not power the computer. Here are some typical problems and how to solve them: The ON/OFF light does not come on when you plug in the AC adaptor and power cord/cable.
If Something Goes Wrong Disk or storage drive problems The screen does not look correct. Choose a theme for your desktop background, under Change the visuals and sounds on your computer, in the Themes panel. You can also change the setting for individual components separately by selecting an item from just below the Themes panel (Desktop Background, Color, Sounds, and Screen Saver). For more information, see the Windows® online Help.
If Something Goes Wrong Disk or storage drive problems 2 105 Click or touch Computer from the list that appears. (Sample Image) Search results for “computer” 3 Right-click or touch the drive you wish to check. (Sample Image) Clicking on the drive 4 In the pop-up menu, click or touch Properties. The drive’s Properties box appears. 5 Click or touch the Tools tab. 6 Click or touch the Check button. The Error Checking box appears. The system will alert you if you need to scan the drive.
If Something Goes Wrong Optical disc drive problems Your hard disk seems very slow. If you have been using your computer for a long time, your files may have become fragmented. Run Disk Defragmenter. To do this: 1 Move your pointer to the upper-right corner of the screen or swipe in from the right edge. When the Windows® charms appear click or touch the Search ( ) charm, then click or touch Settings and, in the Search field, type Defragment. 2 Click or touch Defragment and Optimize Drives.
If Something Goes Wrong Optical disc drive problems 107 Examine the disc to see if it is dirty. If necessary, wipe it with a clean cloth dipped in water or a neutral cleaner. Replace the disc in the tray. Make sure that the disc is lying flat against the tray, label side out. Close the tray carefully, making sure it has shut completely. You press the disc eject button, but the drive tray does not slide out. Make sure the computer is connected to a power source and turned on.
If Something Goes Wrong Sound system problems Sound system problems No sound is coming from the computer’s speakers. Adjust the volume control. Try pressing the F11 key to see if volume mute is disabled. Check that the volume control on the computer is turned up. If you are using external headphones or speakers, check that they are securely connected to your computer. The computer emits a loud, high-pitched noise. This is feedback between the microphone and the speakers.
If Something Goes Wrong Wireless networking problems 109 The printer will not print what you see on the screen. Many programs display information on the screen differently from the way they print it. See if your program has a print preview mode. This mode lets you see your work exactly as it will print. Contact the software manufacturer for more information.
If Something Goes Wrong Wireless networking problems System. Carefully note any error messages - these will be very helpful if you should confer with a support technician at a later time. NOTE To enable or disable wireless communication, use the F12 key. For more information see “TOSHIBA Function Keys” on page 120. ❖ Use IPCONFIG to verify that the computer has a useful IP address - one other than the private address of 169.254.xxx.xxx assigned by Windows®. 1 From the Start screen, type Cmd.
If Something Goes Wrong DVD operating problems 111 DVD operating problems If you experience a problem playing DVDs, you may be able to fix the problem yourself. For general problems playing a DVD title, try the following steps: 1 Verify that the disc is in a format that the drive supports. 2 Ensure that the disc is properly inserted in the drive tray. 3 Use the DVD Player software that came with your computer to view DVD movies. 4 Clean the disc and try again.
If Something Goes Wrong Develop good computing habits The screen saver runs while you are watching a movie or title. If the screen saver is enabled, it runs on top of any movie or title you are watching. To disable the screen saver: 1 Right-click the desktop and click Personalize in the menu. 2 Click or touch Screen Saver in the lower-right corner of the window. 3 Select None from the Screen saver drop-down list. 4 Click or touch OK. Develop good computing habits Save your work frequently.
If Something Goes Wrong Develop good computing habits 113 Read the user’s guides. It is very difficult to provide a fail-safe set of steps you can follow every time you experience a problem with the computer. Your ability to solve problems will improve as you learn about how the computer and its software work together. Get familiar with all the user’s guides provided with your computer, as well as the manuals that come with the programs and devices you purchase.
If Something Goes Wrong Develop good computing habits 3 In the left pane, click or touch System Protection. The System Protection tab of the System Properties window appears. 4 Click or touch Configure. 5 Under Restore settings select Turn on System Protection. 6 Click or touch OK. 7 Click or touch Create. 8 In the input field, enter a name that is descriptive enough to be easily understood in the future, such as “Before installing Brand X Accounting app.” Then click or touch Create.
If Something Goes Wrong Develop good computing habits 115 7 Verify that the Restore point you chose is the correct one. If it is not, click or touch Back to return to the previous step. 8 Close all programs and save all open files. 9 Click or touch Finish, and then Yes to begin the system restore. Your Windows® operating system configuration will now be restored to the state it was in when the chosen restore point was created, and then the computer will be automatically restarted.
If Something Goes Wrong Develop good computing habits General tips for installing hardware and software Here are a few tips to help ensure safe and easy installation of new hardware (printers, pointing devices, external hard drives, optical disc drive writers, scanners, etc.) and software (applications like Microsoft® Office and Adobe® Photoshop®, or utility software such as special toolbars for your web browser).
If Something Goes Wrong Develop good computing habits 117 3 Install one item of hardware or software. 4 Restart the Windows® operating system. 5 Use the new hardware or software for a while, noting any new problems. Make sure that your critical applications (email, business applications, etc.) are working correctly, and verify that important devices are still functioning.
If Something Goes Wrong If you need further assistance If you need further assistance If you have followed the recommendations in this chapter and are still having problems, you may need additional technical assistance. Since some problems may be related to the operating system or the program you are using, it is important to investigate other sources. ❖ Review the troubleshooting information in your operating system documentation.
If Something Goes Wrong Toshiba’s worldwide offices 119 Toshiba’s worldwide offices Australia Canada Toshiba (Australia) Pty. Limited 84-92 Talavera Road North Ryde NSW 2113 Sydney Australia Toshiba Canada Ltd. 191 McNabb Street Markham, Ontario L3R - 8H2 Canada France Germany Toshiba Systèmes (France) S.A. 7, Rue Ampère; B. P.
Appendix A TOSHIBA Function Keys TOSHIBA function keys provide a quick way to modify selected system functions and to launch applications. Functions TOSHIBA Function keys are used to set or modify the following system functions: ❖ Help ❖ Display Brightness ❖ Internet and Media ❖ Mute ❖ Wireless ON/OFF ❖ Zoom (Display resolution) 120 5.375 x 8.375 ver 2.
TOSHIBA Function Keys Functions 121 Help file This TOSHIBA function key will display the help file. Display brightness This TOSHIBA function key decreases the scree brightness. This TOSHIBA function key increases the screen brightness. 5.375 x 8.375 ver 2.
TOSHIBA Function Keys Functions Internet and Media Control buttons This TOSHIBA function key launches the default browser. This TOSHIBA function key launches the Windows Media® Player. This TOSHIBA function key allows you to return to the preceding track on the disc. This TOSHIBA function key allows you to start playing the disc, or pause it if currently playing. This TOSHIBA function key allows you to skip to the following track on the disc.
TOSHIBA Function Keys Functions 123 Volume Mute This TOSHIBA function key enables/disables volume mute on your computer. When volume mute is enabled, no sound will come from the speakers or headphones. Disabling or enabling wireless devices This TOSHIBA Function key enables/disables the Wi-Fi® antenna in your computer. The wireless modes are: ❖ Disables the wireless antenna ❖ Enables the wireless antenna Keyboard Function keys Fn+ This TOSHIBA function key allows you to zoom out.
Appendix B Power Cord/Cable Connectors Your computer ships with the correct power supply for the country of purchase. This appendix shows the shapes of the typical AC power cord/cable connectors for various parts of the world. USA Canada UL approved CSA approved United Kingdom Europe VDA approved NEMKO approved BS approved Australia AS approved 124 5.375 x 8.375 ver 2.
Glossary TECHNICAL NOTE: Some features defined in this glossary may not be available on your computer. Acronyms The following acronyms may appear in this User’s Guide.
Glossary DPI Dots Per Inch DVD Digital Versatile (or Video) Disc DVD-ROM Digital Versatile (or Video) Disc Read-Only Memory eSATA external Serial Advanced Technology Attachment FAT File Allocation Table FCC Federal Communications Commission GB gigabyte GBps gigabytes per second HDD Hard Disk Drive HDMI High-Definition Multimedia Interface HDMI CEC High-Definition Multimedia Interface Consumer Electronics Control HTML Hypertext Markup Language IEEE Institute of Electrical and Ele
Glossary 127 RFI Radio Frequency Interference ROM Read-Only Memory RTC Real-Time Clock SD Secure Digital SDRAM Synchronous Dynamic Random Access Memory SSD Solid State Drive TFT Thin Film Transistor USB Universal Serial Bus URL Uniform Resource Locator WAN Wide Area Network www World Wide Web Terms The following terms may appear in this User’s Guide. A active-matrix display—A liquid crystal display (LCD) made from an array of liquid crystal cells using active-matrix technology.
Glossary application—A computer application that you use to perform tasks of a specific type. Applications include word processors, spreadsheets, and database management systems. See also program. B backup—A copy of a file, usually on a removable disk, kept in case the original file is lost or damaged. Basic Input/Output System (BIOS)—See BIOS. baud rate—The speed at which a communication device, such as a printer or modem, transmits information.
Glossary 129 bus—An electrical circuit that connects the central processing unit (CPU) with other parts of the computer, such as the video adapter, disk drives, and ports. It is the pathway through which data flows from one device to another. See also bus speed, frontside bus. bus speed—The speed at which the central processing unit (CPU) communicates with the other parts of the computer. C cache—A section of very fast memory in which frequently used information is duplicated for quick access.
Glossary click—To press and release the pointing device’s primary button without moving the pointing device. In the Windows® operating system, this refers to the pointing device’s left button, unless otherwise stated. See also double-click. color palette—A set of specified colors that establishes the colors that can be displayed on the screen at a particular time.
Glossary 131 device driver—A program (called a “driver”) that permits a computer to communicate with a device. dialog box—An on-screen window displayed by the operating system or an application giving a direction or requesting input from the user. Direct Current (DC)—The type of power usually supplied by batteries. DC flows in one direction. Compare Alternating Current (AC).
Glossary download—(1) In communications, to receive a file from another computer through a modem or network. (2) To send font data from the computer to a printer. See also upload. drag—To hold down the mouse button while moving the pointer to drag a selected object. In the Windows® operating system, this refers to the left mouse button, unless otherwise stated. driver—See device driver. DVD—An individual digital versatile (or video) disc. See also DVD-ROM.
Glossary F 133 file—A collection of related information, saved on disk with a unique name. A file may be an application, information used by an application, or a document. See also document. File Allocation Table (FAT)—The section of a storage drive that keeps track of the location of stored files. file name—A set of characters that uniquely identifies a file within a particular folder. It consists of two parts: the actual name and the file name extension. See also file extension.
G Glossary ground—A conductor to which all components of an electric circuit are connected. It has a potential of zero (0) volts, is connected to the earth, and is the point of reference for voltages in the circuit. H hard disk—A storage device composed of a rigid platter or platters that can be magnetically coded with data. Hard disks hold much more information than some external media and are used for long-term storage of applications and data.
Glossary 135 Internet—The decentralized, world-wide network of computers that provides electronic mail, the World Wide Web, and other services. See also World Wide Web. K keyboard shortcut—A key or combination of keys that you use to perform a task instead of using a pointing device such as a mouse. L L1 (level one) cache—Memory cache built into the processor to help improve processing speed. See also cache, CPU cache, L2 cache.
Glossary logical drive—A section of a disk that is recognized by the operating system as a separate disk drive. A system’s logical drives may differ from its physical drives. For example, a single hard disk drive may be partitioned into two or more logical drives. M memory—Typically refers to the computer’s main memory, where applications are run and data is temporarily stored and processed.
Glossary 137 non-system disk—A disk for storing applications and data that cannot be used to start the computer. Compare system disk. O online—Available through the computer. Online may refer to information being read from your own computer’s internal storage drive, such as online documentation or online Help, or to information coming from another company on a company network or the Internet. operating system—A set of applications that controls how the computer works.
Glossary pointer—An icon (usually an arrow) that moves on the screen when you slide your finger across the touch pad or move a mouse. Used to point to and select/activate on-screen items, such as icons, menu items, and buttons. The shape and purpose of the pointer varies depending on the application you are using and what you are doing. pointing device—Any device, such as the touch pad or a mouse, that enables you to move the pointer on the screen.
Glossary 139 restart—Synonymous with reboot. To reset the computer by reloading the operating system without turning the computer off. See also boot. RGB (Red, Green, Blue) monitor—A monitor that reproduces all colors by mixing red, green, and blue light in various combinations. RJ45 connector—An eight-wire connector used to connect a computer to a network. ROM (Read-Only Memory)—Non-volatile memory that can be read but not written to.
Glossary Suspend—A feature of some Windows® operating systems that allows you to turn off the computer without exiting your open applications and to continue from where you left off when you turn the computer on again. Swipe—Swipe an open window to the left or right of the screen to display the next or previous window. system prompt—The symbol (in the MS-DOS® operating system, generally a drive letter followed by a “greater than” sign) indicating where users are to enter commands.
Glossary W 141 Web—See World Wide Web. Wi-Fi®—A registered trademark term of the Wi-Fi Alliance that stands for Wireless Fidelity, and is another term for the communication protocol to permit an Ethernet connection using wireless communication components. World Wide Web (www)—The worldwide network of Web sites linked together over the Internet. A user of the Web can jump from site to site regardless of the location of the computer hosting the site. See also Internet.
Index A C AC adaptor 25 AC power 61 accessing network 71 adding optional external devices 31 adequate ventilation cooling fan 24 app, starting 53 App, starting from Start screen 53 apps starting from Start screen 53 audio features 71 caring for your computer 45 cleaning the computer 45 communications set up 70 computer caring for 45 cleaning 45 environmental precautions 22 moving 45 setting up 25 shut down 29 computer lock 46 computer will not start troubleshooting 96 computing habits troubleshooting 112
Index adequate ventilation 24 customize computer settings 44 D data/entire system backup troubleshooting 115 desktop creating new icon 68 exploring the 67 icons 68 recycle bin 68 standard features 67 Desktop Assist 77 Media & Entertainment tab 78 Support & Recovery tab 80 Tools & Utilities tab 79 Device Manager fixing a problem 101 display devices external 43 disposal information 11 DVD removing with computer off 60 removing with computer on 59 DVD player troubleshooting 111 DVDs using 55 143 Function k
Index troubleshooting 103 keys function keys 51 L LEDs system indicator lights ON/OFF light 28 Web Camera light 72 Licenses 10 lock computer, using 46 M manual eject hole optical disc drive 56 Memory card reader inserting memory media 73 removing memory media 74 using 73 microphone using 71 moving the computer 45 N network accessing 71 connecting your computer 70 networking wireless 70 Notification area 69 notifications 69 O online resources Toshiba 60 optical disc Auto-Run feature 58 handling 57
Index power plans selecting power plan options 63 precautions safety 23 printer troubleshooting 108 problem solving contacting Toshiba 118 Startup options 97 R recording sounds 71 recovery creating recovery media 33 installing drivers and applications 41 internal storage drive 32 refresh your PC 37 reset your PC 39 restoring from recovery media 35 Recovery Media Creator 93 recycle bin icon 68 refresh your PC with user’s data 37 registering computer 29 removing an optical disc with computer on 59 and optic
Index online resources 60 registering computer Toshiba Web site 29 worldwide offices 119 TOSHIBA Application Installer 94 TOSHIBA Function Key 92 TOSHIBA Function Keys functions 120 touch screen navigation 52 troubleshooting 103 bookmarked site not found 100 checking device properties 101 computer will not start 96 corrupted/damaged data files 106 data/entire system backup 115 Device Manager 101 display problems screen is blank 103 DVD player 111 eject button 107 error message, warning resume failure
Index Windows® operating system desktop 67, 74 troubleshooting 97 wireless keyboard battery 50 functions 51 using 50 wireless mouse battery 49 using 48 wireless networking 70 troubleshooting 109 147