
User's Manual
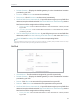
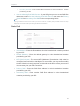
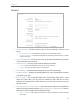
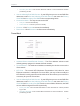

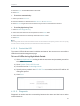
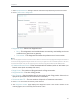
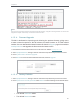
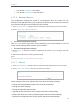
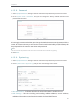
Table Of Contents
- About This Guide
- Get to Know About Your Router
- Connect to the Internet
- Login
- Configure the Router in Standard Wireless Mode
- FAQ

63
Chapter 4
5. Enter the Time in Hour/Minute/Second format.
6. Click Save.
¾ To set time automatically:
7. Select your local time zone.
8. Enter the address or domain of the NTP Server I or NTP Server II.
9. Click Get GMT to get time from the Internet if you have connected to the Internet.
¾ To set Daylight Saving Time:
1. Select Enable DaylightSaving.
2. Select the start time from the drop-down list in the Start field.
3. Select the end time from the drop-down list in the End field.
4. Click Save.
Note:
This setting will be used for some time-based functions such as firewall. You must specify your time zone once you log
in to the router successfully; otherwise, time-based functions will not take effect.
4. 15. 2. Control the LED
The router‘s LEDs indicate router’s activities and status. You can turn on or turn off the
LEDs from the web management page.
To turn off LEDs during Night Mode Period:
1 ) Visit http://tplinkwifi.net, and log in with the username and password you set for
the router.
2 ) Go to System Tools > LED Control.
3 ) Check the box for Enable Night Mode.
4 ) Specify a time period in the LED Off Time as needed, and the LED will be off
during this period.
5 ) Click Save.
4. 15. 3. Diagnostic
Diagnostic is used to test the connectivity between the router and the host or other
network devices.