
User's Manual


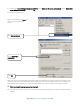


Table Of Contents
- Chapter 1. Get to Know About Your Router
- Chapter 2. Connect the Hardware
- Chapter 3. Log into Your Router
- Chapter 4. Set Up Internet Connection
- Chapter 5. Guest Network
- Chapter 6. USB Application
- Chapter 7. Parental Controls
- Chapter 8. Security
- Chapter 9. NAT Forwarding
- Chapter 10. QoS
- Chapter 11. Specify the Network Settings
- 4. Enter the username, password and domain name of the account (such as lisadns.ddns.net).
- 5. Click Login and Save.
- 1. Change the routers LAN IP addresses to two different IP addresses on the same subnet. Disable Router 2’s DHCP function.
- 2. Visit http://tplinkwifi.net, and log in with the username and password you set for the router. Go to Network →Advanced Routing. Click Add to add a new static routing entry.
- Chapter 12. Administrate Your Network
- Visit http://tplinkwifi.net, and log in with the username and password you set for the router.
- Go to Advanced > System Tools > Administration. In Remote Management section, finish the settings according to your needs.
- Appendix A: Specifications
- Appendix B: Troubleshooting Guide & FAQ
- Appendix C: Configure the PC

Appendix B: Troubleshooting Guide & FAQ
T1. How do I restore my router’s configuration to its factory default settings?
With the router powered on, press and hold the RESET button on the rear panel for 8 to 10 seconds before releasing it.
Note: Once the router is reset, the current configuration settings will be lost and you will need to re-configure the router.
T2. What can I do if I don’t know or forget my password?
1) Restore the router’s configuration to its factory default settings. If you don’t know how to do that, please refer to
T1.
2) Use the default user name and password: admin, admin.
3) Try to configure your router once again by following the instructions in 4.1Use Quick Setup wizard.
T3. What can I do if I cannot access the web-based configuration page?
1) Configure your computer’s IP Address.
For Mac OS X
1) Click the Apple icon on the upper left corner of the screen.
2) Go to “System Preferences -> Network”.
3) Select Airport on the left menu bar, and then click Advanced for wireless configuration; or select Ethernet for
wired configuration.
4) In the Configure IPv4 box under TCP/IP, select Using DHCP.
5) Click Apply to save the settings.
For Windows 7
1) Click “Start -> Control Panel -> Network and Internet -> View network status -> Change adapter settings”.
2) Right-click Wireless Network Connection (or Local Area Connection), and then click Properties.
3) Select Internet Protocol Version 4 (TCP/IPv4), and then click Properties.
4) Select Obtain an IP address automatically and Obtain DNS server address automatically. Then click OK.
For Windows XP
1) Click “Start -> Control Panel -> Network and Internet Connections -> Network Connections”.
2) Right-click Wireless Network Connection (or Local Area Connection), and then click Properties.
3) Select Internet Protocol (TCP/IP), and then click Properties.
4) Select Obtain an IP address automatically and Obtain DNS server address automatically. Then click OK.
For Windows 8
1) Move your mouse to the lower right corner and you will see Search
icon
in the
Popups. Go to “ -> Apps”.
Type
Control Panel in the search box and press Enter, then you will go to Control Panel.
2) Click “View network status and tasks > Change adapter settings”.
3) Right-click “Ethernet” and then select Properties.
Appendix B: Troubleshooting Guide & FAQ77