
User's Manual
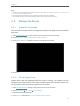
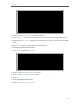
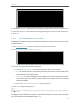

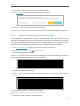


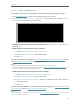
Table Of Contents
- About This Guide
- Get to Know About Your Router
- Connect to the Internet
- Log in
- Configure the router in Standard Wireless Router
- 4. 1. Guest Network
- 4. 2. Parental controls
- 4. 3. QoS
- 4. 4. Network Security
- 4. 5. NAT Forwarding
- 4. 6. VPN Server
- 4. 7. Customize Your Network Settings
- 4. 7. 1. Change the LAN Settings
- 4. 7. 2. Set Up Link Aggregation
- 4. 7. 3. Configure to Support IPTV Service
- 4. 7. 4. Specify DHCP Server Settings
- 4. 7. 5. Set Up a Dynamic DNS Service Account
- 4. 7. 6. Create Static Routes
- 4. 7. 7. Specify Wireless Settings
- 4. 7. 8. Use WPS for Wireless Connection
- 4. 7. 9. Schedule Your Wireless Function
- 4. 8. Manage the Router
- 4. 8. 1. Adjust Wi-Fi Coverage
- 4. 8. 2. Set Up System Time
- 4. 8. 3. Test the Network Connectivity
- 4. 8. 4. Upgrade the Firmware
- 4. 8. 5. Backup and Restore Configuration Settings
- 4. 8. 6. Change the Administrator Account
- 4. 8. 7. Password Recovery
- 4. 8. 8. Local Management
- 4. 8. 9. Remote Management
- 4. 8. 10. System Log
- 4. 8. 11. Monitor the Internet Traffic Statistics
- 4. 8. 12. Control LEDs
- Configure the Router in Access Point Mode
- Configure the Router in Range Extender Mode
- FAQ

55
Chapter 4
4. 8. 8. Local Management
This feature allows you to limit the number of client devices on your LAN from accessing
the router by using the MAC address-based authentication.
1. Visit http://tplinkwifi.net, and log in with password you set for the router.
2. Go to Advanced > System Tools > Administration and complete the settings In Local
Management section according to your needs.
• Allow all LAN connected devices to manage the router:
Toggle on Access for All LAN Connected Devices.
• Allow specific devices to manage the router:
1 ) Toggle off Access for All LAN Connected Devices.
2 ) Click Add.
3 ) Click View Existing Devices and select the device to manage the router from the
Existing Devices list, or enter the MAC address of the device manually.
4 ) Specify a Description for this entry.
5 ) Check the box for Enable This Entry.
6 ) Click OK.