
User's Manual
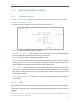
Table Of Contents
- About This Guide
- Get to Know About Your Router
- Connect to the Internet
- Login
- Configure the router
- 4. 1. Status
- 4. 2. Network
- 4. 3. Dual Band Selection
- 4. 4. Wireless(2.4Ghz or 5Ghz)
- 4. 5. Guest Network
- 4. 6. DHCP
- 4. 7. Forwarding
- 4. 8. Security
- 4. 9. Parental Controls
- 4. 10. Access Control
- 4. 11. Advanced Routing
- 4. 12. Bandwidth Control
- 4. 13. IP&MAC Binding
- 4. 14. Dynamic DNS
- 4. 15. IPv6
- 4. 16. System Tools
- 4. 17. Logout
- FAQ

25
Chapter 4
1. Visit http://tplinkwifi.net, and log in with the username and password you set for the router.
2. Go to Wireless > WPS.
3. Follow one of the following three methods to connect your client device to the router’s Wi-Fi
network.
Method ONE: Press the WPS Button on Your Client Device
1. Keep the WPS Status as Enabled and click Add Device.
2. Select Press the WPS button of the new device within the next two minutes and click Connect.
3. Within two minutes, press the WPS button on your client device.
4. A success message will appear on the WPS page if the client device has been successfully
added to the router’s network.
Method TWO: Enter the Client’s PIN
1. Keep the WPS Status as Enabled and click Add Device.