
User's Manual
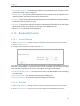
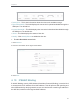

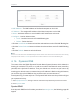
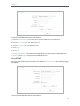
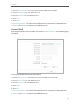


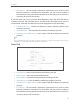
Table Of Contents
- About This Guide
- Get to Know About Your Router
- Connect to the Internet
- Login
- Configure the router
- 4. 1. Status
- 4. 2. Network
- 4. 3. Dual Band Selection
- 4. 4. Wireless(2.4Ghz or 5Ghz)
- 4. 5. Guest Network
- 4. 6. DHCP
- 4. 7. Forwarding
- 4. 8. Security
- 4. 9. Parental Controls
- 4. 10. Access Control
- 4. 11. Advanced Routing
- 4. 12. Bandwidth Control
- 4. 13. IP&MAC Binding
- 4. 14. Dynamic DNS
- 4. 15. IPv6
- 4. 16. System Tools
- 4. 17. Logout
- FAQ

48
Chapter 4
2. Enter the following information.
• Destination IP Address - The Destination Network is the address of the network
or host that you want to assign to a static route.
• Subnet Mask - The Subnet Mask determines which portion of an IP address is
the network portion, and which portion is the host portion.
• Gateway - This is the IP address of the default gateway device that allows the
contact between the router and the network or host.
3. Select Enabled or Disabled for this entry on the Status drop-down list.
4. Click Save.
You can also do the following operations to modify the current settings.
• Click Delete to delete the entry.
• Click Enable All to enable all the entries.
• Click Disable All to disable all the entries.
• Click Delete All to delete all the entries.
• Click Previous to view the information on the previous screen and Next to view the
information on the next screen.
4. 11. 2. System Routing Table
1. Visit http://tplinkwifi.net, and log in with the username and password you set for the router.
2. Go to Advanced Routing > System Routing Table, and you can view all the valid route entries
in use.