
User's Manual


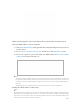
Table Of Contents
- About This Guide
- Get to Know About You Router
- Connect the Hardware
- Log into Your Router
- Set Up Internet Connections
- Guest Network
- USB Application
- Parental Controls
- QoS (Quality of Service)
- Network Security
- NAT Forwarding
- VPN Server
- Customize Your Network Settings
- Manage the Router
- 13. 1. Set Up System Time
- 13. 2. Test the Network Connectivity
- 13. 3. Upgrade the Firmware
- 13. 4. Backup and Restore Configuration Settings
- 13. 5. Change the Administrator Account
- 13. 6. Password Recovery
- 13. 7. Local Management
- 13. 8. Remote Management
- 13. 9. System Log
- 13. 10. Monitor the Internet Traffic Statistics
- 13. 11. Control LEDs
- FAQ
- Specifications

101
• Make sure the router connects to the computer correctly and the corresponding LED
indicator(s) light up.
• Make sure the IP address of your computer is configured as Obtain an IP address
automatically and Obtain DNS server address automatically.
• Make sure the http://tplinkwifi.net you input is right.
• Check your computer’s settings:
1 ) Go to Start > Control Panel > Network and Internet, and click View network status
and tasks;
2 ) Click Internet Options on the bottom left;
3 ) Click Connections, select Never dial a connection;
4 ) Click LAN settings, deselect the following three options and click OK;