
User's Manual
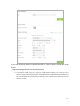


Table Of Contents
- About This Guide
- Get to Know About You Router
- Connect the Hardware
- Log into Your Router
- Set Up Internet Connections
- Guest Network
- USB Application
- Parental Controls
- QoS (Quality of Service)
- Network Security
- NAT Forwarding
- VPN Server
- Customize Your Network Settings
- Manage the Router
- 13. 1. Set Up System Time
- 13. 2. Test the Network Connectivity
- 13. 3. Upgrade the Firmware
- 13. 4. Backup and Restore Configuration Settings
- 13. 5. Change the Administrator Account
- 13. 6. Password Recovery
- 13. 7. Local Management
- 13. 8. Remote Management
- 13. 9. System Log
- 13. 10. Monitor the Internet Traffic Statistics
- 13. 11. Control LEDs
- FAQ
- Specifications

109
3 ) Select and right click on My Computer on desktop, select Manage to open
Computer Management window;
4 ) Expand Services and Applications > Services, find and locate Wireless Zero
Configuration in the Services list on the right side;
5 ) Right click Wireless Zero Configuration, and then select Properties;
6 ) Change Startup type to Automatic, click on Start button and make sure the
Service status is Started. And then click OK;
If you can find other wireless network except your own, please follow the steps
below:
• Check the WLAN LED indicator on your wireless router/modem.
• Make sure your computer/device is still in the range of your router/modem, move
closer if it is currently too far away.
• Go to Advanced > Wireless > Wireless Settings, and check the wireless router settings,
double check your Wireless Network Name, make sure the Region is selected correctly
and wireless is not hided.
Note:
Different countries have different laws about wireless channel. For example, USA allows 2.4GHz channel from 1 to
11, while UK allows from 1 to 13. If you select the Region as UK or the Channel as 12/13 while you are in USA, your
computer might not be able to pick up the signal.