
User's Manual


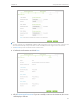
Table Of Contents
- About This Guide
- Get to Know About You Router
- Connect the Hardware
- Log into Your Router
- Set Up Internet Connections
- Guest Network
- USB Application
- Parental Controls
- QoS (Quality of Service)
- Network Security
- NAT Forwarding
- VPN Server
- Customize Your Network Settings
- Manage the Router
- 13. 1. Set Up System Time
- 13. 2. Test the Network Connectivity
- 13. 3. Upgrade the Firmware
- 13. 4. Backup and Restore Configuration Settings
- 13. 5. Change the Administrator Account
- 13. 6. Password Recovery
- 13. 7. Local Management
- 13. 8. Remote Management
- 13. 9. System Log
- 13. 10. Monitor the Internet Traffic Statistics
- 13. 11. Control LEDs
- FAQ
- Specifications

14
Chapter 4
Set Up Internet Connections
4. 1. Quick Setup
The Quick Setup Wizard will guide you through the process to set up your router to
access the Internet.
Tips:
If you need the IPv6 Internet connection, please refer to the section of 4. 3. Setting Up an IPv6 Internet Connection.
Follow the steps below to set up your router to access the Internet.
1. Visit http://tplinkwifi.net, and log in with the username and password you‘ve set for
the router.
2. Click Quick Setup on the top of the page.
3. Select your Region and Time Zone from the drop-down list and click Next.
Note:
Per FCC regulations, all Wi-Fi products marketed in the U.S. are fixed to the U.S. region.
4. Click Auto Detect and the router will detect your connection type automatically.
Note:
You can also choose the connection type manually. Contact your ISP if you are not sure about the Internet connection
information.
• If you use DSL line and you are only provided an account name and a password by your ISP, choose PPPoE.
• If you use cable TV or fiber cable, choose Dynamic IP.
• If you are provided more information such as IP address, Subnet Mask and Default Gateway, choose Static IP.