
User's Manual
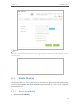
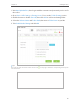


Table Of Contents
- About This Guide
- Get to Know About You Router
- Connect the Hardware
- Log into Your Router
- Set Up Internet Connections
- Guest Network
- USB Application
- Parental Controls
- QoS (Quality of Service)
- Network Security
- NAT Forwarding
- VPN Server
- Customize Your Network Settings
- Manage the Router
- 13. 1. Set Up System Time
- 13. 2. Test the Network Connectivity
- 13. 3. Upgrade the Firmware
- 13. 4. Backup and Restore Configuration Settings
- 13. 5. Change the Administrator Account
- 13. 6. Password Recovery
- 13. 7. Local Management
- 13. 8. Remote Management
- 13. 9. System Log
- 13. 10. Monitor the Internet Traffic Statistics
- 13. 11. Control LEDs
- FAQ
- Specifications

44
Chapter 6
USB Application
5 ) You will see the printer marked as Auto-Connect Printer. Now you can print
with this printer.
Windows
Mac
Tips:
The Print Server also allows different clients to share the scan feature of MFPs (Multi-Function Printers). To
scan with TP-LINK USB Printer Controller, right-click the printer and select Network Scanner. Then, a scanning
window will pop up. Finish the scanning process by following the on-screen instructions.
6. 5. 3G/4G Networking Sharing
If you have a 3G/4G USB modem, the router can be used as a 3G/4G wireless router to
share the 3G/4G network to local users. When the original network service fails, your
router will be directly connected to the 3G/4G network.
Follow the steps below to set your 3G/4G network:
1. Plug your USB modem into the USB port of your router.
2. Visit http://tplinkwifi.net, then log in with the username and password you’ve set
for the router.
3. Go to Advanced > USB Settings > 3G/4G.