
User's Manual

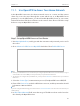
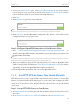
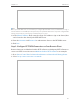


Table Of Contents
- About This Guide
- Get to Know About You Router
- Connect the Hardware
- Log into Your Router
- Set Up Internet Connections
- Guest Network
- USB Application
- Parental Controls
- QoS (Quality of Service)
- Network Security
- NAT Forwarding
- VPN Server
- Customize Your Network Settings
- Manage the Router
- 13. 1. Set Up System Time
- 13. 2. Test the Network Connectivity
- 13. 3. Upgrade the Firmware
- 13. 4. Backup and Restore Configuration Settings
- 13. 5. Change the Administrator Account
- 13. 6. Password Recovery
- 13. 7. Local Management
- 13. 8. Remote Management
- 13. 9. System Log
- 13. 10. Monitor the Internet Traffic Statistics
- 13. 11. Control LEDs
- FAQ
- Specifications

70
Chapter 11
VPN Server
Note:
Before you enable VPN Server, we recommend you configure Dynamic DNS Service (recommended) or assign a
static IP address for router’s WAN port and synchronize your System Time with Internet. If you have configured NAT
Settings, please make sure your external port of NAT settings is not 1723.
3. In the Client IP Address filed, enter the range of IP addresses (up to 10 clients) that
can be leased to the client by the PPTP VPN server.
4. Enter the Username and Password to authenticate clients to the PPTP VPN server.
5. Click Save.
Step 2. Configure PPTP VPN Connection on Your Remote Client
Remote client can use Windows built-in PPTP software or third-party PPTP software to
connect to PPTP Server. Here we use Windows built-in PPTP software as an example.
1. Go to Start > Control Panel > Network and Internet > Network and Sharing Center.
2. Select Set up a new connection or network.