
User's Guide
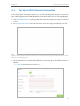

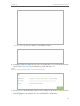

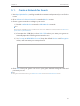
Table Of Contents
- About This Guide
- Get to Know About Your Router
- Connect the Hardware
- Log into Your Router
- Set Up Internet Connection
- Guest Network
- USB Application
- Parental Controls
- QoS
- Network Security
- NAT Forwarding
- VPN Server
- Customize Your Network Settings
- Manage the Router
- 13. 1. Set Up System Time
- 13. 2. Test the Network Connectivity
- 13. 3. Upgrade the Firmware
- 13. 4. Backup and Restore Configuration Settings
- 13. 5. Change the Administrator Account
- 13. 6. Password Recovery
- 13. 7. Local Management
- 13. 8. Remote Management
- 13. 9. System Log
- 13. 10. Monitor the Internet Traffic Statistics
- 13. 11. Control LEDs
- FAQ

23
Chapter 5
Guest Network
5. 2. Customize Guest Network Options
1. Visit http://tplinkwifi.net, and log in with the username and password you set for the
router.
2. Go to Advanced > Guest Network. Locate the Settings section.
3. Customize guest network options according to your needs.
• Allow guests to see each other
Select this checkbox if you want to allow the wireless clients on your guest network
to communicate with each other via methods such as network neighbors, Samba,
Ping, and FTP.
• Allow guests to access my local network
Select this checkbox if you want to allow the wireless clients on your guest network
to communicate with the devices connected to your router’s LAN ports or main
network via methods such as network neighbors, Samba, Ping, and FTP.
4. Click Save. Now you can ensure network security and privacy!
Tips:
To view guest network information, go to Advanced > Status and locate the Guest Network section.