
User's Guide
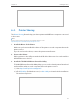
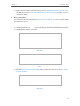
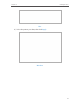
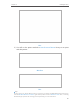
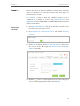
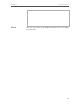
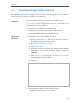
Table Of Contents
- About This Guide
- Get to Know About Your Router
- Connect the Hardware
- Log into Your Router
- Set Up Internet Connection
- Guest Network
- USB Application
- Parental Controls
- QoS
- Network Security
- NAT Forwarding
- VPN Server
- Customize Your Network Settings
- Manage the Router
- 13. 1. Set Up System Time
- 13. 2. Test the Network Connectivity
- 13. 3. Upgrade the Firmware
- 13. 4. Backup and Restore Configuration Settings
- 13. 5. Change the Administrator Account
- 13. 6. Password Recovery
- 13. 7. Local Management
- 13. 8. Remote Management
- 13. 9. System Log
- 13. 10. Monitor the Internet Traffic Statistics
- 13. 11. Control LEDs
- FAQ

43
Chapter 7
Parental Controls
5. Enter a Description for the entry. Keep the Enable This Entry
checkbox selected. Click OK.
6. Select Whitelist as the restriction policy.
Tips:
1. With Blacklist selected, the controlled devices cannot access any websites
containing the specified keywords during the Internet Access Time period.
2. With Whitelist selected, the controlled devices can only access websites containing
the specified keywords during the Internet Access Time period.
7. Click . Enter a keyword or a website and
click Save.
You can add up to 32 keywords for either Blacklist or Whitelist.
Below are some sample entries to allow access.
• Enter a web address (e.g. wikipedia.org) or a web address
keyword (e.g. wikipedia) to only allow or block access to
the websites containing that keyword.
• Specify the domain suffix (eg. .edu or .org) to allow access
only to the websites with that suffix.
• If you wish to block all Internet browsing access, do not
add any keyword to the Whitelist.