
User's Guide
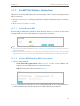
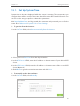

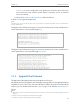
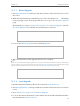
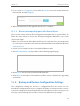


Table Of Contents
- About This Guide
- Get to Know About Your Router
- Connect the Hardware
- Log into Your Router
- Set Up Internet Connection
- Guest Network
- USB Application
- Parental Controls
- QoS
- Network Security
- NAT Forwarding
- VPN Server
- Customize Your Network Settings
- Manage the Router
- 13. 1. Set Up System Time
- 13. 2. Test the Network Connectivity
- 13. 3. Upgrade the Firmware
- 13. 4. Backup and Restore Configuration Settings
- 13. 5. Change the Administrator Account
- 13. 6. Password Recovery
- 13. 7. Local Management
- 13. 8. Remote Management
- 13. 9. System Log
- 13. 10. Monitor the Internet Traffic Statistics
- 13. 11. Control LEDs
- FAQ

78
Chapter 12
Customize Your Network Settings
12. 7. Use WPS for Wireless Connection
Wi-Fi Protected Setup (WPS) provides an easier approach to set up a security-protected
Wi-Fi connection.
1. Visit http://tplinkwifi.net, and log in with the username and password you set for the
router.
2. Go to Advanced > Wireless > WPS .
12. 7. 1. Set the Router’s PIN
Router’s PIN is enabled by default to allow wireless devices to connect to the router
using the PIN. You can use the default one or generate a new one.
Note:
1. If you want to enable/disable the WPS feature, go to System Tools > System Parameters > WPS, select or clear the
Enable WPS check box.
2. PIN (Personal Identification Number) is an eight-character identification number preset to each router. WPS
supported devices can connect to your router with the PIN. The default PIN is printed on the label of the router.
12. 7. 2. Use the WPS Wizard for Wi-Fi Connections
1. Select a setup method:
• Push Button(Recommended): Click Connect on the screen. Within two
minutes, press the WPS button on the client device.
• PIN: Enter the client’s PIN, and click Connect.
2. Success will appear on the above screen and the WPS LED on the router will keep on
for five minutes if the client has been successfully added to the network.