Archer C7 AC1750 Wireless Dual Band Gigabit Router REV4.0.
COPYRIGHT & TRADEMARKS Specifications are subject to change without notice. is a registered trademark of TP-LINK TECHNOLOGIES CO., LTD. Other brands and product names are trademarks or registered trademarks of their respective holders. No part of the specifications may be reproduced in any form or by any means or used to make any derivative such as translation, transformation, or adaptation without permission from TP-LINK TECHNOLOGIES CO., LTD. Copyright © 2016 TP-LINK TECHNOLOGIES CO., LTD.
FCC STATEMENT This equipment has been tested and found to comply with the limits for a Class B digital device, pursuant to part 15 of the FCC Rules. These limits are designed to provide reasonable protection against harmful interference in a residential installation. This equipment generates, uses and can radiate radio frequency energy and, if not installed and used in accordance with the instructions, may cause harmful interference to radio communications.
separation distance of at least 20 cm from all persons and must not be co-located or operating in conjunction with any other antenna or transmitter.” This device is restricted in indoor environment only. CE Mark Warning This is a class B product. In a domestic environment, this product may cause radio interference, in which case the user may be required to take adequate measures.
This radio transmitter (IC: 8853A-C7/ Model: Archer C7) has been approved by Industry Canada to operate with the antenna types listed below with the maximum permissible gain indicated. Antenna types not included in this list (Appendix C), having a gain greater than the maximum gain indicated for that type, are strictly prohibited for use with this device.
Déclaration d'exposition aux radiations: Cet équipement est conforme aux limites d'exposition aux rayonnements IC établies pour un environnement non contrôlé. Cet équipement doit être installé et utilisé avec un minimum de 20 cm de distance entre la source de rayonnement et votre corps. Industry Canada Statement CAN ICES-3 (B)/NMB-3(B) Korea Warning Statements 당해 무선설비는 운용중 전파혼신 가능성이 있음.
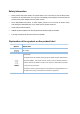
Safety Information When product has power button, the power button is one of the way to shut off the product; when there is no power button, the only way to completely shut off power is to disconnect the product or the power adapter from the power source. Don’t disassemble the product, or make repairs yourself. You run the risk of electric shock and voiding the limited warranty. If you need service, please contact us. Avoid water and wet locations.
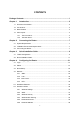
CONTENTS Package Contents..................................................................................................... 1 Chapter 1. Introduction ......................................................................................... 2 1.1 Overview of the Router .................................................................................................2 1.2 Conventions ..................................................................................................................3 1.
4.7 4.8 Wireless 5GHz ............................................................................................................47 4.7.1 Wireless Settings ............................................................................................47 4.7.2 WPS ................................................................................................................48 4.7.3 Wireless Security ............................................................................................51 4.7.
4.16.2 System Routing Table .....................................................................................93 4.17 Bandwidth Control ......................................................................................................94 4.17.1 Control Settings ..............................................................................................94 4.17.2 Rules List ........................................................................................................95 4.
Archer C7 AC1750 Wireless Dual Band Gigabit Router Package Contents The following items should be found in your package: Archer C7 AC1750 Wireless Dual Band Gigabit Router DC Power Adapter for Archer C7 AC1750 Wireless Dual Band Gigabit Router Ethernet Cable Quick Installation Guide Note: Make sure that the package contains the above items. If any of the listed items are damaged or missing, please contact your distributor.
Archer C7 AC1750 Wireless Dual Band Gigabit Router Chapter 1. Introduction 1.1 Overview of the Router The Archer C7 AC1750 Wireless Dual Band Gigabit Router integrates 4-port Switch, Firewall, NAT-router and Wireless AP. Powered by 3x3 MIMO technology, the AC1750 Wireless Dual Band Gigabit Router delivers exceptional range and speed, which can fully meet the need of Small Office/Home Office (SOHO) networks and the users demanding higher networking performance.
Archer C7 1.2 AC1750 Wireless Dual Band Gigabit Router Conventions The router or Archer C7 mentioned in this guide stands for Archer C7 AC1750 Wireless Dual Band Gigabit Router without any explanation. 1.3 Main Features Complies with IEEE 802.11ac. One 10/100/1000M Auto-Negotiation RJ45 Internet port, four 10/100/1000M Auto-Negotiation RJ45 Ethernet ports, supporting Auto MDI/MDIX. Provides USB ports supporting storage/FTP/Media/Print Server.
Archer C7 1.4 AC1750 Wireless Dual Band Gigabit Router Panel Layout 1.4.1 The Front Panel Figure 1-1 LEDs on the front panel The router’s LEDs are located on the front panel (View from left to right). Name (Power) (System) (Wireless 2.4GHz) (Wireless 5GHz) (Ethernet) (Internet) (WPS) (USB on the rear panel) Status Indication Off Power is off. On Power is on. On The router is initializing or maybe has a system error. Flashing The router is working properly.
Archer C7 AC1750 Wireless Dual Band Gigabit Router Note: 1. After a device is successfully added to the network by WPS function, the WPS LED will keep on for about 5 minutes and then turn off. 2. The router is set to working concurrently in 2.4GHz and 5GHz by default. If you desire to choose the working frequency, please go to 4.5 Dual Band Selection. 1.4.2 The Rear Panel Figure 1-2 Rear Panel sketch The following parts are located on the rear panel (View from left to right).
Archer C7 AC1750 Wireless Dual Band Gigabit Router Pressing this button for more than 5 seconds enables the Reset function. With the router powered on, press and hold the WPS/Reset button (approximately 8 seconds) until the SYS LED becomes quick-flash from slow-flash. And then release the button and wait the router to reboot to its factory default settings. Wireless antenna: To receive and transmit the wireless data.
Archer C7 AC1750 Wireless Dual Band Gigabit Router Chapter 2. Connecting the Router 2.1 System Requirements Broadband Internet Access Service (DSL/Cable/Ethernet) One DSL/Cable Modem that has an RJ45 connector (which is not necessary if the router is connected directly to the Ethernet) PCs with a working Ethernet Adapter and an Ethernet cable with RJ45 connectors TCP/IP protocol on each PC Web browser, such as Microsoft Internet Explorer, Mozilla Firefox or Apple Safari 2.
Archer C7 AC1750 Wireless Dual Band Gigabit Router power on the Router. (Before you power on the Router, please make sure your computer is NOT connected to any other wireless network.) Figure 2-1 Hardware Installation Figure 2-2 USB Installation Note: If you want to use the router to share files or printer, plug the USB storage device to the USB port or connect the printer to the router with a matching cable.
Archer C7 AC1750 Wireless Dual Band Gigabit Router Chapter 3. Quick Installation Guide This chapter will show you how to configure the basic functions of your AC1750 Wireless Dual Band Gigabit Router using Quick Setup Wizard within minutes. 3.1 TCP/IP Configuration The default IP address of the router is 192.168.0.1 and the default Subnet Mask is 255.255.255.0. These values can be changed as you desire. In this guide, we use all the default values for description.
Archer C7 AC1750 Wireless Dual Band Gigabit Router If the result displayed is similar to Figure 3-2, it means the connection between your PC and the router failed. Figure 3-2 Failure result of Ping command Please check the connection following these steps: 1. Is the connection between your PC and the router correct? Note: The 1/2/3/4 LEDs of Ethernet ports which you link to on the router and LEDs on your PC's adapter should be lit. 2.
Archer C7 3.2 AC1750 Wireless Dual Band Gigabit Router Quick Installation Guide With a Web-based utility, it is easy to configure and manage the AC1750 Wireless Dual Band Gigabit Router. The Web-based utility can be used on any Windows, Macintosh or UNIX OS with a Web browser, such as Microsoft Internet Explorer, Mozilla Firefox or Apple Safari. 1. To access the configuration utility, open a web-browser and type in the default IP address http://tplinkwifi.net in the address field.
Archer C7 AC1750 Wireless Dual Band Gigabit Router Figure 3-5 Quick Setup 3. Click Next, and then WAN Connection Type page will appear, shown in Figure 3-6. Figure 3-6 WAN Connection Type The router provides Auto-Detect function and supports five popular ways PPPoE, Dynamic IP, Static IP, L2TP and PPTP to connect to the Internet. It’s recommended that you make use of the Auto-Detect function.
Archer C7 AC1750 Wireless Dual Band Gigabit Router Figure 3-7 Quick Setup – MAC Clone 2) If the connection type detected is Static IP, the next screen will appear as shown in Figure 3-8. Configure the following parameters and then click Next to continue. Figure 3-8 Quick Setup - Static IP IP Address - This is the WAN IP address as seen by external users on the Internet (including your ISP). Your ISP will provide you with the IP address you need to enter here. Enter the IP address into the field.
Archer C7 AC1750 Wireless Dual Band Gigabit Router Figure 3-9 Quick Setup – PPPoE/Russia PPPoE User Name/Password - Enter the User Name and Password provided by your ISP. These fields are case-sensitive. If you have difficulty with this process, please contact your ISP. Confirm Password - Enter the password again to make sure that the password is correct.
Archer C7 AC1750 Wireless Dual Band Gigabit Router User Name/Password - Enter the User Name and Password provided by your ISP. These fields are case-sensitive. If you have difficulty with this process, please contact your ISP. Select Static IP if IP Address/ Subnet Mask/ Gateway and DNS server address have been provided by your ISP. Then please enter server IP address or domain name provided by your ISP, and also enter the corresponding parameters.
Archer C7 AC1750 Wireless Dual Band Gigabit Router Select Dynamic IP if none of the above parameters are provided. Then you just need to enter server IP address or domain name provided by your ISP. 5. After finishing WAN Connection Type selection, the Dual Band Selection page will appear as shown in Figure 3-12. Here we take “Concurrently with 2.4GHz and 5GHz (802.11a/b/g/n)” for example. Click Next to continue. Figure 3-12 Quick Setup – Dual Band Selection 2.4GHz - You can use the 2.
Archer C7 AC1750 Wireless Dual Band Gigabit Router Figure 3-13 Quick Setup – Wireless Wireless Radio - Indicates whether the wireless radio feature of the Router is enabled or disabled. Wireless Network Name - Enter a string of up to 32 characters. The same Name (SSID) must be assigned to all wireless devices in your network. The default SSID is set to be TP-LINK_xxxx (xxxx indicates the last unique four characters of each Router's MAC address), which can ensure your wireless network security.
Archer C7 AC1750 Wireless Dual Band Gigabit Router Band - This field displayed the operating frequency being configured. Mode - This field determines the wireless mode which the router works on. 11bg mixed - Select if you are using both 802.11b and 802.11g wireless clients. 11bgn mixed - Select if you are using a mix of 802.11b, 11g, and 11n wireless clients. Channel Width - Select any channel width from the drop-down list.
Archer C7 AC1750 Wireless Dual Band Gigabit Router Wireless Network Name - Enter a string of up to 32 characters. The same Name (SSID) must be assigned to all wireless devices in your network. The default SSID is set to be TP-LINK_xxxx_5G (xxxx indicates the last unique four characters of each Router's MAC address), which can ensure your wireless network security. But it is recommended strongly that you change your networks name (SSID) to a different value. This value is case-sensitive.
Archer C7 AC1750 Wireless Dual Band Gigabit Router Figure 3-15 Quick Setup - Finish - 20 -
Archer C7 AC1750 Wireless Dual Band Gigabit Router Chapter 4. Configuring the Router This chapter will show each Web page's key functions and the configuration way. 4.1 Login Figure 4-1 Login Windows Enter admin for the User Name and Password, both in lower case letters. Then click the Login button or press the Enter key. After your successful login, you will see the main menus on the left of the Web-based utility. On the right, there are the corresponding explanations and instructions.
Archer C7 AC1750 Wireless Dual Band Gigabit Router Figure 4-2 Status - 22 -
Archer C7 4.3 AC1750 Wireless Dual Band Gigabit Router Quick Setup Please refer to 3.2 Quick Installation Guide. 4.4 Network Figure 4-3 the Network menu There are three submenus under the Network menu (shown in Figure 4-3): WAN, LAN, MAC Clone, and IPTV. Click any of them, and you will be able to configure the corresponding function. 4.4.1 WAN Choose menu “Network → WAN”, you can configure the IP parameters of the WAN on the screen below. 1.
Archer C7 AC1750 Wireless Dual Band Gigabit Router This page displays the WAN IP parameters assigned dynamically by your ISP, including IP address, Subnet Mask, Default Gateway, etc. Click the Renew button to renew the IP parameters from your ISP. Click the Release button to release the IP parameters. MTU Size - The normal MTU (Maximum Transmission Unit) value for most Ethernet networks is 1500 Bytes. It is not recommended that you change the default MTU Size unless required by your ISP.
Archer C7 AC1750 Wireless Dual Band Gigabit Router Default Gateway - (Optional) Enter the gateway IP address in dotted-decimal notation provided by your ISP. MTU Size - The normal MTU (Maximum Transmission Unit) value for most Ethernet networks is 1500 Bytes. It is not recommended that you change the default MTU Size unless required by your ISP. Primary/Secondary DNS - (Optional) Enter one or two DNS addresses in dotted-decimal notation provided by your ISP.
Archer C7 AC1750 Wireless Dual Band Gigabit Router Static IP - You can check this radio button to use Static IP as the secondary connection to connect to the local area network provided by ISP. Connect on Demand - In this mode, the Internet connection can be terminated automatically after a specified inactivity period (Max Idle Time) and be re-established when you attempt to access the Internet again.
Archer C7 AC1750 Wireless Dual Band Gigabit Router Figure 4-7 PPPoE Advanced Settings MTU Size - The default MTU size is “1480” bytes, which is usually fine. It is not recommended that you change the default MTU Size unless required by your ISP. Service Name/AC Name - The service name and AC (Access Concentrator) name should not be configured unless you are sure it is necessary for your ISP. In most cases, leaving these fields blank will work.
Archer C7 AC1750 Wireless Dual Band Gigabit Router Figure 4-8 WAN - BigPond Cable User Name/Password - Enter the User Name and Password provided by your ISP. These fields are case-sensitive. Auth Server - Enter the authenticating server IP address or host name. Auth Domain - Type in the domain suffix server name based on your location. e.g. NSW / ACT - nsw.bigpond.net.au VIC / TAS / WA / SA / NT - vic.bigpond.net.au QLD - qld.bigpond.net.
Archer C7 AC1750 Wireless Dual Band Gigabit Router Internet connection, and you will not be able to re-establish your connection automatically as soon as you attempt to access the Internet again. To use this option, check the radio button. If you want your Internet connection to remain active at all times, enter "0" in the Max Idle Time field. Otherwise, enter the number of minutes that you wish to have the Internet connecting last unless a new link is requested.
Archer C7 AC1750 Wireless Dual Band Gigabit Router Dynamic IP/ Static IP - Choose either as you are given by your ISP. Click the Connect button to connect immediately. Click the Disconnect button to disconnect immediately. Connect on Demand - You can configure the router to disconnect from your Internet connection after a specified period of inactivity (Max Idle Time).
Archer C7 AC1750 Wireless Dual Band Gigabit Router Figure 4-10 PPTP Settings User Name/Password - Enter the User Name and Password provided by your ISP. These fields are case-sensitive. Dynamic IP/ Static IP - Choose either as you are given by your ISP and enter the ISP’s IP address or the domain name. If you choose static IP and enter the domain name, you should also enter the DNS assigned by your ISP. And click the Save button. Click the Connect button to connect immediately.
Archer C7 AC1750 Wireless Dual Band Gigabit Router Connect Automatically - Connect automatically after the router is disconnected. To use this option, check the radio button. Connect Manually - You can configure the router to make it connect or disconnect manually. After a specified period of inactivity (Max Idle Time), the router will disconnect from your Internet connection, and you will not be able to re-establish your connection automatically as soon as you attempt to access the Internet again.
Archer C7 AC1750 Wireless Dual Band Gigabit Router MAC Address - The physical address of the router, as seen from the LAN. The value can't be changed. IP Address - Enter the IP address of your router or reset it in dotted-decimal notation (factory default: 192.168.0.1). Subnet Mask - An address code that determines the size of the network. Normally use 255.255.255.0 as the subnet mask. Note: 1) If you change the IP Address of LAN, you must use the new IP Address to log in the router.
Archer C7 4.4.4 AC1750 Wireless Dual Band Gigabit Router IPTV Choose menu “Network → IPTV”, you can configure the IPTV function on the screen below, Figure 4-13Figure 4-12: Figure 4-13 IPTV IGMP Proxy- If you want to watch TV through IGMP, please Enable it. Mode • Automatic - There would be no change to the LAN ports, work with IGMP Proxy technology, allowing watch IPTV via wired and wireless connection.
Archer C7 AC1750 Wireless Dual Band Gigabit Router Concurrently with 2.4GHz and 5GHz (802.11a/b/g/n/ac) - Choose this option, and then the router will work concurrently in 2.4GHz and 5GHz frequency. Only work in 2.4GHz (802.11b/g/n) - Choose this option, and then the router will only work in 2.4GHz frequency. You can use the 2.4GHz band to connect to many classic wireless devices like gaming consoles, laptops, DVRs, ect. Only work in 5GHz (802.
Archer C7 AC1750 Wireless Dual Band Gigabit Router Note Dialog Mode - This field determines the wireless mode which the router works on. 11bg mixed - Select if you are using both 802.11b and 802.11g wireless clients. 11bgn mixed - Select if you are using a mix of 802.11b, 11g, and 11n wireless clients. It is strongly recommended that you set the Mode to 802.11bgn mixed, and all of 802.11b, 802.11g, and 802.11n wireless stations can connect to the router.
Archer C7 AC1750 Wireless Dual Band Gigabit Router Key type - This option should be chosen according to the AP's security configuration. It is recommended that the security type is the same as your AP's security type WEP Index - This option should be chosen if the key type is WEP(ASCII) or WEP(HEX). It indicates the index of the WEP key. Auth Type - This option should be chosen if the key type is WEP(ASCII) or WEP(HEX). It indicates the authorization type of the Root AP.
Archer C7 AC1750 Wireless Dual Band Gigabit Router To build a successful connection by WPS, you should also do the corresponding configuration of the new device for WPS function meanwhile. I. Use the Wi-Fi Protected Setup Button Use this method if your client device has a WPS button. Step 1: Press the WPS/Reset button on the back panel of the router, as shown in Figure 4-19. You can also keep the default WPS status as Enabled and click the Add device button in Figure 4-18.
Archer C7 AC1750 Wireless Dual Band Gigabit Router Figure 4-21 Add A New Device Step 2: Enter the PIN number from the client device in the field on the WPS screen above. Then click Connect button. Step 3: “Connect successfully” will appear on the screen of Figure 4-21, which means the client device has successfully connected to the router. III. Enter the router’s PIN on your client device Use this method if your client device asks for the router’s PIN number.
Archer C7 AC1750 Wireless Dual Band Gigabit Router Figure 4-22 Wireless Security Disable Security - If you do not want to use wireless security, check this radio button. But it’s strongly recommended to choose one of the following modes to enable security. WPA/WPA2-Personal - It’s the WPA/WPA2 authentication type based on pre-shared passphrase. The router is configured by this security type by default. • Version - you can choose the version of the WPA-PSK security on the drop-down list.
Archer C7 AC1750 Wireless Dual Band Gigabit Router Figure 4-23 WPA/WPA2 - Personal • PSK Password - You can enter ASCII characters between 8 and 63 characters or 8 to 64 Hexadecimal characters. The default password is the same with the default PIN code, which is labeled on the bottom of the router or can be found in Figure 4-18. • Group Key Update Period - Specify the group key update interval in seconds. The value should be 30 or above. Enter 0 to disable the update.
Archer C7 AC1750 Wireless Dual Band Gigabit Router Figure 4-25 WEP • Type - you can choose the type for the WEP security on the drop-down list. The default setting is Automatic, which can select Shared Key or Open System authentication type automatically based on the wireless station's capability and request. • WEP Key Format - Hexadecimal and ASCII formats are provided here. Hexadecimal format stands for any combination of hexadecimal digits (0-9, a-f, A-F) in the specified length.
Archer C7 AC1750 Wireless Dual Band Gigabit Router Figure 4-26 Wireless MAC Filtering To filter wireless users by MAC Address, click Enable. The default setting is Disabled. MAC Address - The wireless station's MAC address that you want to filter. Status - The status of this entry, either Enabled or Disabled. Description - A simple description of the wireless station. To Add a Wireless MAC Address filtering entry, click the Add New… button.
Archer C7 AC1750 Wireless Dual Band Gigabit Router To modify an existing entry: 1. Click the Modify in the entry you want to modify. 2. Modify the information. 3. Click the Save button. Click the Delete in the entry you want to delete to delete an existing entry. Click the Enable All button to make all entries enabled Click the Disable All button to make all entries disabled. Click the Delete All button to delete all entries. Click the Next button to go to the next page.
Archer C7 4.6.5 AC1750 Wireless Dual Band Gigabit Router Wireless Advanced Choose menu “Wireless 2.4GHz → Wireless Advanced”, you can configure the advanced settings of your wireless network. Figure 4-28 Wireless Advanced Transmit Power - Here you can specify the transmit power of router. You can select High, Middle or Low which you would like. High is the default setting and is recommended. Beacon Interval - Enter a value between 20-1000 milliseconds for Beacon Interval here.
Archer C7 AC1750 Wireless Dual Band Gigabit Router Enable Short GI - This function is recommended for it will increase the data capacity by reducing the guard interval time. Enabled AP Isolation - This function can isolate wireless stations on your network from each other. Wireless devices will be able to communicate with the router but not with each other. To use this function, check this box. AP Isolation is disabled by default.
Archer C7 4.7 AC1750 Wireless Dual Band Gigabit Router Wireless 5GHz Figure 4-30 Wireless menu There are six submenus under the Wireless menu (shown in Figure 4-15): Wireless Settings, WPS, Wireless Security, Wireless MAC Filtering, Wireless Advanced and Wireless Statistics. Click any of them, and you will be able to configure the corresponding functions. 4.7.
Archer C7 AC1750 Wireless Dual Band Gigabit Router Channel - This field determines which operating frequency will be used. The default channel is set to Auto, so the router will choose the best channel automatically. It is not necessary to change the wireless channel unless you notice interference problems with another nearby access point. Enable SSID Broadcast - When wireless clients survey the local area for wireless networks to associate with, they will detect the SSID broadcast by the router.
Archer C7 AC1750 Wireless Dual Band Gigabit Router Figure 4-33 WPS WPS Status - Enable or disable the WPS function here. Current PIN - The current value of the router's PIN is displayed here. The default PIN of the router can be found in the label or User Guide. Restore PIN - Restore the PIN of the router to its default. Gen New PIN - Click this button, and then you can get a new random value for the router's PIN. You can ensure the network security by generating a new PIN.
Archer C7 AC1750 Wireless Dual Band Gigabit Router Figure 4-35 Add A New Device Step 2: Press and hold the WPS button of the client device directly. Step 3: The Wi-Fi Protected Setup LED flashes for two minutes during the Wi-Fi Protected Setup process. Step 4: When the WPS LED is on, the client device has successfully connected to the router. II. Enter the client device’s PIN on the router Use this method if your client device does not have the WPS button, but has a Wi-Fi Protected Setup PIN number.
Archer C7 AC1750 Wireless Dual Band Gigabit Router Note: 1) The WPS LED on the router will light green for five minutes if the device has been successfully added to the network. 2) The WPS function cannot be configured if the Wireless Function of the router is disabled. Please make sure the Wireless Function is enabled before configuring the WPS. 4.7.3 Wireless Security Choose menu “Wireless 5GHz → Wireless Security”, you can configure the security settings of your wireless network.
Archer C7 • AC1750 Wireless Dual Band Gigabit Router Version - you can choose the version of the WPA-PSK security on the drop-down list. The default setting is Automatic, which can select WPA-PSK (Pre-shared key of WPA) or WPA2-PSK (Pre-shared key of WPA2) automatically based on the wireless station's capability and request. • Encryption - When WPA-PSK or WPA is set as the Authentication Type, you can select either Automatic, or TKIP or AES as Encryption.
Archer C7 AC1750 Wireless Dual Band Gigabit Router Figure 4-39 WPA/WPA2 - Enterprise • Radius Server IP - Enter the IP address of the Radius server. • Radius Port - Enter the port number of the Radius server. • Radius Password - Enter the password for the Radius server. • Group Key Update Period - Specify the group key update interval in seconds. The value should be 30 or above. Enter 0 to disable the update. WEP - It is based on the IEEE 802.11 standard.
Archer C7 AC1750 Wireless Dual Band Gigabit Router 64-bit - You can enter 10 hexadecimal digits (any combination of 0-9, a-f, A-F, and null key is not permitted) or 5 ASCII characters. 128-bit - You can enter 26 hexadecimal digits (any combination of 0-9, a-f, A-F, and null key is not permitted) or 13 ASCII characters. 152-bit - You can enter 32 hexadecimal digits (any combination of 0-9, a-f, A-F, and null key is not permitted) or 16 ASCII characters.
Archer C7 AC1750 Wireless Dual Band Gigabit Router Figure 4-42 Add or Modify Wireless MAC Address Filtering entry To add or modify a MAC Address Filtering entry, follow these instructions: 1. Enter the appropriate MAC Address into the MAC Address field. The format of the MAC Address is XX-XX-XX-XX-XX-XX (X is any hexadecimal digit). For example: 00-0A-EB-B0-00-0B. 2. Give a simple description for the wireless station in the Description field. For example: Wireless station A. 3.
Archer C7 AC1750 Wireless Dual Band Gigabit Router 4. Click the Add New... button. 5. Enter the MAC address 00-0A-EB-B0-00-0B/00-0A-EB-00-07-5F in the MAC Address field. 6. Enter wireless station A/B in the Description field. 7. Select Enabled in the Status drop-down list. 8. Click the Save button. 9. Click the Back button. The filtering rules that configured should be similar to the following list: 4.7.
Archer C7 AC1750 Wireless Dual Band Gigabit Router particular receiving station and negotiate the sending of a data frame. The default value is 2346. Fragmentation Threshold - This value is the maximum size determining whether packets will be fragmented. Setting the Fragmentation Threshold too low may result in poor network performance because of excessive packets. 2346 is the default setting and is recommended.
Archer C7 AC1750 Wireless Dual Band Gigabit Router Received Packets - Packets received by the station Sent Packets - Packets sent by the station You cannot change any of the values on this page. To update this page and to show the current connected wireless stations, click on the Refresh button. If the numbers of connected wireless stations go beyond one page, click the Next button to go to the next page and click the Previous button to return the previous page.
Archer C7 AC1750 Wireless Dual Band Gigabit Router Figure 4-46 Guest Network Wireless Settings Allow Guest To Access My Local Network - If enabled, guests can communicate with hosts. Enable Guest Network Bandwidth Control - If enabled, the Guest Network Bandwidth Control rules will take effect. Egress Bandwidth For Guest Network - The upload speed through the WAN port for Guest Network. Ingress Bandwidth For Guest Network - The download speed through the WAN port for Guest Network.
Archer C7 4.9 AC1750 Wireless Dual Band Gigabit Router DHCP Figure 4-47 The DHCP menu There are three submenus under the DHCP menu (shown in Figure 4-47): DHCP Settings, DHCP Clients List and Address Reservation. Click any of them, and you will be able to configure the corresponding functions. 4.9.1 DHCP Settings Choose menu “DHCP → DHCP Settings”, you can configure the DHCP Server on the page as shown in Figure 4-48.
Archer C7 AC1750 Wireless Dual Band Gigabit Router the user will be automatically assigned a new dynamic IP address. The range of the time is 1 ~ 2880 minutes. The default value is 120 minutes. Default Gateway - (optional.) It is suggested to input the IP address of the Ethernet port of the router. The default value is 192.168.0.1. Default Domain - (optional) Input the domain name of your network. Primary DNS - (optional) Input the DNS IP address provided by your ISP or consult your ISP.
Archer C7 AC1750 Wireless Dual Band Gigabit Router Figure 4-50 Address Reservation MAC Address - The MAC address of the PC for which you want to reserve an IP address. Reserved IP Address - The IP address reserved for the PC by the router. Status - The status of this entry, either Enabled or Disabled. To Reserve an IP address: 1. Click the Add New… button. Then Figure 4-51 will pop up. 2. Enter the MAC address (in XX-XX-XX-XX-XX-XX format.
Archer C7 AC1750 Wireless Dual Band Gigabit Router 4.10 USB Settings Figure 4-52 The USB Settings menu There are five submenus under the USB Settings menu (shown in Figure 4-52):Disk Settings, Folder Sharing, and Print Server. Click any of them, and you will be able to configure the corresponding functions. 4.10.
Archer C7 4.10.2 AC1750 Wireless Dual Band Gigabit Router Folder Sharing Choose menu “USB Settings→Folder Sharing”, you can create an FTP server that can be accessed from the Internet or your local network. Figure 4-54 FTP Server Configuration Sharing Account Use Login Account - You can use the login account or create a new one. The username and the password are the same as that of the login account. When choosing Use Login Account as shared account, the text boxes below cannot be edited.
Archer C7 1) AC1750 Wireless Dual Band Gigabit Router Access Method - Available methods to access the storage device. Network Neighborhood: This method is enabled by default. To access the USB drive for example from a Windows computer: 2) i. Select Start > Run. ii. Enter \\192.168.0.1 in the dialog box and click the OK button. FTP: This method is disabled by default. If you select this check box and click the Save button, the LAN users can access the USB drive through FTP.
Archer C7 AC1750 Wireless Dual Band Gigabit Router Figure 4-55 Add or Modify Share Folder Allow Guest Network Access - Select the check box to allow the Guest Network to have access to the shared folder. Enable Authentication - Select the check box to require users to log in with a username and password. You can create a new login in the Advanced USB Settings page. Otherwise, the username and password will be the same as your Web Management login information.
Archer C7 AC1750 Wireless Dual Band Gigabit Router There are two states of the print server, as follows. Online - Indicates the print service has been turned on, and no user is using the print service at present. You can click the "Stop" button to stop the print service. Offline - Indicates the print service feature is disabled. You can click "Start" button to start the print service. 4.11 NAT Choose “NAT”, and you can enable or disable the NAT and Hardware NAT Control feature.
Archer C7 AC1750 Wireless Dual Band Gigabit Router on your LAN. A virtual server is defined as a service port, and all requests from Internet to this service port will be redirected to the computer specified by the server IP. Any PC that was used for a virtual server must have a static or reserved IP address because its IP address may change when using the DHCP function. If you want the Virtual Servers configuration take effect, please make sure the NAT is enabled.
Archer C7 6. AC1750 Wireless Dual Band Gigabit Router Click the Save button. Figure 4-60 Add or Modify a Virtual Server Entry Note: It is possible that you have a computer or server that has more than one type of available service. If so, select another service, and type the same IP address for that computer or server. To modify an existing entry: 1. Click the Modify in the entry you want to modify. 2. Modify the information. 3. Click the Save button.
Archer C7 AC1750 Wireless Dual Band Gigabit Router Figure 4-61 Port Triggering To add a new rule, follow the steps below. 1. Click the Add New… button, the next screen will pop-up as shown in Figure 4-62. 2. Select a common application from the Common Applications drop-down list, then the Trigger Port field and the Incoming Ports field will be automatically filled. If the Common Applications do not have the application you need, enter the Trigger Port and the Incoming Ports manually. 3.
Archer C7 AC1750 Wireless Dual Band Gigabit Router Incoming Port - The port or port range used by the remote system when it responds to the outgoing request. A response using one of these ports will be forwarded to the PC which triggered this rule. You can input at most 5 groups of ports (or port sections). Every group of ports must be separated with ",", for example, 2000-2038, 2046, 2050-2051, 2085, 3010-3030.
Archer C7 4.12.3 AC1750 Wireless Dual Band Gigabit Router DMZ Choose menu “Forwarding→DMZ”, and then you can view and configure DMZ host in the screen (shown in Figure 4-63).The DMZ host feature allows one local host to be exposed to the Internet for a special-purpose service such as Internet gaming or videoconferencing. The router forwards packets of all services to the DMZ host.
Archer C7 AC1750 Wireless Dual Band Gigabit Router Current UPnP Status - UPnP can be enabled or disabled by clicking the Enable or Disable button. This feature is enabled by default. Current UPnP Settings List - This table displays the current UPnP information. App Description - The description about the application which initiates the UPnP request. External Port - The port which the router opened for the application. Protocol - The type of protocol which is opened.
Archer C7 AC1750 Wireless Dual Band Gigabit Router Figure 4-66 Basic Security Firewall - A firewall protects your network from the outside world. Here you can enable or disable the router’s firewall. SPI Firewall - SPI (Stateful Packet Inspection, also known as dynamic packet filtering) helps to prevent cyber attacks by tracking more state per session. It validates that the traffic passing through the session conforms to the protocol. SPI Firewall is enabled by factory default.
Archer C7 AC1750 Wireless Dual Band Gigabit Router gateway to support address and port translation for certain application layer "control/data" protocols such as FTP, TFTP, H323 etc. FTP ALG - To allow FTP clients and servers to transfer data across NAT, click Enable. TFTP ALG - To allow TFTP clients and servers to transfer data across NAT, click Enable. H323 ALG - To allow Microsoft NetMeeting clients to communicate across NAT, click Enable.
Archer C7 AC1750 Wireless Dual Band Gigabit Router DoS Protection - Denial of Service protection. Check the Enable or Disable button to enable or disable the DoS protection function. Only when it is enabled, will the flood filters be enabled. Note: Dos Protection will take effect only when the Traffic Statistics in “System Tools → Statistics” is enabled. Enable ICMP-FLOOD Attack Filtering - Enable or Disable the ICMP-FLOOD Attack Filtering.
Archer C7 AC1750 Wireless Dual Band Gigabit Router Figure 4-68 Local Management By default, the radio button “All the PCs on the LAN are allowed to access the Router's Web-Based Utility” is checked. If you want to allow PCs with specific MAC Addresses to access the Setup page of the router's Web-Based Utility locally from inside the network, check the radio button “Only the PCs listed can browse the built-in web pages to perform Administrator tasks”, and then enter each MAC Address in a separate field.
Archer C7 AC1750 Wireless Dual Band Gigabit Router Web Management Port - Web browser access normally uses the standard HTTP service port 80. This router's default remote management web port number is 80. For greater security, you can change the remote management web port to a custom port by entering that number in the box provided. Choose a number between 1 and 65534 but do not use the number of any common service port.
Archer C7 AC1750 Wireless Dual Band Gigabit Router Figure 4-71 Add or Modify Parental Control Entry • MAC Address of Child PC - Enter the MAC address of the PC you want to control, or you can make use of the All MAC Address In Current LAN item below. If you leave it blank, then the rule will be applied to all of the PCs except the parental PC. • ALL MAC Address In Current LAN - You can see the MAC addresses of all PCs in current LAN by clicking on the drop-down button.
Archer C7 3. AC1750 Wireless Dual Band Gigabit Router Give a description (e.g. Allow TP-LINK) for the website allowed to be accessed in the Website Description field. 4. Enter the allowed domain name of the website, either the full name or the keywords (e.g. TP-LINK) in the Allowed Domain Name field. Any domain name with keywords in it (www.tp-link.com, www.tp-link.com.cn) will be allowed. 5. Select from the Effective Time drop-down list the schedule (e.g. Schedule_1) you want.
Archer C7 AC1750 Wireless Dual Band Gigabit Router Then you will go back to the Parental Control Settings page and see the following list, as shown in Figure 4-72. Figure 4-72 Parental Control Settings 4.15 Access Control Figure 4-73 Access Control There are four submenus under the Access Control menu as shown in Figure 4-73: Rule, Host, Target and Schedule. Click any of them, and you will be able to configure the corresponding function. 4.15.
Archer C7 AC1750 Wireless Dual Band Gigabit Router Figure 4-74 Access Control Rule Management Enable Internet Access Control - Select the check box to enable the Internet Access Control function, so the Default Filter Policy can take effect. Rule Name - Here displays the name of the rule and this name is unique. Host - Here displays the host selected in the corresponding rule. Target - Here displays the target selected in the corresponding rule.
Archer C7 AC1750 Wireless Dual Band Gigabit Router There are two methods to add a new rule. Method One: 1. Click Setup Wizard button and the next screen will appear as shown in Figure 4-75. Figure 4-75 Quick Setup – Create a Host Entry Host Description - In this field, create a unique description for the host (e.g. Host_1). Mode - Here are two options, IP Address and MAC Address. You can select either of them from the drop-down list.
Archer C7 AC1750 Wireless Dual Band Gigabit Router Target Description - In this field, create a description for the target. Note that this description should be unique (e.g. Target_1). Mode - Here are two options, IP Address and Domain Name. You can choose either of them from the drop-down list. If the IP Address is selected, you will see the following items: • IP Address - Enter the IP address (or address range) of the target (targets) in dotted-decimal format (e.g. 192.168.0.23).
Archer C7 AC1750 Wireless Dual Band Gigabit Router Time - Select "24 hours", or specify the Start Time and Stop Time yourself. Start Time - Enter the start time in HHMM format (HHMM are 4 numbers). For example 0800 is 8:00. Stop Time - Enter the stop time in HHMM format (HHMM are 4 numbers). For example 2000 is 20:00. 4. Click Next when finishing creating the advanced schedule entry, and the next screen will appear as shown in Figure 4-78.
Archer C7 5. AC1750 Wireless Dual Band Gigabit Router Select a schedule from the Schedule drop-down list or choose “Click Here To Add New Schedule”. 6. In the Status field, select Enabled or Disabled to enable or disable your entry. 7. Click the Save button. Figure 4-79 Add Internet Access Control Entry For example: If you desire to allow the host with MAC address 00-11-22-33-44-AA to access www.tp-link.
Archer C7 5) In Status field, select Enabled. 6) Click Save to complete the settings. AC1750 Wireless Dual Band Gigabit Router Then you will go back to the Access Control Rule Management page and see the following list. 4.15.2 Host Choose menu “Access Control → Host”, and then you can view and set a Host list in the screen as shown in Figure 4-80. The host list is necessary for the Access Control Rule.
Archer C7 AC1750 Wireless Dual Band Gigabit Router Figure 4-81 Add or Modify a Host Entry Figure 4-82 Add or Modify a Host Entry For example: If you desire to restrict the internet activities of host with MAC address 00-11-22-33-44-AA, you should first follow the settings below: 1. Click Add New... button in Figure 4-80 to enter the Add or Modify a Host Entry page. 2. In Mode field, select MAC Address from the drop-down list. 3. In Host Description field, create a unique description for the host (e.
Archer C7 AC1750 Wireless Dual Band Gigabit Router Figure 4-83 Target Settings Target Description - Here displays the description about the target and this description is unique. Information - The target can be IP address, port, or domain name. Modify - To modify or delete an existing entry. To add a new entry, please follow the steps below. 1. Click the Add New… button. 2. In Mode field, select IP Address or Domain Name. 3. If you select IP Address, the screen shown is Figure 4-84.
Archer C7 AC1750 Wireless Dual Band Gigabit Router Figure 4-85 Add or Modify an Access Target Entry 1) In Target Description field, create a unique description for the target (e.g. Target_1). 2) In Domain Name field, enter the domain name, either the full name or the keywords (for example, TP-LINK) in the blank. Any domain name with keywords in it (www.tp-link.com, www.tp-link.com.cn) will be blocked or allowed. You can enter 4 domain names. 5. Click the Save button.
Archer C7 AC1750 Wireless Dual Band Gigabit Router Figure 4-86 Schedule Settings Schedule Description - Here displays the description of the schedule and this description is unique. Day - Here displays the day(s) in a week. Time - Here displays the time period in a day. Modify - Here you can edit or delete an existing schedule. To add a new schedule, follow the steps below: 1. Click Add New... button shown in Figure 4-86 and the next screen will pop-up as shown in Figure 4-87. 2.
Archer C7 AC1750 Wireless Dual Band Gigabit Router For example: If you desire to restrict the internet activities of host with MAC address 00-11-22-33-44-AA to access www.tp-link.com only from 18:00 to 20:00 on Saturday and Sunday, you should first follow the settings below: 1. Click Add New... button shown in Figure 4-86 to enter the Advanced Schedule Settings page. 2. In Schedule Description field, create a unique description for the schedule (e.g. Schedule_1). 3.
Archer C7 AC1750 Wireless Dual Band Gigabit Router To add static routing entries: 1. Click Add New… shown in Figure 4-89, you will see the following screen. Figure 4-90 Add or Modify a Static Route Entry 2. Enter the following data: Destination Network - The Destination Network is the address of the network or host that you want to assign to a static route. Subnet Mask - The Subnet Mask determines which portion of an IP Address is the network portion, and which portion is the host portion.
Archer C7 AC1750 Wireless Dual Band Gigabit Router Figure 4-91 System Routing Table Destination Network - The Destination Network is the address of the network or host to which the static route is assigned. Subnet Mask - The Subnet Mask determines which portion of an IP address is the network portion, and which portion is the host portion. Gateway - This is the IP address of the gateway device that allows for contact between the router and the network or host.
Archer C7 AC1750 Wireless Dual Band Gigabit Router Figure 4-93 Bandwidth Control Settings Enable Bandwidth Control - Check this box so that the Bandwidth Control settings can take effect. Line Type - Select the right type for you network connection. If you don’t know how to choose, please ask your ISP for the information. Egress Bandwidth - The upload speed through the Internet port. Ingress Bandwidth - The download speed through the Internet port. 4.17.
Archer C7 2. AC1750 Wireless Dual Band Gigabit Router Enter the information like the screen shown below. Figure 4-95 Bandwidth Control Rule Settings 3. Click the Save button. 4.18 IP & MAC Binding Figure 4-96 the IP & MAC Binding menu There are two submenus under the IP &MAC Binding menu (shown in Figure 4-96): Binding Settings and ARP List. Click any of them, and you will be able to scan or configure the corresponding function. The detailed explanations for each submenu are provided below. 4.18.
Archer C7 AC1750 Wireless Dual Band Gigabit Router Bind - Check this option to enable ARP binding for a specific device. Modify - To modify or delete an existing entry. Click the Enable All button to make all entries enabled. Click the Delete All button to delete all entries. When you want to add or modify an IP & MAC Binding entry, you can click the Add New… button or Modify button, and then you will go to the next page.
Archer C7 3. AC1750 Wireless Dual Band Gigabit Router Click the Find button on the page. Figure 4-100 Find IP & MAC Binding Entry 4.18.2 ARP List To manage the computer, you could observe the computers in the LAN by checking the relationship of MAC address and IP address on the ARP list, and you could also configure the items on the ARP list. This page displays the ARP List; it shows all the existing IP & MAC Binding entries (shown in Figure 4-101).
Archer C7 AC1750 Wireless Dual Band Gigabit Router 4.19 Dynamic DNS Choose menu “Dynamic DNS”, and you can configure the Dynamic DNS function. The router offers the DDNS (Dynamic Domain Name System) feature, which allows the hosting of a website, FTP server, or e-mail server with a fixed domain name (named by yourself) and a dynamic IP address, and then your friends can connect to your server by entering your domain name no matter what your IP address is.
Archer C7 AC1750 Wireless Dual Band Gigabit Router Note: If you want to login again with another account after a successful login, please click the Logout button, then input your new username and password and click the Login button. 4.19.2 Dyndns DDNS If the dynamic DNS Service Provider you select is www.dyn.com, the page will appear as shown in Figure 4-103. Figure 4-103 Dyndns DDNS Settings To set up for DDNS, follow these instructions: 1. Enter the User Name for your DDNS account. 2.
Archer C7 AC1750 Wireless Dual Band Gigabit Router Figure 4-104 No-IP DDNS Settings To set up for DDNS, follow these instructions: 1. Enter the User Name for your DDNS account. 2. Enter the Password for your DDNS account. 3. Enter the Domain Name you received from dynamic DNS service provider. 4. Click the Login button to login to the DDNS service. Connection Status - The status of the DDNS service connection is displayed here. Click Logout to log out the DDNS service.
Archer C7 AC1750 Wireless Dual Band Gigabit Router 4.20.1 IPv6 Status Figure 4-106 IPv6 Status The IPv6 Status page displays the router's current IPv6 status and configuration. All information is read-only.
Archer C7 AC1750 Wireless Dual Band Gigabit Router 4.20.2 IPv6 Setup Figure 4-107 Enable/Disable IPv6 Enable IPv6 - Tick the checkbox to enable the IPv6 function. It’s enabled by default. WAN Connection Type - Choose the correct WAN connection type based on your ISP network topology. • DHCPv6 - Connections which use dynamic IPv6 address assignment. • Static IPv6 - Connections which use static IPv6 address assignment.
Archer C7 1) AC1750 Wireless Dual Band Gigabit Router DHCPv6 Figure 4-108 DHCPv6 Get non-temporary IPv6 address - Get a non-temporary IPv6 address from the ISP. Get IPv6 prefix delegation - Get a temporary IPv6 address and IPv6 prefix from the ISP, the temporary IPv6 address is set to the WAN port, and the LAN port advertise IPv6 address by RADVD or DHCPs. IPv6 Address - The IPv6 address assigned by your ISP dynamically. Click the Renew button to renew the IPv6 parameters from your ISP.
Archer C7 AC1750 Wireless Dual Band Gigabit Router Get IPv6 with Unicast DHCP - A few ISPs' DHCP servers do not support the broadcast applications. If you can't get the IPv6 Address normally, you can choose Unicast. (You generally need not to check this option). IPv6 Address Assign Type - There are two types of assignation for IPv6 address: SLAAC (Stateless address auto-configuration) and DHCPv6 (Dynamic Host Configuration Protocol for IPv6) Server.
Archer C7 AC1750 Wireless Dual Band Gigabit Router Primary DNS - Enter the DNS IPv6 address in dotted-decimal notation provided by your ISP. Secondary DNS - Enter another DNS IPv6 address in dotted-decimal notation provided by your ISP. IPv6 Address Assign Type - There are two types of assignation for IPv6 address: SLAAC (Stateless address auto-configuration) and DHCPv6 (Dynamic Host Configuration Protocol for IPv6) Server.
Archer C7 • AC1750 Wireless Dual Band Gigabit Router Get IPv6 prefix delegation - Get a prefix delegation IPv6 address by DHCPv6 from the ISP, and the clients in LAN create IPv6 address with the delegation. Use IP address specified by ISP - Input a static IPv6 address from the ISP Click the Connect button to connect immediately. Click the Disconnect button to disconnect immediately.
Archer C7 AC1750 Wireless Dual Band Gigabit Router If your ISP gives you one or two DNS IPv6 addresses, select Use the following IPv6 DNS Servers and enter the Primary IPv6 DNS and Secondary IPv6 DNS into the correct fields. Otherwise, the DNS servers will be assigned from ISP dynamically. Primary IPv6 DNS - Enter the DNS IPv6 address in dotted-decimal notation provided by your ISP. Secondary IPv6 DNS - Enter another DNS IPv6 address in dotted-decimal notation provided by your ISP.
Archer C7 4.21.1 AC1750 Wireless Dual Band Gigabit Router Time Settings Choose menu “System Tools → Time Settings”, and then you can configure the time on the following screen. Figure 4-113 Time settings Time Zone - Select your local time zone from this pull down list. Date - Enter your local date in MM/DD/YY into the right blanks. Time - Enter your local time in HH/MM/SS into the right blanks.
Archer C7 AC1750 Wireless Dual Band Gigabit Router 3. Enter the Time in Hour/Minute/Second format. 4. Click Save. To set time automatically: 1. Select your local time zone. 2. Enter the address or domain of the NTP Server I or NTP Server II. 3. Click the Get GMT button to get system time from Internet if you have connected to the Internet. To set Daylight Saving: 1. Check the box to enable Daylight Saving. 2. Select the start time from the drop-down lists in the Start field. 3.
Archer C7 AC1750 Wireless Dual Band Gigabit Router Figure 4-115 Diagnostic Tool Diagnostic Tool - Check the radio button to select one diagnostic too. Ping - This diagnostic tool troubleshoots connectivity, reachability, and name resolution to a given host or gateway. Traceroute - This diagnostic tool tests the performance of a connection. Note: You can use ping/traceroute to test both numeric IP address or domain name.
Archer C7 AC1750 Wireless Dual Band Gigabit Router If the result is similar to the following screen, the connectivity of the Internet is fine. Figure 4-116 Diagnostic Results Note: 1. 2. Only one user can use the diagnostic tools at one time. "Ping Count", "Ping Packet Size" and "Ping Timeout" are Ping Parameters, and "Traceroute Max TTL" is Traceroute Parameter. 4.21.
Archer C7 AC1750 Wireless Dual Band Gigabit Router Note: 1) New firmware versions are posted at www.tp-link.com and can be downloaded for free. There is no need to upgrade the firmware unless the new firmware has a new feature you want to use. However, when experiencing problems caused by the router rather than the configuration, you can try to upgrade the firmware.
Archer C7 AC1750 Wireless Dual Band Gigabit Router Figure 4-119 Backup & Restore Configuration Click the Backup button to save all configuration settings as a backup file in your local computer. To upgrade the router's configuration, follow these instructions. • Click the Browse button to find the configuration file which you want to restore. • Click the Restore button to update the configuration with the file whose path is the one you have input or selected in the blank.
Archer C7 4.21.7 AC1750 Wireless Dual Band Gigabit Router Password Choose menu “System Tools → Password”, and then you can change the factory default user name and password of the router in the next screen as shown in Figure 4-121.
Archer C7 AC1750 Wireless Dual Band Gigabit Router Figure 4-122 System Log Auto Mail Feature - Indicates whether auto mail feature is enabled or not. Mail Settings - Set the receiving and sending mailbox address, server address, validation information as well as the timetable for Auto Mail Feature, as shown in Figure 4-123. Figure 4-123 Mail Account Settings • From - Your mail box address. The router would connect it to send logs. • To - Recipient’s address.
Archer C7 AC1750 Wireless Dual Band Gigabit Router Note: Only when you select Authentication, do you have to enter the User Name and Password in the following fields. • User Name - Your mail account name filled in the From field. The part behind @ is included. • Password - Your mail account password. • Confirm The Password - Enter the password again to confirm. • Enable Auto Mail Feature - Select it to mail logs automatically.
Archer C7 AC1750 Wireless Dual Band Gigabit Router Figure 4-124 Statistics Current Statistics Status - Enable or Disable. The default value is disabled. To enable it, click the Enable button. If it is disabled, the function of DoS protection in Security settings will be disabled. Packets Statistics Interval (5-60) - The default value is 10. Select a value between 5 and 60 seconds in the drop-down list. The Packets Statistic interval indicates the time section of the packets statistic.
Archer C7 Modify AC1750 Wireless Dual Band Gigabit Router UDP Tx The number of UDP packets transmitted to the WAN per second at the specified Packets Statistics interval. It is shown like “current transmitting rate / Max transmitting rate”. TCP SYN Tx The number of TCP SYN packets transmitted to the WAN per second at the specified Packets Statistics interval. It is shown like “current transmitting rate / Max transmitting rate”. Reset Reset the value of he entry to zero.
Archer C7 AC1750 Wireless Dual Band Gigabit Router Appendix A: FAQ 1. How do I configure the router to access Internet by ADSL users? 1) First, configure the ADSL Modem configured in RFC1483 bridge model. 2) Connect the Ethernet cable from your ADSL Modem to the Internet port on the router. The telephone cord plugs into the Line port of the ADSL Modem. 3) Login to the router, click the “Network” menu on the left of your browser, and click "WAN" submenu.
Archer C7 2. AC1750 Wireless Dual Band Gigabit Router How do I configure the router to access Internet by Ethernet users? 1) Login to the router, click the “Network” menu on the left of your browser, and click "WAN" submenu. On the WAN page, select “Dynamic IP” for "WAN Connection Type", finish by clicking “Save”. 2) Some ISPs require that you register the MAC Address of your adapter, which is connected to your cable/DSL Modem during installation.
Archer C7 AC1750 Wireless Dual Band Gigabit Router Figure A-5 Add or Modify a Virtual server Entry Note: Your opposite side should call your WAN IP, which is displayed on the “Status” page. 4) How to enable DMZ Host: Log in to the router, click the “Forwarding” menu on the left of your browser, and click "DMZ" submenu. On the "DMZ" page, click Enable radio button and type your IP address into the “DMZ Host IP Address” field, using 192.168.0.169 as an example, remember to click the Save button.
Archer C7 AC1750 Wireless Dual Band Gigabit Router Figure A-7 Basic Security 4. I want to build a WEB Server on the LAN, what should I do? 1) Because the WEB Server port 80 will interfere with the WEB management port 80 on the router, you must change the WEB management port number to avoid interference. 2) To change the WEB management port number: Log in to the router, click the “Security” menu on the left of your browser, and click "Remote Management" submenu.
Archer C7 3) AC1750 Wireless Dual Band Gigabit Router Log in to the router, click the “Forwarding” menu on the left of your browser, and click the "Virtual Servers" submenu. On the "Virtual Servers" page, click Add New…, then on the “Add or Modify a Virtual Server” page, enter “80” into the blank next to the “Service Port”, and your IP address next to the “IP Address”, assuming 192.168.0.188 for an example, remember to select the status to be Enabled and Save.
Archer C7 AC1750 Wireless Dual Band Gigabit Router Appendix B: Configuring the PC In this section, we’ll introduce how to install and configure the TCP/IP correctly in Windows 7. First make sure your Ethernet Adapter is working, refer to the adapter’s manual if needed. 1. Install TCP/IP component 1) On the Windows taskbar, click the Start button, and then click Control Panel. 2) Click the Network and Internet, and click the Network and Sharing Center, then click Change adapter settings.
Archer C7 AC1750 Wireless Dual Band Gigabit Router Figure B-2 5) The following TCP/IP Properties window will display and the IP Address tab is open on this window by default. Now you have two ways to configure the TCP/IP protocol below: Setting IP address automatically Select Obtain an IP address automatically, Choose Obtain DNS server automatically, as shown in the Figure below: Figure B-3 Setting IP address manually 1 Select Use the following IP address radio button.
Archer C7 2 AC1750 Wireless Dual Band Gigabit Router If the router's LAN IP address is 192.168.0.1, specify the IP address as 192.168.0.x (x is from 2 to 254), and Subnet mask is 255.255.255.0. 3 Type the router’s LAN IP address (the default IP is 192.168.0.1) into the Default gateway field. 4 Select Use the following DNS server addresses radio button.
Archer C7 AC1750 Wireless Dual Band Gigabit Router Appendix C: Specifications General IEEE 802.11ac, IEEE 802.11n, IEEE 802.11g, IEEE 802.11b, IEEE Standards 802.11a, IEEE 802.11e, IEEE 802.11i, IEEE 802.1X, IEEE 802.3X, IEEE 802.3, IEEE 802.3u, IEEE 802.
Archer C7 AC1750 Wireless Dual Band Gigabit Router Appendix D: Glossary 802.11ac - IEEE 802.11ac is a wireless computer networking standard of 802.11.This specification will enable multi-station WLAN throughput of at least 1 gigabit per second .This is accomplished by extending the air interface concepts embraced by 802.11n: wider RF bandwidth, more MIMO spatial streams, multi-user MIMO, and high-density modulation (up to 256 QAM). 802.11n - 802.11n builds upon previous 802.
Archer C7 AC1750 Wireless Dual Band Gigabit Router NAT (Network Address Translation) - NAT technology translates IP addresses of a local area network to a different IP address for the Internet. PPPoE (Point to Point Protocol over Ethernet) - PPPoE is a protocol for connecting remote hosts to the Internet over an always-on connection by simulating a dial-up connection.