Archer D7 AC1750 Wireless Dual Band Gigabit ADSL2+ Modem Router Rev: 1.0.
COPYRIGHT & TRADEMARKS Specifications are subject to change without notice. is a registered trademark of TP-LINK TECHNOLOGIES CO., LTD. Other brands and product names are trademarks or registered trademarks of their respective holders. No part of the specifications may be reproduced in any form or by any means or used to make any derivative such as translation, transformation, or adaptation without permission from TP-LINK TECHNOLOGIES CO., LTD. Copyright © 2014 TP-LINK TECHNOLOGIES CO., LTD.
FCC STATEMENT This equipment has been tested and found to comply with the limits for a Class B digital device, pursuant to part 15 of the FCC Rules. These limits are designed to provide reasonable protection against harmful interference in a residential installation. This equipment generates, uses and can radiate radio frequency energy and, if not installed and used in accordance with the instructions, may cause harmful interference to radio communications.
CE Mark Warning
This is a class B product. In a domestic environment, this product may cause radio interference, in which case the user may be required to take adequate measures.
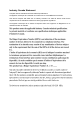
Industry Canada Statement Complies with the Canadian ICES-003 Class B specifications. Cet appareil numérique de la classe B est conforme à la norme NMB-003 du Canada. This device complies with RSS 210 of Industry Canada. This Class B device meets all the requirements of the Canadian interference-causing equipment regulations. Cet appareil numérique de la Classe B respecte toutes les exigences du Règlement sur le matériel brouilleur du Canada.
Korea Warning Statements: 당해 무선설비는 운용중 전파혼신 가능성이 있음.
Safety Information When product has power button, the power button is one of the way to shut off the product; when there is no power button, the only way to completely shut off power is to disconnect the product or the power adapter from the power source. Don’t disassemble the product, or make repairs yourself. You run the risk of electric shock and voiding the limited warranty. If you need service, please contact us. Avoid water and wet locations.
TP-LINK TECHNOLOGIES CO., LTD DECLARATION OF CONFORMITY For the following equipment: Product Description: AC1750 Wireless Dual Band Gigabit ADSL2+ Modem Router Model No.
CONTENTS Package Contents ....................................................................................................1 Chapter 1. Product Overview...................................................................................2 1.1 Overview of the Modem Router ...................................................................................... 2 1.2 Main Features................................................................................................................. 3 1.
4.7.2 Clients List.......................................................................................................................... 40 4.7.3 Address Reservation.......................................................................................................... 40 4.7.4 Conditional Pool ................................................................................................................. 41 4.8 Wireless 2.4GHz........................................................................
4.13.1 IPv6 Default Gateway....................................................................................................... 75 4.13.2 IPv6 Static Route .............................................................................................................. 75 4.14 Forwarding.................................................................................................................... 76 4.14.1 Virtual Servers ................................................................................
4.24 Logout......................................................................................................................... 108 Appendix A: Specifications .................................................................................109 Appendix B: Troubleshooting .............................................................................110 ppendix C: Technical Support.............................................................................
Archer D7 AC1750 Wireless Dual Band Gigabit ADSL2+ Modem Router User Guide Package Contents The following contents should be found in your package: One Archer D7 AC1750 Wireless Dual Band Gigabit ADSL2+ Modem Router One Power Adapter for Archer D7 AC1750 Wireless Dual Band Gigabit ADSL2+ Modem Router Quick Installation Guide One RJ45 cable Two RJ11 cables One ADSL splitter One Resource CD for Archer D7 AC1750 Wireless Dual Band Gigabit ADSL2+ Modem Router, including: This Use
Archer D7 AC1750 Wireless Dual Band Gigabit ADSL2+ Modem Router User Guide Chapter 1. Product Overview Thank you for choosing the Archer D7 AC1750 Wireless Dual Band Gigabit ADSL2+ Modem Router. 1.1 Overview of the Modem Router The Archer D7 AC1750 Wireless Dual Band Gigabit ADSL2+ Modem Router integrates 4-port Switch, Firewall, NAT-Router and Wireless AP.
Archer D7 AC1750 Wireless Dual Band Gigabit ADSL2+ Modem Router User Guide 1.2 Main Features Complies with IEEE 802.11ac to provide a wireless data rate of up to 450Mbps (2.4GHz) + 1300Mbps (5GHz). Four 10/100/1000Mbps Auto-Negotiation RJ45 LAN ports (Auto MDI/MDIX), one RJ11 port. Provides external splitter. Adopts Advanced DMT modulation and demodulation technology. Supports bridge mode and Router function. Multi-user sharing a high-speed Internet connection.
Archer D7 AC1750 Wireless Dual Band Gigabit ADSL2+ Modem Router User Guide 1.3 Panel Layout 1.3.1 The Front Panel Figure 1-1 The modem router’s LEDs are located on the top panel (View from top to bottom). They indicate the device’s working status. For details, please refer to LED Explanation. LED Explanation: Name (WPS) (USB) Status Indication On A wireless device has been successfully added to the network by WPS function. Flash WPS handshaking is in process and will continue for about 2 minutes.
Archer D7 AC1750 Wireless Dual Band Gigabit ADSL2+ Modem Router User Guide On There is a device connected to this LAN port, or the LAN port is sending or receiving data. Off There is no device connected to this LAN port. On Wireless is enabled. The modem router is working on 2.4GHz/5 GHz radio band. Off Wireless is disabled. On The network is available with a successful Internet connection. Off There is no successful Internet connection or the modem router is operating in Bridge mode.
Archer D7 AC1750 Wireless Dual Band Gigabit ADSL2+ Modem Router User Guide 1.3.2 The Back Panel Figure 1-2 ADSL: Through the port, you can connect the modem router with the telephone. Or you can connect them by an external separate splitter. For details, please refer to 2.3 Connecting the Modem Router. USB2, USB1: The USB port connects to a USB storage device or a USB printer. WPS: The switch for the WPS function. For details, please refer to 4.8.2 WPS Settings.
Archer D7 AC1750 Wireless Dual Band Gigabit ADSL2+ Modem Router User Guide Chapter 2. Connecting the Modem Router 2.1 System Requirements Broadband Internet Access Service (DSL/Cable/Ethernet). PCs with a working Ethernet Adapter and an Ethernet cable with RJ45 connectors. TCP/IP protocol on each PC. Web browser, such as Microsoft Internet Explorer, Mozilla Firefox or Apple Safari. 2.
Archer D7 AC1750 Wireless Dual Band Gigabit ADSL2+ Modem Router User Guide Figure 2-1 8
Archer D7 AC1750 Wireless Dual Band Gigabit ADSL2+ Modem Router User Guide Chapter 3. Quick Installation Guide This chapter will show you how to configure the basic functions of your Archer D7 AC1750 Wireless Dual Band Gigabit ADSL2+ Modem Router using Quick Setup Wizard within minutes. 3.1 TCP/IP Configuration The default IP address of the Archer D7 AC1750 Wireless Dual Band Gigabit ADSL2+ Modem Router is 192.168.1.1. And the default Subnet Mask is 255.255.255.0.
Archer D7 1) AC1750 Wireless Dual Band Gigabit ADSL2+ Modem Router User Guide Is the connection between your PC and the router correct? The LEDs of LAN port which you link to the device and the LEDs on your PC's adapter should be lit. 2) Is the TCP/IP configuration for your PC correct? If the router's IP address is 192.168.1.1, your PC's IP address must be within the range of 192.168.1.2 ~ 192.168.1.254. 3.
Archer D7 AC1750 Wireless Dual Band Gigabit ADSL2+ Modem Router User Guide Note: 1) Do not mix up the user name and password with your ADSL account user name and password which are needed for PPP connections. 2) If the above screen does not pop up, it means that your Web-browser has been set to a proxy. Go to Tools menu→Internet Options→Connections→LAN Settings, in the screen that appears, cancel the Using Proxy checkbox, and click OK to finish it. 2.
Archer D7 5. AC1750 Wireless Dual Band Gigabit ADSL2+ Modem Router User Guide Select Yes and then click Next to continue. Figure 3-6 Note: If the connection type can not be detected, please select No to configure it manually (shown in Figure 3-7). Figure 3-7 A. Configuration for PPPoE/PPPoA Enter the Username, Password given by your ISP, and then click Next.
Archer D7 AC1750 Wireless Dual Band Gigabit ADSL2+ Modem Router User Guide Note: If you are using the modem router on a new DSL line and have not completed your DSL provider’s online registration, you may be using a generic username and password. When registration is completed, you will need to update the username and password if you have created a new one. B. Configuration for Dynamic IP or Bridge This type doesn't need to be configured. C.
Archer D7 AC1750 Wireless Dual Band Gigabit ADSL2+ Modem Router User Guide Figure 3-11 8. On this page, please confirm all parameters. Click Back to modify or click the Save button to save your configuration. Figure 3-12 9. You will see the Complete screen below, click Finish to complete these settings.
Archer D7 AC1750 Wireless Dual Band Gigabit ADSL2+ Modem Router User Guide Figure 3-13 The basic settings for your modem router are completed. Please open the web browser and try to log on to http://www.tp-link.com to test your Internet connection.
Archer D7 AC1750 Wireless Dual Band Gigabit ADSL2+ Modem Router User Guide Chapter 4. Configuring the Modem Router This chapter will show each Web page's key function and the configuration way. 4.1 Login After your successful login, you will see the twenty-three main menus on the left of the Web-based utility. On the right, there are the corresponding explanations and instructions. The detailed explanations for each Web page’s key function are listed below. 4.
Archer D7 AC1750 Wireless Dual Band Gigabit ADSL2+ Modem Router User Guide Figure 4-1 4.3 Quick Setup Please refer to Section 3.2 Quick Installation Guide.
Archer D7 AC1750 Wireless Dual Band Gigabit ADSL2+ Modem Router User Guide 4.4 Operation Mode Choose “Operation Mode”, and you will see the screen as shown in Figure 4-2. Select your desired mode and then click Save. Figure 4-2 DSL Modem Router Mode: The device enables multi-users to share Internet via ADSL using its ADSL port and share it wirelessly at 1300Mbps wireless speeds over the crystal clear 5GHz band and 450Mbps over the 2.4GHz band.
Archer D7 AC1750 Wireless Dual Band Gigabit ADSL2+ Modem Router User Guide 4.5.1 WAN Settings Choose “Network”“WAN Settings”, and you will see the WAN Port Information Table in the screen similar to Figure 4-3, which describes the WAN port settings and the relevant manipulation to each interface. There are six different configurations for the connection types, which are Static IP, Dynamic IP, PPPoE, PPPoA, IPoA and Bridge. You can select the corresponding types according to your needs.
Archer D7 AC1750 Wireless Dual Band Gigabit ADSL2+ Modem Router User Guide Figure 4-4 4.5.1.1 Static IP Select this option if your ISP provides static IP information to you. You should set static IP address, IP subnet mask, and gateway address in the screen below.
Archer D7 AC1750 Wireless Dual Band Gigabit ADSL2+ Modem Router User Guide Figure 4-5 ATM Configuration: VPI (0~255): Identifies the virtual path between endpoints in an ATM network. The valid range is from 0 to 255. Please input the value provided by your ISP. VCI (1~65535): Identifies the virtual channel endpoints in an ATM network. The valid range is from 1 to 65535 (1 to 31 is reserved for well-known protocols). Please input the value provided by your ISP.
Archer D7 AC1750 Wireless Dual Band Gigabit ADSL2+ Modem Router User Guide DNS Server/ Secondary DNS Server: Here you can set DNS Server (at least one) manually. The Route will use this DNS Server for priority. Enable IPv6: Check the box to enable IPv6. IPv6 Address: Enter the IPv6 address provided by your ISP. Prefix Length: Enter the prefix length of the IPv6 address. The default value is 64. IPv6 Gateway: Enter the gateway IPv6 address provided by your ISP.
Archer D7 AC1750 Wireless Dual Band Gigabit ADSL2+ Modem Router User Guide Figure 4-6 Click Advance, advanced selections for WAN Service Setup can be shown. MTU (bytes): Maximum Transmission Unit Size. Check this box then you can change the MTU size. The default MTU value is 1500 Bytes. It is not recommended that you change the default value unless required by your ISP. Enable NAT: This technology translates the IP addresses of a local area network to a different IP address for the Internet.
Archer D7 AC1750 Wireless Dual Band Gigabit ADSL2+ Modem Router User Guide Get IP with Unicast: This is disabled by default. The minority of DHCP Server of ISP will not support to enable this. When the Route is connected right but IP cannot get, you can select this box. Set DNS Server manually: Choose “Set DNS Server manually”, you can set DNS Server manually here. The modem router will use this DNS Server for priority. Get IPv6 Address with Unicast: This is disabled by default.
Archer D7 AC1750 Wireless Dual Band Gigabit ADSL2+ Modem Router User Guide Figure 4-7 PPP Username/Password/Confirm Password: Enter the User Name, Password and Confirm Password provided by your ISP. These fields are case-sensitive. Connection Mode: For PPPoE connection, you can select Always on or Connect on demand or Connect manually. Connect on demand is dependent on the traffic. If there is no traffic (or Idle) for a pre-specified period of time, the connection will tear down automatically.
Archer D7 AC1750 Wireless Dual Band Gigabit ADSL2+ Modem Router User Guide IPv6 Default Gateway: Select a WAN connection from the drop-down list as the IPv6 default gateway. Click Advance, advanced selections for WAN Service Setup can be shown. Service Name/Server Name: Enter the Service Name and Server Name if it was provided by your ISP. You can leave them blank, if the ISP doesn’t provide them. MTU (bytes): Maximum Transmission Unit Size. Check this box then you can change the MTU size.
Archer D7 AC1750 Wireless Dual Band Gigabit ADSL2+ Modem Router User Guide Figure 4-8 4.5.1.5 IPoA If your ISP provides an IPoA connection, select IPoA option for the Connection Type on the screen.
Archer D7 AC1750 Wireless Dual Band Gigabit ADSL2+ Modem Router User Guide Figure 4-9 IP Address/Subnet Mask: Enter the IP Address and Subnet Mask provided by ISP. If you forget, you can ask your ISP. DNS Server/Secondary DNS Server: Type in your preferred DNS server. Default Gateway: select a WAN Interface from the drop-down list as the IPv4 default gateway. 4.5.1.
Archer D7 AC1750 Wireless Dual Band Gigabit ADSL2+ Modem Router User Guide Note: After you finish the Internet configuration, please click Save to make the settings take effect. 4.5.2 Interface Grouping Choose “Network”“Interface Grouping”, you can view all the current groups on this page (shown in Figure 4-11).
Archer D7 AC1750 Wireless Dual Band Gigabit ADSL2+ Modem Router User Guide Figure 4-12 Click Save to make the entry effective immediately 4.5.3 LAN Settings Choose “Network”“LAN Settings” menu, and you will see the LAN screen (shown in Figure 4-13). Please configure the parameters for LAN ports according to the descriptions below. Figure 4-13 IP Address: You can configure the modem router’s IP Address and Subnet Mask for LAN Interface.
Archer D7 AC1750 Wireless Dual Band Gigabit ADSL2+ Modem Router User Guide Enable IGMP Snooping: If you select the option, please choose the IGMP Mode: Standard Mode or Blocking Mode. Enable Second IP: You can configure the modem router’s second IP Address and Subnet Mask for LAN Interface through which you can also access to the Web-based Utility as the default IP Address and Subnet Mask.
Archer D7 AC1750 Wireless Dual Band Gigabit ADSL2+ Modem Router User Guide Address Autoconfiguration Type: Select a type to assign IPv6 addresses to the computers in your LAN. RADVD and DHCPv6 Server are provided. 1) If RADVD is selected, it doesn’t need to be configured. 2) If DHCPv6 Server is selected, please complete the following parameters. Figure 4-15 Start IPv6 Address: Enter a value for the DHCPv6 server to start with when issuing IPv6 addresses.
Archer D7 AC1750 Wireless Dual Band Gigabit ADSL2+ Modem Router User Guide Click the Save button to save the settings. 4.5.5 MAC Clone Choose menu “Network”“MAC Clone”, you can configure the MAC address of the WAN Interface as shown below. The WAN Interface List displays the WAN Interfaces you have configured on the section 4.5.1 WAN Settings and its default MAC Address.
Archer D7 AC1750 Wireless Dual Band Gigabit ADSL2+ Modem Router User Guide PPTP Passthrough: Point-to-Point Tunneling Protocol (PPTP) allows the Point-to-Point Protocol (PPP) to be tunneled through an IP network. To allow PPTP tunnels to pass through the modem router, click Enable. L2TP Passthrough: Layer Two Tunneling Protocol (L2TP) is the method used to enable Point-to-Point sessions via the Internet on the Layer Two level.
Archer D7 AC1750 Wireless Dual Band Gigabit ADSL2+ Modem Router User Guide Figure 4-21 This section will guide you to configure a VPN tunnel between two Archer D7s. The topology is as follows. Note: You could also use other VPN Routers to set VPN tunnels with Archer D7. Archer D7 supports up to 10 VPN tunnels simultaneously. Click Add New Connection in Figure 4-21 and then you will enter the screen shown in Figure 4-22.
Archer D7 AC1750 Wireless Dual Band Gigabit ADSL2+ Modem Router User Guide Figure 4-22 IPSec Connection Name: Enter a name for your VPN. Remote IPSec Gateway Address (URL): Enter the destination gateway IP address in the box which is the public WAN IP or Domain Name of the remote VPN server endpoint. (For example: Input 219.134.112.247 in Device1, Input 219.134.112.
Archer D7 AC1750 Wireless Dual Band Gigabit ADSL2+ Modem Router User Guide Click Show Advanced Settings and then you can configure the Advanced Settings. Figure 4-23 Mode: Select Main Mode to configure the standard negotiation parameters for IKE phase1. Aggressive Mode: Select Aggressive Mode to configure IKE phase1 of the VPN Tunnel to carry out negotiation in a shorter amount of time.
Archer D7 AC1750 Wireless Dual Band Gigabit ADSL2+ Modem Router User Guide Figure 4-24 Enable IPTV: Check the box to enable IPTV function.. VPI (0~255): Identifies the virtual path between endpoints in an ATM network. The valid range is from 0 to 255. Please input the value provided by your ISP. VCI (1~65535): Identifies the virtual channel endpoints in an ATM network. The valid range is from 1 to 65535 (1 to 31 is reserved for well-known protocols). Please input the value provided by your ISP.
Archer D7 AC1750 Wireless Dual Band Gigabit ADSL2+ Modem Router User Guide Figure 4-25 Start IP Address: Enter a value for the DHCP server to start with when issuing IP addresses. Because the default IP address for the modem router is 192.168.1.1, the default Start IP Address is 192.168.1.100, and the Start IP Address must be 192.168.1.100 or greater, but smaller than 192.168.1.254. End IP Address: Enter a value for the DHCP server to end with when issuing IP addresses.
Archer D7 AC1750 Wireless Dual Band Gigabit ADSL2+ Modem Router User Guide Note: 1) 2) 3) To use the DHCP server function of the modem router, you must configure all computers on the LAN as "Obtain an IP Address automatically". You have to disable NAT of the WAN connections, or the DHCP Relay may not take effect. If you select Disabled, the DHCP function will not take effect. Click the Save button to save your settings. 4.7.
Archer D7 AC1750 Wireless Dual Band Gigabit ADSL2+ Modem Router User Guide To Reserve an IP address: 1. Click the Add New button. Then Figure 4-28 will pop up. 2. Enter the MAC address (in XX:XX:XX:XX:XX:XX format.) and IP address (in dotted-decimal notation) of the computer for which you want to reserve an IP address. 3. Click the Save button. Figure 4-28 To modify or delete an existing entry: 1. Click the Edit in the entry you want to modify. If you want to delete the entry, click the Delete. 2.
Archer D7 AC1750 Wireless Dual Band Gigabit ADSL2+ Modem Router User Guide Click the Save button. Figure 4-30 To modify or delete an existing entry: 1. Click the Edit in the entry you want to modify. If you want to delete the entry, click the Delete. 2. Modify the information. 3. Click the Save button. Click the Enable/Disable Selected button to make selected entries enabled/disabled. Click the Delete Selected button to delete the selected entries. 4.8 Wireless 2.
Archer D7 AC1750 Wireless Dual Band Gigabit ADSL2+ Modem Router User Guide 4.8.1 Basic Settings Choose menu “Wireless 2.4GHz” → “Basic Settings”, you can configure the basic settings for the wireless network of 2.4GHz on this page. Figure 4-31 SSID: Wireless network name shared among all points in a wireless network. The SSID must be identical for all devices in the wireless network. It is case-sensitive and must not exceed 32 characters (use any of the characters on the keyboard).
Archer D7 AC1750 Wireless Dual Band Gigabit ADSL2+ Modem Router User Guide Channel Width: Select the channel width from the drop-down list. The default setting is automatic, which can adjust the channel width for your clients automatically. Note: If 11b only, 11g only, or 11bg mixed is selected in the Mode field, the Channel Width selecting field will turn grey and the value will become 20M, which is unable to be changed.
Archer D7 AC1750 Wireless Dual Band Gigabit ADSL2+ Modem Router User Guide Figure 4-32 WPS: Enable or disable the WPS function here. Current PIN: The current value of the modem router's PIN is displayed here. The default PIN of the modem router can be found in the label or User Guide. Restore PIN: Restore the PIN of the modem router to its default. Gen New PIN: Click this button, and then you can get a new random value for the modem router's PIN.
Archer D7 AC1750 Wireless Dual Band Gigabit ADSL2+ Modem Router User Guide Figure 4-33 Step 2: Press and hold the WPS button of the client device directly. Step 3: The Wi-Fi Protected Setup LED flashes for two minutes during the Wi-Fi Protected Setup process. Step 4: When the WPS LED is on, the client device has successfully connected to the modem router. Refer back to your client device or its documentation for further instructions. II.
Archer D7 AC1750 Wireless Dual Band Gigabit ADSL2+ Modem Router User Guide Note: 1) The WPS LED on the modem router will light green for five minutes if the device has been successfully added to the network. 2) The WPS function cannot be configured if the Wireless Function of the modem router is disabled. Please make sure the Wireless Function is enabled before configuring the WPS. 4.8.3 Wireless Security Choose menu “Wireless 2.
Archer D7 AC1750 Wireless Dual Band Gigabit ADSL2+ Modem Router User Guide Group Key Update Period: Specify the group key update interval in seconds. The value should be 30 or above. Enter 0 to disable the update. WPA/WPA2 – Enterprise: It’s based on Radius Server. Authentication Type: Authentication Type: You can choose the type for the WPA/WPA2-Personal security on the drop-down list.
Archer D7 AC1750 Wireless Dual Band Gigabit ADSL2+ Modem Router User Guide 128-bit: You can enter 26 hexadecimal digits (any combination of 0-9, a-f, A-F, zero key is not promoted) or 13 ASCII characters. Be sure to click the Save button to save your settings on this page. 4.8.4 Wireless Schedule Choose menu “Wireless 2.4GHz”“Wireless Schedule”, you can configure the Task Schedule as shown below. Figure 4-36 Note: The time you set is the period you need the wireless off.
Archer D7 AC1750 Wireless Dual Band Gigabit ADSL2+ Modem Router User Guide Figure 4-37 To filter wireless users by MAC Address, click Enable. The default setting is Disabled. MAC Address: The wireless station's MAC address that you want to filter. Status: The status of this entry either Enabled or Disabled. Description: A simple description of the wireless station. To Add a Wireless MAC Address filtering entry, click the Add New button.
Archer D7 AC1750 Wireless Dual Band Gigabit ADSL2+ Modem Router User Guide Click the Enable/ Disabled Selected button to make selected entries enabled or disabled. Click the Delete Selected button to delete the selected entries.
Archer D7 AC1750 Wireless Dual Band Gigabit ADSL2+ Modem Router User Guide Transmit Power: Here you can specify the transmit power of the modem router. You can select 100%, 50% or 25%. 100% is the default setting and is recommended. Beacon Interval: Enter a value between 25-1000 milliseconds for Beacon Interval here. The beacons are the packets sent by the modem router to synchronize a wireless network. Beacon Interval value determines the time interval of the beacons. The default value is 100.
Archer D7 AC1750 Wireless Dual Band Gigabit ADSL2+ Modem Router User Guide Sent Packets: Packets sent by the station. SSID: The wireless network name. Click on the Refresh button to update this page. 4.9 Wireless 5GHz There are seven submenus under the Wireless 5Ghz menu: Basic Settings, WPS Settings, Wireless Security, Wireless Schedule, Wireless MAC Filtering, Wireless Advanced and Wireless Status. Click any of them, and you will be able to configure the corresponding function. 4.9.
Archer D7 AC1750 Wireless Dual Band Gigabit ADSL2+ Modem Router User Guide Region: Select your region from the drop-down list. This field specifies the region where the wireless function of the modem router can be used. It may be illegal to use the wireless function of the modem router in a region other than one of those specified in this field. If your country or region is not listed, please contact your local government agency for assistance.
Archer D7 AC1750 Wireless Dual Band Gigabit ADSL2+ Modem Router User Guide Authentication Type: This option should be chosen if the key type is WEP(ASCII) or WEP(HEX). It indicates the authorization type of the Root AP. Password: If the AP your modem router is going to connect needs password, you need to fill the password in this blank. Click Save to save your settings. 4.9.
Archer D7 AC1750 Wireless Dual Band Gigabit ADSL2+ Modem Router User Guide You can also keep the default WPS Status as Enabled and click the Add device button in Figure 4-42, then Choose “Press the button of the new device in two minutes” and click Connect. (Shown in the following figure) Figure 4-43 Step 2: Press and hold the WPS button of the client device directly. Step 3: The Wi-Fi Protected Setup LED flashes for two minutes during the Wi-Fi Protected Setup process.
Archer D7 AC1750 Wireless Dual Band Gigabit ADSL2+ Modem Router User Guide Note: 1) The WPS LED on the modem router will light green for five minutes if the device has been successfully added to the network. 2) The WPS function cannot be configured if the Wireless Function of the modem router is disabled. Please make sure the Wireless Function is enabled before configuring the WPS. 4.9.
Archer D7 AC1750 Wireless Dual Band Gigabit ADSL2+ Modem Router User Guide Group Key Update Period: Specify the group key update interval in seconds. The value should be 30 or above. Enter 0 to disable the update. WPA/WPA2 – Enterprise: It’s based on Radius Server. Authentication Type: Authentication Type: You can choose the type for the WPA/WPA2-Personal security on the drop-down list.
Archer D7 AC1750 Wireless Dual Band Gigabit ADSL2+ Modem Router User Guide 64-bit: You can enter 10 hexadecimal digits (any combination of 0-9, a-f, A-F, zero key is not promoted) or 5 ASCII characters. 128-bit: You can enter 26 hexadecimal digits (any combination of 0-9, a-f, A-F, zero key is not promoted) or 13 ASCII characters. Be sure to click the Save button to save your settings on this page. 4.9.
Archer D7 AC1750 Wireless Dual Band Gigabit ADSL2+ Modem Router User Guide Figure 4-47 To filter wireless users by MAC Address, click Enable. The default setting is Disabled. MAC Address: The wireless station's MAC address that you want to filter. Status: The status of this entry either Enabled or Disabled. Description: A simple description of the wireless station. To Add a Wireless MAC Address filtering entry, click the Add New button.
Archer D7 AC1750 Wireless Dual Band Gigabit ADSL2+ Modem Router User Guide Click the Delete Selected button to delete the selected entries. For example: If you desire that the wireless station A with MAC address 00:1D:0F:11:22:33 and the wireless station B with MAC address 00:0A:EB:00:07:5F are able to access the modem router, but all the other wireless stations cannot access the Modem router, you can configure the Wireless MAC Address Filtering list by following these steps: 1.
Archer D7 AC1750 Wireless Dual Band Gigabit ADSL2+ Modem Router User Guide Figure 4-49 Transmit Power: Here you can specify the transmit power of the modem router. You can select 100%, 50% or 25%. 100% is the default setting and is recommended. Beacon Interval: Enter a value between 25-1000 milliseconds for Beacon Interval here. The beacons are the packets sent by the modem router to synchronize a wireless network. Beacon Interval value determines the time interval of the beacons.
Archer D7 AC1750 Wireless Dual Band Gigabit ADSL2+ Modem Router User Guide Click on the Refresh button to update this page. 4.10 Guest Network There are four submenus under the Guest Network menu: Basic Settings 2.4GHz, Basic Settings 5GHz, Guest Status 2.4GHz and Guest Status 5GHz. Click any of them, and you will be able to scan or configure the corresponding function. The detailed explanations for each submenu are provided below. 4.10.1 Basic Settings 2.
Archer D7 AC1750 Wireless Dual Band Gigabit ADSL2+ Modem Router User Guide WPA/WPA2-Personal. WPA/WPA2-Personal is the WPA/WPA2 authentication type based on pre-shared passphrase. Authentication Type: Select the Authentication Type from the drop-down list, the default method is Auto, and you can leave it as a default setting. Encryption: You can select either Auto, or TKIP or AES. Wireless Password: You can enter ASCII characters between 8 and 63 characters or 8 to 64 Hexadecimal characters.
Archer D7 AC1750 Wireless Dual Band Gigabit ADSL2+ Modem Router User Guide You can enable or disable Guest Network. When you enable this function, you could set wireless parameters for Guest Network. SSID: The guest network name. When setting up a Guest network, it is strongly recommended to use a name that easily distinguishes it from your primary network. The default name is TP-LINK Guestxx (xx is the last two numbers of MAC address).
Archer D7 AC1750 Wireless Dual Band Gigabit ADSL2+ Modem Router User Guide Click on the Refresh button to update this page. 4.10.4 Guest Status 5GHz Choose menu “Guest Network”“Guest Status 5GHz”, you can see the MAC Address, Current Status, Received Packets and Sent Packets for each connected wireless station. Figure 4-54 MAC Address: The connected wireless station's MAC address. Current Status: The connected wireless station's running status.
Archer D7 AC1750 Wireless Dual Band Gigabit ADSL2+ Modem Router User Guide Figure 4-55 Volume: The volume name of the USB drive the users have access to. File System: The system of the USB drive. Capacity: The storage capacity of the USB driver. Status: Indicates the shared or non-shared status of the volume. Active means volume can be shared, while Inactive means volume can not be shared.
Archer D7 AC1750 Wireless Dual Band Gigabit ADSL2+ Modem Router User Guide Figure 4-56 To add a new user account, please follow the steps below: 1. Choose the index from the drop-down list of Choose Index. 2. Self-define a New Username. 3. Enter the password in the New Password field. 4. Re-enter the password in the Confirm password field. 5. Click the Set button, and then a new entry will be added in the table. To delete an existing user account, please click Delete in the Action column. 4.11.
Archer D7 AC1750 Wireless Dual Band Gigabit ADSL2+ Modem Router User Guide Anonymous access to all the volumes: This function is enabled by default, so users can access all activated volumes of Storage Sharing without accounts. If you want to add a shared folder which does not allow anonymous login, uncheck the box to disable this function. And Folder Table will be displayed as shown below. Share Name: This folder's display name. Directory: The real full path of the specified folder.
Archer D7 AC1750 Wireless Dual Band Gigabit ADSL2+ Modem Router User Guide Click the Enable/Disable Selected button to enable or disable the selected entries. Click the Delete Selected button to delete the selected entries. Note: 1. The max share folders number is 10. If you want to share a new folder when the number has reached 10, you can delete an existing share folder and then add a new one. 2.
Archer D7 AC1750 Wireless Dual Band Gigabit ADSL2+ Modem Router User Guide Figure 4-60 2. Click the Browse button, and then select the Select Volume from the drop-down list. 3. Enter display name of the share folder in Share Name filed. 4. Click the Apply button to apply the settings. You can click the upper button to go to the upper folder. Click the Enable/Disable Selected button to enable or disable the selected entries. Click the Delete Selected button to delete the selected entries. Note: 1.
Archer D7 AC1750 Wireless Dual Band Gigabit ADSL2+ Modem Router User Guide To add a new share folder for your media server, please follow the instructions below: a) Click Add New Folder button, and you will see the screen as shown in Figure 4-62. b) Enter the name of the share folder in Share Name field. c) Click the Apply button to apply the configuration. Figure 4-62 Click the Scan now to scan all the share folders immediately.
Archer D7 AC1750 Wireless Dual Band Gigabit ADSL2+ Modem Router User Guide 4.12.1 Default Gateway Choose “Route Settings”“Default Gateway”, you can see the Default Gateway screen. You can select a WAN Interface from the drop-down list as the system default gateway. Figure 4-64 Click the Add Interface button, you can add WAN Interfaces. Click the Save button to save your settings. 4.12.2 Static Route Choose “Route Settings” “Static Route”.
Archer D7 AC1750 Wireless Dual Band Gigabit ADSL2+ Modem Router User Guide Figure 4-66 2. Enter the following data: Destination IP Address: The Destination IP Address is the address of the network or host that you want to assign to a static route. Subnet Mask: The Subnet Mask determines which portion of an IP Address is the network portion, and which portion is the host portion.
Archer D7 AC1750 Wireless Dual Band Gigabit ADSL2+ Modem Router User Guide Note: RIP cannot be configured on the WAN Interface which has NAT enabled (such as PPPoE). 4.13 IPv6 Route Settings Choose “IPv6 Route Settings”, it includes four menus: IPv6 Default Gateway and IPv6 Static Route. The detailed descriptions are provided below. 4.13.1 IPv6 Default Gateway Choose “IPv6 Route Settings”“IPv6 Default Gateway”, you can see the Default Gateway screen.
Archer D7 AC1750 Wireless Dual Band Gigabit ADSL2+ Modem Router User Guide Figure 4-70 2. Enter the following data: Destination IPv6 Address: The Destination IPv6 Address is the address of the network or host that you want to assign to a static route. Prefix Length: The prefix length of the destination IPv6 address. Gateway: Here you should type the IPv6 Gateway address correctly, and the option for Interface will adopt the default IPv6 Gateway address for the IPv6 Static Route.
Archer D7 AC1750 Wireless Dual Band Gigabit ADSL2+ Modem Router User Guide 4.14.1 Virtual Servers Choose menu “Forwarding” → “Virtual Servers”, and then you can view and add virtual servers in the next screen (shown in Figure 4-71). Virtual servers can be used for setting up public services on your LAN. A virtual server is defined as a service port, and all requests from Internet to this service port will be redirected to the computer specified by the server IP.
Archer D7 AC1750 Wireless Dual Band Gigabit ADSL2+ Modem Router User Guide Figure 4-72 Note: It is possible that you have a computer or server that has more than one type of available service. If so, select another service, and type the same IP address for that computer or server. To modify or delete an existing entry: 1. Find the desired entry in the table. 2. Click Edit as desired on the Edit column. Click the Enable/ Disabled Selected button to make selected entries enabled/ disabled.
Archer D7 AC1750 Wireless Dual Band Gigabit ADSL2+ Modem Router User Guide To add a new rule, follow the steps below. 1. Click the Add New button, the next screen will pop-up as shown in Figure 4-74. 2. Select a common application from the Common Service Port drop-down list, then the Trigger Port field and the Open Ports field will be automatically filled. If the Common Service Port does not have the application you need, enter the Trigger Port and the Open Ports manually. 3.
Archer D7 AC1750 Wireless Dual Band Gigabit ADSL2+ Modem Router User Guide To modify or delete an existing entry: 1. Find the desired entry in the table. 2. Click Edit as desired on the Edit column. Click the Enable/ Disabled Selected button to make selected entries enabled/ disabled. Click the Delete Selected button to delete the selected entries. Once the modem router is configured, the operation is as follows: 1.
Archer D7 AC1750 Wireless Dual Band Gigabit ADSL2+ Modem Router User Guide 4.14.4 UPnP Choose menu “Forwarding→UPnP”, and then you can view the information about UPnP in the screen (shown in Figure 4-76). The Universal Plug and Play (UPnP) feature allows the devices, such as Internet computers, to access the local host resources or devices as needed. UPnP devices can be automatically discovered by the UPnP service application on the LAN.
Archer D7 AC1750 Wireless Dual Band Gigabit ADSL2+ Modem Router User Guide Figure 4-77 Enable Parental Control: Check the box if you want this function to take effect. This function is disabled by default. MAC Address of Parental PC: In this field, enter the MAC address of the controlling PC, or you can make use of the Copy To Above button below. MAC Address of Current PC: This field displays the MAC address of the PC that is managing this modem router.
Archer D7 AC1750 Wireless Dual Band Gigabit ADSL2+ Modem Router User Guide 4.16 Firewall There are four submenus under the Firewall menu: Rule, LAN Host, WAN Host and Schedule. Click any of them, and you will be able to configure the corresponding function. 4.16.1 Rule Choose menu “Firewall” → “Rule”, and then you can view and set Access Control rules in the screen as shown in Figure 4-78.
Archer D7 AC1750 Wireless Dual Band Gigabit ADSL2+ Modem Router User Guide The methods to add a new rule: 1. Click the Add New button and the next screen will pop up as shown in Figure 4-79. 2. Give a name (e.g. Rule_1) for the rule in the Description field. 3. Select a host from the LAN Host drop-down list or choose “Add LAN Host”. 4. Select a target from the WAN Host drop-sown list or choose “Add WAN Host”. 5. Select a schedule from the Schedule drop-down list or choose “Add Schedule”. 6.
Archer D7 AC1750 Wireless Dual Band Gigabit ADSL2+ Modem Router User Guide Edit: To modify an existing entry. To add a new entry, please follow the steps below. 1. Click the Add New button. 2. In the Mode field, select IP Address or MAC Address. If you select IP Address, please follow the steps below: 1) In Description field, create a unique description for the host (e.g. Host_1). 2) In IP Address field, enter the IP address.
Archer D7 AC1750 Wireless Dual Band Gigabit ADSL2+ Modem Router User Guide 1) In Description field, create a unique description for the host (e.g. Host_1). 2) In IP Address field, enter the IP address. If you select MAC Address, the screen shown is Figure 4-83. Figure 4-83 1) In Description field, create a unique description for the host (e.g. Host_1). 2) In MAC Address field, enter the MAC address. If you select URL Address, the screen shown is Figure 4-84.
Archer D7 AC1750 Wireless Dual Band Gigabit ADSL2+ Modem Router User Guide Figure 4-85 Description: Here displays the description of the schedule and this description is unique. Edit: Here you can modify an existing schedule. To add a new schedule, follow the steps below: 1. Click Add New button and the next screen will pop-up as shown in Figure 4-86. 2. In Description field, create a unique description for the schedule (e.g. Schedule_1). 3. In Apply To field, select the day or days you need. 4.
Archer D7 AC1750 Wireless Dual Band Gigabit ADSL2+ Modem Router User Guide 4.17 IPv6 Firewall There are four submenus under the IPv6 Firewall menu: IPv6 Rule, IPv6 LAN Host, IPv6 WAN Host and IPv6 Schedule. Click any of them, and you will be able to configure the corresponding function. 4.17.1 IPv6 Rule Choose menu “IPv6 Firewall” → “IPv6 Rule”, and then you can view and set Access Control rules in the screen as shown in Figure 4-87.
Archer D7 AC1750 Wireless Dual Band Gigabit ADSL2+ Modem Router User Guide Figure 4-88 2. Give a name (e.g. Rule_1) for the rule in the Description field. 3. Select a host from the IPv6 LAN Host drop-down list or choose “Add IPv6 LAN Host”. 4. Select a target from the IPv6 WAN Host drop-sown list or choose “Add IPv6 WAN Host”. 5. Select a schedule from the IPv6 Schedule drop-down list or choose “Add IPv6 Schedule”. 6. In the Action field, select Deny or Allow to deny or allow your entry. 7.
Archer D7 AC1750 Wireless Dual Band Gigabit ADSL2+ Modem Router User Guide Edit: To modify an existing entry. To add a new entry, please follow the steps below. 1. Click the Add New button, and you will see the screen as shown in Figure 4-90. Figure 4-90 2. Create a unique name for the host (e.g. Host_1) in the Description field. 3. Enter an IPv6 address in the IPv6 Address field. 4. Enter the prefix length of the IPv6 address in the Prefix Length field. 5.
Archer D7 AC1750 Wireless Dual Band Gigabit ADSL2+ Modem Router User Guide Figure 4-92 2. Create a unique description for the host (e.g. Host_1) in the Description field. 3. Enter an IPv6 address in the IPv6 Address field. 4. Enter the prefix length of the IPv6 address in the Prefix Length field. 5. Click the Save button to save the settings. Click the Delete Selected button to delete the selected entries. 4.17.
Archer D7 AC1750 Wireless Dual Band Gigabit ADSL2+ Modem Router User Guide Figure 4-94 2. Create a unique description for the schedule (e.g. Schedule_1) in Description field. 3. Select the day or days you need in Apply To field. 4. In time field, you can select all day-24 hours or you may enter the Start Time and Stop Time in the corresponding field. 5. Click Save to save the settings. Click the Clear Schedule button to clear your settings in the table.
Archer D7 AC1750 Wireless Dual Band Gigabit ADSL2+ Modem Router User Guide Figure 4-95 Enable: Check the box to enable IPv6 Tunnel function. It is disabled by default. Mechanism: Select a type for IPv6 tunnel from the drop-down list. DS-Lite, 6RD and 6to4 are supported. 1) DS-Lite This type is used in the situation that your WAN connection is IPv6 while LAN connection is IPv4. Select DS-Lite, and you will see the screen as shown in Figure 4-96.
Archer D7 AC1750 Wireless Dual Band Gigabit ADSL2+ Modem Router User Guide Figure 4-97 WAN Connection: Select a WAN connection from the drop-down list. Only the connected WAN connections can be shown in the drop-down list. Configuration Type: Select a configuration type for this tunnel. Auto means to obtain the following parameters automatically while Manual means you set them manually. If Auto is selected, only Dynamic IP connection can be selected from the drop-down list.
Archer D7 AC1750 Wireless Dual Band Gigabit ADSL2+ Modem Router User Guide 4.19 Bandwidth Control Choose menu “Bandwidth Control”, and then you can configure the Upstream Bandwidth and Downstream Bandwidth in the next screen. The values you configure should be less than 1000000Kbps. For optimal control of the bandwidth, please select the right Line Type and ask your ISP for the total bandwidth of the egress and ingress.
Archer D7 AC1750 Wireless Dual Band Gigabit ADSL2+ Modem Router User Guide Figure 4-100 3. Click the Save button. Click the Enable/ Disable Selected button to make selected entries enabled or disabled. Click the Delete Selected button to delete the selected entries. 4.20 IP&MAC Binding There are two submenus under the IP &MAC Binding menu: Binding Settings and ARP List. Click any of them, and you will be able to scan or configure the corresponding function.
Archer D7 AC1750 Wireless Dual Band Gigabit ADSL2+ Modem Router User Guide When you want to add or modify an IP & MAC Binding entry, you can click the Add New button or Edit button, and then you will go to the next page. This page is used for adding or modifying an IP & MAC Binding entry (shown in Figure 4-102.) Figure 4-102 To add IP & MAC Binding entries, follow the steps below. 1. Click the Add New button as shown in Figure 4-101. 2. Enter the MAC Address and IP Address. 3.
Archer D7 AC1750 Wireless Dual Band Gigabit ADSL2+ Modem Router User Guide Click the Refresh button to refresh all items. 4.21 Dynamic DNS Choose menu “Dynamic DNS”, and you can configure the Dynamic DNS function.
Archer D7 AC1750 Wireless Dual Band Gigabit ADSL2+ Modem Router User Guide Figure 4-105 4.23 System Tools Choose menu “System Tools”, and you can see the submenus under the main menu: System Log, Time Settings, Manage Control, CWMP Settings, SNMP Settings, Backup & Restore, Factory Defaults, Firmware Upgrade, Reboot and Statistics. Click any of them, and you will be able to configure the corresponding function. The detailed explanations for each submenu are provided below. 4.23.
Archer D7 AC1750 Wireless Dual Band Gigabit ADSL2+ Modem Router User Guide Figure 4-106 Log Type: By selecting the log type, only logs of this type will be shown. Log Level: By selecting the log level, only logs of this level will be shown. Refresh: Refresh the page to show the latest log list. Clear Log: All the logs will be deleted from the modem router permanently, not just from the page. Save Log: Click to save all the logs in a txt file.
Archer D7 AC1750 Wireless Dual Band Gigabit ADSL2+ Modem Router User Guide Figure 4-108 Time Zone: Select your local time zone from this pull down list. Date: Enter your local date in MM/DD/YY into the right blanks. Time: Enter your local time in HH/MM/SS into the right blanks. NTP Server 1 / NTP Server 2: Enter the address or domain of the NTP Server 1 or NTP Server 2, and then the modem router will get the time from the NTP Server preferentially.
Archer D7 AC1750 Wireless Dual Band Gigabit ADSL2+ Modem Router User Guide Figure 4-109 Current User Status: This box displays the information about User Type, User Name, Host IP Address and Host MAC Address. Account Management: Here you can set the account user information about Old Password, New User Name, New Password and Confirm Password.
Archer D7 AC1750 Wireless Dual Band Gigabit ADSL2+ Modem Router User Guide Figure 4-110 CWMP: Select enable the CWMP function. Inform: Enable or disable the function. If enabled, the information will be informed to ACS server periodically. Inform Interval: Enter the interval time here. ACS URL: Enter the website of ACS which is provided by your ISP. ACS User Name/Password: Enter the User Name and password to login the ACS server.
Archer D7 AC1750 Wireless Dual Band Gigabit ADSL2+ Modem Router User Guide Figure 4-111 An SNMP Agent is an application running on the modem router that performs the operational role of receiving and processing SNMP messages, sending responses to the SNMP manager, and sending traps when an event occurs. So a router contains SNMP "agent" software can be monitored and/or controlled by SNMP Manager using SNMP messages. 4.23.
Archer D7 AC1750 Wireless Dual Band Gigabit ADSL2+ Modem Router User Guide Figure 4-113 Click the Restore button to reset all configuration settings to their default values. The default User Name: admin The default Password: admin The default Subnet Mask: 255.255.255.0 Note: All changed settings will be lost when defaults are restored. 4.23.
Archer D7 AC1750 Wireless Dual Band Gigabit ADSL2+ Modem Router User Guide Note: 1) New firmware versions are posted at http://www.tp-link.com and can be downloaded for free. There is no need to upgrade the firmware unless the new firmware has a new feature you want to use. However, when experiencing problems caused by the modem router rather than the configuration, you can try to upgrade the firmware.
Archer D7 AC1750 Wireless Dual Band Gigabit ADSL2+ Modem Router User Guide Figure 4-116 Statistics Status: Enable or Disable. The default value is disabled. To enable it, click the Enable. If it is disabled, the function of DoS protection in Security settings will be disabled. Statistics Interval (5-60): The default value is 10. Select a value between 5 and 60 seconds in the drop-down list. The Packets Statistic interval indicates the time section of the packets statistic.
Archer D7 AC1750 Wireless Dual Band Gigabit ADSL2+ Modem Router User Guide Reset Reset the value of he entry to zero. Delete Delete the existing entry in the table. Operation 4.24 Logout Choose “Logout”, and you will back to the login screen as shown in Figure 4-117.
Archer D7 AC1750 Wireless Dual Band Gigabit ADSL2+ Modem Router User Guide Appendix A: Specifications General ANSI T1.413, ITU G.992.1, ITU G.992.3, ITU G.992.5, Standards and Protocols Safety & Emission IEEE 802.11a, IEEE 802.11b, IEEE 802.11g, IEEE 802.11n, IEEE 802.11ac, IEEE 802.3, IEEE 802.3u, IEEE802.3ab, TCP/IP, PPPoA, PPPoE, SNTP, HTTP, DHCP, ICMP, NAT FCC, CE Four 10/100/1000M Auto-Negotiation RJ45 ports(Auto MDI/MDIX) Ports One RJ11 port Two USB 2.
Archer D7 AC1750 Wireless Dual Band Gigabit ADSL2+ Modem Router User Guide Appendix B: Troubleshooting T1. How do I restore my modem router’s configuration to its factory default settings? With the modem router powered on, press and hold the RESET button on the rear panel for 8 to 10 seconds before releasing it. Note: Once the modem router is reset, the current configuration settings will be lost and you will need to re-configure the router. T2.
Archer D7 AC1750 Wireless Dual Band Gigabit ADSL2+ Modem Router User Guide Select Obtain an IP address automatically and Obtain DNS server address automatically. Then click OK. For Windows 8 Move your mouse to the lower right corner and you will see Search icon in the Popups. Go to “ -> Apps”. Type Control Panel in the search box and press Enter, then you will go to Control Panel. Click “View network status and tasks > Change adapter settings”.
Archer D7 AC1750 Wireless Dual Band Gigabit ADSL2+ Modem Router User Guide Now, try to log on to the Web-based configuration page again after the above settings have been configured. If you still cannot access the configuration page, please restore your modem router’s factory default settings and reconfigure your modem router following the instructions in 3.2 Quick Installation Guide. Please feel free to contact our Technical Support if the problem still exists. T4.
Archer D7 AC1750 Wireless Dual Band Gigabit ADSL2+ Modem Router User Guide ppendix C: Technical Support Technical Support For more troubleshooting help, go to: http://www.tp-link.com/en/support/faq To download the latest Firmware, Driver, Utility and User Guide, go to: http://www.tp-link.com/en/support/download For all other technical support, please contact us by using the following details: Global Tel: +86 755 2650 4400 Fee: Depending on rate of different carriers, IDD. E-mail: support@tp-link.