
User's Manual
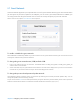
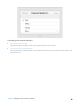


Table Of Contents
- Chapter 1. Get to Know About Your Router
- Chapter 2. Configure your Touch P5 as a Router
- 2.1 Connect Your Router
- 2.2 Log into Your Router
- 2.3 Quick Setup
- 2.4 Mode Selection
- 2.5 Wireless Settings
- 2.6 WPS
- 2.7 Guest Network
- 2.8 Parental Controls
- 2.9 Devices Control
- 2.10 Printer Server
- 2.11 DDNS
- 2.12 LAN
- 2.13 DHCP Server
- 2.14 QoS
- 2.15 Clock
- 2.16 Screen Settings
- 2.17 Reboot & Reset
- 2.18 Administrator Password
- 2.19 About
- 2.20 USB Application
- 2.21 Set Up IPv6 Connection
- 2.22 NAT Forwarding
- 2.23 Update the Firmware
- Troubleshooting Guide & FAQ
- Appendix A: Specifications
- Appendix B: Glossary
- 空白页面

You can get the utility from http://www.tp-link.com/app/usb/
.
PC Utility is for Windows computer and Mac Utility
is for Mac computer.
4. Access the Printer
You should set the shared printer as Auto-Connect Printer on every computer that needs printer service.
1. Double-click the icon on your desktop to launch the USB Printer Controller.
2. Highlight the printer you share.
Windows Mac
3. Click the Auto-Connect for printing tab to pull down a list, then select Set Auto-Connect Printer.
Windows
Chapter 2 Configure your Touch P5 as a Router 28