
User's Manual
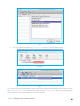
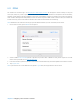


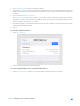
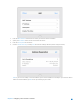


Table Of Contents
- Chapter 1. Get to Know About Your Router
- Chapter 2. Configure your Touch P5 as a Router
- 2.1 Connect Your Router
- 2.2 Log into Your Router
- 2.3 Quick Setup
- 2.4 Mode Selection
- 2.5 Wireless Settings
- 2.6 WPS
- 2.7 Guest Network
- 2.8 Parental Controls
- 2.9 Devices Control
- 2.10 Printer Server
- 2.11 DDNS
- 2.12 LAN
- 2.13 DHCP Server
- 2.14 QoS
- 2.15 Clock
- 2.16 Screen Settings
- 2.17 Reboot & Reset
- 2.18 Administrator Password
- 2.19 About
- 2.20 USB Application
- 2.21 Set Up IPv6 Connection
- 2.22 NAT Forwarding
- 2.23 Update the Firmware
- Troubleshooting Guide & FAQ
- Appendix A: Specifications
- Appendix B: Glossary
- 空白页面

Mac
5. You will see the printer marked as Auto-Connect Printer. Now you can print with this printer.
Windows
Mac
Note: The Print Server also allows different clients to share the scan feature of MFPs (Multi-Function Printers). To scan
with TP-LINK USB Printer Controller, right-click the printer and select Network Scanner. Then, a scanning window will
pop up. Finish the scanning process following on-screen instructions.
Chapter 2 Configure your Touch P5 as a Router 30