
User's Manual
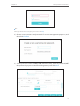
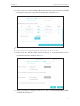
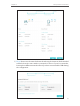
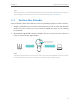
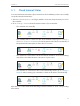
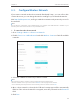
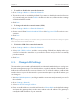
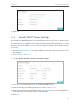

Table Of Contents

15
Chapter 3 Customize Your Network
¾ To enable or disable the extended network:
1. Go to Settings > Wireless > Extended Network.
2. The wireless radio is enabled by default. If you want to disable the wireless function
of a certain band, just clear the Enable checkbox. In this case, all the wireless settings
of this band will be invalid.
3. Click Save.
¾ To change the wireless network name (SSID):
1. Go to Settings > Wireless > Extended Network.
2. Create a new SSID in Extended 2.4GHz SSID or click Copy Host SSID. The value is case-
sensitive.
3. Click Save.
Note:
If you change the wireless settings via a wireless device, you will be disconnected after the settings are applied.
Please write down the new SSID for future use.
¾ To hide the SSID of the extended network:
1. Go to Settings > Wireless > Extended Network.
2. Select Hide SSID broadcast, and the corresponding SSID will not display when you
scan for local wireless networks on your wireless device and you have to manually
join the network.
3. Click Save.
3. 3. Change LAN Settings
The extender is preset with a default LAN IP 192.168.0.254, with which you can log in to
the web management page. The LAN IP address, together with the Subnet Mask, also
defines the subnet that the connected devices are on. If the IP address conflicts with
another device on your local network or your network requires a specific IP subnet, you
can change it.
1. Visit http://tplinkrepeater.net, and log in with the username and password you set for
the extender.
2. Go to Settings > Network.
3. Select Use the following IP address.
4. Enter a new IP Address as needed and leave the Subnet Mask as the default settings
and enter the gateway that is in the same subnet as the IP address. The gateway is
usually the LAN IP address of your extender.