
User's Manual
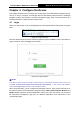

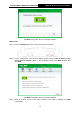
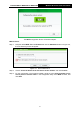
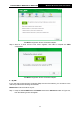
Table Of Contents
- 组合 4.pdf
- 组合 2.pdf
- TL-WA801ND UG.pdf
- Package Contents
- Chapter 1 Introduction
- Chapter 2 Hardware Installation
- Chapter 3 Quick Installation Guide
- Chapter 4 Configure the Device
- Appendix A: Application Example
- Appendix B: Factory Defaults
- Appendix C: Troubleshooting
- Appendix D: Specifications
- Appendix E: Glossary
- RF Exposure Information
- TL-WA801ND UG.pdf
- RF Exposure Information
- 组合 2.pdf
- TL-WA801ND IC UG
- 组合 2
- TL-WA801ND UG.pdf
- Package Contents
- Chapter 1 Introduction
- Chapter 2 Hardware Installation
- Chapter 3 Quick Installation Guide
- Chapter 4 Configure the Device
- Appendix A: Application Example
- Appendix B: Factory Defaults
- Appendix C: Troubleshooting
- Appendix D: Specifications
- Appendix E: Glossary
- RF Exposure Information
- TL-WA801ND UG.pdf
- TL-WA801ND UG.pdf
- Package Contents
- Chapter 1 Introduction
- Chapter 2 Hardware Installation
- Chapter 3 Quick Installation Guide
- Chapter 4 Configure the Device
- Appendix A: Application Example
- Appendix B: Factory Defaults
- Appendix C: Troubleshooting
- Appendix D: Specifications
- Appendix E: Glossary
- 组合 2
TL-WA701ND/TL-WA801ND/TL-WA901ND
Wireless N Access Point User Guide
22
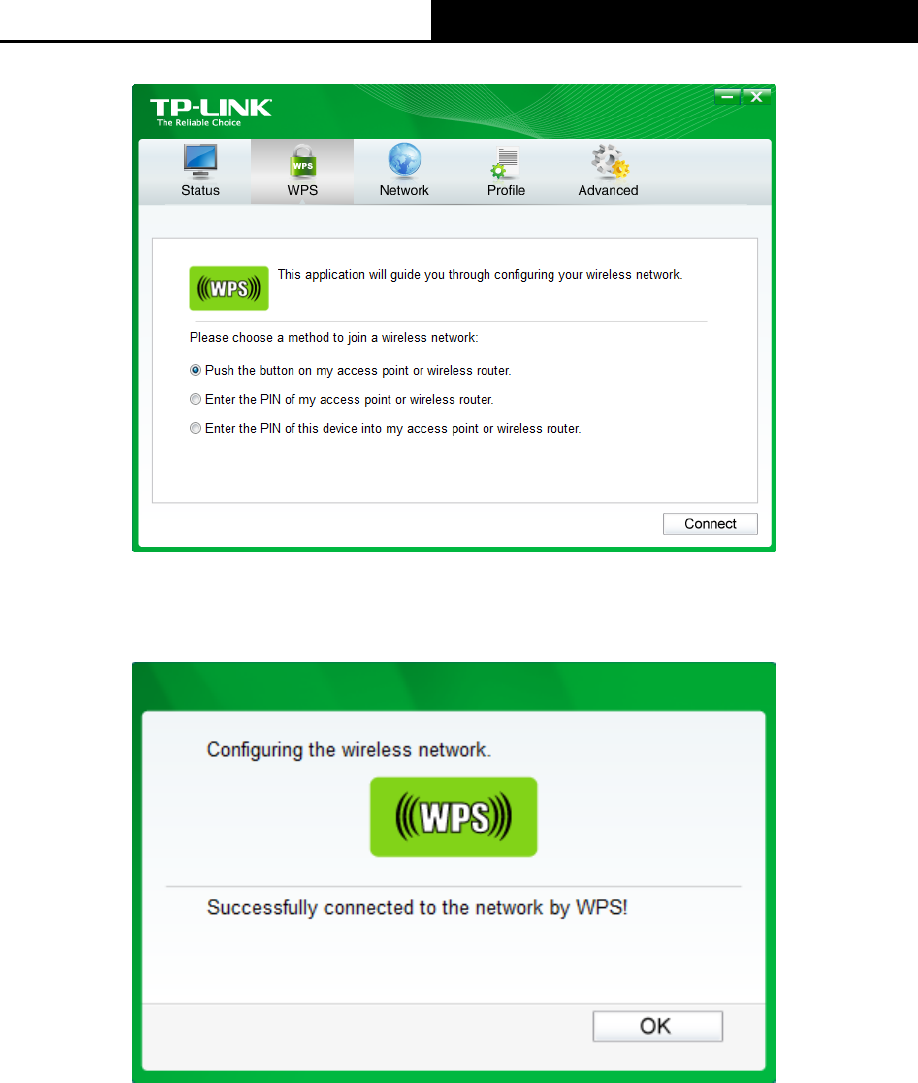
The WPS Configuration Screen of Wireless Adapter
Step 4: Wait for a while until the next screen appears. Click OK to complete the WPS
configuration.
The WPS Configuration Screen of Wireless Adapter
II. By PIN
If the new device supports Wi-Fi Protected Setup and the PIN method, you can add it to the
network by PIN with the following two methods.
Method One: Enter the PIN into my AP
Step 1: Keep the default WPS Status as Enabled and click the Add device button in Figure 4-5,
then the following screen will appear.