TL-WN851N Wireless N PCI Adapter Rev: 1.0.
COPYRIGHT & TRADEMARKS Specifications are subject to change without notice. is a registered trademark of TP-LINK TECHNOLOGIES CO., LTD. Other brands and product names are trademarks or registered trademarks of their respective holders. No part of the specifications may be reproduced in any form or by any means or used to make any derivative such as translation, transformation, or adaptation without permission from TP-LINK TECHNOLOGIES CO., LTD. Copyright © 2009 TP-LINK TECHNOLOGIES CO., LTD.
FCC STATEMENT This equipment has been tested and found to comply with the limits for a Class B digital device, pursuant to part 15 of the FCC Rules. These limits are designed to provide reasonable protection against harmful interference in a residential installation. This equipment generates, uses and can radiate radio frequency energy and, if not installed and used in accordance with the instructions, may cause harmful interference to radio communications.
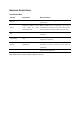
National Restrictions 2400.0-2483.5 MHz Country Restriction Reason/remark General authorization required for outdoor use and Bulgaria public service France Outdoor use limited to 10 mW Military Radiolocation use. Refarming of the 2.4 GHz e.i.r.p. band has been ongoing in recent years to allow current within 2454-2483.5 MHz the band relaxed regulation.
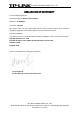
TP-LINK TECHNOLOGIES CO., LTD DECLARATION OF CONFORMITY For the following equipment: Product Description: Wireless N PCI Adapter Model No.: TL-WN851N Trademark: TP-LINK We declare under our own responsibility that the above products satisfy all the technical regulations applicable to the product within the scope of Council Directives: Directives 1999/5/EC The above product is in conformity with the following standards or other normative documents: ETSI EN 300 328 V1.7.1: 2006 ETSI EN 301 489-1 V1.8.
CONTENTS Package Contents .................................................................................................... 1 Chapter 1 Introduction ........................................................................................... 2 1.1 Overview of the Product .......................................................................................... 2 1.2 Features .................................................................................................................. 2 1.
Package Contents The following items should be found in your package: ¾ ¾ ¾ One TL-WN851N Wireless N PCI Adapter Quick Installation Guide One resource CD for TL-WN851N, including: • • • TP-LINK Wireless Client Utility (TWCU) and Drivers User Guide Other Helpful Information ) Note: Make sure that the package contains the above items. If any of the listed items are damaged or missing, please contact with your distributor.
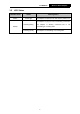
TL-WN851N Wireless N PCI Adapter Chapter 1 Introduction Thank you for choosing the TL-WN851N Wireless N PCI Adapter! 1.1 Overview of the Product The adapter is a 802.11n client device; it is designed to provide a high-speed and unrivaled wireless performance for your notebook. With a faster wireless connection, you can get a better Internet experience, such as downloading, gaming, video streaming and so on. With the 802.
TL-WN851N 1.3 Wireless N PCI Adapter LED Status LED Indications Status Working Status Status Solid Light The adapter is inserted in the slot and the power is on. The adapter is trying to scan a networking connection; Flashing slowly Activity The adapter is already connected but is not transmitting or receiving data. Flashing Quickly The adapter is transmitting or receiving data.
TL-WN851N Wireless N PCI Adapter Chapter 2 Installation Guide 2.1 Hardware Installation To install the adapter, follow these steps listed below: 1. 2. 3. 4. 2.2 Turn off your desktop PC and disconnect the power. Remove your PC case and locate an available PCI slot on the mianboard. Remove the metal slot cover on the back of the PC. Check with your computer manufacturer for instructions if needed. Slide the PCI Adapter into the PCI slot.
TL-WN851N 2. Wireless N PCI Adapter Click Install Driver & Utility to load the following screen. Figure 2-2 3. Soon, Figure 2-3 will display after a moment. Click Next to continue. Figure 2-3 4. After that, you should choose a Setup type. It is recommended that you select Install Client Utilities and Driver. Select Install Driver Only to install driver only, select Make Driver Installation Diskette(s) to make the diskette(s) as the installation driver (shown in Figure 2-4). Click Next to continue.
TL-WN851N Wireless N PCI Adapter Figure 2-4 5. Click Browse to change the destination location for the software, then click Next in the screen below (shown in Figure 2-5). Figure 2-5 6. After that, select the program folder, you should create a new folder name or select one from the Existing Folders list. It is recommended that you keep the default setting. Click Next to continue the installation.
TL-WN851N Wireless N PCI Adapter Figure 2-6 7. Choose configuration tool, if you are not sure, please leave it default. Then click Next to continue. Figure 2-7 8. Wait a while for the setup as shown in Figure 2-8.
TL-WN851N Wireless N PCI Adapter Figure 2-8 ) Note: 1) For Windows XP, the Setup Wizard will notify you of how to proceed with the installation during these steps (shown in Figure 2-9). Our drivers have been tested thoroughly, and are able to work with the operating system. Click Continue Anyway to continue the Installation. 2) Figure 2-9 In Windows 2000, the warning screen is shown below (Figure 2-10), and please select Yes to continue installation.
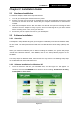
TL-WN851N Wireless N PCI Adapter Figure 2-10 9. After all the steps above, you will see the screen below, click Finish to complete the installation. Figure 2-11 2.2.3 Software Installation for Windows Vista 1. Insert the Resource CD into your CD-ROM drive, and the Figure 2-13 will appear. To continue, select the TL-WN851N.There will be a menu including: Install Driver & Utility, Install QSS and User Guide.
TL-WN851N Wireless N PCI Adapter Figure 2-12 2. Click Install Driver & Utility to load the following screen. Figure 2-13 3. Soon, Figure 2-14 will display after a moment. Click Next to continue.
TL-WN851N Figure 2-14 4. Click Yes to continue. Figure 2-15 5. The following page will display and please wait a moment.
TL-WN851N Wireless N PCI Adapter Figure 2-16 ) Note: For Windows Vista, the Setup Wizard will notify you of how to proceed with the installation during these steps (shown in Figure 2-17). Our drivers have been tested thoroughly, and are able to work with the operating system. Click Install this driver software anyway to continue the Installation. Figure 2-17 6. Click Finish to complete the installation.
TL-WN851N Figure 2-18 13 Wireless N PCI Adapter
TL-WN851N Wireless N PCI Adapter Chapter 3 Configuration TP-LINK TL-WN851N can be configured by TP-LINK Wireless Client Utility (TWCU). This chapter describes how to configure your Adapter for wireless connectivity on your Wireless Local Area Network (WLAN) and use the data security encryption features. After Installing the Adapter, the Adapter’s tray icon will appear in your system tray.
TL-WN851N Wireless N PCI Adapter Figure 3-1 The following table describes the items found on the Current Status screen. ¾ Profile Name - This shows the name of current selected configuration profile. The configuration of Profile name will be described on the General tab of Profile Management. ¾ Link Status - This shows whether the station is associated to the wireless network. ¾ Wireless Mode - Here displays the wireless mode.
TL-WN851N 3.2 Wireless N PCI Adapter Profile Management Click the Profile Management tab of the TWCU and the next screen will appear (shown in Figure 3-2). The Profile Management screen provides tools to: ¾ Add a new profile ¾ Modify a profile ¾ Remove a profile ¾ Activate a Profile ¾ Import a Profile ¾ Export a Profile ¾ Scan Available Networks ¾ Order profiles Figure 3-2 3.2.
TL-WN851N Wireless N PCI Adapter Figure 3-3 2. Edit the Security tab Select the Security tab in the screen above, and then you can edit the fields to configure the profile. To define the security mode, select the radio button of the desired security mode as follows.
TL-WN851N Wireless N PCI Adapter Figure 3-4 ¾ WPA/WPA2: Wi-Fi Protected Access. ¾ WPA/WPA2 Passphrase: Wi-Fi Protected Access Passphrase. ¾ 802.1x: Enables 802.1x security. ¾ Pre-Shared Key (Static WEP): Enables the use of shared keys that are defined on both the access point and the station. To define shared encryption keys, choose the Shared Key radio button and click Configure to fill in the Define Shared Keys window (shown in Figure 3-5). ) Note: The WEP security mode is not available for 802.
TL-WN851N Wireless N PCI Adapter Figure 3-5 ) Note: Select different Security Options, the configurations are different; you can select the appropriate security option and configure the exact key as your need. 3. Edit the Advanced tab This screen below allows you to make advanced configuration for the profile.
TL-WN851N Wireless N PCI Adapter Figure 3-6 ¾ ¾ Power Save Mode - Please select the power save mode in the drop-down list. • Maximum - Selects maximum mode to let the access point buffer incoming messages for the Adapter. The Adapter will detect the access point if any messages are waiting periodically. • Normal - Normal mode uses maximum when retrieving a large number of packets, then switches back to power save mode after retrieving the packets.
TL-WN851N Wireless N PCI Adapter of the access point with which it associates. ¾ Wireless Mode when Starting an Ad Hoc Network: Specifies 2.4 GHz 300/54/11 Mbps to start an Ad Hoc network if no matching network name is found after scanning all available modes. If the adapter finds no other ad hoc adapters, the channel that the adapter starts the ad hoc network with will be selected automatically. The Adapter must match the wireless mode and channel of the clients it associates. ¾ 802.
TL-WN851N 3.2.3 Switch another Profile 1. 2. Go to the Profile Management screen (shown in Figure 3-2). Select the profile name required in the Profiles List. 3. Click Activate. 3.2.4 Wireless N PCI Adapter Export a Profile 1. From the Profile Management screen (shown in Figure 3-2), highlight the profile to export. 2. 3. Click Export…, the Export Profile window will then appear below. Browse the directory to export the profile to. 4. Click Save.
TL-WN851N Wireless N PCI Adapter Figure 3-9 3.2.6 Scan Available Networks 1. Click Scan on the Profile Management screen (shown in Figure 3-2), the Available Infrastructure and Ad Hoc Networks window will appear below. 2. 3. Click Refresh to refresh the list at any time. Highlight a network name and click Activate to connect to an available network. If no configuration profile exists for that network, the Profile Management window will open the General tab screen.
TL-WN851N 1. 2. Wireless N PCI Adapter On the Profile Management screen (shown in Figure 3-2), click Order Profiles…. The Auto Profiles Selection management window will appear (shown in Figure 3-11) with a list of all created profiles in the Available Profiles. Figure 3-11 3. 4. Highlight the profiles to add to auto profile selection, and click Add. The profile will appear in the Auto Selected Profiles box. Highlight a profile in the Auto Selected Profiles box. 5.
TL-WN851N Wireless N PCI Adapter The Diagnostics tab lists the following receiving and transmitting diagnostics for frames received or transmitted by the wireless network adapter: ¾ Multicast frames transmitted and received ¾ Broadcast frames transmitted and received ¾ Unicast frames transmitted and received ¾ Total bytes transmitted and received Figure 3-12 3.3.
TL-WN851N Wireless N PCI Adapter Figure 3-13 3.4 Configuration for Windows Vista After the Adapter's driver has been installed, Windows Vista will display a wireless Network Connection message like this one. Figure 3-14 means the connection has been established. Icon Icon means there is no connection. To establish a connection, please follow the steps below. 1. Right-click the icon in your system tray, then click Connect to a network.
TL-WN851N Wireless N PCI Adapter Figure 3-15 2. The following screen will show you available wireless networks. Highlight the one you want to join, and then click Connect. Figure 3-16 3. To continue, click Connect Anyway. Click the Cancel button to end the connection.
TL-WN851N 4. Wireless N PCI Adapter If the connection is successful established, the following screen will appear, click close to finish the connection.
TL-WN851N Wireless N PCI Adapter Chapter 4 QSS Configuration QSS (Quick Secure Setup) function allows you to add a new wireless device to an existing network quickly. If the wireless card supports Wi-Fi Protected Setup (WPS), you can establish a wireless connection between wireless card and router using either Push Button Configuration (PBC) method or PIN method. First, the QSS software should be installed. Insert the Resource CD into your CD-ROM drive, and the Figure 4-1 will appear.
TL-WN851N Wireless N PCI Adapter Figure 4-2 Then, please follow the clue of the Operation System to complete the QSS installation. After that, QSS function can be enabled. Here we will introduce two ways to configure the QSS (For the configuration of QSS, here takes the Wireless Router of our company for example). 4.1 PBC (Push Button Configuration) method 1. Firstly, Press the QSS button directly on the front panel of the Router shown in Figure 4-3. Figure 4-3 2.
TL-WN851N Wireless N PCI Adapter Figure 4-4 Figure 4-5 3. Then wait a minute until Figure 4-6 appears. Click Finish to complete the QSS configuration.
TL-WN851N Wireless N PCI Adapter Figure 4-6 4.2 PIN method There are two ways to configure the QSS by PIN method: 1) Enter a PIN into your AP device. 2) Enter the PIN from your AP device. Following are the detailed configuration procedure of each way. 4.2.1 Enter a PIN into your AP device 1. Double click the icon on the desktop to open the QSS Utility and then you can see the welcome screen shown as Figure 4-4. Click Next to continue. Figure 4-5 will appear.
TL-WN851N Wireless N PCI Adapter Figure 4-7 2. Open the Router’s Web-based Utility and click QSS link on the left of the main menu. Then Figure 4-8 will appear. Figure 4-8 3. Click Add device, then you can see Figure 4-9. Select Enter the new device’s PIN and enter the PIN value of the adapter shown in Figure 4-7, click Connect. Figure 4-9 4. When Figure 4-6 appears, the QSS configuration is complete. 4.2.2 Enter the PIN from your AP device 1. Open the QSS Utility and you will see Figure 4-4.
TL-WN851N Wireless N PCI Adapter the Router. Click Next. Figure 4-10 2. When Figure 4-6 appears, the QSS configuration is complete. ) Note: If you generate a new PIN code for your Router, please enter the new one instead.
TL-WN851N Wireless N PCI Adapter Appendix A: Specifications Normal Interface 32 bit PCI Interface Standards IEEE802.11n; IEEE802.11g; IEEE802.11b; Operating System Windows 2000, XP, Vista Throughput 300Mbps (Maximal) 27/54/81/108/162/216/243/270Mbps 13.5/27/40.5/54/81/108/121.5/135Mbps Radio Data Rate 13/26/39/52/78/104/117/130Mbps 6.5/13/19.5/26/39/52/58.5/65Mbps 1/2/5.
TL-WN851N Wireless N PCI Adapter Appendix B: Glossary ¾ 802.11b - The 802.11b standard specifies a wireless product networking at 11 Mbps using direct-sequence spread-spectrum (DSSS) technology and operating in the unlicensed radio spectrum at 2.4GHz, and WEP encryption for security. 802.11b networks are also referred to as Wi-Fi networks. ¾ 802.
TL-WN851N Wireless N PCI Adapter developed by the military for use in reliable, secure, mission-critical communications systems. It is designed to trade off bandwidth efficiency for reliability, integrity, and security. In other words, more bandwidth is consumed than in the case of narrowband transmission, but the trade off produces a signal that is, in effect, louder and thus easier to detect, provided that the receiver knows the parameters of the spread-spectrum signal being broadcast.