
User's Manual
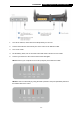
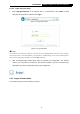
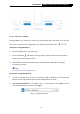
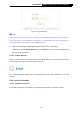

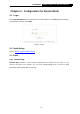
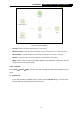
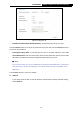
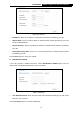
Table Of Contents
- Package Contents
- Chapter 1. Introduction
- Chapter 2. Connecting the Internet
- Chapter 3. Configuration for Router Mode
- 3.1 Login
- 3.2 Quick Setup
- 3.3 Basic
- 3.4 Advanced
- 3.4.1 Status
- 3.4.2 Network
- 3.4.3 Wireless
- 3.4.4 Wireless Statistics
- 3.4.5 Guest Network
- 3.4.6 DHCP
- 3.4.7 Forwarding
- 3.4.8 Security
- 3.4.9 Parental Control
- 3.4.10 Access Control
- 3.4.11 Advanced Routing
- 3.4.12 Bandwidth Control
- 3.4.13 IP & MAC Binding
- 3.4.14 ARP List
- 3.4.15 Dynamic DNS
- 3.4.16 No-IP DDNS
- 3.4.17 IPv6 Support
- 3.4.18 System Tools
- 3.4.19 Diagnostic
- 3.4.20 Firmware Upgrade
- Chapter 4. Range Extender Mode
- Chapter 5. Access Point Mode
- Appendix A: FAQ
- Appendix B: Configuring the PCs
- Appendix C: Specifications
- Appendix D: Glossary

-13-
TL-WR841HP
300Mbps High Power Wireless N Router
Figure 2-6 Login Windows
Note:
If the above screen does not pop-up, it means that your Web-browser has been set to a proxy.
Go to Tools menu > Internet Options > Connections > LAN Settings, in the screen that appears,
cancel the Using Proxy checkbox, and click OK to finish it.
4. After successfully login, follow Quick Setup to complete the configuration.
Make sure to choose Range Extender and click Survey to choose your host network and
fill in its wireless password.
2.4.3.2. STEP 2: Relocate
Place the router between your host router and the Wi-Fi dead zone. The location you choose
must be within the range of your existing host network.
The extended network shares the same SSID(wireless name) and password as your host
network.
2.4.4 Access Point Mode
2.4.4.1. Hardware connection
This mode can help you to transform your existing wired network to a wireless network.