
User's Manual
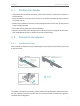
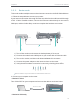
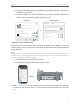
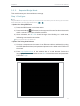
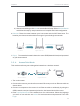
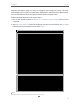
Table Of Contents
- About This Guide
- Get to Know About Your Router
- Connect to the Internet
- Log In
- Configure the Router in Standard Wireless Router
- Configure the Router in Access Point Mode
- Configure the Router in Repeater Mode
- FAQ

9
Chapter 2
Connect to the Internet
1 ) Find the SSID (Network Name) and Wireless Password printed on the label at
the bottom of the router.
2 ) Click the network icon of your computer or go to Wi-Fi Settings of your smart
device, and then select the SSID to join the network.
OR
Connections are available
Wireless Network Connection
TP-Link_XXXX
Connect automatically Connect
Wireless Name
Wi-Fi
Wi-Fi
TP-Link_XXXX
CHOOSE A NETWORK...
Other...
< Settings
Wireless Name
Smart DeviceComputer
• Method 3: Use the WPS button
Wireless devices that support WPS, including Android phones, tablets, most USB
network cards, can be connected to your router through this method ( Not supported
by iOS devices).
Note:
The WPS function cannot be configured if the wireless function of the router is disabled. Also, the WPS function will be
disabled if your wireless encryption is WEP. Please make sure the wireless function is enabled and is configured with the
appropriate encryption before configuring the WPS.
1 ) Tab the WPS icon on the device’s screen.
2 ) Immediately press the WPS button on your router.
WLAN
On
TP-Link_2017
TP-Link_Home
My Home
My Network
Home Network
TP-Link_Network
TP-Link_Test
4G
Close to
3. Enter http://tplinkwifi.net in the address bar of a web browser. Select the language
you want to use and then use admin for both username and password. Then click
Login.