
User's Manual
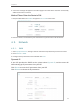
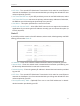
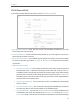
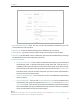
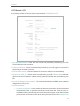
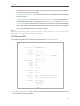
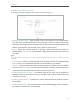
Table Of Contents
- About This Guide
- Get to Know About Your Router
- Connect the Hardware
- Set Up Internet Connection Via Quick Setup Wizard
- Configure the router
- FAQ

18
Chapter 4
3. A success message will appear on the WPS page if the client device has been successfully
added to the router’s network.
Method Three: Enter the Router’s PIN
1. Keep the WPS Status as Enabled and get the Current PIN of the router.
2. Enter the router’s current PIN on your client device to join the router’s Wi-Fi network.
4. 3. Network
4. 3. 1. WAN
1. Visit http://tplinkwifi.net, and log in with the username and password you set for the router.
2. Go to Network > WAN.
3. Configure the IP parameters of the LAN and click Save.
Dynamic IP
If your ISP provides the DHCP service, please select Dynamic IP, and the router will
automatically get IP parameters from your ISP.
Click Renew to renew the IP parameters from your ISP.
Click Release to release the IP parameters.