
User's Manual
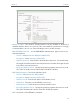
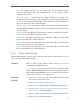
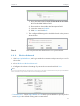
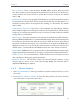
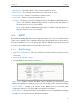
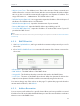
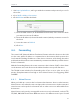
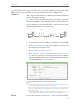
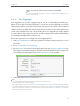
Table Of Contents

35
Chapter 4
Congure
1. Visit http://tplinkwifi.net, and log in with the username and password you set for
the router.
2. Go to DHCP > Address Reservation.
3. Click Add New and fill in the blank.
1 ) Enter the MAC address (in XX-XX-XX-XX-XX-XX format) of the client for which
you want to reserve an IP address.
2 ) Enter the IP address (in dotted-decimal notation) which you want to reserve for
the client.
3 ) Leave the status as Enabled.
4 ) Click Save.
4. 6. Forwarding
The router’s NAT (Network Address Translation) feature makes the devices in the LAN
use the same public IP address to communicate in the Internet, which protects the
local network by hiding IP addresses of the devices. However, it also brings about the
problem that external hosts cannot initiatively communicate with the specified devices
in the local network.
With the forwarding feature, the router can traverse the isolation of NAT so that clients
on the Internet can reach devices in the LAN and realize some specific functions.
The TP-LINK router includes four forwarding rules. If two or more rules are set, the
priority of implementation from high to low is Virtual Servers, Port Triggering, UPNP
and DMZ.
4. 6. 1. Virtual Servers
When you build up a server in the local network and want to share it on the Internet,
Virtual Servers can realize the service and provide it to Internet users. At the same time
virtual servers can keep the local network safe as other services are still invisible from
the Internet.
Virtual Servers can be used to set up public services in your local network, such as HTTP,
FTP, DNS, POP3/SMTP and Telnet. Different service uses different service port. Port 80