
User's Manual


18
Chapter 4
&RQƮJXUHWKH5RXWHULQ6WDQGDUG:LUHOHVV5RXWHU
3. A success message will appear on the WPS page if the client device has been successfully
added to the router’s network.
Method Three: Enter the Router’s PIN
1. Keep the WPS Status as Enabled and get the Current PIN of the router.
2. Enter the router’s current PIN on your client device to join the router’s Wi-Fi network.
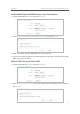
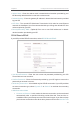
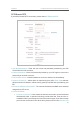
4. 3. Working Mode
1. Visit http://tplinkwifi.net, and log in with the username and password you set for the router.
2. Go to
Working Mode.
3. Select the
Standard Wireless Router mode as needed and click Save.
4. 4. Network
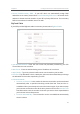
4. 4. 1. WAN
1. Visit http://tplinkwifi.net, and log in with the username and password you set for the router.
2. Go to
Network > WAN.
3. Configure the IP parameters of the LAN and click
Save.
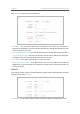
Dynamic IP
If your ISP provides the DHCP service, please select Dynamic IP, and the router will
automatically get IP parameters from your ISP.
Click
Renew to renew the IP parameters from your ISP.