
User's Guide


49
Chapter 11
Customize Your Network Settings
11. 1. Change the LAN Settings
The router is preset with a default LAN IP 192.168.0.1, which you can use to log in to
its web management page. The LAN IP address together with the Subnet Mask also
defines the subnet that the connected devices are on. If the IP address conflicts with
another device on your local network or your network requires a specific IP subnet, you
can change it.
1. Visit
http://tplinkwifi.net, and log in with your TP-Link ID or the password you set for
the router.
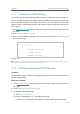
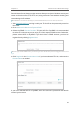
2. Go to
Advanced > Network > LAN.
3. Type in a new IP Address appropriate to your needs. And leave the
Subnet Mask as
the default settings.
4. Click SAVE.
Note: If you have set the Port Forwarding, DMZ or DHCP address reservation, and the new LAN IP address is not in the
same subnet with the old one, then you should reconfigure these features.
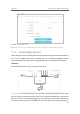
11. 2. Configure to Support IPTV Service
I want to:
Configure IPTV setup to enable Internet/IPTV/Phone service provided by my internet
service provider (ISP).
How can I do that?
1. Visit http://tplinkwifi.net, and log in with your TP-Link ID or the password you set for
the router.
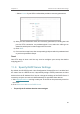
2. Go to
Advanced > Network > IPTV/VLAN.
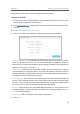
3. Configure IPTV/VLAN settings:
1 ) Tick
Enable IPTV/VLAN.
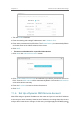
2 ) Select the appropriate
Mode according to your ISP.
• Select
Bridge if your ISP is not listed and no other parameters are required.