
User's Manual

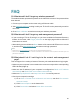
Table Of Contents
- About This Guide
- Get to Know About Your Router
- Connect the Hardware
- Log In to Your Router
- Set Up Internet Connection
- TP-Link Cloud Service
- Guest Network
- USB Settings
- HomeCare – Parental Controls, QoS, Anti-Virus
- Network Security
- NAT Forwarding
- VPN Server
- Customize Your Network Settings
- 12. 1. Change the LAN Settings
- 12. 2. Set Up Link Aggregation
- 12. 3. Configure to Support IPTV Service
- 12. 4. Specify DHCP Server Settings
- 12. 5. Set Up a Dynamic DNS Service Account
- 12. 6. Create Static Routes
- 12. 7. Specify Wireless Settings
- 12. 8. Use WPS for Wireless Connection
- 12. 9. Schedule Your Wireless Function
- Manage the Router
- 13. 1. Set Up System Time
- 13. 2. Control LEDs
- 13. 3. Test the Network Connectivity
- 13. 4. Upgrade the Firmware
- 13. 5. Backup and Restore Configuration Settings
- 13. 6. Set the Router to Reboot Regularly
- 13. 7. Change the Administrator Account
- 13. 8. Password Recovery
- 13. 9. Local Management
- 13. 10. Remote Management
- 13. 11. System Log
- 13. 12. Monitor the Internet Traffic Statistics
- 13. 13. System Parameters
- 13. 14. Log Out
- Work with Alexa
- FAQ

88
Chapter 13
Manage the Router
3. Choose the type and level of the system logs as needed.
4. Click Save Log to save the system logs to a local disk.
• To send the system log to a mailbox at a fixed time:
For example, I want to check my router’s working status at a fixed time every day,
however, it’s too troublesome to log in to the web management page every time I want
to go checking. It would be great if the system logs could be sent to my mailbox at 8
a.m. every day.
1. Visit http://tplinkwifi.net, and log in with your TP-Link ID or the password you set for
the router.
2. Go to Advanced > System Tools > System Log.
3. Click Mail Settings.
4. Enter the information required: