
User Guide


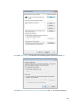
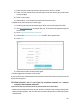
Table Of Contents
- About This Guide
- Get to Know About Your Router
- Connect the Hardware
- Log In to Your Router
- Set Up Internet Connection
- TP-Link Cloud Service
- Wireless Settings
- Guest Network
- USB Settings
- HomeShield
- OneMesh with Seamless Roaming
- Network Security
- NAT Forwarding
- VPN Server
- Customize Your Network Settings
- Manage the Router
- 15. 1. Upgrade the Firmware
- 15. 2. Backup and Restore Configuration Settings
- 15. 3. Change the Login Password
- 15. 4. Password Recovery
- 15. 5. Local Management
- 15. 6. Remote Management
- 15. 7. System Log
- 15. 8. Test the Network Connectivity
- 15. 9. Set Up System Time
- 15. 10. Set the Router to Reboot Regularly
- 15. 11. Control the LED
- FAQ
100
Chapter 15
Manage the Router
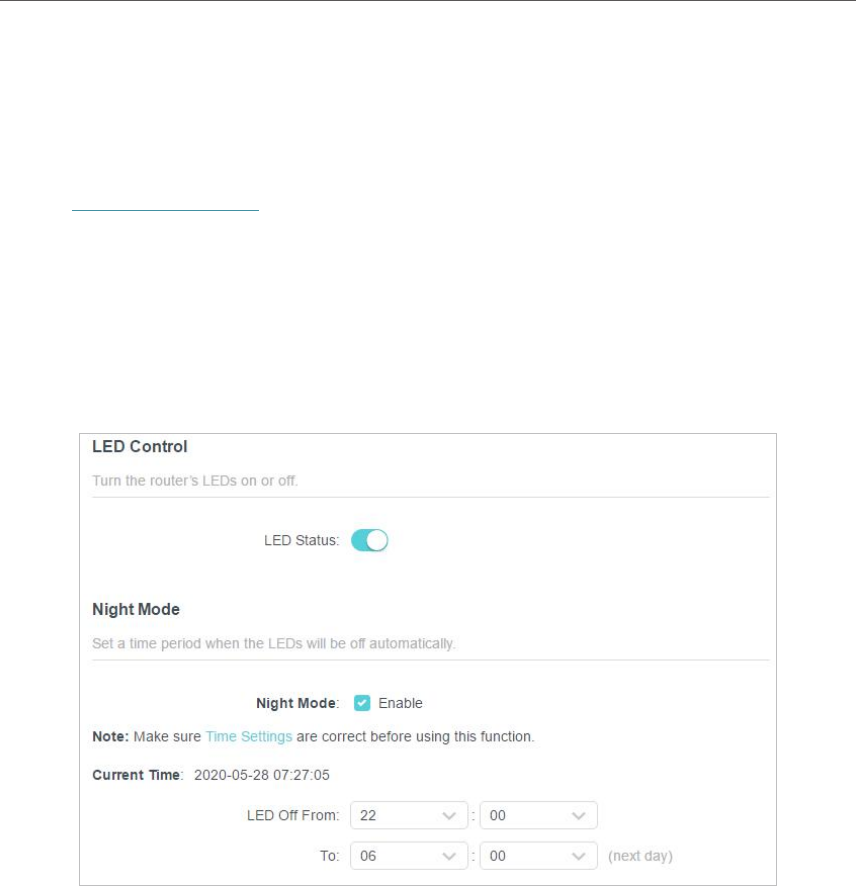
15. 11. Control the LED
The LED of the router indicates its activities and status. You can enable the Night Mode
feature to specify a time period during which the LED is off.
1. Visit http://tplinkwifi.net, and log in with your TP-Link ID or the password you set for
the router.
2. Go to Advanced > System > LED Control.
3. Enable Night Mode.
4. Specify the LED off time, and the LED will be off during this period every day.
5. Click SAVE.