Chapter 10 OneMesh with Seamless Roaming 3. Connect a OneMesh extender to this router by following the setup instructions in the extender’s manual. The extender will be listed on the router’s OneMesh page. Note: To check full list of TP-Link OneMesh devices, visit https://www.tp-link.com/onemesh/compatibility. 4. If you have set up the extender to join the OneMesh network, it will be listed on the router’s OneMesh page.
Chapter 10 OneMesh with Seamless Roaming 10. 2. Manage Devices in the OneMesh Network In a OneMesh network, you can manage all mesh devices and connected clients on your router’s web page. • To view mesh devices and connected clients in the network: 1. Visit http://tplinkwifi.net, and log in with your TP-Link ID or the password you set for the router. 2. Go to Network Map. 3. Click • to view all mesh devices, and click to view all connected clients. To manage a OneMesh device in the network: 1.
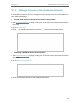
Chapter 10 OneMesh with Seamless Roaming 4. Manage the OneMesh device as needed. You can: • Change device information. • Click Leave OneMesh to delete this device from the OneMesh network. • Click Manage Device to redirect to the web management page of this device.
Chapter 10 Network Security This chapter guides you on how to protect your home network from cyber attacks and unauthorized users by implementing these three network security functions. You can protect your home network from cyber attacks, block or allow specific client devices to access your network using Access Control, or you can prevent ARP spoofing and ARP attacks using IP & MAC Binding.
Chapter 10 Network Security 10. 1. Protect the Network from Cyber Attacks The SPI (Stateful Packet Inspection) Firewall protects the router from cyber attacks and validate the traffic that is passing through the router based on the protocol. This function is enabled by default. 1. Visit http://tplinkwifi.net, and log in with your TP-Link ID or the password you set for the router. 2. Go to Advanced > Security > Firewall. It’s recommended to keep the default settings. 10. 2.
Chapter 10 2 ) Click Network Security and select devices you want to be blocked and Click ADD. 3 ) The Operation Succeeded message will appear on the screen, which means the selected devices have been successfully added to the blacklist. • To allow specific device(s): 1 ) Select Whitelist and click SAVE. 2 ) Your own device is in the whitelist by default and cannot be deleted. Click to add other devices to the whitelist. • Add connected devices 1 ) Click Select From Device List.
Chapter 10 Network Security 3 ) The Operation Succeeded message will appear on the screen, which means the selected devices have been successfully added to the whitelist. • Add unconnected devices 1 ) Click Add Manually. 2 ) Enter the Device Name and MAC Address of the device you want to be allowed and click ADD. 3 ) The Operation Succeeded message will appear on the screen, which means the device has been successfully added to the whitelist.
Chapter 10 Network Security I want to: Prevent ARP spoofing and ARP attacks. How can I do that? 1. Visit http://tplinkwifi.net, and log in with your TP-Link ID or the password you set for the router. 2. Go to Advanced > Security > IP & MAC Binding. 3. Enable IP & MAC Binding. 4. Bind your device(s) according to your need. • To bind the connected device(s): 1 ) Click in the Binding List section. 2 ) Click VIEW CONNECTED DEVICES and select the device you want to bind.
Chapter 10 • Network Security To bind the unconnected device: 1 ) Click in the Binding List section. 2 ) Enter the MAC Address and IP Address that you want to bind. 3 ) Click SAVE.
Chapter 11 NAT Forwarding The router’s NAT (Network Address Translation) feature makes devices on the LAN use the same public IP address to communicate with devices on the internet, which protects the local network by hiding IP addresses of the devices. However, it also brings about the problem that an external host cannot initiatively communicate with a specified device on the local network.
Chapter 11 NAT Forwarding 11. 1. Share Local Resources on the Internet by Port Forwarding When you build up a server on the local network and want to share it on the internet, Port Forwarding can realize the service and provide it to internet users. At the same time Port Forwarding can keep the local network safe as other services are still invisible from the internet. Port Forwarding can be used for setting up public services on your local network, such as HTTP, FTP, DNS, POP3/SMTP and Telnet.
Chapter 11 NAT Forwarding 5. Click VIEW COMMON SERVICES and select HTTP. The External Port, Internal Port and Protocol will be automatically filled in. 6. Click VIEW CONNECTED DEVICES and select your home PC. The Device IP Address will be automatically filled in. Or enter the PC’s IP address 192.168.0.100 manually in the Device IP Address field. 7. Click SAVE. Tips: It is recommended to keep the default settings of Internal Port and Protocol if you are not clear about which port and protocol to use.
Chapter 11 NAT Forwarding Tips: The WAN IP should be a public IP address. For the WAN IP is assigned dynamically by the ISP, it is recommended to apply and register a domain name for the WAN referring to Set Up a Dynamic DNS Service Account. Then users on the internet can use http:// domain name to visit the website. • If you have changed the default External Port, you should use http:// WAN IP: External Port or http:// domain name: External Port to visit the website. • 11. 2.
Chapter 11 NAT Forwarding 4. Click SAVE. Tips: • You can add multiple port triggering rules according to your network need. • The triggering ports can not be overlapped. • If the application you need is not listed in the Existing Applications list, please enter the parameters manually. You should verify the external ports the application uses first and enter them into External Port field according to the format the page displays. 11. 3.
Chapter 11 NAT Forwarding How can I do that? 1. Assign a static IP address to your PC, for example 192.168.0.100. 2. Visit http://tplinkwifi.net, and log in with your TP-Link ID or the password you set for the router. 3. Go to Advanced > NAT Forwarding > DMZ and tick to enable DMZ. 4. Click VIEW CONNECTED DEVICES and select your PC. The Device IP Address will be automatically filled in. Or enter the PC’s IP address 192.168.0.100 manually in the DMZ Host IP Address field. 5. Click SAVE.
Chapter 11 NAT Forwarding corresponding ports allowing the following data penetrating the NAT to transmit. Therefore, you can play Xbox online games without a hitch. INTERNET If necessary, you can follow the steps to change the status of UPnP. 1. Visit http://tplinkwifi.net, and log in with your TP-Link ID or the password you set for the router. 2. Go to Advanced > NAT Forwarding > UPnP and toggle on or off according to your needs.
Chapter 12 VPN Server The VPN (Virtual Private Networking) Server allows you to access your home network in a secured way through internet when you are out of home. The router offers two ways to setup VPN connection: OpenVPN and PPTP (Point to Point Tunneling Protocol) VPN. OpenVPN is somewhat complex but with greater security and more stable. It is suitable for restricted environment, such as campus network and company intranet.
Chapter 12 VPN Server 12. 1. Use OpenVPN to Access Your Home Network In the OpenVPN connection, the home network can act as a server, and the remote device can access the server through the router which acts as an OpenVPN Server gateway. To use the VPN feature, you should enable OpenVPN Server on your router, and install and run VPN client software on the remote device. Please follow the steps below to set up an OpenVPN connection. INTERNET Home Network Router Remote Devices Step1.
Chapter 12 VPN Server 6. Select your Client Access type. Select Home Network Only if you only want the remote device to access your home network; select Internet and Home Network if you also want the remote device to access internet through the VPN Server. 7. Click SAVE. 8. Click GENERATE to get a new certificate. Note: If you have already generated one, please skip this step, or click GENERATE to update the certificate. 9.
Chapter 12 VPN Server 2. Go to Advanced > VPN Server > PPTP, and tick the Enable box of PPTP. Note: Before you enable VPN Server, we recommend you configure Dynamic DNS Service (recommended) or assign a static IP address for router’s WAN port and synchronize your System Time with internet. 3. In the Client IP Address field, enter the range of IP addresses (up to 10) that can be leased to the devices by the PPTP VPN server. 4. Set the PPTP connection permission according to your needs.
Chapter 12 VPN Server 3 ) Click ADD. Step 2. Configure PPTP VPN Connection on Your Remote Device The remote device can use the Windows built-in PPTP software or a third-party PPTP software to connect to PPTP Server. Here we use the Windows built-in PPTP software as an example. 1. Go to Start > Control Panel > Network and Internet > Network and Sharing Center. 2. Select Set up a new connection or network. 3. Select Connect to a workplace and click Next.
Chapter 12 VPN Server 4. Select Use my Internet connection (VPN). 5. Enter the internet IP address of the router (for example: 218.18.1.73) in the Internet address field. Click Next.
Chapter 12 VPN Server 6. Enter the User name and Password you have set for the PPTP VPN server on your router, and click Connect. 7. The PPTP VPN connection is created and ready to use.
Chapter 12 VPN Server 71
Chapter 13 Customize Your Network Settings This chapter guides you on how to configure advanced network features.
Chapter 13 Customize Your Network Settings 13. 1. Change the LAN Settings The router is preset with a default LAN IP 192.168.0.1, which you can use to log in to its web management page. The LAN IP address together with the Subnet Mask also defines the subnet that the connected devices are on. If the IP address conflicts with another device on your local network or your network requires a specific IP subnet, you can change it. 1. Visit http://tplinkwifi.
Chapter 13 Customize Your Network Settings 2 ) Click SAVE. 3 ) After configuring IGMP proxy, IPTV can work behind your router now. You can connect your set-top box to any of the router’s Ethernet port. If IGMP is not the technology your ISP applies to provide IPTV service: 1 ) Tick Enable IPTV/VLAN. 2 ) Select the appropriate Mode according to your ISP. • Select Bridge if your ISP is not listed and no other parameters are required.
Chapter 13 Customize Your Network Settings 13. 3. Specify DHCP Server Settings By default, the DHCP (Dynamic Host Configuration Protocol) Server is enabled and the router acts as a DHCP server; it dynamically assigns TCP/IP parameters to client devices from the IP Address Pool. You can change the settings of the DHCP Server if necessary, and you can reserve LAN IP addresses for specified client devices. 1. Visit http://tplinkwifi.
Chapter 13 Customize Your Network Settings 2. Click VIEW CONNECTED DEVICES and select the you device you want to reserve an IP for. Then the MAC Address will be automatically filled in. Or enter the MAC address of the client device manually. 3. Enter the IP address to reserve for the client device. 4. Click SAVE. 13. 4. Set Up a Dynamic DNS Service Account Most ISPs assign a dynamic IP address to the router and you can use this IP address to access your router remotely.
Chapter 13 Customize Your Network Settings If you have selected NO-IP or DynDNS, enter the username, password and domain name of your account. 5. Click LOGIN AND SAVE. Tips: If you want to use a new DDNS account, please click Logout first, and then log in with a new account. 13. 5. Create Static Routes Static routing is a form of routing that is configured manually by a network administrator or a user by adding entries into a routing table.
Chapter 13 Customize Your Network Settings I want to: Visit multiple networks and servers at the same time. For example, in a small office, my PC can surf the internet through Router A, but I also want to visit my company’s network. Now I have a switch and Router B. I connect the devices as shown in the following figure so that the physical connection between my PC and my company’s server is established.
Chapter 13 Customize Your Network Settings Network Destination: The destination IP address that you want to assign to a static route. This IP address cannot be on the same subnet with the WAN IP or LAN IP of Router A. In the example, the IP address of the company network is the destination IP address, so here enter 172.30.30.1. Subnet Mask: Determines the destination network with the destination IP address. If the destination is a single IP address, enter 255.255.255.
Chapter 13 • Customize Your Network Settings To enable or disable the wireless function: 1. Go to Wireless or Advanced > Wireless > Wireless Settings. 2. The wireless function is enabled by default. If you want to disable the wireless function of the router, just untick the Enable checkbox of each wireless network. In this case, all the wireless settings will be invalid. • To change the wireless network name (SSID) and wireless password: 1. Go to Wireless or Advanced > Wireless > Wireless Settings.
Chapter 13 Customize Your Network Settings 3. Keep the default values or set a new SSID and password, and click SAVE. This SSID and password will be applied for the 2.4GHz and 5GHz wireless networks. • To change the security option: 1. Go to Advanced > Wireless > Wireless Settings. 2. Select an option from the Security drop-down list. • • • No security - No password is needed to access your guest network.
Chapter 13 Customize Your Network Settings • Mode - Select a transmission mode according to your wireless client devices. It is recommended to just leave it as default. • To use the OFDMA feature: The OFDMA feature enables multiple users to transmit data simultaneously, and thus greatly improves speed and efficiency. Note: Only when your clients also support OFDMA can you fully enjoy the benefits. 1. Go to Wireless or Advanced > Wireless > Wireless Settings. 2. Enable OFDMA. 13. 7.
Chapter 13 Customize Your Network Settings Note: The Effective Time Schedule is based on the time of the router. You can go to Advanced > System > Time & Language to modify the time. • The wireless network will be automatically turned on after the time period you set. • 13. 8. Use WPS for Wireless Connection Wi-Fi Protected Setup (WPS) provides an easier approach to set up a security-protected Wi-Fi connection. 1. Visit http://tplinkwifi.
Chapter 13 Customize Your Network Settings Note: PIN (Personal Identification Number) is an eight-character identification number preset to each router. WPS supported devices can connect to your router with the PIN. The default PIN is printed on the label of the router. 13. 8. 3. Push the WPS Button Click Start on the screen or directly press the router’s WPS button. Within two minutes, enable WPS on your personal device.
Chapter 13 Customize Your Network Settings • WMM - WMM function can guarantee the packets with high-priority messages being transmitted preferentially. • Short GI - It is recommended to enable this function, for it will increase the data capacity by reducing the guard interval time. • AP Isolation - This function isolates all connected wireless stations so that wireless stations cannot access each other through WLAN.
Chapter 14 Manage the Router This chapter will show you the configuration for managing and maintaining your router.
Chapter 14 Manage the Router 14. 1. Upgrade the Firmware TP-Link aims at providing better network experience for users. We will inform you through the web management page if there’s any update firmware available for your router. Also, the latest firmware will be released at the TP-Link official website www.tp-link.com, and you can download it from the Support page for free. • • Note: Backup your router configuration before firmware upgrade. Do NOT turn off the router during the firmware upgrade. 14.
Chapter 14 Manage the Router Tips: If there’s a new and important firmware update for your router, you will see the prompt notification on your computer as long as a web browser is opened. Click UPGRADE, and log in to the web management page with the username and password you set for the router. You will see the Firmware Upgrade page. 14. 1. 2. Local Upgrade 1. Download the latest firmware file for the router from www.tp-link.com. 2. Visit http://tplinkwifi.
Chapter 14 • Manage the Router To restore configuration settings: 1. Click BROWSE to locate the backup configuration file stored on your computer, and click RESTORE. 2. Wait a few minutes for the restoring and rebooting. Note: During the restoring process, do not turn off or reset the router. • To reset the router except your login password and TP-Link ID: 1. In the Factory Default Restore section, click RESTORE. 2. Wait a few minutes for the resetting and rebooting.
Chapter 14 Manage the Router Note: • During the resetting process, do not turn off or reset the router. • We strongly recommend you backup the current configuration settings before resetting the router. 14. 3. Change the Login Password The account management feature allows you to change your login password of the web management page. Note: If you are using a TP-Link ID to log in to the web management page, the account management feature will be disabled.
Chapter 14 • • Manage the Router Tips: SMTP server is available for users in most webmail systems. For example, the SMTP server address of Gmail is smtp.gmail.com. Generally, Authentication should be enabled if the login of the mailbox requires username and password. 5. Click SAVE. To recover the login password, please visit http://tplinkwifi.net, click Forgot Password? on the login page and follow the instructions to set a new password. 14. 5.