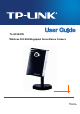
TL-SC3430N Wireless N H.264 Megapixel Surveillance Camera Rev: 1.0.
COPYRIGHT & TRADEMARKS Specifications are subject to change without notice. is a registered trademark of TP-LINK TECHNOLOGIES CO., LTD. Other brands and product names are trademarks or registered trademarks of their respective holders. No part of the specifications may be reproduced in any form or by any means or used to make any derivative such as translation, transformation, or adaptation without permission from TP-LINK TECHNOLOGIES CO., LTD. Copyright © 2012 TP-LINK TECHNOLOGIES CO., LTD.
FCC STATEMENT This equipment has been tested and found to comply with the limits for a Class B digital device, pursuant to part 15 of the FCC Rules. These limits are designed to pro-vide reasonable protection against harmful interference in a residential installation. This equipment generates, uses and can radiate radio frequency energy and, if not in-stalled and used in accordance with the instructions, may cause harmful interference to radio communications.
CONTENTS Package Contents..............................................................................................................1 Chapter 1 Safety Instructions..........................................................................................2 Chapter 2 Minimum System Requirement & Product Feature......................................3 2.1 2.2 2.3 2.4 2.5 System Requirement ........................................................................................................
Europe – EU Declaration of Conformity.........................................................................89 Federal Communication Commission Interference Statement ....................................
Package Contents The following items should be found in your package: ¾ TL-SC3430N Wireless N H.264 Megapixel Surveillance Camera ¾ Power Adapter ¾ Mounting Bracket with three screws, a Lock Ring, a Brace and a Base Plate ¾ RJ45 Cable ¾ Quick Installation Guide ¾ Resource CD, including: z This User Guide z Application Guide z Other helpful information ) Note: Make sure that the package contains the above items.
Chapter 1 ¾ Safety Instructions Before you use this product This product has been designed with safety in mind. However, the electrical products can cause fires which may lead to serious body injury if not used properly. To avoid such accidents, be sure to heed the following. ¾ Legal Caution Video and audio surveillance can be forbidden by laws that vary from country to country. Check the laws in your local region before using this product for surveillance purposes.
Chapter 2 Minimum System Requirement & Product Feature 2.1 System Requirement For normal operation and viewing of the network camera, it’s recommended that your system meets these minimum requirements for proper operation: Item Requirements CPU Pentium 4 2.
Audio compression: G.711 μ law, a law, and AMR Mobile Phone Live View Through 2.5 WAP, 3GPP, 3G Streaming, and 3G Browser Alarm Sending FTP Client / SMTP / Network Storage / Memory Card / HTTP event Security Passward Protecton / HTTPS encryption / IP Filter Alarm Buffer Recording image and audio file pre-and-post disconnection up to 5 sec.
Built-in Microphone: The location where the voice from your partner comes out. SD/SDHC Card Slot: Supports SD/SDHC memory card. 2.3.2 Bottom view ¾ Power Connector: The power connector is where you connect the power adapter. ¾ RESET: Please take the following steps to reset the camera to its defaults. Keep the camera powered on, then press and hold the Reset button for more than 15 seconds. Afterwards release it, and the Camera will be restored to factory defaults after rebooting.
Step 1. Press the WPS button on the router supporting WPS for 2 seconds. Step 2. Press the WPS button on the Camera within 2 minutes. ¾ Lock Ring: It is used to adjust the angle of the Camera. ¾ Base Plate: It is used to support the Camera and can be fixed to a flat surface with the supplied screws. 2.4 Mount the Camera 2.4.1 The Screw Size There are three supplied screws for mounting the Camera. The length of the screws is 25±1 mm and the diameter is 4±0.2 mm. 2.4.2 Wall and Ceiling Mount 1.
(2) Wall Mount 2.5 Hardware Connection Before proceeding, confirm that your PC is connected to your router and can access the Internet. Make sure that your router’s DHCP feature is enabled. If not, please refer to your router’s instruction to enable it. For TL-SC3430N, if your router supports WPS (Wi-Fi Protected Setup), you can also use WPS to setup a wireless connection quickly. You can also choose Wired Connection. Please connect the Camera according to the following steps. 2.5.
2.5.2 Method 2: WPS Connection Power on the Camera and make sure that the Power LED is blue before WPS Connection. Then take the following steps. A. Press the WPS button on the router supporting WPS for 2 seconds. B. Press the WPS button on the Camera within 2 minutes. After you press the WPS button on the Camera, the Power LED will turn purple and flash, and when the WPS Connection is established successfully, it will return blue.
Chapter 3 Using IP Camera via Web Browser 3.1 Obtain the IP Address 1. Insert the provided CD into your CD-ROM driver. The Setup Wizard will automatically pop up on your computer’s screen as shown in the figure below. Figure 3-1 2. Choose the Intelligent IP Installer, and then the next screen appears. Click on Intelligent IP Installer to begin the installation.
3. After the installation is finished, click Start > All Programs > TP-LINK >Intelligent IP Installer to start using the program. Figure 3-3 4. The following screen will then display. Click the Search button to search Network Cameras in the network; it displays Network Cameras information including IP Address.
3.2 .2 Windows Web Browser The configuration of browser is similar in Windows XP/Vista/7. Here we take IE browser in Windows XP for example. 1 Click Link to IE button in Figure 3-4 directly. You can also launch your web browser and then enter the IP address or host name of the IP camera in the Location / Address field of your browser. ) Note: If you only want to view the video without accessing Setting screen, enter “http:///index2.htm” as your web URL.
3.3 .3 Mac Web Browser 1 Click the Safari icon. 2 After the home page appears, click Bookmarks and then choose Show All Bookmarks.
3 Click Bonjour on the left of the following screen. Double click the Mac address of the Camera in the bookmark list. For example, TP-LINK-001BFE0334A2. 4 Enter the default Name admin and default Password admin. Click Log In. ) Note: The default user name “admin” and the password “admin”are set at the factory for the administrator. You can change them in the Account Menu.
5 The monitor image will be displayed in your browser. In the far left side of main configuration are Setting, Client Setting and Image Setup.
Chapter 4 Operating IP Camera via Mobile Phone 4.1 Mobile Phone Viewing 4.1.1 3G Mobile Phone Streaming Viewing For 3G mobile phone viewing, type “rtsp://:/video.3gp ” into your 3G Streaming Link. is the Public IP address of your IP Camera; is the RTSP port of your IP Camera (Default value is 554.) Example: rtsp://100.10.10.1:554/video.3gp ) Note: You can also use RTSP clients (RealPlayer, VLC, QuickTime Player…etc.) to view RTSP streaming, just type in “rtsp://:/video.
3. Enter name and password. Default values are both admin. Then click Log in 4. The TP-LINK User Interface and live image will show up in the middle of the screen. ) Note: It will show continuous snapshots not a real time video streaming. Therefore, the recording feature is disabled.
Chapter 5 Configuration of Main Menu In the left side of main configuration are Setting, Client setting and Image setting. In the right side, you can control Live View in your main Browser. The functions include: Snapshot, Open digital zoom, Audio, and Video Play. Open digital zoom Video Play Audio Play 5.1 Live View 5.1.1 Snapshot You can capture a still image shot by clicking the Camera icon and save it in the operating computer.
5.1.2 Digital zoom in / out the image via the monitor window • Click • Pull the showed on the above window. • Use the left click of your mouse to move to anywhere in the window area. to display the digital zoom in window. to adjust the digital zoom range, and it will be 5.1.3 Video play buttons Symbols Meaning Pause the current video Play the video Stop the current video Record the current video ) Note: Concerning the recording storage requirement of your hard disk, please refer to the CHAPTER 9.
Click Basic folder, there are sub-folders including System, Camera, Network, and Security. Fore more information, you can see Chapter 6. Click Advanced folder, there are sub-folders including FTP Client, SMTP, Network Storage, Memory Card, HTTP event, Schedule, Alarm buffer, Motion detection, Audio detection, and System Log. Fore more information, please see Chapter 7. 5.3 Client Setting This function is only for the client. Click this button to control Mode, View size, Protocol, and Video buffer. 5.3.
5.3.4 .3.4 Video Buffer Turn the Video Buffer function On / Off. The Video Buffer function makes the streaming more smooth in unsteady network environment, but might cause a little delay in live viewing. 5.4 Image Setup The tool bar can be adjusted to optimize video Brightness, Contrast, Saturation, Sharpness and Exposure. 5.4.1 Brightness The value range is 0~99. The higher value the brightness is, the brighter the image is. 5.4.2 Contrast The value range is 0~99.
Chapter 6 Setting-Basic Click the Basic folder to display the sub folders including System, Camera, Network, and Security. 6.1 System Click the folder of System to display the sub-folders including Information, Date / Time, Initialize, and Language. 6.1.1 Information The Information screen provides the product factory information which includes Product Name, Firmware Version.
6.1.2 Date / Time The Date/ Time screen displays all options of time setting. ¾ Current Date / Time: This displays the current date and time of this IP Camera. ¾ PC Clock: This displays the date and time of the monitoring PC clock. ¾ Date / Time Format: You can click the pull down box to select different time display formats. ) Note: If you would like the Date / Time information shows on the Live View screen, please check “Setting → Basic → Camera → General → Date / Time ” to execute the setting.
time display will be the same as the current date / time option. ¾ Daylight Saving Time: There are two modes to choose for setting up daylight saving time. z By Date: Set the start and end time by select month, day, hour, and minute. z By Week Number: Set the start and end time by select month, week, hour, and minute. ) Note: The NTP server (Network Time Protocol) is the time server which is an Internet standard protocol built on the top of TCP / IP.
6.1.4 Language ¾ Upload Language Pack: Clicking “Browse” and selecting the file for updating, the present language display of WEB User Interface could be changed. A confirmation dialogue will appear. Click “OK”, then the update will be applied immediately. The default language is “English”. 6.2 Camera Click the folder of Camera to display the sub folders including General, Stream 1, Stream 2, Advanced and Playback.
6.2.1 General ¾ RTSP: The default value is 554. If the IP Cameras connected with router and installed outside are over 2 sets and all of them need support RTSP, please fill some value in the blank space in the range from 1024 to 65535. ¾ RTP Unicast streaming: The default value of port range is 5000 ~ 7999 and can be changed from 1024 to 65535. ) Note: Under Unicast streaming mode, streaming video is delivered from the Camera to a single client device.
¾ Text Overlay: Some information can be showed on the display screen, such as Date / Time and user-defined text. And the background color can be chosen. ¾ Privacy Mask: A specific area of the video image can be covered. 6.2.2 Stream 1 ¾ ¾ Viewer Authentication: z On: If the viewer authentication is On, the users will be requested to key-in username and password when using QuickTime Player to have live viewing.
20, 25, and 30 fps. The unit “fps” stands for “frames per second”. ) Note: The frame rate is up to 15 fps at 1280x1024, and up to 30 fps at 640x480. However, if you would like choose frame rate over 15 fps, the IMAGE SIZE of H.264/MPEG-4/MJPEG setting page has to been selected 320x240 or 640x480 at the same time. ¾ Quality: z Auto: The quality and bitrate will be adjusted automatically according to the frame rate.
¾ ¾ Viewer Authentication: z On: If the viewer authentication is On, the users will be requested to key-in username and password when using QuickTime Player to have live viewing. z Off: If the viewer authentication is Off, you can have live viewing on computer by QuickTime Player after entering “rtsp://ip:port/video.mp4” on the URL column directly. Multicasting Streaming (if it’s on): z Multicast Address: Specify the multicast server address.
z Fixed Quality: Select the value of quality among Medium, Standard, Good, Detailed and Excellent. z Fixed Bitrate: Set the bitrate of MPEG-4 image transmission for a line. You can select one value among 64Kbps, 128Kbps, 256Kbps, 384Kbps, 512Kbps, 768Kbps, 1Mbps, 1.5 Mbps, 2 Mbps, 3 Mbps, 4 Mbps, 5 Mbps, and 6 Mbps. ) Note: Concerning how to select the suitable image quality for Fixed Quality or Fixed Bitrate, please refer to the APPENDIX / A. Frame-rate & Bitrate Table.
z Video / Audio Port: Specify the transmission port number of the video data, from 1124 to 65534. z Time-To-Live: Set the maximum TTL that multicast can pass through. ) Note: Time-To-Live option determines the maximum length of time (measure as the number of network routers that can be passed before data arrives at its destination or is dropped) within which a multicast packet must reach its destination. ¾ Image Size: Specify the image size when the network camera transmits.
z On: If the viewer authentication is On, the users will be requested to key-in username and password when using QuickTime Player to have live viewing. z Off: If the viewer authentication is Off, you can have live viewing on computer by QuickTime Player after entering “rtsp://ip:port/video.3gp” on the URL column directly. ¾ Image Size: Image size for 3GPP is 320 x 240 or 160 x 120. ¾ Frame Rate: Set the frame rate of the 3GPP image. Choose one between 5 or 10 fps.
z Auto: Choose Auto and you have 3 options to adjust the exposure condition. 9 Back Light Compensate: Click it on and it helps avoid problems in situations where the main subject ends up being too dark, such as when shooting people or other subjects in front of a bright background. 9 Slow Shutter: Click it on and the range of shutter speed will be from 1/5 to 1/120 sec. It will adjust the shutter speed automatically and helpful to capture the clear image when shooting in a dark place.
Snapshot Mirror/ Flip Increase Speed Pause Stop Decrease Speed Open Files Full Screen Volume Mute on / Mute off Open Digital Zoom 6.3 Network Click the folder of Network to display the sub folders including Information, PPPoE, DDNS, UPnP, Bonjour, IP Notification, Wireless and WPS.
6.3.1 Information Display the MAC address of the device. ¾ Obtain an IP address automatically (DHCP): If a DHCP server is installed on the network, to select this while the IP address is assigned by the DHCP server. ¾ Obtain DNS server address automatically: Select this to obtain the address of DNS server automatically.
¾ ¾ ¾ Use the following IP address: Select this option when the fixed IP address is set. z IP address: Enter the IP address of the device. z Subnet mask: Enter the subnet mask. z Default gateway: Enter the default gateway. Use the following DNS server address: Select this when you set the fixed address as the IP address of DNS server. z Primary DNS server: Enter the IP address of the primary DNS server. z Secondary DNS server: Enter the IP address of the secondary DNS server, if necessary.
¾ IP Address: The IP address obtained at the PPPoE connecting with network. ¾ User ID: Enter the user ID for authentication necessary for PPPoE connections. Type it up to 64 characters. ¾ Password: Enter the password for authentication necessary for PPPoE connections. Type it up to 32 characters. ¾ Re-type Password: Re-type the password to confirm. ¾ Obtain DNS server address automatically: Select this to obtain the address of DNS server automatically.
2) 3) 4) Point-to-Point Protocol frames insider Ethernet frames. PPPoE connection is used mainly with ADSL service where individual users connect to the ADSL transceiver (modem) over Ethernet work. It also widely used in XDSL (digital affiliate line such as ADSL, VDSL or SDSL) The IP Camera needs to be rebooted after it finishes changing the network completely. For more details, please refer to Section 6.1.
2. Input all information and follow step by step with DynDNS. 3. Login with new account and click Account → My Hosts → Add Host Services.
4. Type domain in the Hostname field and select sub-domain. 5.
6. Type your DDNS User ID, Password and Host name in Setting → Network → DDNS. After completing setting, reboot IP Camera. 6.3.4 UPnP (Universal Plug and Play) If you have a Router to access to internet and the Router supports UPnP IGD function, you need to turn on the UPnP Port Forwarding function.
¾ HTTP Port: Enter the HTTP port number and default HTTP port is 80. ¾ SSL Port: Enter the SSL port number and default SSL port is 443. ¾ RTSP Port: Enter the RTSP port, default value is 554 for computer view. ) Note: UPnP (Universal Plug and Play): UPnP is a set of computer network protocol. It allows devices to connect seamlessly and simplify the implementation of networks in the home and corporate environments. 6.3.
¾ Device Name: Enter Device Name you wish. ) Note: How to use Bonjour in your Windows Browser UI? Please check the link below: http://www.apple.com/support/downloads/bonjourforwindows.html 6.3.6 IP Notification Once IP Notification is set to "On", the Camera will automatically send an e-mail notification to tell users its updated network parameters if the network settings about IP address, network connection type, HTTP port or wireless connection is changed or completed.
z SMTP: Select if SMTP authentication is necessary for sending e-mail. z POP before SMTP: Select if POP before SMTP authentication is necessary for sending e-mail. 9 POP server name: It is necessary when the POP before SMTP is selected in Authentication. Type the POP (receiving mail) server name up to 64 characters, or type the IP address of the POP server. This setting is necessary when the SMTP server which sends e-mails performs authentication using the POP user account.
¾ Status of Wireless Networks The list above is the result of network scan. The network currently linked to will be shown in blue. The following information is provided. ¾ z ESSID - The name of a wireless network (or ad-hoc device). If the same name occurs several times this means that several access points for that network were found. The Camera cannot be configured to only associate with one particular access point.
z ESSID (ESSID is sometimes written as SSID) - This is the name of the wireless network to which the Camera is ready to connect. The field accepts up to 32 alphanumeric characters. The name must be exactly the same as that used in the wireless access point; otherwise, the connection will not be established. Leaving this field blank means the Camera will attempt to access the nearest unsecured network. There are two methods to enter the ESSID field.
9 Obtain an IP address automatically (DHCP) – If a DHCP server is installed and enabled on the network, to select this for the IP address can be assigned by the DHCP server. 9 Use the following IP address - Select this when the fixed IP address is set. IP address: Enter the IP address of the Camera, which must be in the same subnet with that of the desired AP/ Router. Subnet mask: Enter the subnet mask. Default gateway: Enter the default gateway.
2. Secondly, open the router’s Web-based Utility and click QSS link on the left of the main menu. Then the following screen will appear. Click Add device. And then select Enter the new device’s PIN and enter the PIN value of the Camera, click Connect.
6.4 Security Click the folder of Security to display the sub folders including Account, HTTPS, and IP Filter. 6.4.1 Account The device fault account and password setting is “admin / admin”. That means everyone who knows IP address can access the device including all configuration. It is necessary to assign a password if the device is intended to be accessed by others. ¾ User Name: Set a user name between 4-16 characters. ¾ Password: Set a password between 4-16 characters.
z ¾ The Viewer mode only can view the Live View. Viewer Authentication: Select whether the authentication is needed when users access to live view. z On: Authentication is required to let different users have different levels of permission to access the Camera view. z Off: Authentication is not required to access the Camera.
) Note: When enable HTTPS with RTSP on mode, the IP Camera only protect the setting such as username and password and do not protect video and audio. When enable HTTPS with RTSP off mode, the IP Camera will protect all setting including video and audio. 6.4.3 IP Filter IP Filter provides the function of controlling the range of IP address, similar with firewall service. This feature can only be applied to the users with the right of Operator or Viewer except the Admin users.
Chapter 7 Setting-Advanced Click the folder of Advanced to display the sub folders including FTP client, SMTP, Network storage, Memory Card, HTTP event, Schedule, Alarm buffer, Motion detection, Audio detection, and System Log. 7.1 FTP Client Use this menu to set up for capturing and sending an image or video clip to an FTP server.
7.1.1 General Select On when you use FTP function. The FTP client Setting screen appears. Select Off, when you do not wish to use the FTP client function. ) Note: The frame rate and operability on the main viewer may decrease while a file is being transmitted by the FTP client function. ¾ Attached file Type: You can choose snapshot or video clip for alarm sending. Select “Snapshot,” one snapshot will be transmitted to the specified FTP server while motion detection / audio detection triggered.
the external sensor input or by the built-in motion detection function. Select On to send the file to FTP server linked with the alarm detection. ¾ Remote Path: Type the path to the destination in FTP server up to 64 characters. ¾ Image File Name: Type the file name you want to assign to the files when sending to the FTP server. You can use up to 10 alphanumeric characters, - (hyphen) and _ (underline) for naming.
→Audio Detection → Setting”) z Network Link Down: Click it on to receive a snapshot or a video clip while network link down. If Attached File Type (go “Setting → Advanced → FTP Client → General”) was clicked as video clip, you can use Alarm Buffer function as a sensor. It’s for recording audio file in the IP CAM before and after disconnected network. ) Note: You can set alarm buffer at alarm buffer screen.
number is added to the file name. z Sequence number: A consecutive number is added to the Image file name. z Sequence number clear: Click Clear and the suffix of the sequence number returns to 1. ¾ Interval: Set the periodical sending is effective interval. Min value is 1 min and Max value is 24 hour. ¾ Effective Period: Set the period when the periodical sending is effective. z Always: The periodical sending is always effective.
Network → IP Notification”) ¾ SMTP Server Name: Type the SMTP server name up to 64 characters, or the IP address of the SMTP server. ¾ SMTP Server Port: You can set port number from 1~65535 according to your mail server. The default value is 25. z Security setting: Tick SSL box if the mail server you use has security restriction. ) Note: If you use g-mail as your mail server, you should set 25 as your port number and tick SSL box.
This address is used for reply mail and sending system messages from the SMTP server. ¾ Attached File Type: You can choose snapshot or video clip for alarm sending. Select “Snapshot,” one snapshot will be transmitted to the administrator’s e-mail address while motion detection / audio detection triggered. Select “Video Clip,” one 5-seconds video clip will be transmitted. ¾ Subject: Type the subject/title of the e-Mail up to 64 characters.
¾ z Date & time: The date & time suffix is added to the Image file name. The date & time suffix consists of lower two-digits of year (2 digits), month (2 digits), date (2 digits), hour (2 digits), minute (2 digits) and second (2 digits), and consecutive number (2 digits), thus 14-digit number is added to the file name. z Sequence number: A consecutive number is added to the Image file name. z Sequence number clear: Click Clear and the suffix of the sequence number returns to 1.
¾ Image File Name: Type the file name of the image sent by SMTP up to 10 alphanumeric characters, - (hyphen) and _ (under score). ¾ Suffix: Select a suffix to be added to the file name sent by SMTP. z Date & time: The date & time suffix is added to the Image file name.
7.3.1 General Select On if you would like to use the network storage function. Then choose one protocol between Windows network (SMB/CIFS) and Unix network (NFS). ¾ Protocol- Unix Network (NFS): z ¾ Network storage location: Type the IP or name of specified computer and folder. For example, //IP/folder name or // my_nas:/folder name.
z Network Storage Location: Type the IP or name of specified computer and folder. For example, \\IP\folder name or \\my_nas:\folder name. z Workgroup: Type the name of workgroup which the operating computer belongs. z User Name: Type the name of workgroup. (If none, please leave it blank.) z Password: Type the password for workgroup. (If none, please leave it blank.) z Re-type password: Re-type password for workgroup.
¾ Alarm Sending: Select On to set to send files with connection to the alarm detection to network storage. ¾ Image File Name: Type the file name you want to assign to the file to attach a mail. You can use up to 10 alphanumeric, - (hyphen) and _ (underscore) for naming. ¾ Suffix: Select a suffix to add to the file name ¾ z Date & time: The date & time suffix is added to the Image file name.
) Note: You can set alarm buffer at alarm buffer screen. (Please go “Setting → Advanced → Alarm Buffer → Setting”) ¾ Effective Period: Set the period when the periodical sending is effective. z Always: The periodical sending is always effective. z Schedule: You can specify the period when the periodical sending is effective in the Schedule setting in the other section. ) Note: You can set schedule function at schedule screen. (Please go “Setting → Advanced → Schedule → Setting”) 7.3.
¾ Recording Time: Set the period when the periodical recording is effective. z Always: The periodical recording is always effective. z Schedule: You can specify the period when the periodical recording is effective in the Schedule setting in the other section. ) Note: You can set schedule function at schedule screen. (Please go “Setting → Advanced → Schedule → Setting”) 7.4 Memory Card Memory card provides the storage function for saving image files.
¾ Format: Click Execute to clear up the data in memory card. ¾ Card Status: The free space and capacity of memory card. ¾ Card staus notification: Select On to enable card status notification. z SMTP server name: Type the SMTP server name using up to 64 characters, or the IP address of the SMTP server. z SMTP server port: You can set port number from 1~65535 according to your mail server. The default value is 25. z Authentication: Select the authentication required when you send an email.
9 On: If authentication is necessary for sending e-mail, select one of the authentication methods from the followings. SMTP: Select if SMTP authentication is necessary for sending e-mail. POP Before SMTP: Select when POP before SMTP authentication is necessary for sending e-mail. z Recipient E-mail Address: Type the recipient e-Mail address using up to 64 characters. You can specify up to three recipient E-mail addresses.
¾ Alarm Sending: Select On to set to send files with connection to the alarm detection to memory card. ¾ Image File Name: Type the file name you want to assign to the file to attach a mail. You can use up to 10 alphanumeric, - (hyphen) and _ (underscore) for naming. ¾ Suffix: Select a suffix to add to the file name ¾ z Date & time: The date & time suffix is added to the Image file name.
¾ Image File Name: Type the file name of the image sent by SMTP up to 10 alphanumeric characters, - (hyphen) and _ (under score). ¾ Suffix: Select a suffix to be added to the file name sent by SMTP. z Date & time: The date & time suffix is added to the Image file name.
¾ FTP server shutdown: Backup files to memory card when FTP server is shut down. ¾ Network storage shutdown: Backup images to memory card when network storage is shut down. 7.5 HTTP event Use this menu to set up for capturing and sending images to an HTTP server. By using HTTP client function, you can send the image file and audio file which has been shot and recorded linked with the built-in motion detection function to HTTP server.
7.5.1 General Select On when you use the HTTP function. The common setting options are displayed below. Select Off, if you do not wish to use the HTTP function. ¾ HTTP event: Set up the HTTP server URL, port, User ID, Password and Proxy Server settings. For example: URL: 192.168.1.107/cgi-bin/operator/ptzset. ) Note: 1. The setting of URL should be the same as CGI. 2. The example above is for reference only.
7.5.2 Alarm sending Set to send the mail with connection to the alarm detection by the built-in motion detection function. Select On to send the image and audio file to HTTP server linked with the alarm detection. Alarm sending: Select On to set to send mail with connection to the alarm detection. ¾ Alarm z Motion Detection: Click it for using Motion Detection function as a sensor. You can set motion detection function on the motion detection function page.
) Note: You can set motion detection on motion detection page. (Please go to “Setting → Advanced →Motion detection → Setting”) Motion Detection works only when the MPEG4 function is On.
z z z Parameter: the parameter of CGI (defined in Setting → Advanced → HTTP event → General → URL) is from your target device. For example, move=down. Message: message will show up in the form of Message = PTZ down. If your target device didn’t support the parameter of message, you can’t see the message. So you can just take the message as a note. For example: PTZ down. Audio detection: Click it for using Audio Detection function as a sensor.
z z ¾ Parameter: the parameter of CGI (defined in Setting → Advanced → HTTP event → General → URL) is from your target device. For example, move=down. Message: message will show up in the form of Message = PTZ down. If your target device didn’t support the parameter of message, you can’t see the message. So you can just take the message as a note. For example: PTZ down. Effective period: Set the period when the periodical sending is effective. z z Always: The periodical sending is always effective.
menu as the setting menu which is displayed when you click Schedule to set Effective period and Schedule in FTP client, e-Mail (SMTP), Record, and Alarm out setting menu setting menu. ¾ Schedule Selection: Select the list box to specify the schedule you want to set.
Use alarm buffer function for recording audio and video file in the IP Camera before and after disconnected network. After re-connecting, these files will transmit to FTP client, SMTP, and Network storage. You can set the pre-alarm and post-alarm period up to 5 seconds in Alarm Buffer function screen. 7.8 Motion Detection There are three Motion Detection functions as sensors to set for different detecting zones.
Click it on for using Audio Detection function as a sensor. You can set audio detection function at the audio detection function screen. ¾ Threshold: It means the extent which the alarm will be triggered. The default value is 50 and the value range is 0~100. The larger the value, the higher the threshold. ¾ Sensitivity: It means that how often the sensor will scan the image different. The higher sensitivity it is and the more frequently it scans. The default value is 5 and the value range is 1~10.
¾ Enable Remote Log: Enables user to send the log data to a specified log server.
Appendix A. Frame-rate and Bitrate Table – Help to set IP Camera with your network environment to access Internet. Base on your network upload environment to choose the suitable Image-Quality setting. For example, if the network environment is ADSL 256Kb (upload) / 2Mb (download), the most fluent Image-Quality needs to set up under 256Kb situation. A.1 Mega Mode A.1.1. H.
320*240 320*240 320*240 320*240 320*240 6144 2048 2048 512 512 10 15 10 15 10 3600 2200 2200 550 550 10 15 10 15 10 A.1.4. MPEG 4@ 15fps / kbps Quality Excellent Detailed Good Standard Medium 1280*1024 2700 1100 500 350 300 1280*720 2000 800 350 250 200 640*480 300 200 150 100 80 320*240 100 80 60 40 35 1280*720 1400 550 250 180 140 640*480 200 120 100 80 60 320*240 80 60 40 30 25 A.1.5. MPEG4@ 10fps / kbps Quality Excellent Detailed Good Standard Medium 1280*1024 1800 800 350 250 200 A.1.6.
A.1.7. MJPEG @ 15fps / kbps Quality Excellent Detailed Good Standard Medium 1280*1024 22000 12000 7000 5500 4000 1280*720 16000 7000 5000 4000 3000 640*480 6000 3000 2500 2000 1200 320*240 2200 1200 1000 800 500 1280*720 11000 5000 3500 3000 2000 640*480 4000 2000 1800 1500 800 320*240 1500 800 700 600 350 A.1.8. MJPEG@ 10fps / kbps Quality Excellent Detailed Good Standard Medium 1280*1024 15000 8000 5000 4000 3000 A.1.9.
A.2 VGA Mode A.2.1 H.264 @ 30fps / kbps Quality Excellent Detailed Good Standard Medium 640*480 600 120 60 50 40 320*240 60 40 30 25 20 640*480 400 80 40 30 25 320*240 40 30 25 20 15 A.2.2 H.264@15 fps / kbps Quality Excellent Detailed Good Standard Medium A.2.3 H.
A.2.6 MPEG4 / kbps, fps Image-Size Bitrate Setting 640*480 640*480 640*480 640*480 640*480 640*480 320*240 320*240 320*240 320*240 320*240 320*240 6144 6144 2048 2048 512 512 6144 6144 2048 2048 512 512 Frame-Rate Setting 30 15 30 15 30 15 30 15 30 15 30 15 Current Bitrate 6300 6300 2200 2200 550 550 5100 2800 2200 2200 550 550 Current Frame-Rate 30 15 30 15 30 15 30 15 30 15 30 15 A.2.
B. Storage Requirement Table - Help to set Recording Storage System. Please refer to the following table to find out the capability for recording into your hard disk. B.1 Mega Mode B.1.1 H.264 Storage Requirement GB / channel / day @ 15fps Quality Excellent Detailed Good Standard Medium 1280*1024 50 16.6 13 8.3 6.7 1280*720 45 13 8.3 5 4.2 640*480 10 8.3 6.7 4.2 3.4 320*240 4.2 2.5 1.7 1.3 1 640*480 6.7 5.9 4.6 2.5 2.1 320*240 2.5 1.7 1.3 1.3 0.7 B.1.2 H.
B.1.4 MPEG4 Storage Requirement GB / channel / day @ 15fps Quality Excellent Detailed Good Standard Medium 1280*1024 133 58.1 42 30 25 1280*720 83 42 25 21 17 640*480 25 17 12.5 8.3 6.7 320*240 8.3 6.7 5 3.4 3 640*480 17 10 8.3 6.7 5 320*240 6.7 5 3.4 2.5 2 B.1.5 MPEG4 Storage Requirement GB / channel / day @ 10fps Quality Excellent Detailed Good Standard Medium 1280*1024 92 42 30 21 17 1280*720 58.1 30 17 12.5 10 B.1.
Standard Medium 4.2 3.4 2.1 1.7 B.2.2. H.264 Storage Requirement GB / channel / day @ 15fps Quality Excellent Detailed Good Standard Medium 640*480 12.5 6.7 3.4 2.5 2.1 320*240 3.4 2.5 2.1 1.7 1.3 B.2.3. H.264 Storage Requirement GB / channel / day Image-Size Bitrate Setting 640*480 640*480 640*480 640*480 640*480 6144 6144 2048 2048 Frame-Rate Setting 30 15 30 15 512 30 550 Storage Requirement 522.9 522.9 182.6 182.6 45.
640*480 640*480 640*480 320*240 320*240 320*240 320*240 320*240 320*240 2048 512 512 6144 6144 2048 2048 512 512 15 30 15 30 15 30 15 30 15 2200 550 550 5100 2800 2200 2200 550 550 C. System Requirement – Help to setup System C.1. 16 Channel IP Camera with CIF Performance Equipment Configuration Software: MainConsole Version 2.6.
Results from Test with a Resolution of 704×480 CCD IPCamera 704x480 Quality Frame Rate CPU Load Bandwidth 16 IP camera Excellent 30 95% 15~20 Mbps Results from Test with a Resolution of 640×480 CMOS IPCamera 640x480 Quality Frame Rate CPU Load Bandwidth 16 IP camera Excellent 30 95% 10~15 Mbps 88
Europe – EU Declaration of Conformity This device complies with the essential requirements of the R&TTE Directive 1999/5/EC. The following test methods have been applied in order to prove presumption of conformity with the essential requirements of the R&TTE Directive 1999/5/EC: Clause EN 60950-1: 2001 EN 50392: 2004 EN 300 328 V1.6.1 (2004-11) EN 301 489-17 V1.2.1 (2002-08) and EN 301 489-1 V1.5.
Español [Spanish] Por medio de la presente [nombre del fabricante] declara que el [clase de equipo] cumple con los requisitos esenciales y cualesquiera otras disposiciones aplicables o exigibles de la Directiva 1999/5/CE. Ελληνική [Greek] ΜΕ ΤΗΝ ΠΑΡΟΥΣΑ [name of manufacturer] ΔΗΛΩΝΕΙ ΟΤΙ [type of equipment] ΣΥΜΜΟΡΦΩΝΕΤΑΙ ΠΡΟΣ ΤΙΣ ΟΥΣΙΩΔΕΙΣ ΑΠΑΙΤΗΣΕΙΣ ΚΑΙ ΤΙΣ ΛΟΙΠΕΣ ΣΧΕΤΙΚΕΣ ΔΙΑΤΑΞΕΙΣ ΤΗΣ ΟΔΗΓΙΑΣ 1999/5/ΕΚ.
Svenska [Swedish] Härmed intygar [företag] att denna [utrustningstyp] står I överensstämmelse med de väsentliga egenskapskrav och övriga relevanta bestämmelser som framgår av direktiv 1999/5/EG.
Federal Communication Commission Interference Statement This equipment has been tested and found to comply with the limits for a Class B digital device, pursuant to Part 15 of the FCC Rules. These limits are designed to provide reasonable protection against harmful interference in a residential installation. This equipment generates, uses and can radiate radio frequency energy and, if not installed and used in accordance with the instructions, may cause harmful interference to radio communications.