User Guide tpPLC Utility For TP-Link Powerline Adapters and Extenders REV2.0.
Contents About This Guide . . . . . . . . . . . . . . . . . . . . . . . . . . . . . . . . . . . . . . . . . . . . . . . . . . . . . 1 Chapter 1. Get to Know the tpPLC Utility . . . . . . . . . . . . . . . . . . . . . . . . . . . . . 2 Chapter 2. Quick Start . . . . . . . . . . . . . . . . . . . . . . . . . . . . . . . . . . . . . . . . . . . . . . . 4 Chapter 3. Manage an Individual Powerline Device . . . . . . . . . . . . . . . . . . . 7 3. 1. Change Basic Settings . . . . . . . . . . . . . . . . . .
About This Guide This guide provides detailed functions of the tpPLC Utility and shows how to manage your powerline devices according to your needs. In addition to this guide, a Quick Installation Guide is also released with each TP-Link powerline device. You are suggested to configure your powerline devices for quick internet setup by following the published Quick Installation Guide before you get started with a further configuration.
Chapter 1 Get to Know the tpPLC Utility This chapter briefly introduces the tpPLC Utility.
Chapter 1 Get to Know the tpPLC Utility What This Software Does The tpPLC Utility is a computer software used to view and manage TP-Link powerline devices, including powerline adapters and powerline extenders. Compared with the web management interface focusing on single-device management, the tpPLC Utility shows you a vivid and intuitive powerline network, and it also enables you to conveniently manage all powerline devices in the network.
Chapter 2 Quick Start This chapter guides you on how to prepare for using the utility.
Chapter 2 Quick Start 1. Download the utility and install it on your computer. • For Windows Users a ) Go to the product support page at http://www.tp-link.com and download the tpPLC Utility package. b ) Double-click the package and follow the setup wizard to install the utility. Note: WinPcap (version 4.1.2 or higher) is required for the tpPLC Utility. If it is not found on your computer, the wizard will guide you to install it. c ) Wait until the installation is completed.
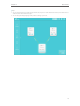
Chapter 2 Quick Start Tips: 1. You can click each device to view the current powerline rates. If you see a red line between two devices, move either device to another location and check the rates again. 2. You can change the display language of the product according to your needs.
Chapter 3 Manage an Individual Powerline Device This chapter guides you on how to manage an individual powerline device via the utility.
Chapter 3 Manage an Individual Powerline Device 3. 1. Change Basic Settings 3. 1. 1. Rename a Device The utility names a powerline device in “Device-XXXX” format by default, in which “XXXX” indicates the last four digits of the device’s MAC address. You can rename your powerline devices for easy identification. To rename a device, follow the steps below: 1. Open the utility, move your mouse over a device, and click the (Basic) icon.
Chapter 3 3. 1. 2. Manage an Individual Powerline Device Turn On or Off the LEDs Device LEDs help you to know the device working status. To turn on or off the LEDs on a device, follow the steps below: 1. Open the utility, move your mouse over a device, and click the (Basic) icon. Note: Login is required at your first access to basic settings of a powerline extender. The login username and password (admin/admin by default) are the same as those of the web management interface. 2.
Chapter 3 Manage an Individual Powerline Device 2. Go to the Wireless page, click 2.4GHz or 5GHz. Note: If you can’t find the Wireless menu, make sure you select a powerline extender, not a powerline adapter. Then make sure your computer uses an IP address of the same segment as the powerline extender’s IP address assigned by your router. We recommend you change your computer to obtain an IP address automatically. 3.
Chapter 3 Manage an Individual Powerline Device 2. Go to the Reset page, and click Reset. Now this device will be restored to its factory default settings. Note: After reset, the device may leave the original powerline network if this network does not use the default name (HomePlugAV). In this case, refer to the device’s Quick Installation Guide to pair the device. 3. 1. 5. Check the Firmware Version To check the firmware version of this device, follow the steps below: 1.
Chapter 3 Manage an Individual Powerline Device Here you see the current firmware version of this device. You can update it on the Advanced > Update page. 3. 2. Change Advanced Settings 3. 2. 1. Set Up QoS QoS (Quality of Service) allows you to give highest priority to a specific traffic type. The powerline device will first guarantee transmission of the selected traffic type in case of data traffic congestion. To set up QoS, follow the steps below: 1.
Chapter 3 Manage an Individual Powerline Device Now the powerline device will first guarantee transmission of the traffic type you selected in case of data traffic congestion. 3. 2. 2. Update the Firmware TP-Link is dedicated to improving and richening the product features, giving you a better network experience. We will release the latest firmware at TP-Link official website (http://www.tp-link.com). You can download and upgrade the latest firmware for your device.
Chapter 3 Manage an Individual Powerline Device 5. Select the obtained update file(s), and click Update. 6. Wait for the upgrading to complete. Note: During the upgrading process, do not turn off or reset the powerline device. 3. 2. 3. Change the Working Mode For some powerline devices you can change their working mode according to your needs. • Power Saving Mode This mode is supported by powerline adapters only.
Chapter 3 Manage an Individual Powerline Device 2. Go to the Mode page and disable the Power Saving Mode. • Lower PLC-to-VDSL Interference Mode This mode is supported by 8-series and 9-series powerline devices only. It can lower the interference to the VDSL device, but may reduce the data transfer rate. Use this mode only if the performance of a VDSL device is being affected by your powerline network. This mode is disabled by default. If you want to enable it, follow the steps below: 1.
Chapter 3 Manage an Individual Powerline Device 3. On the pop-up window, click Apply. Now this device will have less interference with your VDSL device. 3. 3. Redirect to the Web Management Interface For a powerline extender (wireless powerline device), you can redirect to its web management interface for more settings. Open the utility, move your mouse over a powerline extender, and click the icon.
Chapter 4 Manage the Whole Powerline Network This chapter guides you on how to manage the whole powerline network via the utility.
Chapter 4 4. 1. Manage the Whole Powerline Network Add a Device to the Network To add a device to the current network, follow the steps below: 1. Write down the 16-digit powerline key printed on the device label. 2. Plug the device into a wall socket and wait until its LEDs become stable. 3. Open the utility, and click Add Device on the left column. 4. On the Add a New Device page, enter the powerline key you wrote down, and click Save. Now the new device will appear on the utility. 4. 2.
Chapter 4 Manage the Whole Powerline Network once plugged on the same electrical circuit. You can change this name to a new one, allowing only the powerline devices using the same name to join this network. To set a new powerline network name, follow the steps below: 1. Open the utility, and click Secure on the left column. 2. On the Secure Powerline Network page, enter a new name, or generate a random name. Then click Save. Now only the powerline devices using the same name can join this network. 4.
Chapter 4 4. 4. Manage the Whole Powerline Network Turn On or Off the LEDs Device LEDs show you working status of the device . To turn on or off the LEDs on all the powerline devices in the current network, follow the steps below: 1. Open the utility, and click LED on the left column. 2. On the LED ON/OFF page, click the On or Off icon. Now the displayed LEDs as well as the actual product LEDs will become on or off correspondingly. 4. 5.
Chapter 4 Manage the Whole Powerline Network 21
COPYRIGHT & TRADEMARKS Specifications are subject to change without notice. is a registered trademark of TP-Link Technologies Co., Ltd. Other brands and product names are trademarks or registered trademarks of their respective holders. No part of the specifications may be reproduced in any form or by any means or used to make any derivative such as translation, transformation, or adaptation without permission from TP-Link Technologies Co., Ltd. Copyright © 2017 TP-Link Technologies Co., Ltd.