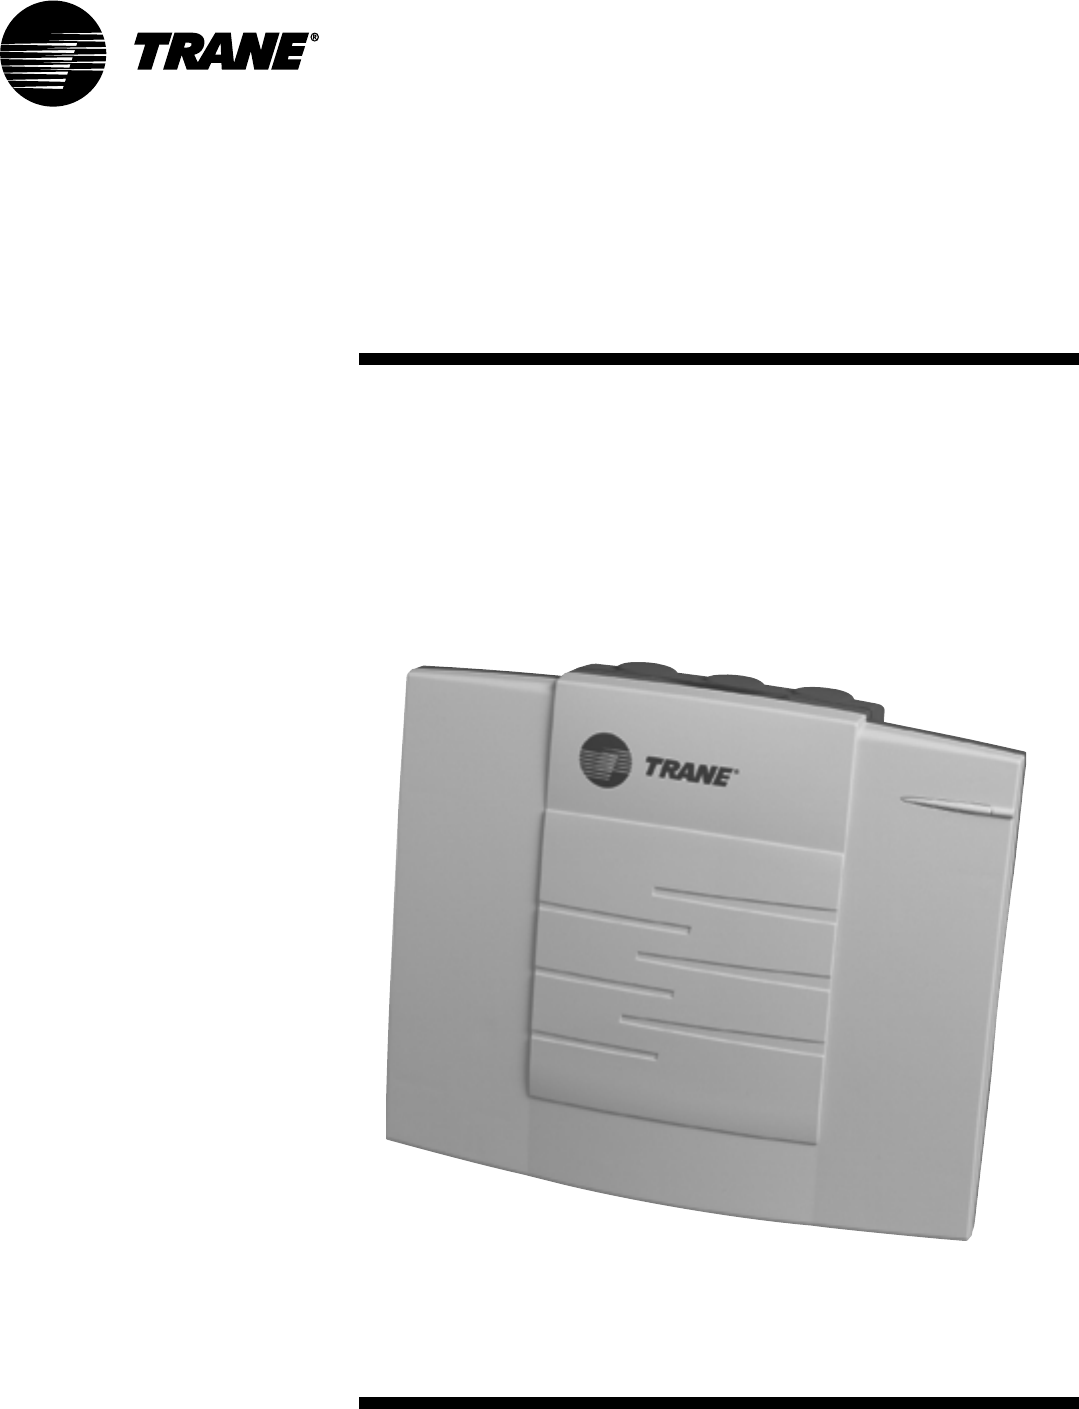
Installation Manual VariTrac™ Central Control Panel June 2002 VAV-SVN03A-EN
VariTrac Central Control Panel Installation Manual This manual and the information in it are the property of American Standard Inc. and shall not be used or reproduced in whole or in part, except as intended, without the written permission of American Standard Inc. Since Trane has a policy of continuous product improvement, it reserves the right to change design and specification without notice. Use of the software contained in this package is provided under a software license agreement.
Contents About This Manual ............................................ 1 Contents .............................................................................................................. 1 Compliance Information .............................................................................. 1 Specifications ............................................................................................... 1 VariTrac Changeover Bypass System .........................................................
UCM Damper .................................................................................................... 10 Communicating Sensor/Bypass Control Assembly ........................................ 11 Relay Board Binary Outputs ............................................................................. 11 Wire Specifications ........................................................................................... 11 Getting Started ...............................................
Connecting PC with VariTrac Software to CCP ......................................... 39 Installation Checklist...................................... 41 Shipment .................................................................................................... 41 Unit Location .............................................................................................. 41 AC Power Wiring ........................................................................................
Delivered VAV System .................................... 53 Overview ........................................................................................................... 53 What is Delivered VAV? ............................................................................. 53 What Delivered VAV is Not ........................................................................ 53 Central Control Panel .................................................................................
About This Manual Contents This manual describes the steps required to install and configure VariTrac™ Changeover Bypass Zoning and Delivered VAV Systems. Sections in this manual are highlighted below: Compliance Information Information about FCC approval and possible radio and telephone interference, and the CE compliance statement. Specifications Technical specifications for VariTrac Central Control Panel unit and system components.
About This Manual Naming Conventions The following is a list of naming conventions used in this manual: • CCP: Refers to the system Central Control Panel • VariTrac: Refers to the CCP used in a pressure dependent bypass zoning system • Delivered VAV: Refers to the CCP used with a Commercial Voyager VAV rooftop unit and VariTrane pressure independent VAV boxes • VAV: Variable air volume Cautionary Statements The following cautionary statements signal procedures or conditions that require particular attenti
FCC Information VariTrac and Delivered VAV Radio and Television Interference VariTrac and Delivered VAV generate, use, and can radiate radio frequency energy. If not installed and used in accordance with the instruction manual, interference to radio and television reception may occur.
FCC Information 'HFODUDWLRQ RI &RQIRUPLW\ Manufacturer’s Name: Manufacturer’s Address: Trane 4833 White Bear Parkway Saint Paul, Minnesota 55110 USA The manufacturer hereby declares that the product: Product Name: Product Number: Product Option: VariTrac CCP Controller X13650940010; X13650942010 Operator Display Conforms to the following standards or other normative documents: Electromagnetic Emission: (by Council Directive 89/336/EEC) Electromagnetic Immunity: EN 50081-1:1998 Radiated EN55
VariTrac Changeover-Bypass System Overview VariTrac Changeover-bypass VAV is a comfort system solution designed for light commercial applications. As the name implies, these systems deliver a varying volume of air to multiple zones, each with its own thermostat, while still utilizing a unitary machine with a constant volume fan. Changeoverbypass VAV combines the comfort benefits of VAV with the cost effectiveness and simplicity of packaged unitary equipment.
VariTrac Changeover-Bypass System • rectangular damper sizes are 8 x 12, 8 x 14, 8 x 16, 10 x 16, 10 x 20, and 14 x 16 inches. The damper consists of a 16 gage galvanized steel frame and opposed blade damper assembly. Communicating Sensor/Bypass Damper Control The communicating sensor/bypass damper assembly is a bypass damper and communicating sensor/bypass control that resides on the same bus as the VariTrac dampers and Voyager/Reliatel rooftop unit.
CO2 Sensor • sensor with digital display, adjustable setpoint, night setpoint override button, cancel button, and communications jack CO2 Sensor A CO2 sensor may be connected to the UCM damper control to sense CO2 levels in the space. This signal is communicated to the CCP for demand ventilation calculation and control. Occupancy Sensor A normally open occupancy sensor contact may be connected to the UCM damper control binary input to indicate zone occupancy.
8 VariTrac Central Control Panel 24 Vac Transformer Communicating Sensor/Bypass Control Assembly Legend Zone Sensor Communications Link (2 cond, Level 4 comm wire) 24 Vac Sensor wiring VariTrac Zone Damper Bypass Damper (w/connecting cable assembly) Voyager or Reliatel TCI-3 VariTrac Changeover-Bypass System Figure 2: VariTrac Changeover Bypass System Configuration VAV-SVN03A-EN
Specifications VariTrac Central Control Panel VAV-SVN03A-EN Power Requirements 20-30 Vac, 60 Hz, single phase, 30 VA minimum Class 2 transformer required Operating Environment 32°F to 122°F, 10 to 90% relative humidity, non-condensing Storage Environment -40°F to 185°F, 5 to 95% relative humidity, non-condensing Cabinet NEMA 1 resin enclosure, plenum rated Mounting Mount directly on wall surface or mount on recessed 4 in. x 4 in. conduit box. Dimensions 8.75 in. high x 10.25 in. wide x 2.75 in.
Specifications Operator Display Power Requirements The operator display is powered by the CCP. Operating Environment 32°F to 122°F 10 to 90% relative humidity, noncondensing Storage Environment -40°F to 185°F 5 to 95% relative humidity, noncondensing Cabinet NEMA 1 resin enclosure, plenum rated Mounting Plugs directly onto VariTrac CCP Dimensions 8.75 in. high x 10.25 in. wide x 1.5 in. deep.
Communicating Sensor/Bypass Control Assembly Communicating Sensor/Bypass Control Assembly Power Requirements 20 to 30 Vac, 60 Hz, single phase, 15 VA minimum Class 2 transformer required Operating Environment 32°F to 120°F 10 to 90% relative humidity, noncondensing Storage Environment -50°F to 200°F 5 to 95% relative humidity, noncondensing Control Box NEMA 1 metal enclosure, plenum rated Communication Link Wiring Communication link wiring must be Level 4 22 AWG twisted shielded pair wire with st
Specifications Table 1: Communication Link Wire Specifications 12 Specification 22 AWG Conductors, Shielded, Level 4 Plenum CMP Rated Number of Cond: 1 pr. Jacket Color: light blue Cond. Strand: 7/30 Nom. Jacket thick. inch: 0.009" Nom. Jacket thick. wall in: 0.015" Nom OD inch: 0.
Getting Started Familiarize yourself with the system components and preview the installation procedures before installing and configuring the VariTrac system.
Getting Started Mount the Wiring Base Figure 3: Termination module conduit access and mounting holes Conduit connector Conduit access (three places) Holes for mounting on a 2 in. x 4 in. conduit box horizontally (left and right) Two holes for mounting on a wall (one on each side) Termination board Holes for mounting on a 4 in. x 4 in. conduit box (four corners) Jamb nut (attaches to conduit connector) Holes for mounting on a 2 in. x 4 in.
Secure Termination Module to Wall The VariTrac Central Control Panel should be easily accessible for making wiring connections and for servicing. Provide two inches of clearance on the left and right sides, and sufficient clearance above the unit to make conduit connections. Sufficient space should be available in front of the unit to making wiring connections and perform maintenance. Figure 4: Dimensions for VariTrac Central Control Panel Components Top view 10.25 in. (26.04 cm) 2.75 in. (6.99 cm) 8.
Getting Started Secure Termination Module to Conduit Box 1 Remove the screws from the conduit box. 2 Line up the conduit box screw holes on the termination module (Figure 3) with the screw holes on the conduit box. 3 Install the screws. NOTE: When mounting the termination module to a 4 in. x 4 in. conduit box, remove the plastic cover over the box for easier access. Do not attempt to break away excess plastic. Use a hack saw blade and carefully cut away the plastic.
Wire AC Power Wire AC Power CCP Field Wiring Field wiring to the VariTrac Central Control Panel includes: • AC power wiring • binary input wiring • communication link wiring • binary output wiring (requires optional relay board) These procedures are detailed in the following sections. Refer to Figure 6 for wiring connections.
Getting Started AC Power Wiring A dedicated 24 Vac, 30 VA Class 2 transformer is required to power the VariTrac Central Control Panel. The VariTrac Central Control Panel requires 3-wire service with a nominal voltage of 24 Vac and a utilization range of 20 to 30 Vac. All wiring must comply with the National Electrical Code and local codes. The 24 Vac line can enter the VariTrac Central Control Panel cabinet through the 4 in. x 4 in. knockout or through the knockouts in the top of the panel.
Occupied/Unoccupied Input Wiring Occupied/Unoccupied Input Wiring This input closes the connection between TB2-8 and TB2-9. This is most likely from an external time clock, but any other device allowing a dry contact connection may be used. When the connection is open, the VariTrac Central Control Panel operates in the occupied mode. When the connection is closed, the CCP operates in the unoccupied mode.
Getting Started Figure 7: Binary Output Wiring for Optional Relay Board Termination Board TB1 24 V* FAN Ht. Pump 24 V* FAN 4 5 6 7 8 9 10 G W1 Y2 Y1 3 13 14 NOT USED 11 12 Ht1 Ht2 EM HT C/O A UX W2/O 2 C2 COMP2 NC NO 1 C1 COMP1 Rh Rc 2H/2C *24 Vac from the rooftop unit. For single transformer systems, connect Rc to Rh. For two transformer systems, connect the cooling transformer to RC and the heating transformer to Rh.
Bypass Damper Wiring Bypass Damper Wiring The interconnect cable is pre-wired to the bypass damper and may be lengthened if necessary. IMPORTANT Mounting screws must be located towards the ends of the damper when hanging straps are used to avoid interference with the rotating damper. A label attached to the dampers indicates the acceptable areas for mounting screws. IMPORTANT The bypass damper must be positioned to orient the drive shaft horizontally.
Getting Started If the supply duct branches out at the riser, install the control in the largest supply duct. A two-inch hole is required to insert the temperature and static pressure sensor. Use the supplied gasket to seal off air leaks. Secure the sensor to the duct with a minimum of three sheet metal screws. IMPORTANT The sensor assembly should be mounted on the side of the duct to keep the pressure transducer in a vertical orientation. Do not install horizontally on the top or bottom of a duct.
Install the VariTrac Dampers Install the VariTrac Dampers A sketch of basic damper installation is shown in Figure 10. The damper may be connected with hard duct or flex duct at either end. If two bypass dampers are installed, a pigtail socket is provided on the cable so the second damper can be plugged into the UCM. IMPORTANT Mounting screws must be located towards the ends of the damper when hanging straps are used to avoid interference with the rotating damper.
Getting Started Figure 11: Proper Damper Mounting Positions Connect UCM Wiring Connect the power to terminals TB1-1 (24V) and TB1-2 (ground). 24 Vac is required to power the UCM control. 20 Vac to 28 Vac is acceptable. Use 18 to 20 AWG for power wiring. The power consumption for an auto-changeover cooling-only UCM (model CHGR) is 10VA. Local heat outputs are rated at 10VA maximum for each output.
Set the UCM DIP Switches Figure 12: UCM Wiring Set the UCM DIP Switches Each device connected to the VariTrac Central Control Panel must a unique address. No two devices (of the same type) can have the same address. Table 2 lists the address settings for UCM DIP switches connected to the VariTrac Central Control Panel. IMPORTANT The UCM located in the communicating sensor/bypass control must always be addressed as #33.
Getting Started Table 2: DIP Switch Settings for UCM Damper Addresses DIP Switch Settings UCM Number 01 02 03 04 05 06 07 08 09 10 11 12 13 14 15 16 17 18 19 20 21 22 23 24 25 26 27 28 29 30 31 32 33 1 2 ON ON ON 3 ON ON ON ON ON ON ON ON ON ON ON 4 ON ON ON ON ON ON ON ON ON ON ON ON ON ON ON ON ON ON ON ON ON ON ON ON ON 5 ON ON ON ON ON ON ON ON ON ON ON ON ON ON ON ON ON ON ON ON ON ON ON ON ON ON ON Addresses 25-32 used for Delivered VAV only ON ON ON ON ON ON ON ON ON ON ON ON ON
Slaved Dampers outputs of the UCM controlling the primary damper by using the BYPS damper cable assembly shipped with the BYPS damper. Refer to diagram and connect as follows: 1 Disconnect the red actuator plug from the master damper UCM. 2 Plug the red actuator connector from the BYPS damper onto the master damper UCM socket (ACT) as shown in Figure 13. 3 Reconnect the master damper actuator’s red connector to the spare connector socket pigtailed on the BYPS damper cable assembly.
Getting Started Install the Zone Temperature Sensors Five types of zone temperature sensors are available.
Mounting Standard and Digital Zone Temperature Sensors • areas near heat sources like equipment (appliances, computers, copiers, etc.) or concealed pipes or chimneys • dead spots behind doors, draperies, or in corners. Mounting Standard and Digital Zone Temperature Sensors Zone temperature sensors consist of two basic pieces: the base and cover. Externally adjustable versions have an external adjustment knob.
Getting Started 2 Using two #6-32 screws, fasten the base to the junction box’s threaded mounting holes. 3 Connect the control wires to the proper terminals on the temperature sensor (See Figure 15). 4 Replace the sensor cover. Zone Temperature Sensor Wiring A zone temperature sensor designed specifically for UCM damper control must control each unit. Field wiring for the zone temperature sensors must meet local code.
Zone Temperature Sensor Wiring 2. 3 wires are required for sensor connection. 2 wires are required for 24 Vac power connection. For wire lengths less than 75 feet, an 18 gage, 5 conductor cable may be used. For wire lengths greater than 75 feet, use 18 gage, 2 conductor cable for the power wiring (TB1-TB1), and 18 gage, 3 conductor cable for signal wiring (TB2-TB3).
Getting Started Communication Link Wiring The VariTrac Central Control Panel communication link (TB2-10, 11, and 12) connects the CCP, UCM dampers, communicating sensor/bypass damper control assembly, and Voyager/Reliatel rooftop units. Field wiring for the communication link must meet the following requirements: • All wiring must be in accordance with the National Electrical Code and local codes.
Communication Link Wiring Figure 16: Daisy Chain Configuration for Communication Link Wiring VariTrac Central Control Panel UCM Dampers UCM Dampers UCM Dampers UCM Dampers UCM Dampers UCM Dampers Each Voyager/Reliatel Rooftop requires a Trane communications interface (TCI) board for connection to the VariTrac Central Control Panel communication link. Refer to the TCI installation manual for more information on connecting a rooftop to the communication link.
1 Shield ground Figure note = Twisted pair, shielded wire per Trane specifications DDC / UCM Control Board = = Legend 2 To Zone Dampers 3 through 24 Address Switch Zone UCM Address #2 DDC / UCM Control Board 2 Splice Address Switch Air Supply Temp Sensor DDC / UCM Control Board Note The UCM order in this drawing is for demonstration purposes only. No specific order is required on the Comm link.
Voyager Communication Link Wiring Figure 18: Voyager Communication Link Wiring VariTrac Communications Interface (Comm4) Comm Termination Details for Voyager RTU Voyager (UPC) Unit Control Panel 1 2 (TCI-V) Figure Notes 1 All dip switches off. 2 Comm board to non-isolated Comm3 or Comm4 option.
Getting Started Figure 19: Precedent Communication Link Wiring VariTrac Communications Interface (Comm4) Comm Termination Details for Voyager RTU Trane Communication Interface-Precedent 1 2 (TCI-P) Precedent (UCP) Unit Control Panel Figure Notes 1 All dip switches off. 2 Comm board to non-isolated Comm3 or Comm4 option. Mount Main Module After mounting and wiring the wiring base, attach the main module.
Mounting Main Module Figure 20: Mounting Main Module Termination module Main module Alignment pin (four places) IMPORTANT Do not use excessive force when mounting the module. If the module does not snap easily into place, slightly reposition it on the alignment pins. Failure to comply may cause damage to the module. Firmly push the main module onto the wiring base until it snaps into place. If 24 Vac is applied, the main module will start.
Getting Started • Align the three tabs on the bottom of the display with the slots in the bottom of the main module. (Figure 21). • Starting with the center tab, insert the tabs into the slots. Figure 21: Install operator display IMPORTANT Do not use excessive force when mounting the module. If the module does not snap easily into place, slightly reposition it on the alignment pins. Failure to comply may cause damage to the module.
Connecting Modem Devices Figure 22: Modular Adapters, Cable, and Connections for External Modems Termination module bottom view RJ-12 port (PC direct connection) RJ-12 port for PC direct connection (bottom side) To modem serial port RJ-12 cable (PN: 35914260) Connect RJ-12 to 25-pin male adapter (PN: 35914269) Connecting PC with VariTrac Software to CCP The VariTrac PC Software provides a graphic user interface for VariTrac and Delivered VAV systems.
Getting Started Figure 23: Typical VariTrac Central Control Panel to PC serial port connections Termination module bottom view RJ-12 port (PC direct connection) RJ-12 port for PC direct connection (bottom side) Connect RJ-12 to 9-pin female adapter (PN: 35914262) To PC serial port RJ-12 cable (PN: 35914260) 40 VAV-SVN03A-EN
Installation Checklist Complete this checklist as the VariTrac Central Control Panel is installed to verify that all recommended procedures are performed. This checklist does not replace the detailed instructions provided in the manual. Read the entire manual carefully to become familiar with the installation procedures before installing the unit. Shipment o Inspect VariTrac Central Control Panel for shipping damage. File claim if necessary. o Inspect zone dampers and accessories for shipping damage.
Installation Checklist VariTrac Dampers o UCM dampers mounted and secure according to recommendations. Zone Temperature Sensors o Sensors are properly mounted and wired per instructions and in the correct space. UCM Wiring o UCM power is properly wired to TB1-1 and TB1-2. NOTE: TB1-2 is COMMON (case ground) if grounded secondary transformers are being used. Confirm polarity from one UCM to the next if more than one UCM is being powered from a single transformer.
System Start-Up and Checkout Pre-power-Up Checkout Central Control Panel • Measure the supply voltage to the CCP TB2-1 and TB2-2. The supply voltage should be between 20 Vac and 30 Vac. • Assure that a reliable ground is attached to TB2-3 on the CCP. • Check the UCM communication link to assure that the wire designated (+) is connected to the TB2-10 and the wire designated (–) is terminated at the TB2-11. The shield must be connected to TB2-12.
System Start-Up and Checkout • Verify that the proper unit address is set on each UCM. Occupied Mode After the system is completely wired and installed it is ready for the initial power-up. Upon power-up the CCP and UCMs will initiate the sequence of events that follows. IMPORTANT For the CCP start-up sequence to begin, it is necessary for one UCM and a communicating sensor/bypass control on the loop to communicate with the CCP. • The CCP prepares for static calibration.
UCM LEDs Green LED ON Normal Operation OFF No 24 Vac power, or defective board BLINKING Defective Board Yellow LED VAV-SVN03A-EN ON Reversed communication link polarity OFF No communication link activity or defective board SLOW BLINK Communication on the link not intended for that UCM FAST BLINK The UCM communicated with the CCP 45
System Start-Up and Checkout 46 VAV-SVN03A-EN
Tests and Troubleshooting Displayed Failures Static Sensor Calibration Failure If static sensor calibration fails, the CCP uses 0.50 inch wg as the static pressure setpoint. The zone dampers continue to control normally. Failed static sensor calibration may indicate that the position or location of the sensor is not correct. See mounting the communicating sensor/bypass control in this manual.
Tests and Troubleshooting Zone Sensor Failure If the zone sensor fails, the damper drives to minimum position, and its vote is excluded. Zone Setpoint Failure If a setpoint fails, the UCM automatically uses the edited occupied cooling and heating setpoints. Auxiliary Sensor Failure If the auxiliary sensor circuit opens, the temperature reading on the display screen reads and a diagnostic is be displayed on the operator display and PC software.
Zone, Auxiliary and System Temperature Sensor Checkout Table 4: Temperature Resistance Table VAV-SVN03A-EN Temp Thumbwheel Resistance Sensor Resistance -30 -20 -10 0 10 20 30 40 50 - 241000 170000 121000 88000 64000 47000 35000 26000 20000 55 56 57 58 59 792 772 753 733 714 16958 16541 16135 15741 15358 60 61 62 63 64 65 66 67 68 69 694 675 656 636 617 597 578 558 539 519 14962 14605 14257 13918 13588 13266 12652 12346 12347 12056 70 71 72 73 74 75 76 77 78 79 500 481 461 442 422 403 383 364
Tests and Troubleshooting UCM Local Heat Checkout Turn the adjustable zone sensor to full heating, or adjust the temperature setpoints at the CCP. IMPORTANT Model DCEA local heat outputs are disabled in the heating control action. Model DCWA local heat outputs are enabled in the heating or cooling control action. To check the local heat outputs: • Disconnect any connections to Terminals J8, J9, J10, or J11.
Static Pressure Sensor Input Test Static Pressure Sensor Input Test In order to perform this test a voltage between 0.25 Vdc and 0.7 Vdc must be present at J3 pins 2 and 3. This voltage is from the pressure transducer in the communicating sensor/bypass control. If system pressure is insufficient to create at least .25 Vdc apply pressure to the transducer with an alternate pressure source. CAUTION Do not over pressurize the transducer. The maximum pressure signal should not exceed 2 inches H20.
Tests and Troubleshooting 52 VAV-SVN03A-EN
Delivered VAV System Overview What is Delivered VAV? Delivered VAV is a small tonnage VAV system made up of three Trane product families. It is the combination of: • Voyager Commercial 27 ½ to 50 ton VAV Packaged Rooftop Unit • Up to 32 VariTrane VAV boxes with DDC Controls • VariTrac Central Control Panel with Operator Display Delivered VAV will only work with this combination of Trane products. It will not support any other types of equipment.
54 VariTrac Central Control Panel w/ Operator Display 24 Vac Transformer Zone Sensor Legend Communications Link (2 cond, Level 4 comm wire) 24 Vac Sensor wiring VAV Terminal Unit Voyager Commercial VAV Unit (27 1/2 to 50 ton) Delivered VAV System Figure 24: Delivered VAV System Configuration VAV-SVN03A-EN
Central Control Panel Central Control Panel The VariTrac Central Control Panel is the central source of communications and decision making between the individual zones and the air conditioning unit.
Delivered VAV System The local series fan within the terminal unit operates whenever the unit is in the occupied mode. The volume of air delivered to the VAV zone is constant, but the temperature of the delivered air varies. As the zone requires less cooling, the primary air damper closes. As the primary air damper closes, the air mixture supplied to the zone contains less cool air and more warm plenum air. Remote heat or terminal reheat can provide additional local heating.
Getting Started Familiarize yourself with the system components and preview the installation procedures before installing and configuring the Delivered VAV system.
Getting Started At the VariTrac Central Control Panel, the communication link wires must be connected to Terminals TB2-10 (+) and TB2-11 (−). Refer to Figure 26. This connection is polarity sensitive. IMPORTANT Connections between lengths of link wiring should be soldered and taped. Wire nuts are not acceptable. CAUTION Connecting the communication link with reversed polarity will lead to system malfunction and possible equipment damage.
Daisy Chain Configuration for Communication Link Wiring Figure 25: Daisy Chain Configuration for Communication Link Wiring VariTrac Central Control Panel with Operator Display VAV Terminal Unit VAV Terminal Unit VAV Terminal Unit VAV Terminal Unit VAV Terminal Unit VAV Terminal Unit Each Voyager VAV Rooftop requires a Trane communications interface (TCI) board for connection to the VariTrac Central Control Panel communication link.
1 Twisted pair, shielded wire per Trane specifications Shield ground Figure note = = DDC / UCM Control Board = Legend 2 To VAV Terminal Units 4 through 32 Address Switch VAV UCM Address #3 DDC / UCM Control Board 2 Splice Address Switch DDC / UCM Control Board VAV UCM Address #1 Note The UCM order in this drawing is for demonstration purposes only. No specific order is required on the Comm link. Figure Notes 1 Shield must be cut back and taped at last unit controller.
Voyager Communication Link Wiring Figure 27: Voyager Communication Link Wiring VariTrac Communications Interface (Comm4) Comm Termination Details for Voyager RTU Voyager (UPC) Unit Control Panel 1 2 (TCI-V) Figure Notes 1 All dip switches off. 2 Comm board to non-isolated Comm3 or Comm4 option.
Getting Started 62 VAV-SVN03A-EN
Installation Checklist Complete this checklist as the VariTrac Central Control Panel is installed to verify that all recommended procedures are performed. This checklist does not replace the detailed instructions provided in the manual. Read the entire manual carefully to become familiar with the installation procedures before installing the unit. Shipment o Inspect VariTrac Central Control Panel for shipping damage. File claim if necessary. o Inspect VAV terminal units and accessories for shipping damage.
Installation Checklist o Confirm voltage present between 20 Vac and 28 Vac. o Ensure that the sensor is properly terminated. o If optional local heat is being used, confirm wiring per appropriate diagram. Communication Link Wiring o Field installed communications wiring complies with all applicable codes. o VariTrac Central Control Panel communication link wiring to VAV UCMs and Voyager VAV rooftop unit is connected at TB2-10, TB2-11, and TB2-12 on the CCP.
Trane An American Standard Company www.trane.com For more information contact your local district office or e-mail us at comfort@trane.com Literature Order Number VAV-SVN03A-EN File Number SV-AH-VAV-000-SVN03A-EN-0602 Supersedes VADA-IN-2 Stocking Location La Crosse Trane has a policy of continuous product and product data improvement and reserves the right to change design and specifications without notice.