
Printer User Manual

Revision J
0
2 4
2 4 2 4
2 4
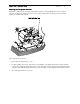
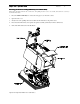
The POSjet
®
1500 uses a drive belt that is adjustable by simply loosening the phillips head screw on the belt
tensioner. An improperly adjusted belt tensioner may cause pre-mature belt wear and/or produce inconsistent
printing. To adjust the belt tensioner:
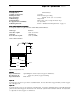
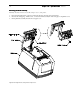
Figure 3 Adjusting the Belt Tensioner
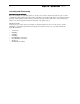
1. Open both the front and rear top covers.
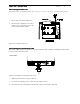
2. Locate the phillip’s head screw on the tensioner and partially loosen until the spring tension returns the belt to
correct position. Slide ink carriage from side to side to ensure that tensioner spring resets itself and immediately
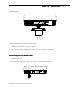
re-tighten screw while holding the Belt Tensioner with your finger to ensure alignment with mechanism frame.
3. Close both the front and rear top covers.