
Owner`s manual


12
•
TR A X X AS
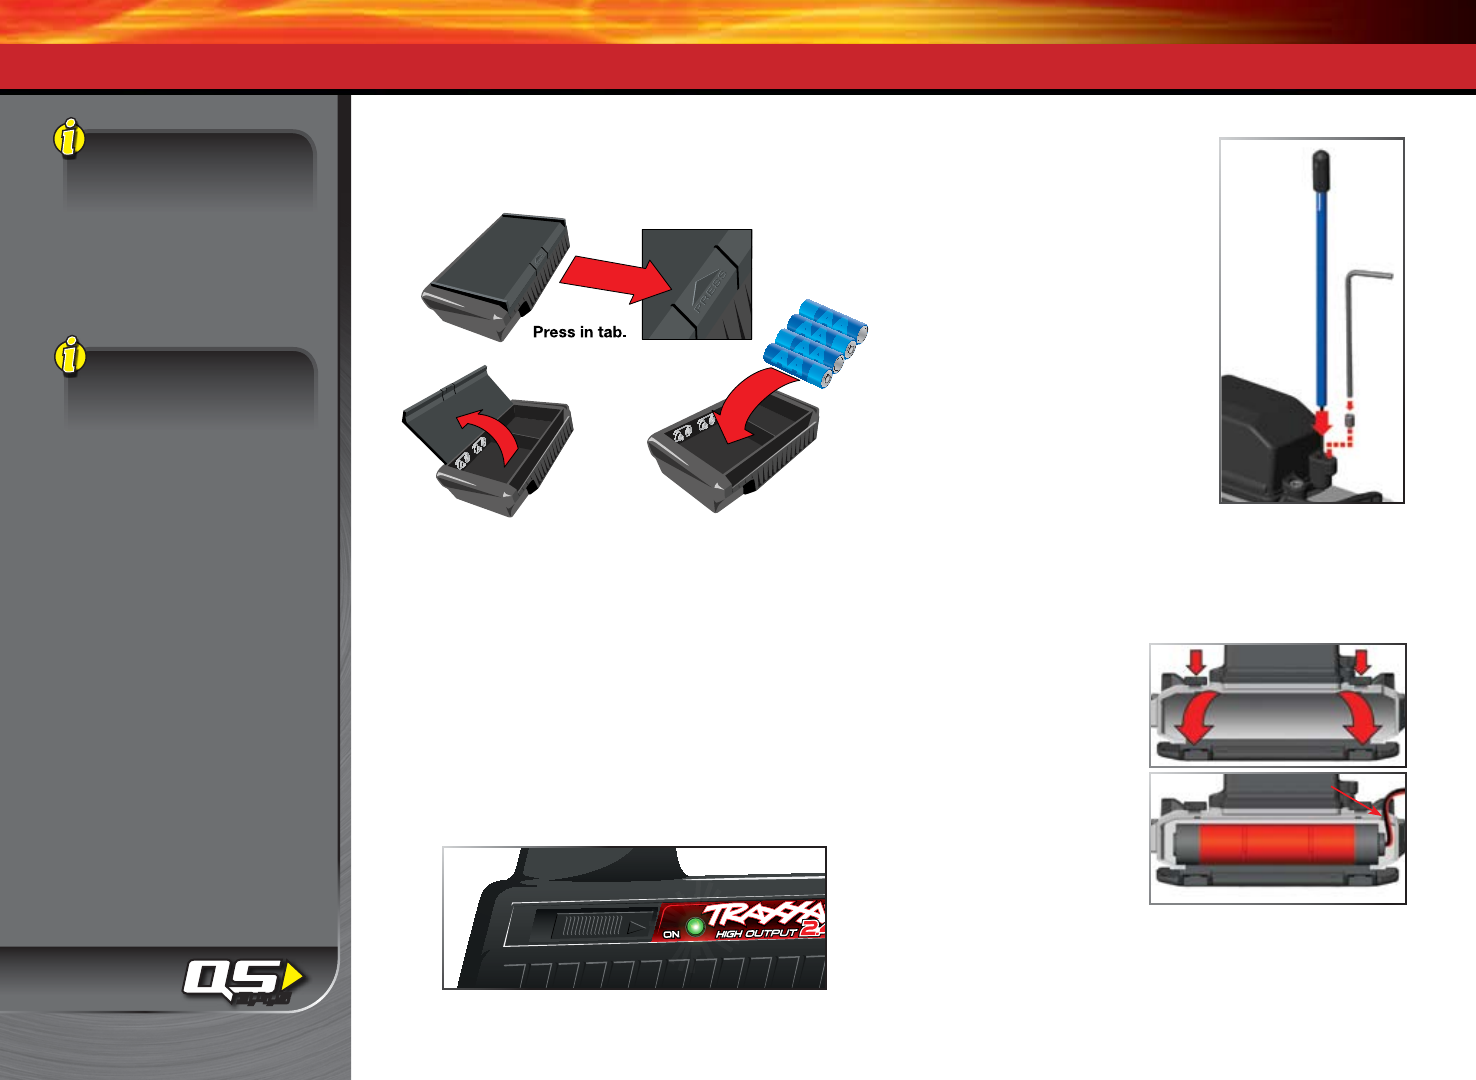
INSTALLING TRANSMITTER BATTERIES
Your TQ transmitter uses 4 AA batteries. The battery compartment
is located in the base of the transmitter.
1. Remove the battery compartment door by pressing the tab
and lifting the door up.
*
2. Install the batteries in the correct orientation as indicated in
the battery compartment.
3. Reinstall the battery door and snap it closed.
4. Turn on the transmitter and check the status indicator for a solid
green light.
If the status LED ashes red, the transmitter batteries may be
weak, discharged or possibly installed incorrectly. Replace with
new or freshly charged batteries. The power indicator light does
not indicate the charge level of the battery pack installed in the
model. Refer to the Troubleshooting section on page 29 for more
information on the transmitter Status LED codes.
SETTING UP THE ANTENNA
The receiver antenna has been set up
and installed from the factory. The
antenna is secured by a 3x4mm set
screw. To remove the antenna tube,
simply remove the set screw with the
included 1.5mm wrench.
When reinstalling the antenna, rst slide
the antenna wire into bottom of antenna
tube until white tip of antenna exits the
top of tube. Carefully curve the white
tip over the antenna tube and install
the antenna tip to hold it in place. Next
insert the antenna tube into the mount
while making sure that antenna wire
is in slot in the antenna mount, then
install the set screw next to the antenna
tube. Use the supplied 1.5mm wrench to
tighten the screw just until the antenna
tube is securely in place. Do not over tighten.
Do not bend or kink
the antenna wire! See the side bar on page 13 for more information.
INSTALLING THE BATTERY PACK
Your model includes a 7.2-volt battery pack. To properly balance the
model, it should be installed in the battery compartment on the left
side of the model. Follow these
steps to install the battery:
Battery Installation
1. Open the battery
compartment door by
pressing on the
release tabs.
2. Install the battery pack with
the battery wires facing the
rear of the model.
3. Route the battery wire through
the slot near the vent.
4. Close the battery door,
making sure not to pinch the battery wires. Be sure both release
tabs are fully engaged with the door. Do not connect the battery
pack to the ESC at this time. Note: always unplug the battery and
remove from the model after use.
Antenna
Tip
Antenna
Tube
1.5mm
Wrench
Set
Screw
Antenna
Mount
Battery Wire Slot
Battery Orientation
3, 4, 5
If the power indicator doesn’t
light green, check the polarity
of the batteries. Check
rechargeable batteries for
a full charge. If you see any
other ashing signal from the
LED, refer to the chart on page
29 to identify the code.
Use the Right Batteries
Your transmitter uses AA
batteries. Use new alkaline
batteries, or rechargeable
batteries such as NiMH
(Nickel Metal Hydride)
batteries in your transmitter.
Make sure rechargeable
batteries are fully
charged according to the
manufacturer’s instructions.
If you use rechargeable
batteries in your
transmitter, be aware
that when they begin
to lose their charge, they lose
power more quickly than
regular alkaline batteries.
Caution: Discontinue running
your model at the rst sign of
weak batteries (ashing red
light) to avoid losing control.
TRAXXAS TQ 2.4GHz RADIO & VELINEON POWER SYSTEM
*A Quick Reference Guide has been provided for you in the battery compartment of the transmitter. Always store the Quick Reference Guide in your transmitter.