
Installation Guide
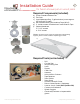


Installation Guide
www.trendingaccessibility.com info@trendingaccessibility.com
9
for fusion shower pan on wood joists
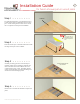
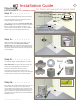
Step 22> > > > > > > >
Begin the application of the liquid waterproofing
membrane. Paint a layer of liquid waterproofing
over all taped joints. It is easiest to begin with the
walls first and then proceed to the floor area. For
consistant application, use a paint roller to apply
waterproofing to all surfaces. Allow to dry for about
4 hours. After first coat is dry, re-coat in the opposite
direction. If you rolled up and down for the first coat,
roll left to right on the second coat.
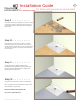
Step 23 > > > > > > >
Apply two coats of liquid waterproofing in
opposing directions to achieve 2 mils. (roughly the
thickness of a credit card)
Make sure that the “V” section of the gasket clamp
is filled with the liquid waterproofing.
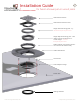
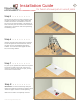
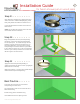
Step 21 > > > > > > > >
Now attach the clamping ring. Apply primer and
solvent cement to inside of clamping ring. Press
firmly into position and allow the solvent to set.
It may take about 60 seconds for the cement to
form a bond.
NOTE: Do not allow the solvent cement to come
into contact with the membrane
Gasket Clamp
Drain Adapter Flange
Gasket Membrane
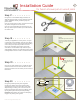
Best Practice > > > > >
To achieve the best results, we recommend
waterproofing the whole room.
The waterproofing must cure for at least 12 hours
before flood testing.
If flood testing, perform test before tiling.
Use modified thinset when placing the tile.