-i-
Table of Contents 1. Introduction ....................................................................................................... 1 Features ........................................................................................................................ 1 Package Contents .......................................................................................................... 1 System Requirements ..............................................................................................
1. Introduction The TU2-ET100 is a high speed USB network adapter that allows you to instantly connect to a 10/100Mbps network from a USB enabled desktop or Notebook PC. Compliant with USB 2.0 and backwards compatible with the USB 1.0 and 1.1, you can share files and printers and also gain access to broadband Internet to explore valuable resources on the web. Features Compliant with USB 2.0 and 1.1 specifications Compliant with IEEE 802.3 and 802.
LED Status LED Color Description 100Mbps Green On for 100Mbps Off of 10Mbps or not connected Link Green LAN activity. Blinking when there is data flow between LAN and the host computer.
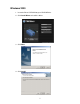
2. Installation Windows 7/ Vista 1. Insert the Driver CD-ROM into your CD-ROM Drive. 2. Click Run Install.exe 3. Click Install Driver to install the driver.
4. Click Next. 5. Click Install. 6. Click Finish. 7. Remove the CD-ROM from your computer’s CD-ROM drive. 8. Connect the Adapter to an available USB port of your computer 9. Drivers will install automatically 10. Connect a Network cable from the TU2-ET100 to a Switch, Router or Cable/DSL Modem.
Windows XP 1. Insert the Driver CD-ROM into your CD-ROM Drive. 2. Click Install Driver to install the driver. 3. Click Next. 4. Click Install.
5. Click Finish. 6. Remove the CD-ROM from your computer’s CD-ROM drive. 7. Connect the Adapter to an available USB port of your computer 8. Drivers will install automatically 9. Connect a Network cable from the TU2-ET100 to a Switch, Router or Cable/DSL Modem.
Windows 2000 1. Insert the Driver CD-ROM into your CD-ROM Drive. 2. Click Install Driver to install the driver. 3. Click Next. 4. Click Install.
5. Click Finish. 6. Remove the CD-ROM from your computer’s CD-ROM drive. 7. Connect the Adapter to an available USB port of your computer 8. Drivers will install automatically 9. Connect a Network cable from the TU2-ET100 to a Switch, Router or Cable/DSL Modem.
Windows ME 1. Insert the provided CD into your CD-ROM drive, then Click Exit. 2. Connect the Adapter to an available USB port of your computer 3.
4. When the screen below appears, click Browse to navigate to D:\Driver\Win98_ME where D: is your CD-ROM drive letter. Then click Next. 5. Click Next 6. Click Finish.
7. When prompted, click Yes to restart your computer. 8. Connect a Network cable from the TU2-ET100 to a Switch, Router or Cable/DSL Modem.
Windows 98SE 1. Insert the provided CD into your CD-ROM drive, then Click Exit. 2. Connect the Adapter to an available USB port of your computer 3. Upon your USB device connection, Windows will detect the new device and pop up the following screen. click Next.
4. Select Search for the best driver for your device. Click Next. 5. Select Specify a location and click Browse to navigate to F:\Driver\Win98_ME where F: is your CD-ROM drive letter. Then click Next. 6. Click Next.
7. If the system prompts you for the Windows 98SE CD-ROM, click OK. Remove the provided CD and insert the Windows 98SE CD-ROM. Then click OK again. 8. If the screen below appears, click OK. 9. In the drop-down list, select F:\Driver\Win98_ME and click OK.
10. Click Finish. 11. When prompted, click Yes to restart your computer. 12. Connect a Network cable from the TU2-ET100 to a Switch, Router or Cable/DSL Modem.
Verifying the Driver Installation in Windows To verify your Ethernet adapter installation, select Control Panel > System > (Hardware) > Device Manager. In the Network adapters group, ASIX AX88772 USB2.0 to Fast Ethernet Adapter should be displayed. If there is a question or exclamation mark next to that item, then the driver is not properly installed. Please delete the item and repeat the installation steps. *The example screenshot is under Windows XP.
Mac 10.6x 1. Connect the Ethernet adapter to a free USB port. There system will pop up a message “A new network interface has been detected” 2. If the message not pop up , please Start System Preferences and select Network, then click the ”+” to add an “USB Ethernet “ service .
3. Select “USB Gigabit Ethernet “ then click “Advanced” to setting the network by static IP or thru DHCP way. 4. by “ Using DHCP” Mode , please Click” Renew DHCP License “to get the IP address , Else you have to enter the related information from your network service provider .
5. You will find that a new Ethernet network interface is available 6. Once you finish the installation, you can open GO > Utilities > System Profile > Hardward > USB > to verify if your Ethernet adapter is properly installed.
Mac 10.5x 1. Insert the provided driver CD into your CD-ROM drive. Double-click the CD and navigate to the directory of \Driver\Mac10.x. 2. In the directory of Mac10.x, please double-click AX88772_10.5 to execute the installer program. 3. The onscreen prompted and please click on Continue to go to next step.
4. Please Click on Install to continue this installation. 5. Make sure that you want to install this driver now and the computer will be restarted once the installation is done. Please click on Continue Installation to continue this installation.
6. Click on Restart to take the new settings effect.
Mac 10.4.x 1. Insert the provided CD into your CD-ROM drive. Copy the archive file under the directory of \Driver\Mac10.4\ to the desktop and then double-click the file until you locate the setup file. 2. Double-click the setup file “AX88772”. 3. When the welcome screen appears, click Continue. 4. Select a destination disk to install the driver and click Continue.
5. Click Continue to start the installation. 6. When the Authenticate screen appears, enter your password in the provided field and click OK. 7. Click Continue Installation. 8. When the software was successfully installed, click Restart.
9. After the restart, plug the Ethernet adapter’s USB cable into an available USB port on your computer. Then attach one end of an Ethernet cable to the Ethernet port on the adapter and the other end to your network switch, hub or router. 10. Mac system will detect the new hardware and show the name of the adapter, e.g. Ethernet Adapter (en1) as in the example below. Configuring Network Settings and Making a Connection 1.
2. From the Show drop-down list, select the adapter to be configured, e.g., Ethernet Adapter (en1). Configure the network settings as required by your network and then click Apply Now. Configure the network settings as required by your network environment. 3. To make a connection, select Network Status from the Show drop-down list and highlight the adapter representing the USB Ethernet adapter and click Connect to establish a network connection.
Mac OS X 10.1.x ~ 10.3.x 1. Insert the provided driver CD into your CD-ROM drive. Double-click the CD and navigate to the directory of /Driver/Mac10.1_10.3. 2. In the directory of Mac10.1_10.3, select and copy the folder named AX88772.kext. 3. On the desktop, double-click the start-up drive. 4. Paste the AX88772.kext to the root directory of the disk.
5. Open the terminal application by clicking Go > Application > Utilities > Terminal. 6. If there is one old driver in the Extensions directory, please remove it first by executing the command: sudo rm –R /System/Library/Extensions/AX88772.kext You will need to enter your password as prompted. 7. Paste the driver to the Extensions folder by the command line below: sudo cp –R //AX88772.kext /System/Library/Extensions/AX88772.
To verify the installation, you can go to /System/Library/Extensions to check if AX88772.kext is present. 8. Connect the Ethernet adapter to a free USB port. 9. Reboot your Mac. 10. Start System Preferences and select Network. 11. You will find that a new Ethernet network interface is available. It’s usually named Ethernet Adapter (en1) or Ethernet Adapter (en2). Now you are ready to configure the network settings for network access.
You must use the command line to install the driver as instructed above. Simply copy and paste AX88772.
3. Specifications Hardware Standards USB 2.0, 1.1 IEEE 802.3: 10Base-T IEEE 802.3u: 100Base-TX Data Transfer Rate Ethernet: 10Mbps/20Mbps (Half/Full Duplex) Fast Ethernet: 100Mbps/200Mbps (Half/Full Duplex) Embedded Buffers 20KB SRAM for RX Packets Buffering 8KB SRAM for TX Packets Buffering Supported OS Windows 98SE/ME/2000/XP(32-bit/64-bit) /Vista (32-bit/64-bit)/Windows 7 (32/64-bit) Mac OS 10-1 ~10.
Limited Warranty TRENDnet warrants its products against defects in material and workmanship, under normal use and service, for the following lengths of time from the date of purchase. TU2-ET100– 3 Years Limited Warranty AC/DC Power Adapter, Cooling Fan, and Power Supply carry 1 year warranty.
limited to, duty, tax, and other fees. WARRANTIES EXCLUSIVE: IF THE TRENDNET PRODUCT DOES NOT OPERATE AS WARRANTED ABOVE, THE CUSTOMER’S SOLE REMEDY SHALL BE, AT TRENDNET’S OPTION, REPAIR OR REPLACE. THE FOREGOING WARRANTIES AND REMEDIES ARE EXCLUSIVE AND ARE IN LIEU OF ALL OTHER WARRANTIES, EXPRESSED OR IMPLIED, EITHER IN FACT OR BY OPERATION OF LAW, STATUTORY OR OTHERWISE, INCLUDING WARRANTIES OF MERCHANTABILITY AND FITNESS FOR A PARTICULAR PURPOSE.
34