
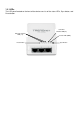
Network Hardware User Manual
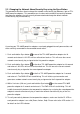

2.3 Changing the Network Name/Security Key using the Sync Button
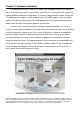
The procedure describes how to change the network name/security key between a pair of TPL-
305E powerline adapters. This procedure can also be used to establish connectivity between
two powerline adapters that are currently disconnected and change the default network
name/security key simultaneously.
Assuming your TPL-305E powerline adapters are already plugged into wall power outlets and
either currently connected or disconnected to each other.
1. Push and hold the Sync button on one of the TPL-305E powerline adapters for 10
seconds and release it. All LEDs will turn off and turn back on. This will erase the current
network name/security key assigned to the first powerline adapter.
2. Push and hold the Sync button on the other TPL-305E powerline adapter for 10 seconds
and release it. All LEDs will turn off and turn back on. This will erase the current network
name/security key assigned to the second powerline adapter.
3. Push and hold the Sync button on the first TPL-305E powerline adapter for 2 seconds
and release it. The PWR LED will start blinking. This will initiate sync/connection and
generate a random network name/security key assignment to the first powerline adapter.
4. Within 2 minutes (120 sec), push and hold the Sync button on the second TPL-305E
powerline adapter for 2 seconds and release it. The PWR LED will start blinking. This will
establish connectivity between the two powerline adapters by assigning the second powerline
adapter’s network name/security key to match the network name/security key of the first
powerline adapter.
5. To verify connectivity between the two powerline adapters, make sure that the PL LED on
each powerline adapter is on solid (Green, Amber, Red). Please refer to the LED section 1.5
for details on the LED indicator.