Quick Installation Guide TEG-160WS TEG-240WS
Table ofofContents Table Contents Deutsch ..................................................................................................... 1. Bevor Sie anfangen ........................................................................... 2. Installation der Hardware .................................................................. 3. Webmanagement-Programm ............................................................ 1 1 2 3 Troubleshooting .............................................................
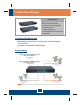
1. Bevor Sie anfangen Packungsinhalt TEG-160WS/TEG-240WS Anleitung zur Schnellinstallation Programm-CD mit Bedienungsanleitung 2 Montageklammern mit Schrauben Stromkabel Systemanforderungen Webbrowser: Internet Explorer (5.0 oder höher), Netscape Navigator (6.
2. Installation der Hardware Hinweis: Konfigurieren Sie den TEG-160WS/TEG-240WS nach Abschluss der Hardware-Installation mit dem webbasierten Smart-Programm. Öffnen Sie dazu Ihren Webbrowser und geben Sie die standardmäßige IP-Adresse http://192.168.0.1 ein. Das Standardkennwort lautet „admin". Achten Sie darauf, dass Ihr Computer und der TEG-160WS/TEG-240WS dem gleichen Netzwerksegment zugeordnet sind. 1.
3. Webmanagement-Programm Hinweis: Installieren Sie das Webmanagement-Programm, wenn Sie problemlos alle webbasierten Switches Ihres Netzwerks auffinden, IPAdressen zuweisen, Kennwörter ändern und die Firmware aktualisieren wollen. Gehen Sie dazu entsprechend den folgenden Schritten vor. Für Benutzer von Windows 1. Legen Sie die Programm-CD mit Bedienungsanleitung in das CD-ROM-Laufwerk Ihres Computers ein und klicken Sie auf Install Utility (Programm installieren). 2.
4. Klicken Sie auf Discovery (Suche). Doppelklicken Sie in der Discovery List (Suchliste) auf den Switch. 5. Klicken Sie in der Monitor List (Überwachungsliste) auf den Switch und dann auf Configuration setting (Konfigurationseinstellung). 6. Konfigurieren Sie IP-Adresse, Subnet Mask, Gateway und Password (Kennwort). Klicken Sie auf Set.
. Klicken Sie auf OK. 8. Klicken Sie auf Web access (Webzugriff). 9. Geben Sie Ihr Password (Kennwort) ein und klicken Sie dann auf Login (Anmelden). Weitere Informationen zu den Konfigurations- und erweiterten Einstellungen des webbasierten Dienstprogramms finden Sie in der Bedienungsanleitung auf der beiliegenden CD oder auf der Webseite von TRENDnet unter www.trendnet.com.
Troubleshooting Q1: After connecting the TEG-160WS/TEG-240WS to a power outlet, the LEDs do not turn on. A1: Check the connection of the power cord to the TEG-160WS/TEG-240WS and the power outlet. Also check that the power outlet is receiving power. Q2: After installing the Web-Management Utility, I clicked Discovery and the Utility is unable to discover the TEG-160WS/TEG-240WS. What should I do? A2: Make sure that the TEG-160WS/TEG-240WS is powered on and that all connections are secure.
Certifications This equipment has been tested and found to comply with FCC and CE Rules. Operation is subject to the following two conditions: (1) This device may not cause harmful interference. (2) This device must accept any interference received. Including interference that may cause undesired operation. Waste electrical and electronic products must not be disposed of with household waste. Please recycle where facilities exist. Check with you Local Authority or Retailer for recycling advice.
TRENDnet Technical Support US . Canada Toll Free Telephone: 1(866) 845-3673 24/7 Tech Support Europe (Germany . France . Italy . Spain . Switzerland . UK) Toll Free Telephone: +00800 60 76 76 67 English/Espanol - 24/7 Francais/Deutsch - 11am-8pm, Monday - Friday MET Worldwide Telephone: +(31) (0) 20 504 05 35 English/Espanol - 24/7 Francais/Deutsch - 11am-8pm, Monday - Friday MET Product Warranty Registration Please take a moment to register your product online. Go to TRENDnet’s website at http://www.