english 2011 installation guide TREX DECKING AND RAILING ® Building your OUTDOOR HOME
installation guide Contents SECTION ONE: General Information General Tips.............................................................................5 Trex DeckLighting™. ................................................................5 Trex CustomCurve™ (Bending Trex)......................................5 Job Site Storage......................................................................5 Safety.......................................................................................6 Tools...
General information When working on any construction project, you should wear protective clothing and safety equipment. Wear safety glasses, gloves, a dust mask and long sleeves, particularly when cutting in confined spaces. Trex® decking and railing are heavier and more flexible than wood. Do not try to lift the same quantity of Trex boards as you would traditional lumber. Go to Trex.com for Material Safety Data Sheets (MSDS). All exterior building materials require cleaning.
General information General information Trex® Decking and Railing General Care and Cleaning Guide Mold Technical Bulletin (Composite and PVC) All exterior building materials require cleaning. Trex recommends basic cleaning with soap and hot water or a commercially available deck cleaner twice a year. This will help maintain the beauty of Trex decking, fencing, railing, and trim. Problem SOLUTION Dirt and Debris Clean deck to remove dirt and debris. Soap and hot water is all that is needed.
Note: Trex Transcend decking or railing and Trex Escapes® cannot be painted or stained.* ® What types of paints and stains can I use? Most paints or stains that you would apply to wood can be applied to Trex decking.
CALGeneral PROPERTIES information MECH TEST METHOD VALUES Abrasion Resistance ASTM D2394 .01 wear/1000 revs. Hardness ASTM D143 562 kg (5 kn) Self-Ignition Temperature ASTM D1929 743°F (395°C) ASTM D1929 698°F (370°C) Flame Spread (a) [Fire Defense] ASTM E84 80 [40] Water Absorption (sanded surface) 24 hr. immersion ASTM D1037 4.3% Water Absorption (unsanded surface) 24 hr. immersion ASTM D1037 1.
Decking Specifications and Profiles decking DECKING DESCRIPTION 1" x 6" (2.5 cm x 15.2 cm) Square Edge Board 12' (3.66 m) 16' (4.88 m) 20' (6.1 m) Transcend Transcend Transcend XX010612TS48 XX010616TS48 XX010620TS48 TH, VL, GP, FP, SR, LR 12' (3.66 m) 16' (4.88 m) 20' (6.1 m) Escapes Escapes Escapes XX010612ES48 XX010616ES48 XX010620ES48 AC, PW 12' (3.66 m) 16' (4.88 m) 20' (6.1 m) Accents Accents Accents XX010612AS48 XX010616AS48 XX010620AS48 WG, WB, MB, SD 12' (3.66 m) 16' (4.
FRAMING AND FASTENING TIPS Decking Fasteners RECOMMENDED FASTENERS TO USE WITH TREX® Phillips II Plus High Trex Performance FastenMaster® FastenMaster® Hideaway® Composite TrapEase® II Quik Drive® UFO Dexxter™ TrimTop Scrudini™ Hidden Decking Composite Composi-Lok™ Ballistic Composite Hidden Hand Drive Fastener Screw* Screw** Deck Screws*** NailScrews®**** Screw***** Fasteners** Screws***** 800-289-8739 888-332-6283 800-518-3569 800-999-5099 800-352-0028 800-966-2801 800-518-35
Special Patterns Code Compliance When planning a unique pattern, you will need to adjust the framing to support the surface pattern. Refer to the span and gapping charts on pages 19 and 20. Many decks are designed to take advantage of angles, as shown below. Joist Spanning for Decking Trex® decking meets all applicable national model building codes. The joists must be spaced on center according to the chart below. Be sure that joists are level and plumb. Trex decking must span at least three joists.
Gapping Stairs You must gap Trex® decking, both end-to-end and width-to-width. Gapping is necessary for drainage and the slight thermal expansion and contraction of Trex decking boards. Gapping also allows for the shrinkage of the wood joist system. 1/4" – 3/8" (0.6 cm – 1 cm) Brasilia, 5" Contours, and Escapes Width-to-Width The minimum required width-to-width gapping is 1/4" (0.6 cm). When installing in temperatures below 40°F (4.5°C), Trex recommends 3/8" (1 cm) gapping.
TIPS FOR INSTALLING A TREX® HIDEAWAY HIDDEN FASTENER SYSTEM Installing Angled Deck Boards in Corners board decking Shift 1/2" (1.3 cm) Routing Grooves for Trex Hideaway Fasteners How to install Trex hideaway® stainless steel fasteners Installing Second Board Parts Bump stop tab Start clip For Universal and Stainless Steel (Universal shown here) 5 Connector clip TooLs Needed ALWAYS start in corner with a small triangular piece of decking at 45° and work outwards.
How to install Universal Hidden Fasteners How to INSTALL ESCAPES® boards with TREX® Universal fasteners Parts 1. Follow steps 1 and 2 for installing start clips and first board. See page 24. 2. At both ends and center of first board, toenail screw (provided with Escapes universal hidden fasteners), at an angle through grooved edge of deck board. 3. Follow steps 3-5 for installing universal fasteners. See page 24.
How to replacE trex® boards Installed with stainless Steel or Universal fasteners/continued Insert Fasteners 3 Note: You may have to loosen .adjacent boards to slide fasteners into position. Note: Cannot be used with Trex Transcend® Classic railing or Trex Traditional railing styles. 2 Parts » » » » » » » » » » » 4. Position replacement board and secure fasteners on center of each joist. (1) Post mount (2) Guide blocks (4) 5/16" x 6" (0.8 cm x 15.2 cm) Hex (mounting) bolts (4) 5/16" x 1" (0.
How to Install post mounts on deck Boards/continued Install Railing System of Choice 4b Inline 4b. Use center holes for inline applications and offset holes for corner applications. Install Mounting Bolt s Tools Needed 3 Position Leveling Plates 1 3. Secure post mount with four concrete bolts and washers. Install Guide Blocks 5 Note: Torque recommended is 5 - 10 ft. lbs. Install Guide Blocks 1/4" (0.
Trex Transcend® railing Specifications and Profiles RAILING Part DESCRIPTION ITEM NUMBER Post Sleeve/ Porch Post/ Newel Post 4" x 4" x 39" (10.2 cm x 10.2 cm x 99.1 cm) Post Sleeve 4" x 4" x 108" (10.2 cm x 10.2 cm x 2.74 m) Post Sleeve XX040439APS XX0404108APS WT, BK, TH, VL, GP, FP 4" x 4" x 48" (10.2 cm x 10.2 cm x 122 cm) Newel Post 4" x 4" x 108" (10.2 cm x 10.2 cm x 2.74 m) Porch Post 5" x 5" x 48" (12.7 cm x 12.7 cm x 2.
designer/traditional Railing specifications and profiles Trex Transcend® Railing Systems RAILING SYSTEM DESCRIPTION ITEM NUMBER Top and Bottom Rail Kit 6' (1.83 m) Top and Bottom Rail Kit 8' (2.44 m) Top and Bottom Rail Kit 6' (1.83 m) Top and Bottom Stair Kit 8' (2.
ada railing specifications and profiles DESCRIPTION 1 104" (264.2 cm) Straight rail 1.5" (3.
Trex TRANSCEND® How to install standard railing DECK railing Trex TRANSCEND® Standard B A D Installing Railing Support Brackets (RSBs) Cutting post sleeves is Not required. A. Pressure-treated post with Trex Transcend post sleeve B. Top rail C. Universal bottom rail D. Trex standard balusters See page 37 for “How to Install Standard Railing”. Option 1: Without TrexExpress™ Railing Template 3a 3b 1 35-1/16\ 35-1/16" (89.1 cm) or 41-1/16\ 41-1/16" (104.
How to install standard railing/continued How to install classic railing Trex TRANSCEND® Attaching Universal Rail and Foot Block Trex TRANSCEND® Attaching Top Rail Note: Refer to page 47 for detailed instructions on installing foot blocks. Attaching the Inverted Universal Rai l Option 8 7 7 8 1 4b 4a 2 1 1 1 x2 3 1 2 2 7. Place top rail on RSBs with balusters in rail channels. Attach top rail to RSB with two selftapping screws (provided). 8.
How to install glass panel railing How to install colonial railing Trex TRANSCEND® Trex TRANSCEND® 9 Attach Weatherstripping and Positioning Panel 10 1 1 6 5 2 62-1/2" (158.8 cm) 3 2 2" (5.1 cm) 9. Place 2" x 4" (5.1 cm x 10.2 cm) on universal rail. Attach board to rail with 2" (5.1 cm) pan-head screws (provided) every 16" (40.6 cm) on center. Toenail 2-1/2" (6.4 cm) screw at each end of 2" x 4" (5.1 cm x 10.2 cm) into post on back side of rail (side not facing decking).
How to install Glass Panel railing/continued how to install Bird's Mouth railing Hiding Brackets Note: Use with 4" x 4" (10.2 cm x 10.2 cm) post sleeve only. Trex TRANSCEND® 10 11 Trex TRANSCEND® Read all instructions before installation. Note: Drill at slight inward angle to drill holes on marks. PARTS Attaching Top and Bottom RSBs Top bracket 10. Cut Transcend baluster spacer into four lengths equal to distance between the glass panel and posts.
how to install Bird's Mouth railing/continued HOW TO INSTALL STAIR RAILing Using Miter Box Saw to Cut Rails Read all instructions BEFORE installation. Trex TRANSCEND® 3. Set stop on saw so blade travels half the depth of rails. Several test cuts can be made on scrap material to accurately set the stop. 4. “V” cut both sides of the rail. 2" x 4" (5.1 cm x 10.2 cm) Note: Transcend's top and universal rails will require different stop settings.
HOW TO INSTALL STAIR RAILing/continued HOW TO INSTALL FOOT BLOCKs Trex Transcend® Trex Transcend® Positioning RSBs on UPPER Post Complete Stair Rails Installation 5 Attaching Foot Block to Universal Rail Read all instructions before installation. Note: Foot blocks must be placed before installing bottom rails. 7 3 2 Note: One centered foot block is required for every section of railing or stairway section. 3 Drill Pilot Hole for Foot Block Base Plate 1 3 4 1 1 5.
trex Designer series Railing® How to install standard railing Trex designer series Trex Designer Series Railing® Parts 2b. I f using Trex Railpost™, slide post skirt over post and down to rest on decking surface. A. Top rail B. Bottom rail C. Railing support brackets (RSBs) D. Balusters* E. Trex Railpost™/Post sleeve* F. Trex Railpost™ Assembly Tool* G. Post cap/Post sleeve cap* H. Post skirt/Post sleeve skirt* I.
How to install standard railing/continued How to install STANDARD Railing/continued Measuring and Cutting Railings Attaching Foot Blocks Trex designer series 4 4. Measure and cut top and bottom rails to fit between posts. Leave 1/16" (0.15 cm) gap at each end for cold weather expansion. designer standard Securing Balusters to Bottom Rail Finishing Post 10 8 6 2 3-1/2" to 4" (8.9 cm to 10.2 cm) 1 1 2 Assembling Rails with Balusters 5 1 1 6.
how to install CONTEMPORARY Railing how to install CONTEMPORARY Railing/continued TREX designer SERIES TREX designer SERIES Installing Top Rail DETERMINING NUMBER OF balusterS and spacing Option 2: If using Designer balusters for 5b 9 Number of balusters needed Length of rail ______" ÷ 4.5 = ______balusters » If number is odd, balusters will be centered. » If number is even, balusters will be offset 2-1/4" (5.7 cm) from center. Installing Baluster Connectors 18" (45.7 cm) 7 1.
how to install standard stair Railing how to install standard stair Railing/continued Trex designer series Note: Trex rails meet major building codes for use as a guardrail system. Local municipalities may require a graspable handrail on stairways. Trex offers an ADA code-compliant handrail system. Check with your local building code officials for local requirements. Installing Posts for Stair Railing Trex designer series Installing Bottom RSBs on Upper and Lower Posts 3 6.
how to install standard stair Railing/continued How to install contemporary stair Railing/continued Mounting Rails on Posts Installing Bottom Rail Trex designer series 12 Trex designer series Bottom rail can also be secured to posts with 16 gauge finishing nails, toenailed through the side of rail into the posts, 1-1/2" (3.8 cm) from bottom of rail and 1" (2.5 cm) from the post. Finishing Posts 1 1 3 2 12. Place assembled railing section on RSBs on posts and secure top rail with two 1-1/2" (3.
Trex® traditional/anchored DECK railing Trex® traditional Railing Trex® Traditional Railing Parts List A. Top rail B. Lateral rail C. Balusters D. Post sleeve E. Post skirt/Post sleeve skirt F. Trex decking G. TrexTrim™ or Trex fascia H. Code-approved wood joist - 2" x 8" (5.1 cm x 20.3 cm) I. Code-approved wood rim joist - 2" x 8" (5.1 cm x 20.3 cm) or larger J. Foot block K. Trex Railpost™ B D A » Escapes and 5" (12.7 cm) Contours cannot be used for top rail. » 6" x 6" (15.2 cm x 15.
How to install Anchored Railing/continued How to install Anchored Railing Trex® traditional Trex® traditional Cutting Posts to Length and Installing Top Rail 2 Installing Balusters 4 1 1 4. Cut balusters to desired length, pre-drill two holes at top and bottom on side that will face outward on each baluster. Locate center between posts, mark and place first baluster and secure with four 2-1/2" (6.4 cm) exterior-approved screws. Space balusters to the left and right a maximum of 3-5/8" (9.
how to install Raised railing how to install Raised railing/continued Trex® Traditional/option 2 Trex® Traditional/option 1 Cutting Posts to Length and Installing Top Rail 5 3 1 2 1 42" Max. (106.7 cm) Cutting Lateral Rails 4 1 36" Min. (91.4 cm) 1 3 2 x2 Rails Between Posts with standard Trex Balusters 3-1/2” max (8.9 cm) 3. Cut posts to designated height as measured from top of decking surface. Measure distance between posts from center-to-center.
how to install Raised railing/continued how to install Raised railing Installing Balusters Rails Between Posts with Contemporary Balusters Trex® Traditional/option 2 6 3-5/8" (9.2 cm) 1 1 2 18" (45.7 cm) 5" (13 cm) 6. Cut balusters to length, pre-drill two holes at top and bottom sides that will face outward on each baluster. Locate the center between posts, mark and place first baluster and secure with four 2-1/2” (6.4 cm) exterior-approved screws.
how to install Raised railing/continued how to install Raised Stair railing Rails baluster Betweensize Posts with Contemporary OPTIONS and spacing Balusters Installing Stair Railing with Contemporary Balusters Trex® Traditional/option 3 Securing Upper Lateral Rail 7 For 36" (91.4 cm) rail height, use Trex 26" (66 cm) 1. contemporary Attaching Posts, Post Sleeve Skirts, and . balusters. Part number: BK3Q26RBK Post Sleeves See instructions on page 62 and 64. For 42" (106.
how to install Raised sTair railing/continued how to install Raised railing Trex® Traditional/option 3 Trex® Traditional/option 4 Rails Between Posts with Architectural Balusters Installing Top Hand Rail Securing Bottom Lateral Rail 5 8 Cutting Lateral Rail 3 1 1 1 1 2 2 x2 5. Place bottom lateral rail between posts and attach using “L” brackets or equivalent construction method. Secure with 2-1/2" (6.4 cm) compositeapproved screws. Installing Balusters and Top Lateral Rail 8.
how to install Raised railing/continued how to install Raised Stair railing Attaching Lateral Rail with L-Brackets Installing Stair Railing with Architectural Balusters Trex® Traditional/option 4 5 Trex® Traditional/option 4 Installing Balusters 6 1 3 baluster OPTIONS AND CONNECTORS 25-1/4" (64.1 cm) 1 1 1 1 3-1/2" (8.9 cm) 2 2 5. Center lateral rail under top rail and attach to posts using an “L” bracket or equivalent construction method. Secure with 2-1/2" (6.
Trex® ADA railing Stair Application How to Install Trex® ADA railing Horizontal Application 90° Wall Return Handrail Bracket 2 4 IVE ADHES METAL 4 2 2 1 3 5 1 4 3 Cut the aluminum and PVC tube to proper length. You can install ADA handrails using various design applications such as those for stairs, ramps, and horizontal inclines. Designs include options for straight and 90° wall returns, 90° corners, and adjustable angles. Choose which is best for your needs before installing.
How to Install Trex® ADA railing How to Install Trex® ADA railing End Loop - Horizontal Post Return - Angled 7 E SIV L TA E DH A ME 1 3 1 4 2 1. Apply adhesive to all metal contact surfaces. Slide straight joiner into post return and aluminum rail support. 2. Pre-drill holes using 1/4" (0.6 cm) drill bit and attach bracket to mounting surface using an appropriate connector (a 3/8" (1 cm) lag bolt at least 2" (5.1 cm) long should be used when mounting to a wood surface). 3.
Trex Transcend® 25-Year Limited Residential Fade and Stain Warranty Warranties For a period of twenty-five (25) years from the date of original purchase, Trex Company, Inc.
Trex Transcend® 10-Year Limited Commercial Fade and Stain Warranty Procedure for Making a Claim under This Warranty In order to make a claim under this warranty, Purchaser must do the following: 1.
Procedure for Making a Claim under this Warranty 25-Year Limited Residential Warranty In order to make a claim under this warranty, Purchaser must do the following: Trex Company, Inc.
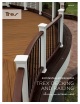
decking: Trex Transcend® in Tree House & Vintage Lantern railing: Trex Transcend in Classic White with contemporary balusters in Charcoal Black fascia: TrexTrim™ visit trex.com or call 1-800-BUY-TREX © 2011 Trex Company, Inc. All rights reserved. Trex®, Trex Transcend®, Trex Accents®, Trex Escapes®, Trex Designer Series Railing®, Trex Hideaway®, TrexTrimTM, Trex Contours®, Trex CustomCurveTM and TrexExpressTM are either federally registered trademarks, trademarks or trade dress of Trex Company, Inc.