
Installation Guide


17
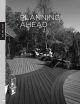
PLANNING AHEAD
PLANNING
AHEAD
Trex® Decking:
» When installing Trex Transcend
®
Tropical Colors of
Spiced Rum, Lava Rock, and Tiki Torch, it is a good
idea to mix and match all of the boards on the job
site prior to installation to ensure an appealing mix of
light and dark tones.
Railing (Including ADA Handrail):
» First, pick the railing style you want.
» Calculate your spanning based on the railing you
chose.
» Determine the number of balusters you will need
based on the railing you choose. See page 50.
NOTE: Trex railings are made to be installed at
maximum of 6' (1.82 m) or 8' (2.44 m) on center
(depending upon type of railing you choose). Trex
railings are not true 6' (72") or 8' (96") in length.
» Determine post locations prior to installing any
decking. In most cases, posts are usually installed
before decking is installed.
» Confirm with your local building official if ADA
Handrail is required, and if so plan spanning for
posts accordingly to allow for attachment of Trex
ADA Handrail. ADA Handrail requires a span of
6' OC for posts.
» Grill placement: A good recommendation to help
prevent damage to your railing is to not have a grill
too close to your railing. Allow for ample airspace
between the back/sides of your grill to help prevent
charring or staining to the railing.
See pages 55 - 72 for Transcend railing installation,
pages 73-80 for Select™ railing installation, pages
81 - 90 for Designer railing installation, pages 91 - 101 for
Traditional railing installation, and pages 102 - 105 for
ADA Handrail installation.
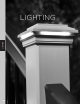
Trex Lighting:
» Plan locations of lights, power supply, timer, and
dimmer. These should be accessible for service if
necessary.
» Install wiring before decking and railing have been
installed.
» DO NOT run wires between joists and deck boards.
See pages 20 - 25 for Trex® DeckLighting
™
installation.
Trex® RainEscape® Deck Drainage System:
» Plan ahead for deck layout to allow for proper
placement of Trex RainEscape within the joist system.
» Make sure joists are straight and square.
See www.trex.com for more information on Trex
RainEscape recommendations and installation. Trex
RainEscape is manufactured and distributed by Dri-Deck
Enterprises, LLC, under a trademark license with Trex
Company, Inc.
Installing Hot Tubs, Planters, and Seating:
» Plan ahead proper joist spanning if required (this is
especially important if installing a hot tub).
» Refer to page 33 for Trex Decking Span Chart for
specific loads.
Call 1-800-BUY-TREX for detailed questions.
Installing Fireplaces and/or Fire Pits With Trex
Decking:
» Determine if fire will be gas or wood burning (NOTE:
Most fire pits shown in Trex ads are gas burning).
» For gas, the fire pit is installed by cutting around the
Trex decking. It is not to be installed on top of Trex
decking. A fire resistant material is installed under
the fire pit and a protective “wall” made from stone
or other fire resistant material is installed to hold fire
pit in place and also protect the decking from heat.
» For wood, fire pits are not recommended on
top of Trex decking unless using a product called
DeckProtect
®
. Wood burning fire pits can damage
the decking due to extreme heat from the bottom of
the fire pit and/or burning embers “shooting” onto
the decking. DeckProtect
®
was tested on all Trex
decking and there were no issues with burning of
the decking surface when placed directly under
a standard size portable fire pit along with the
accompanying rack (NOTE: Rack is not available for
all sizes, so check with manufacturer first for
verification). Trex does recommend that the
PLANNING AHEAD